Video: Creating a new risk model
Last updated: April 8, 2026
In this guide, you will learn how to create a new risk model in Mesh.
When logging in to your account, please ensure you select the correct region, which will be one of the following:
Australia: https://au.mesh.complyadvantage.com/
You can find the link to your region in the onboarding email you received (look for the "Welcome to ComplyAdvantage" email).
If you can’t find the email, don't worry! You can always contact our support team at [email protected].
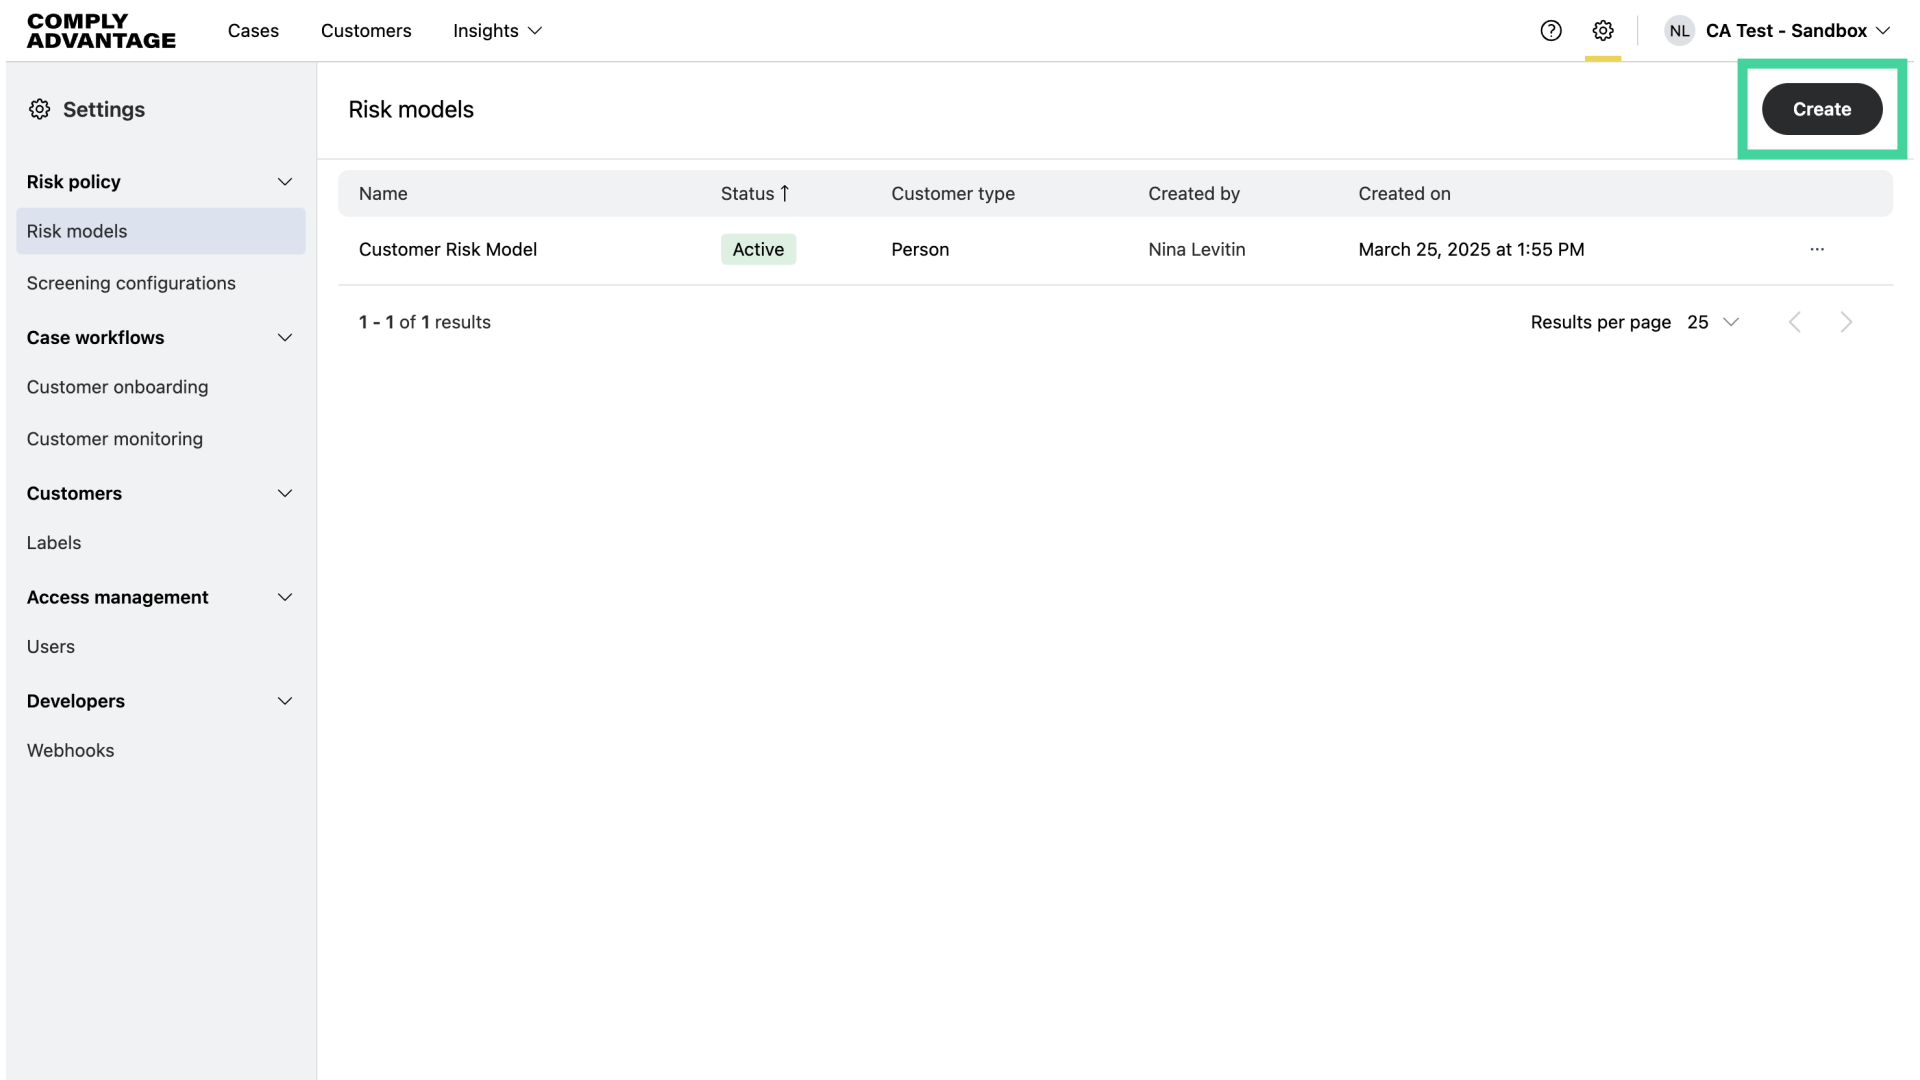
1. Click "Create"
After clicking on the settings icon, click "Create" to build a new risk model.
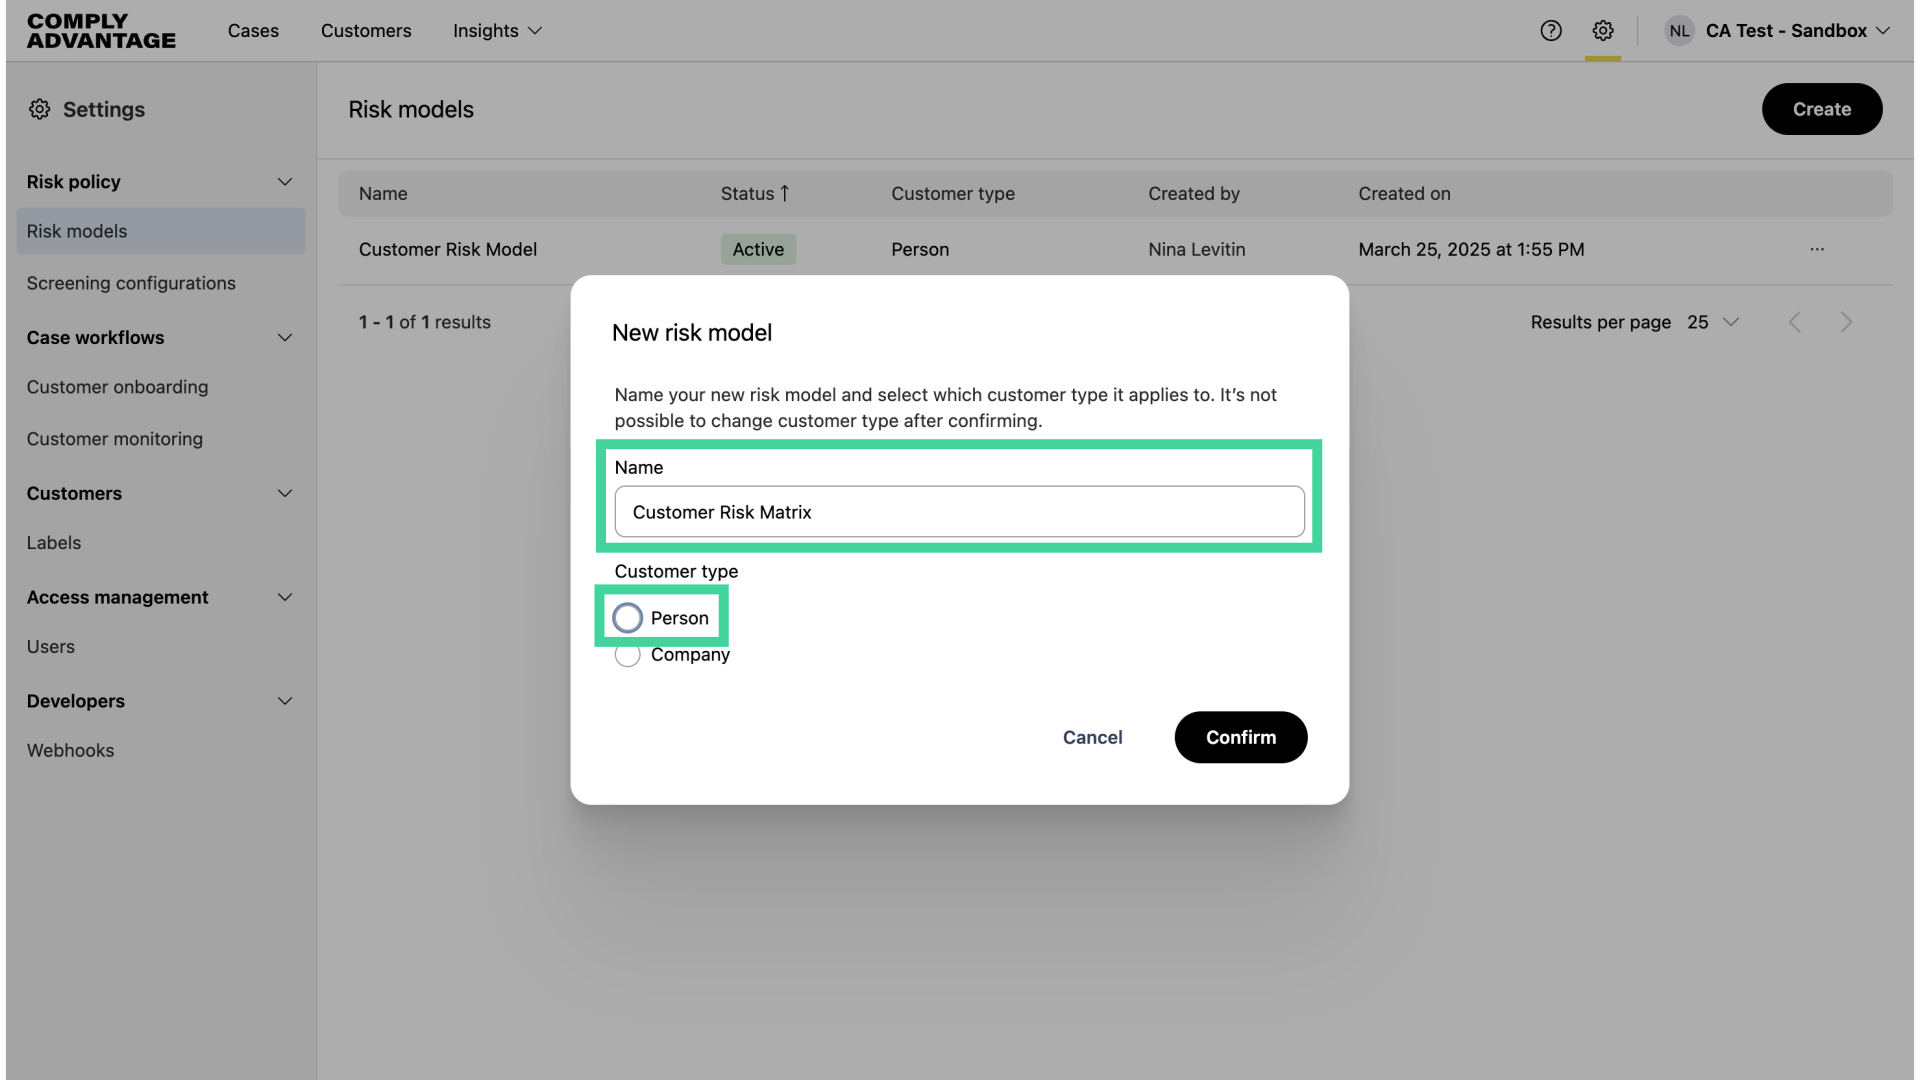
2. Add Name and Customer type
Add the name of your risk model and choose which customer type it applies to, person or company.
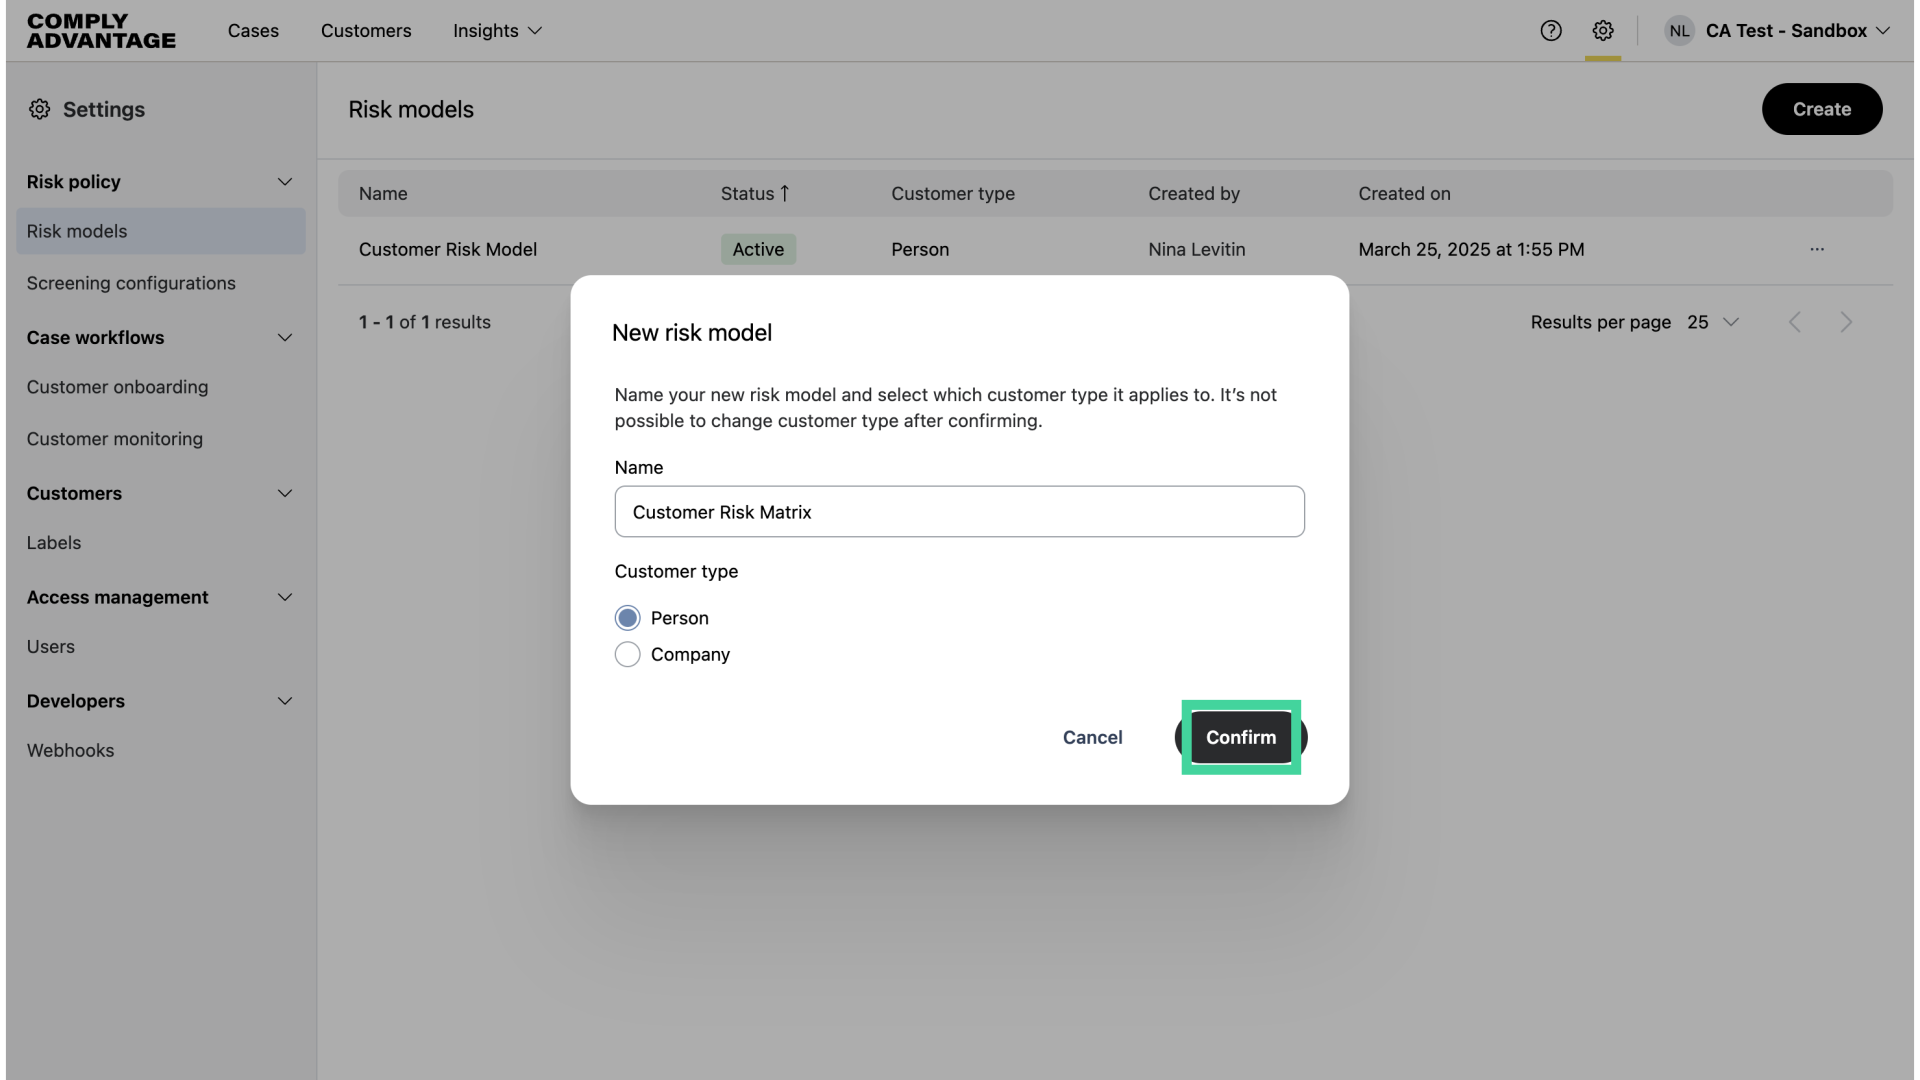
3. Click "Confirm"
Click "Confirm."
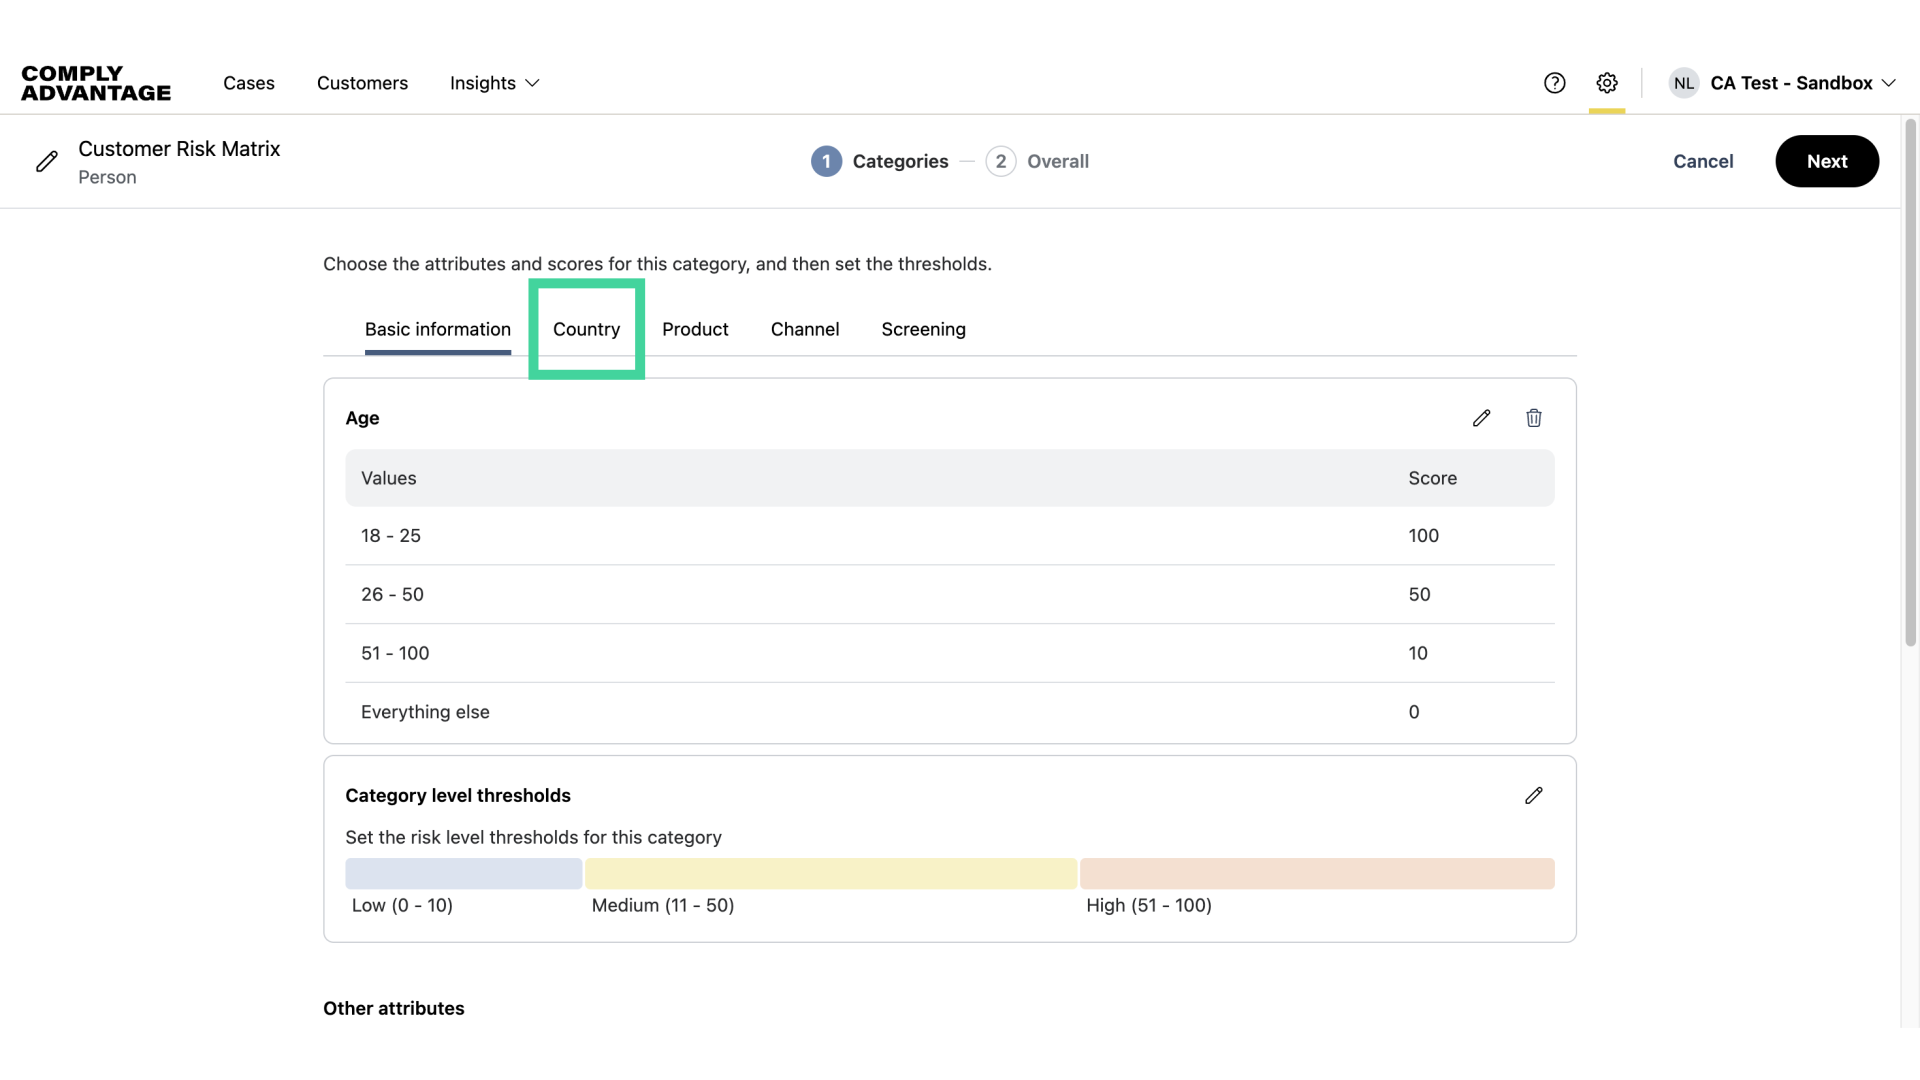
4. The Categories page
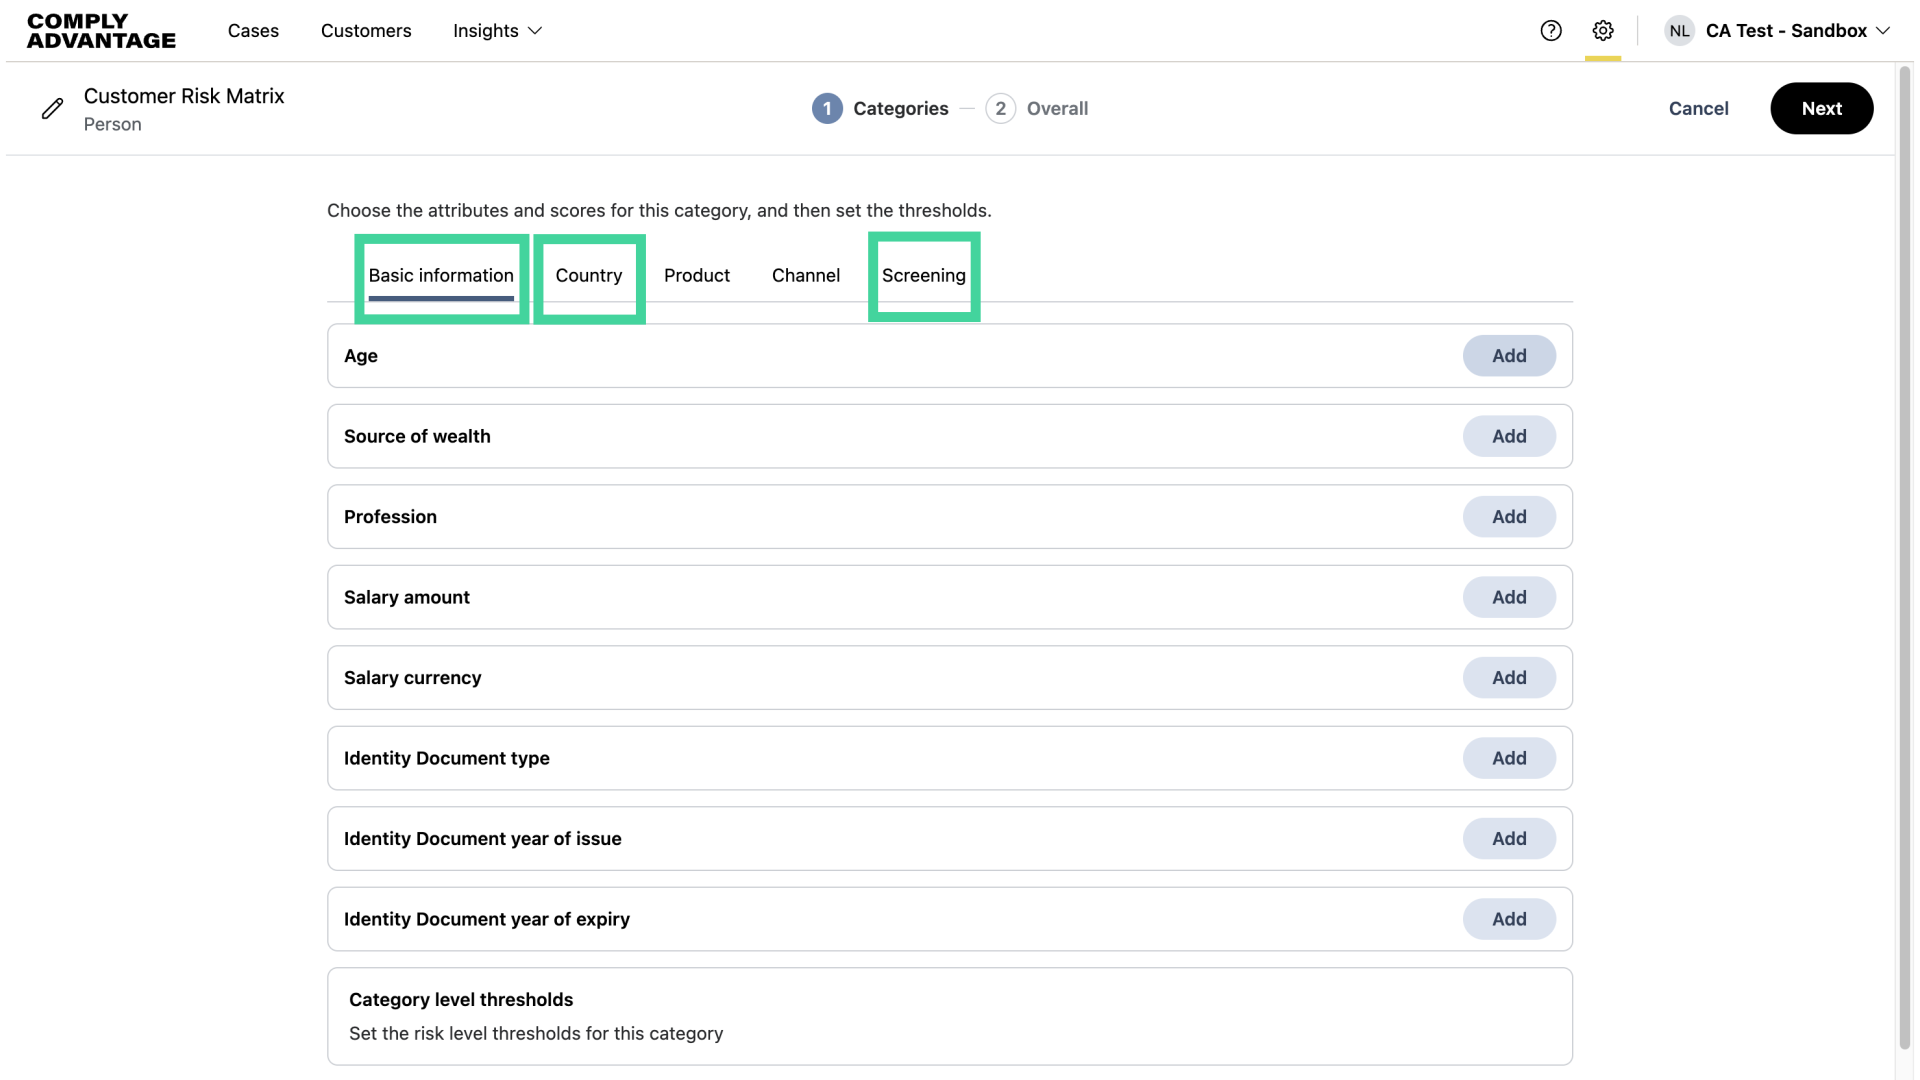
The Categories page opens with five category options: Basic information, Country, Product, Channel, and Screening.
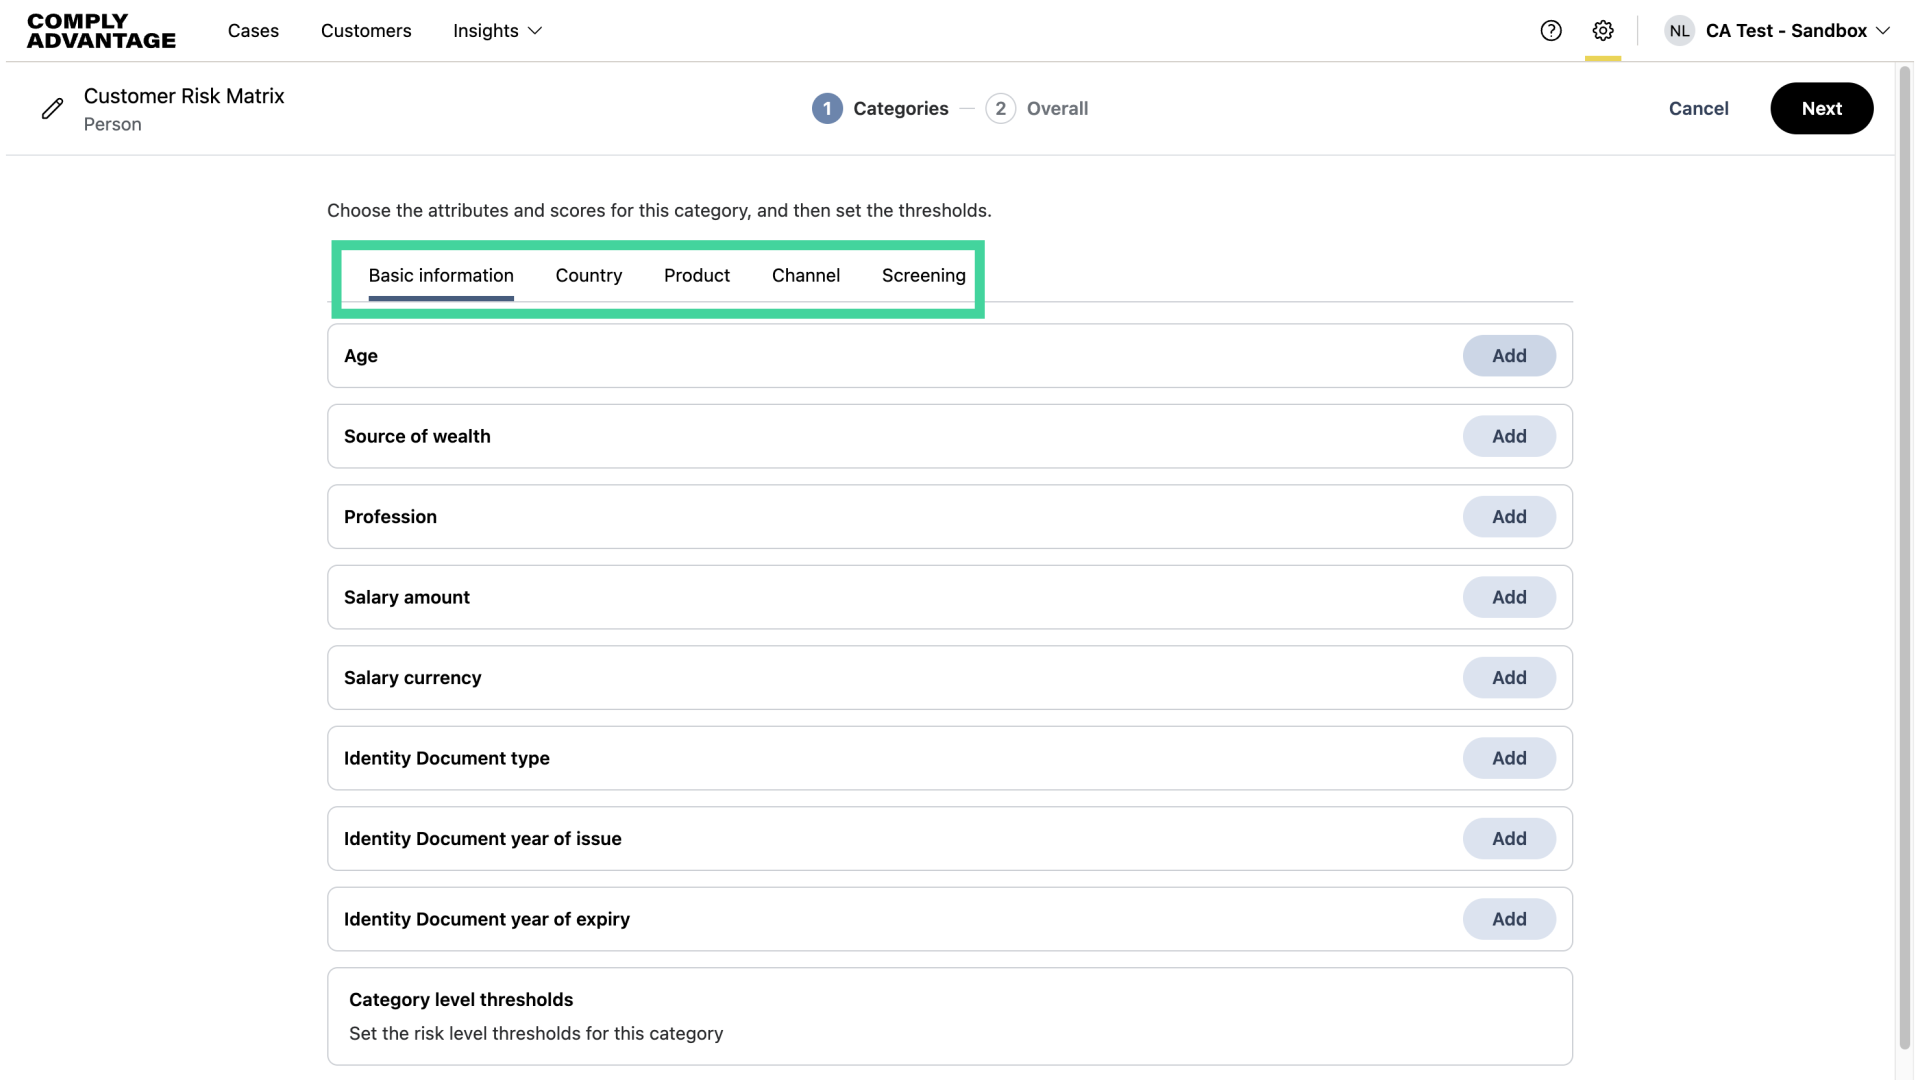
5. Category selection
In this risk model, I will add attributes within the Basic information, Country, and Screening categories.
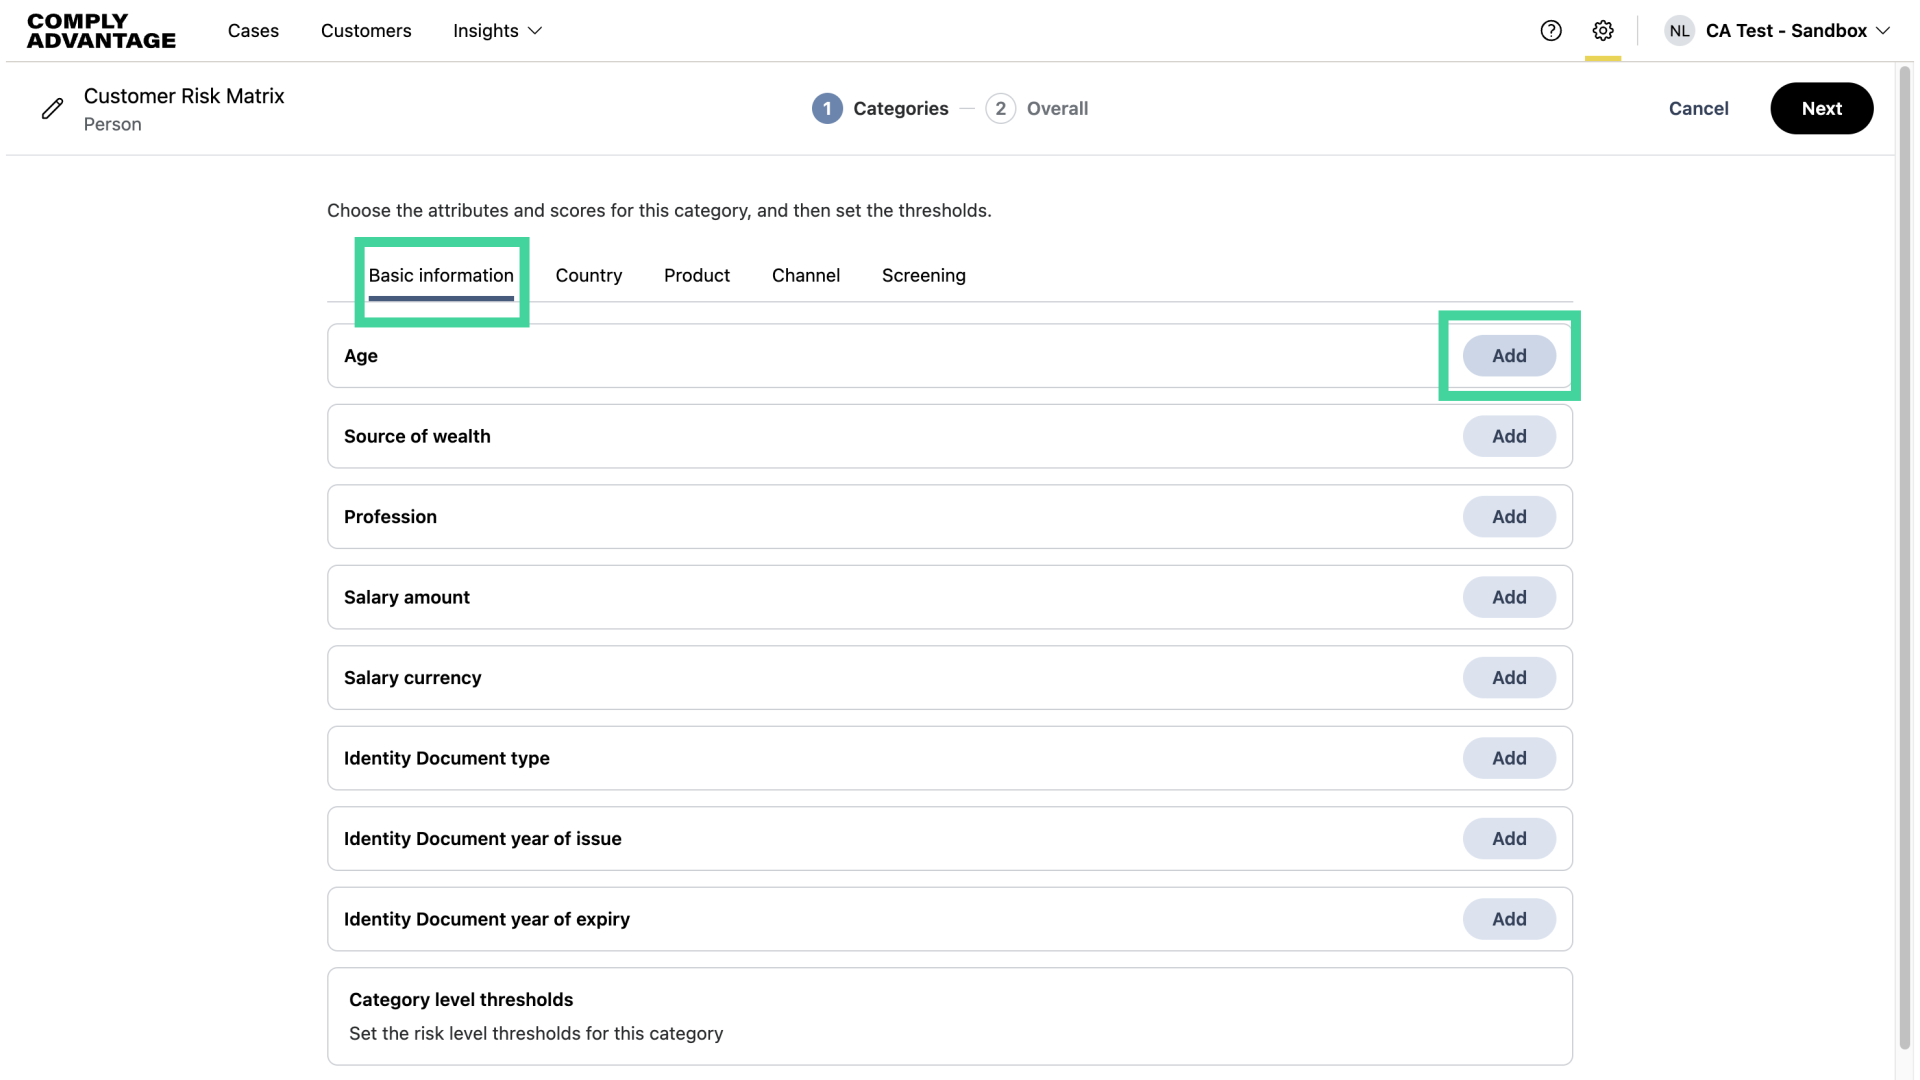
6. Click "Add"
First, I will add the "Age" attribute under Basic Information.
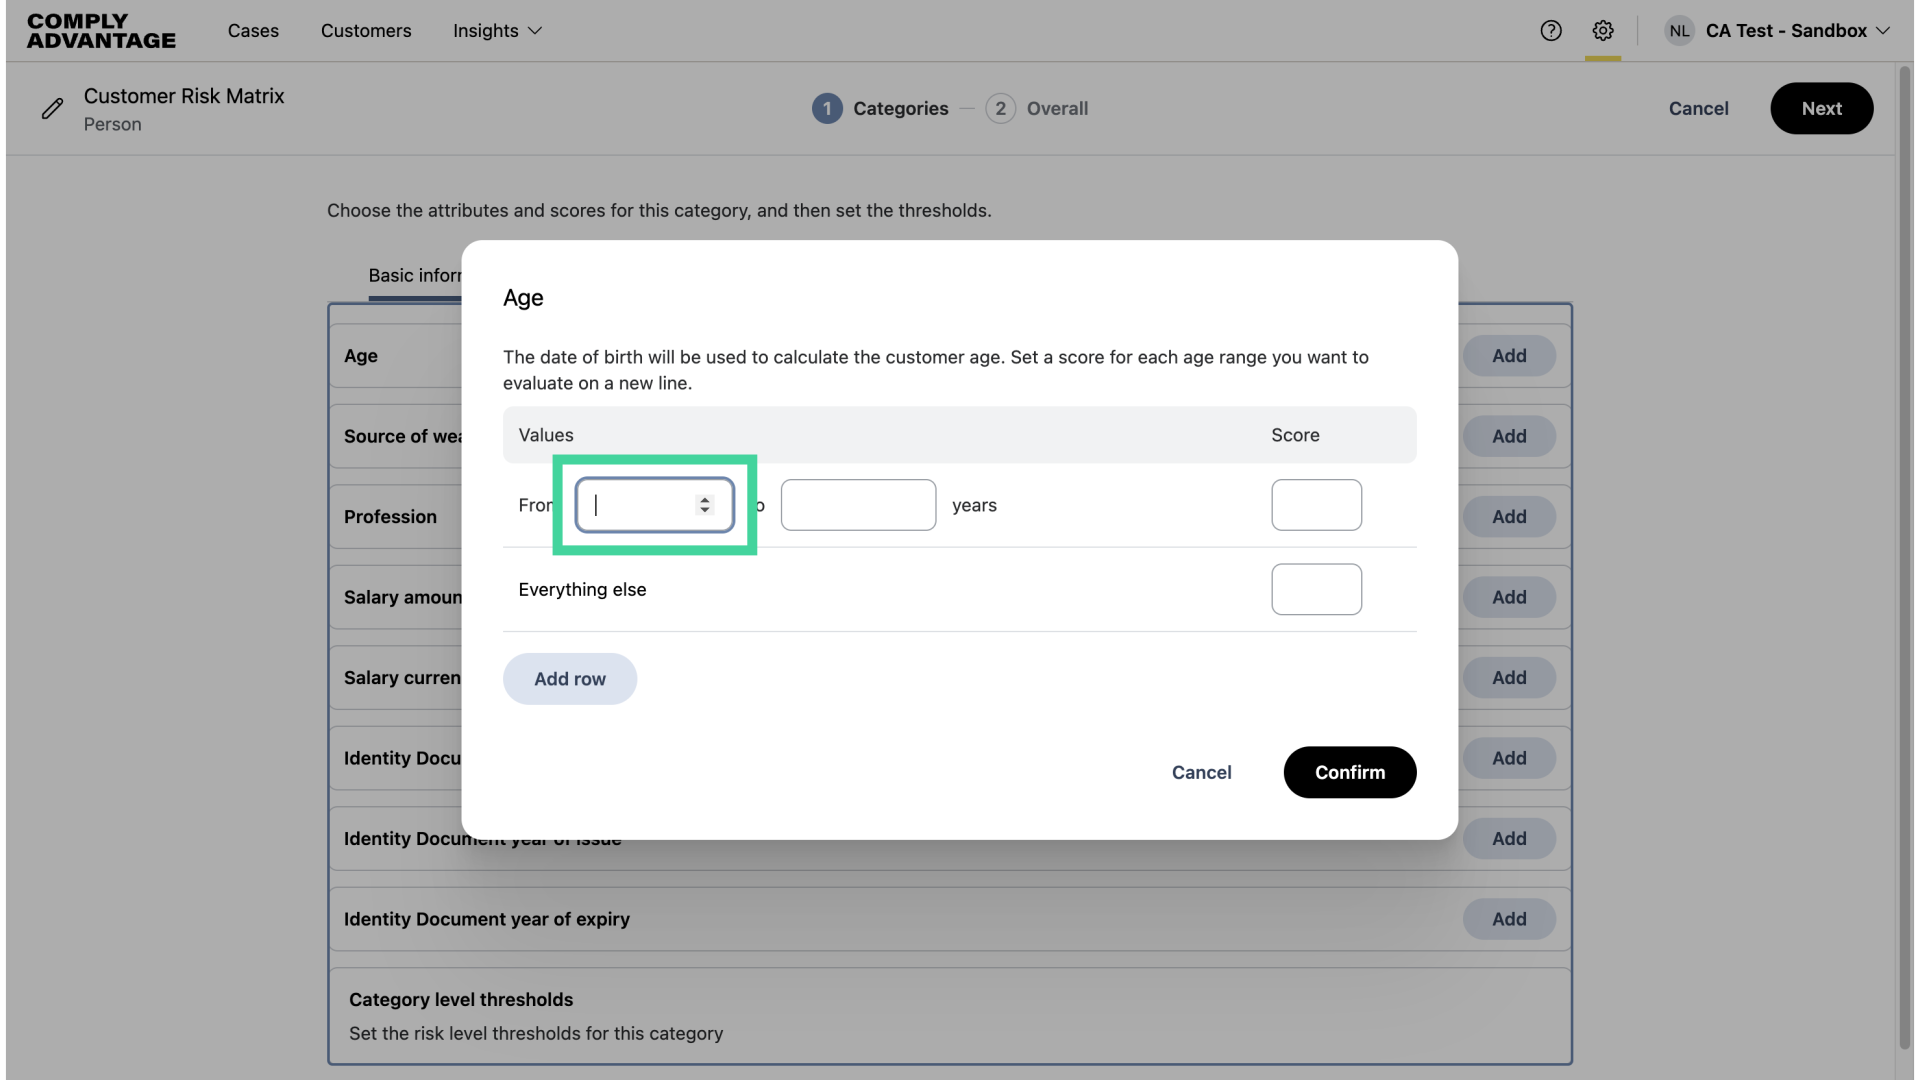
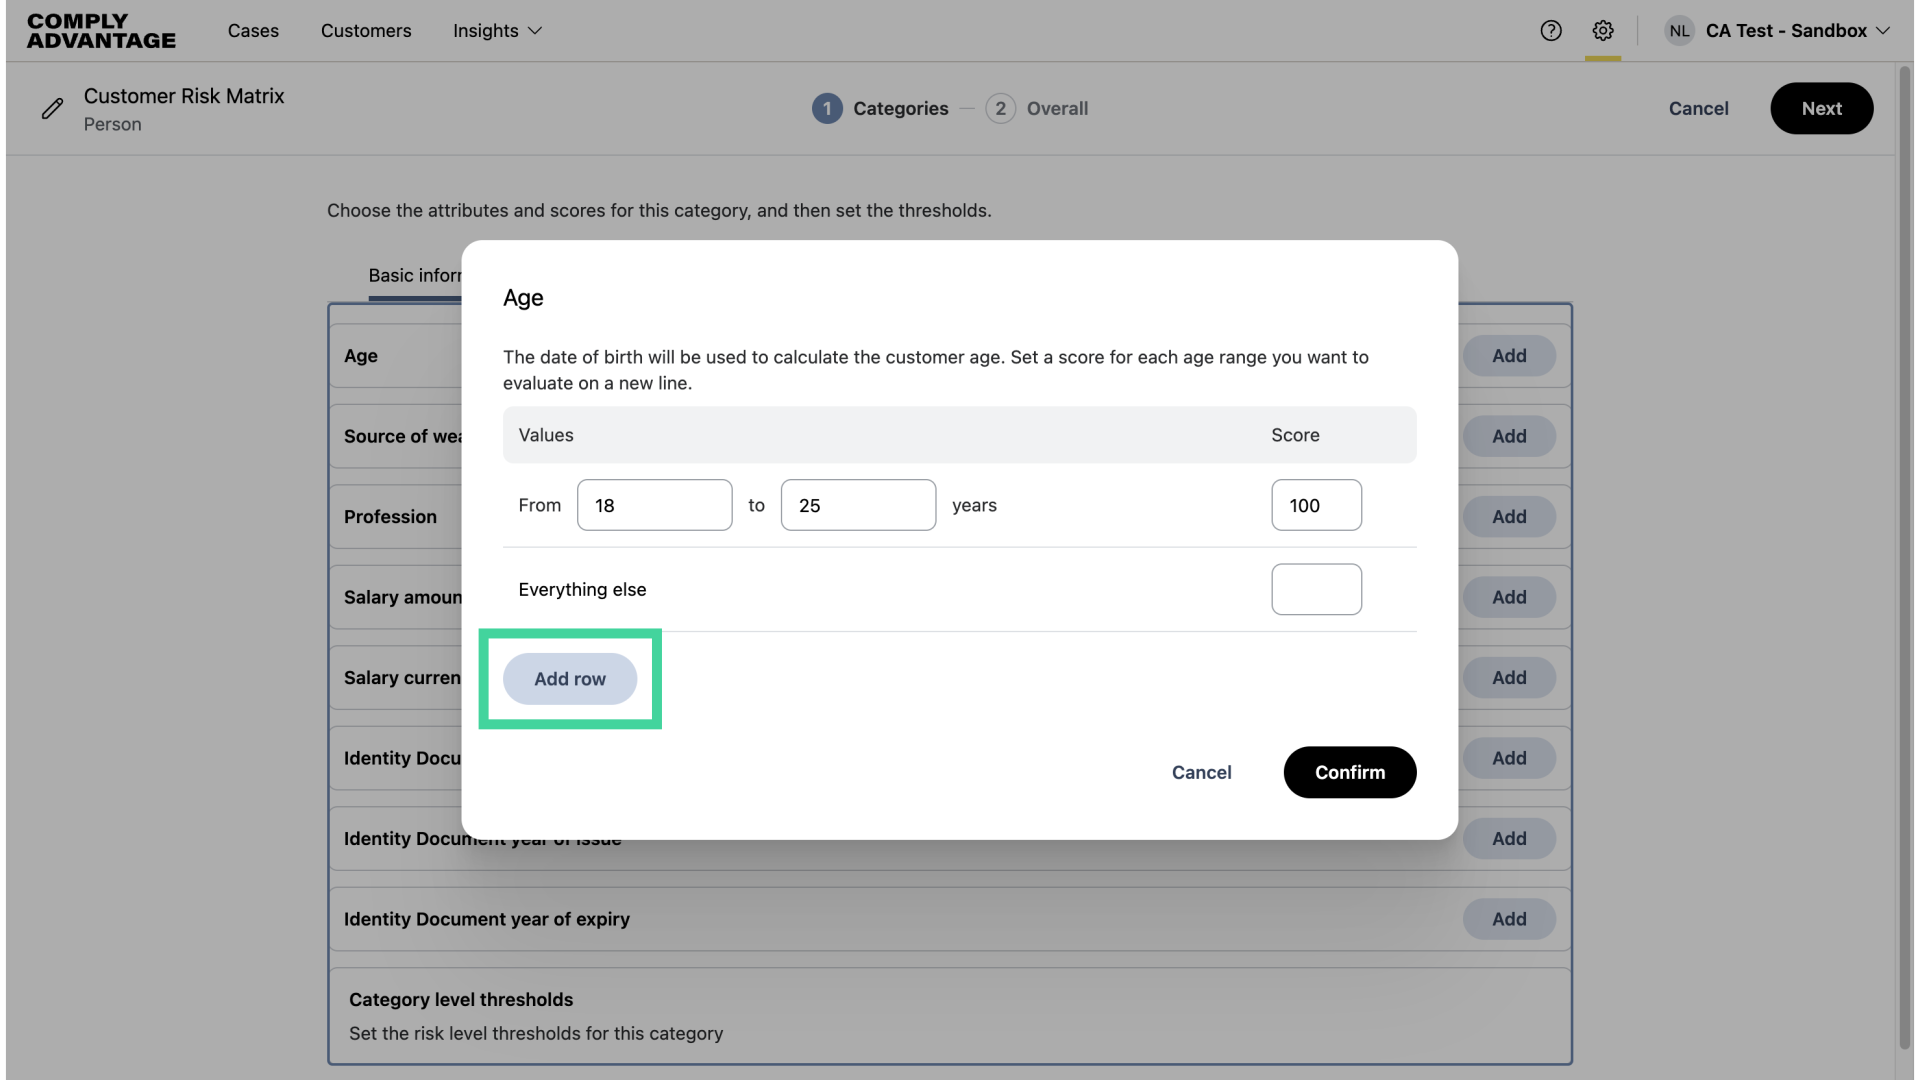
7. Add values
Here, you can add age ranges and apply a corresponding score based on your risk tolerance.
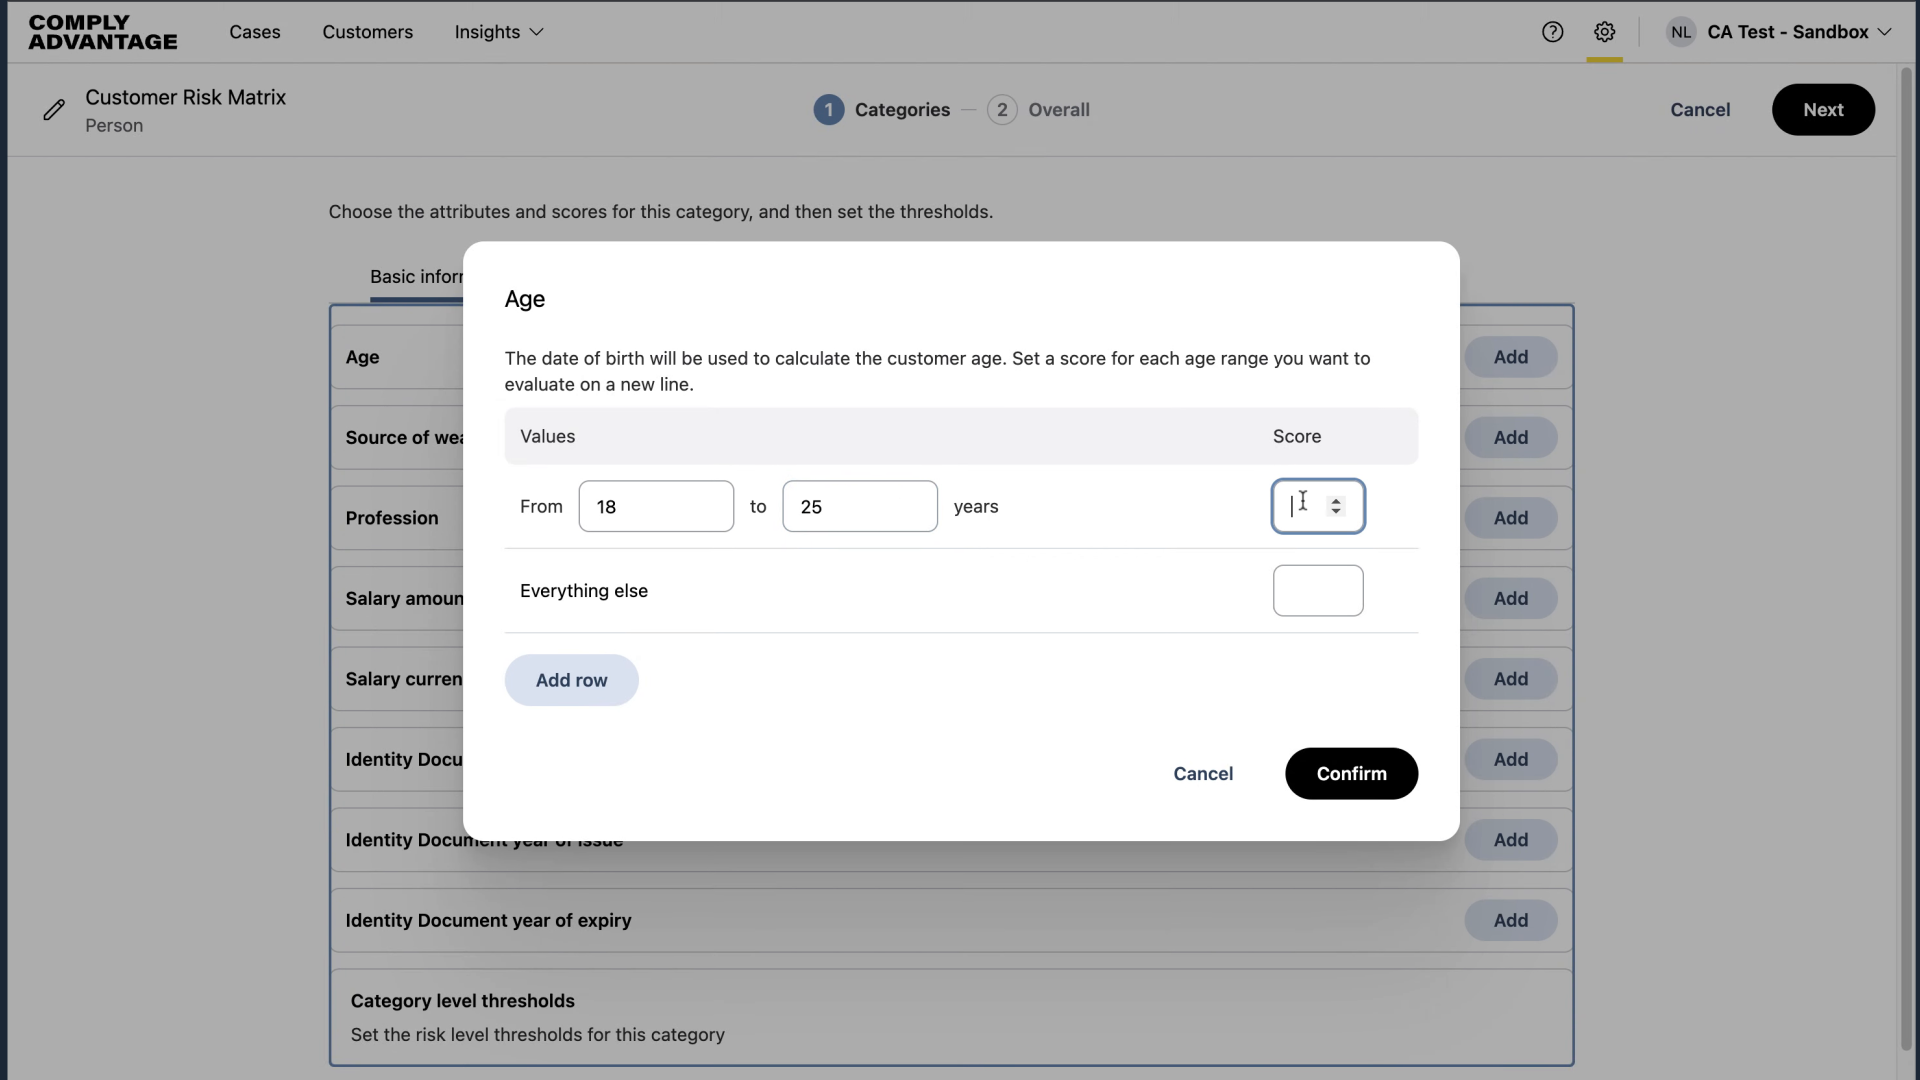
8. Add values and score
I'm adding ages 18-25 with a score of 100, which is high risk for my risk model.
9. Click "Add row"
Add additional age ranges by clicking, "Add row."
10. Add values and score
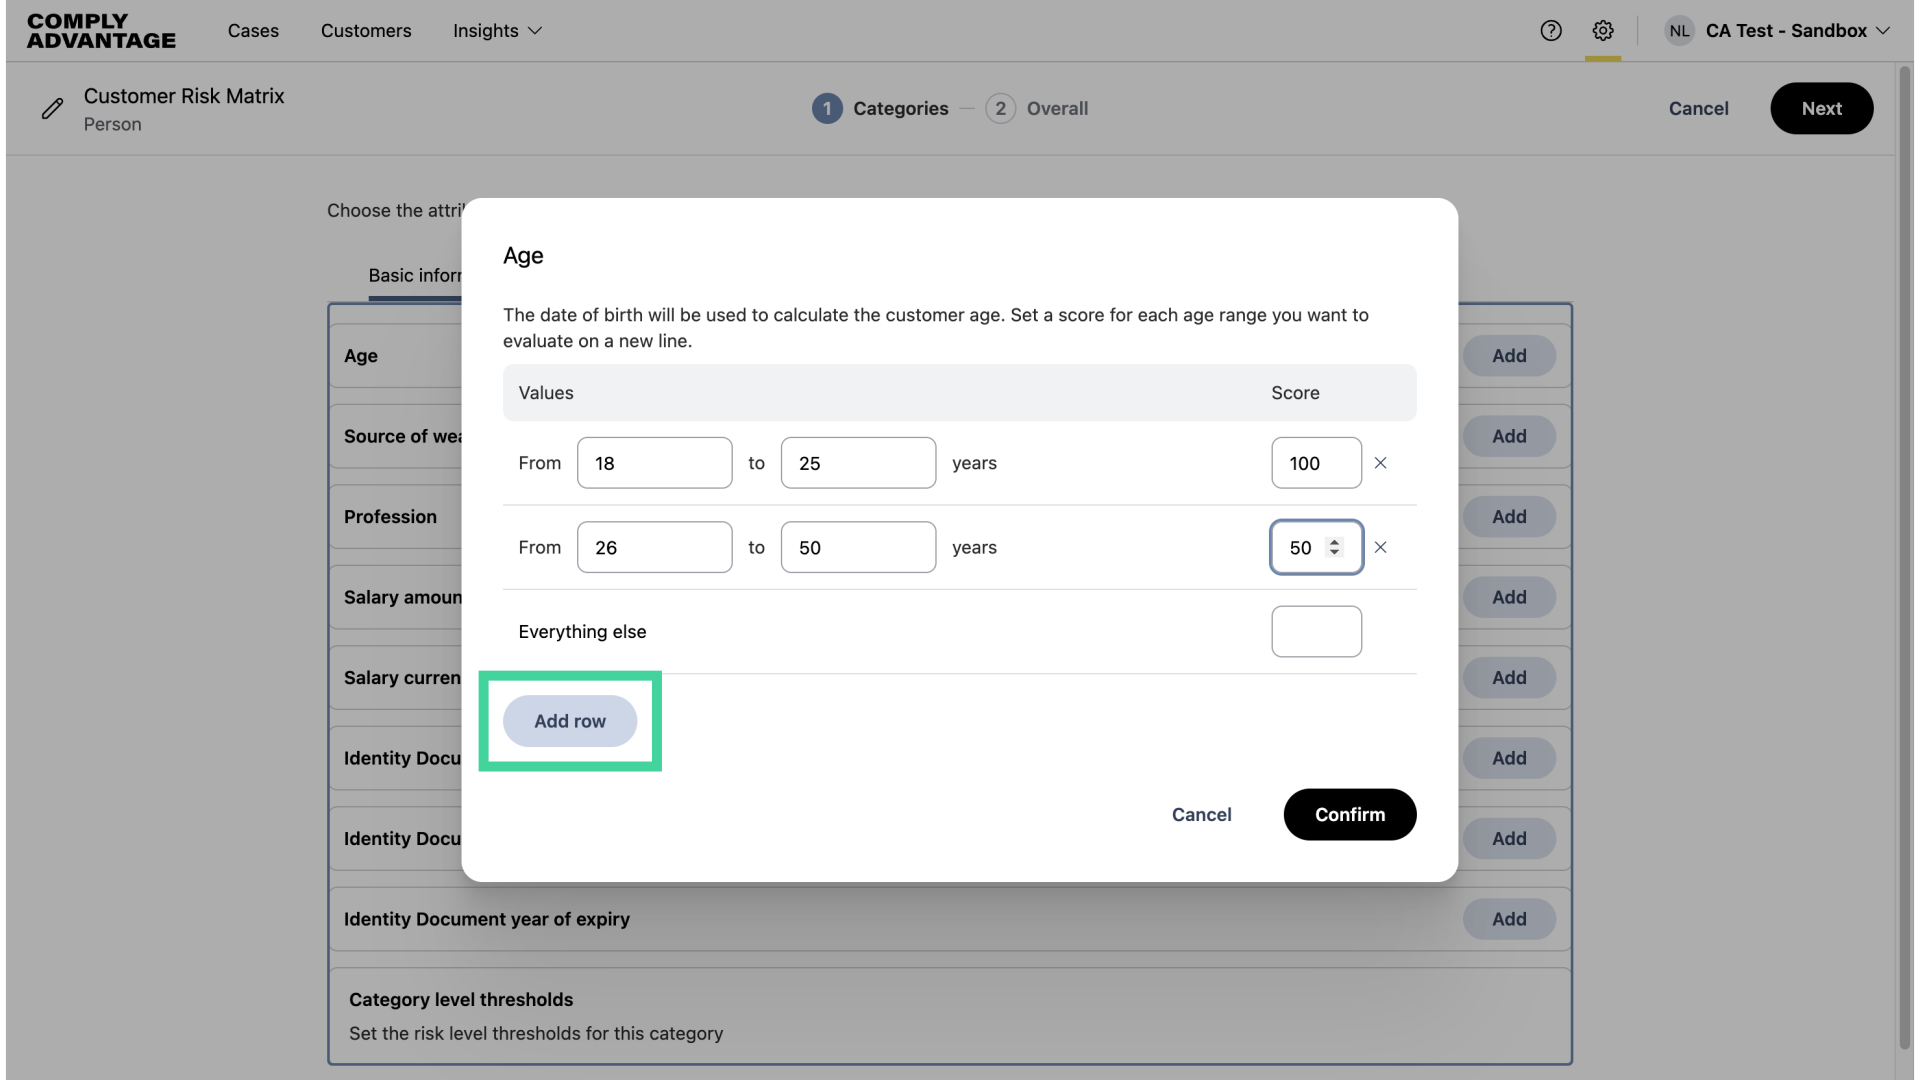
Now, I've added 26-50 as my next age range for medium-risk customers, where I've applied a score of 50.
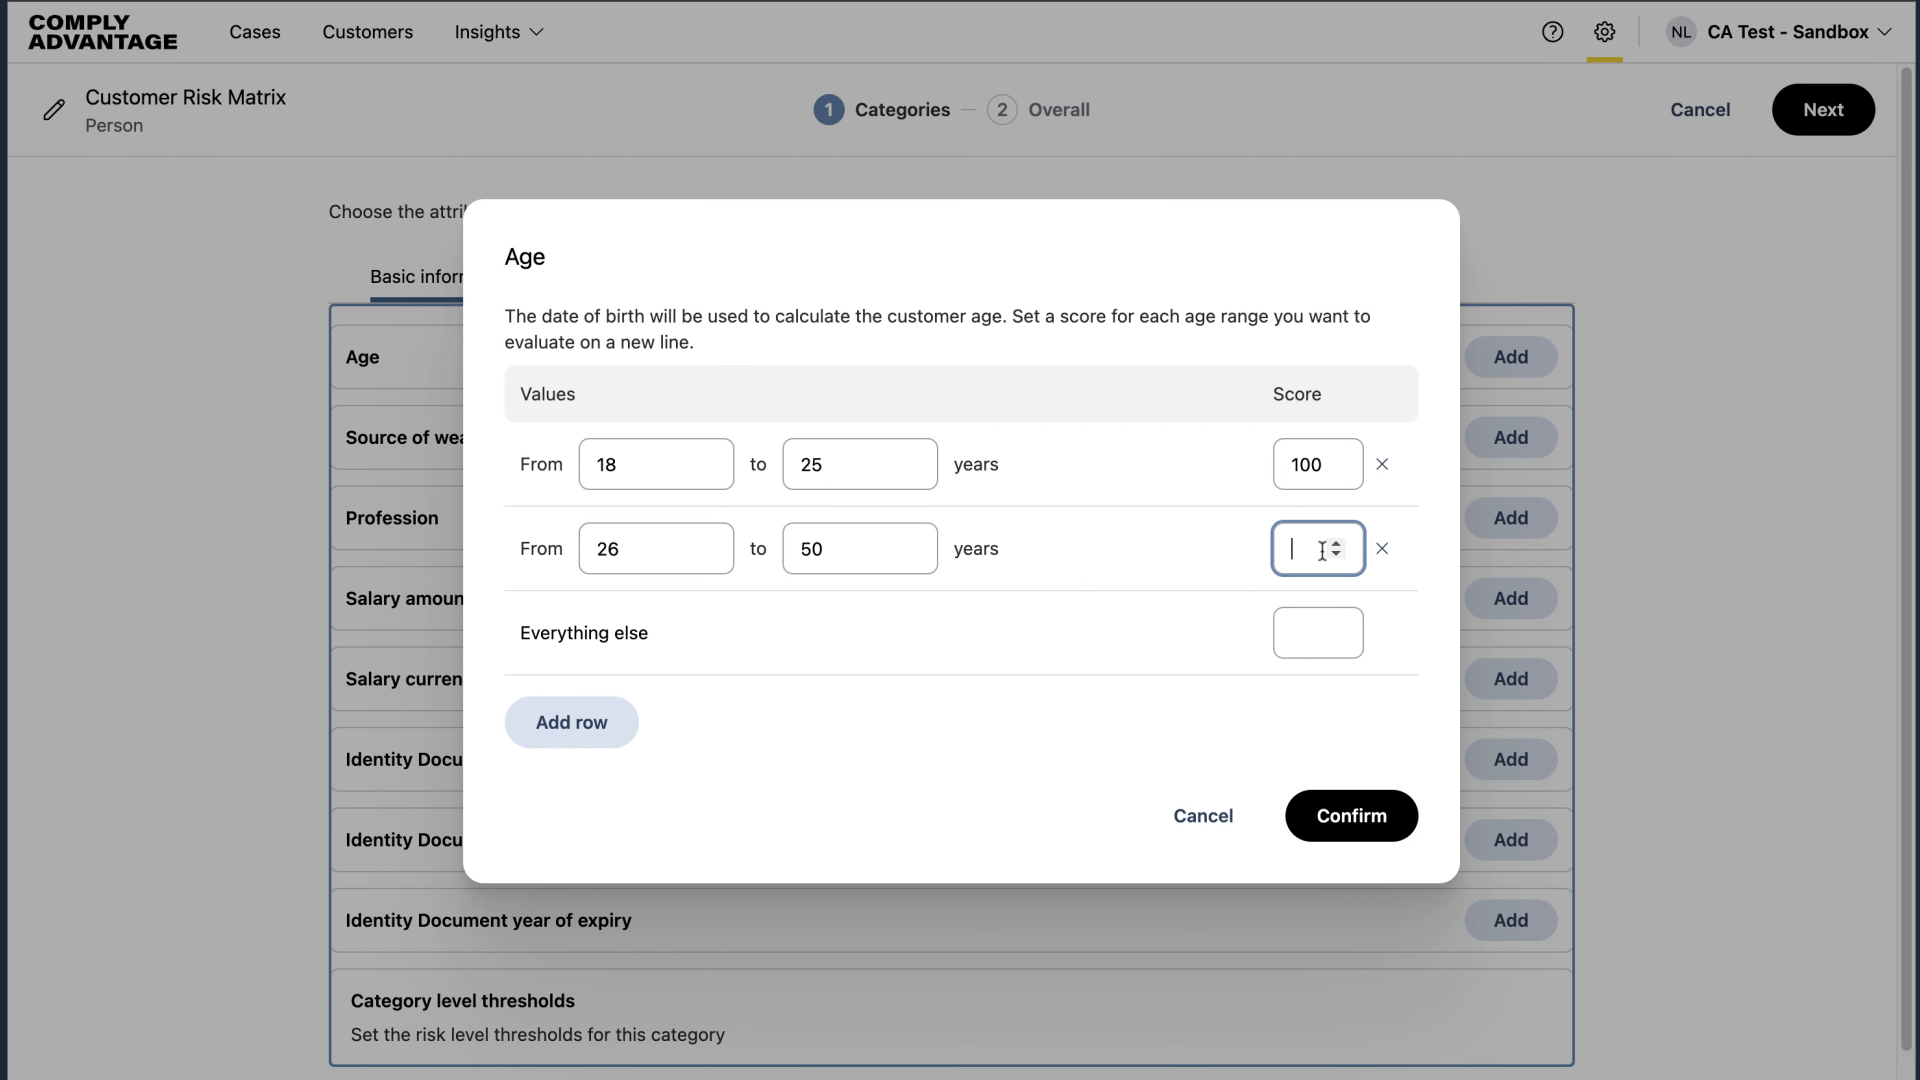
11. Click "Add row"
Lastly, I'm going to add the final age range.
12. Add age range and score
I'm applying a score of 10 since I deem 51-100 as low risk.
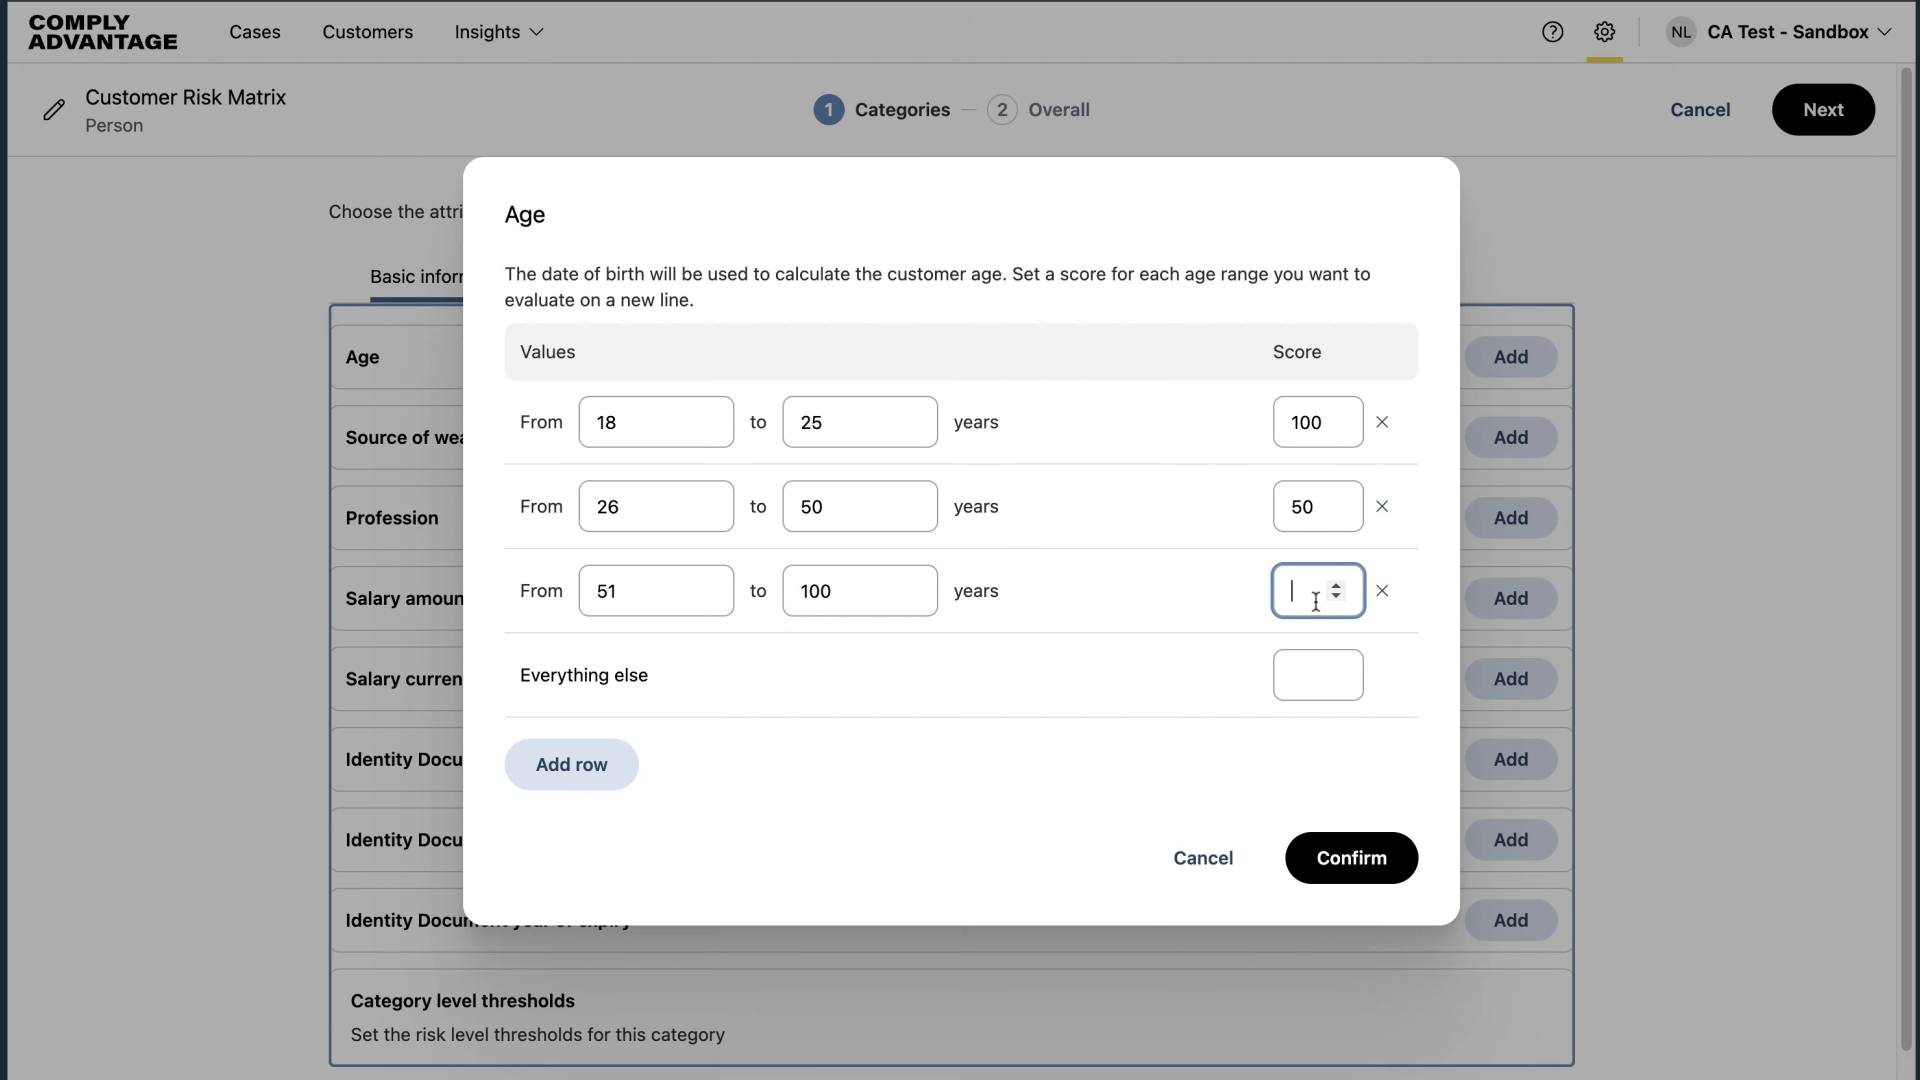
13. Apply score for all other entries
For all other ages, I'm applying a score of 0.
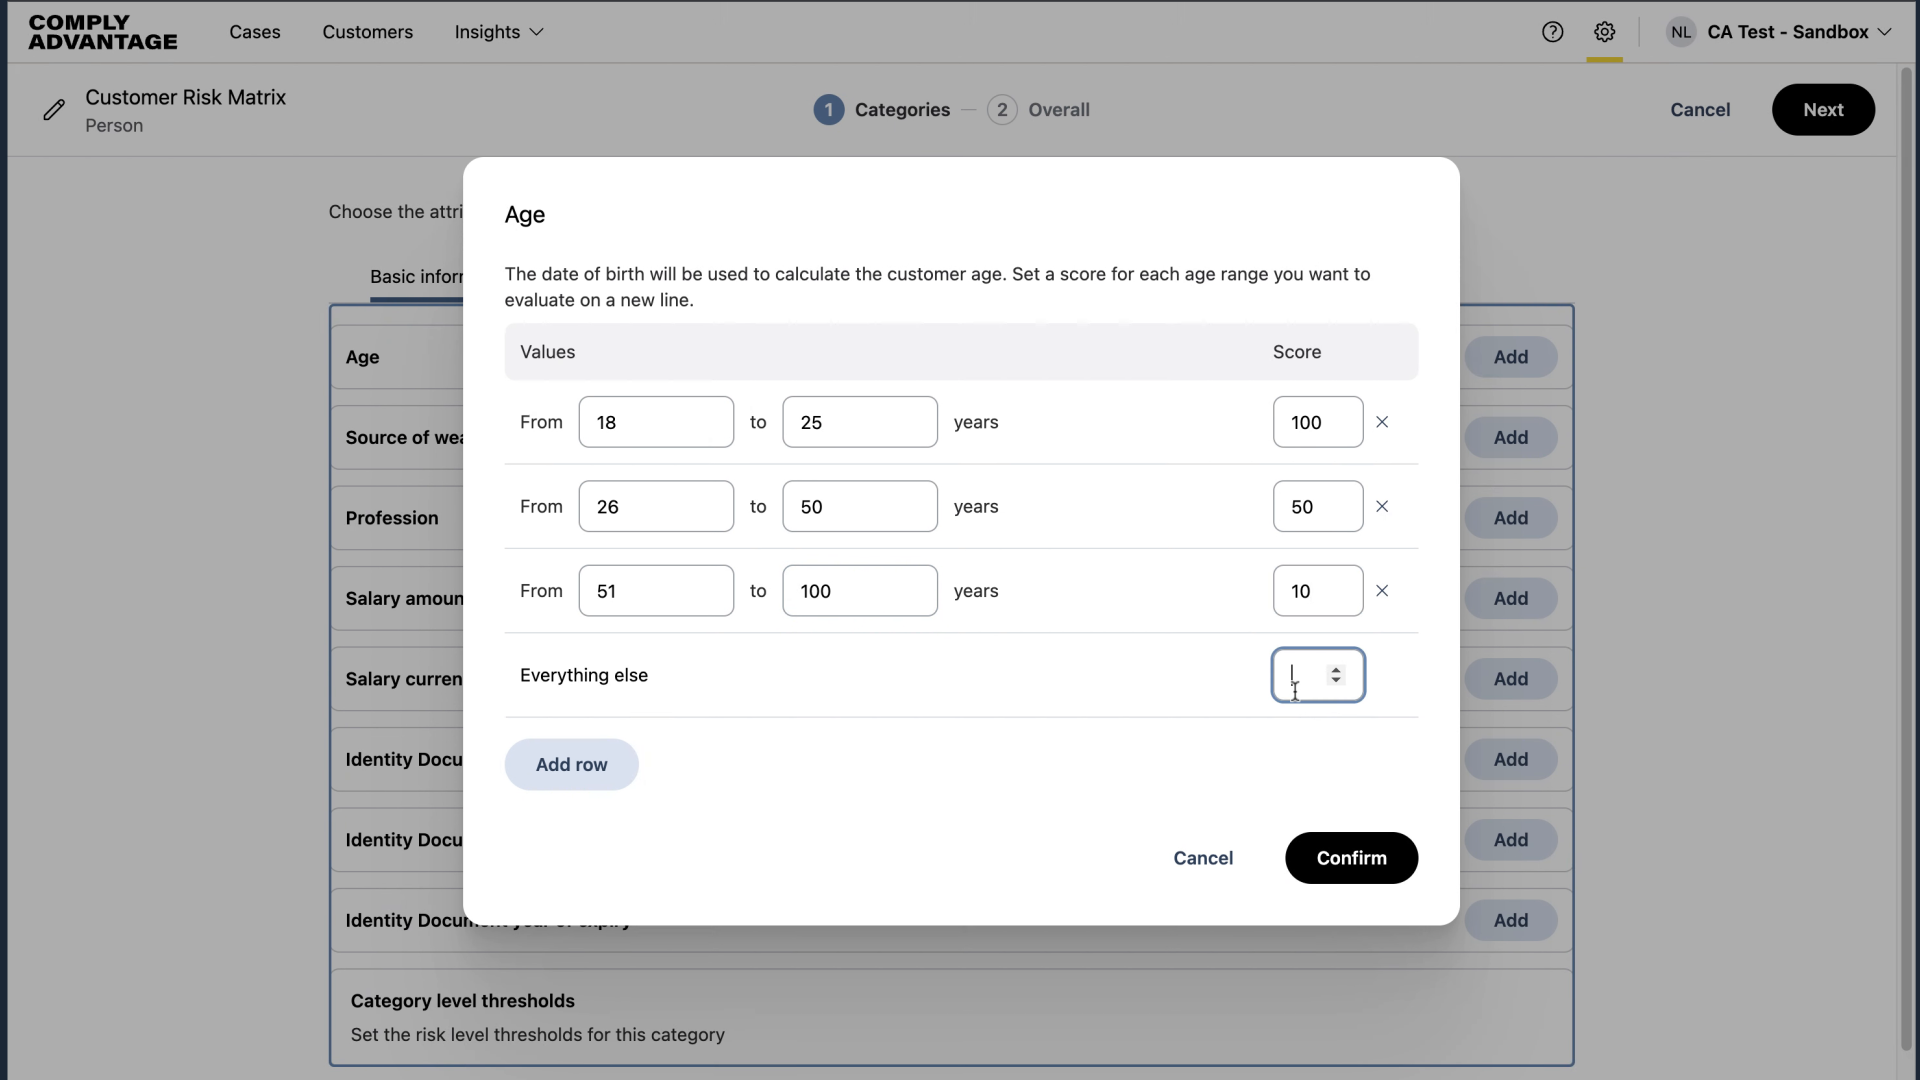
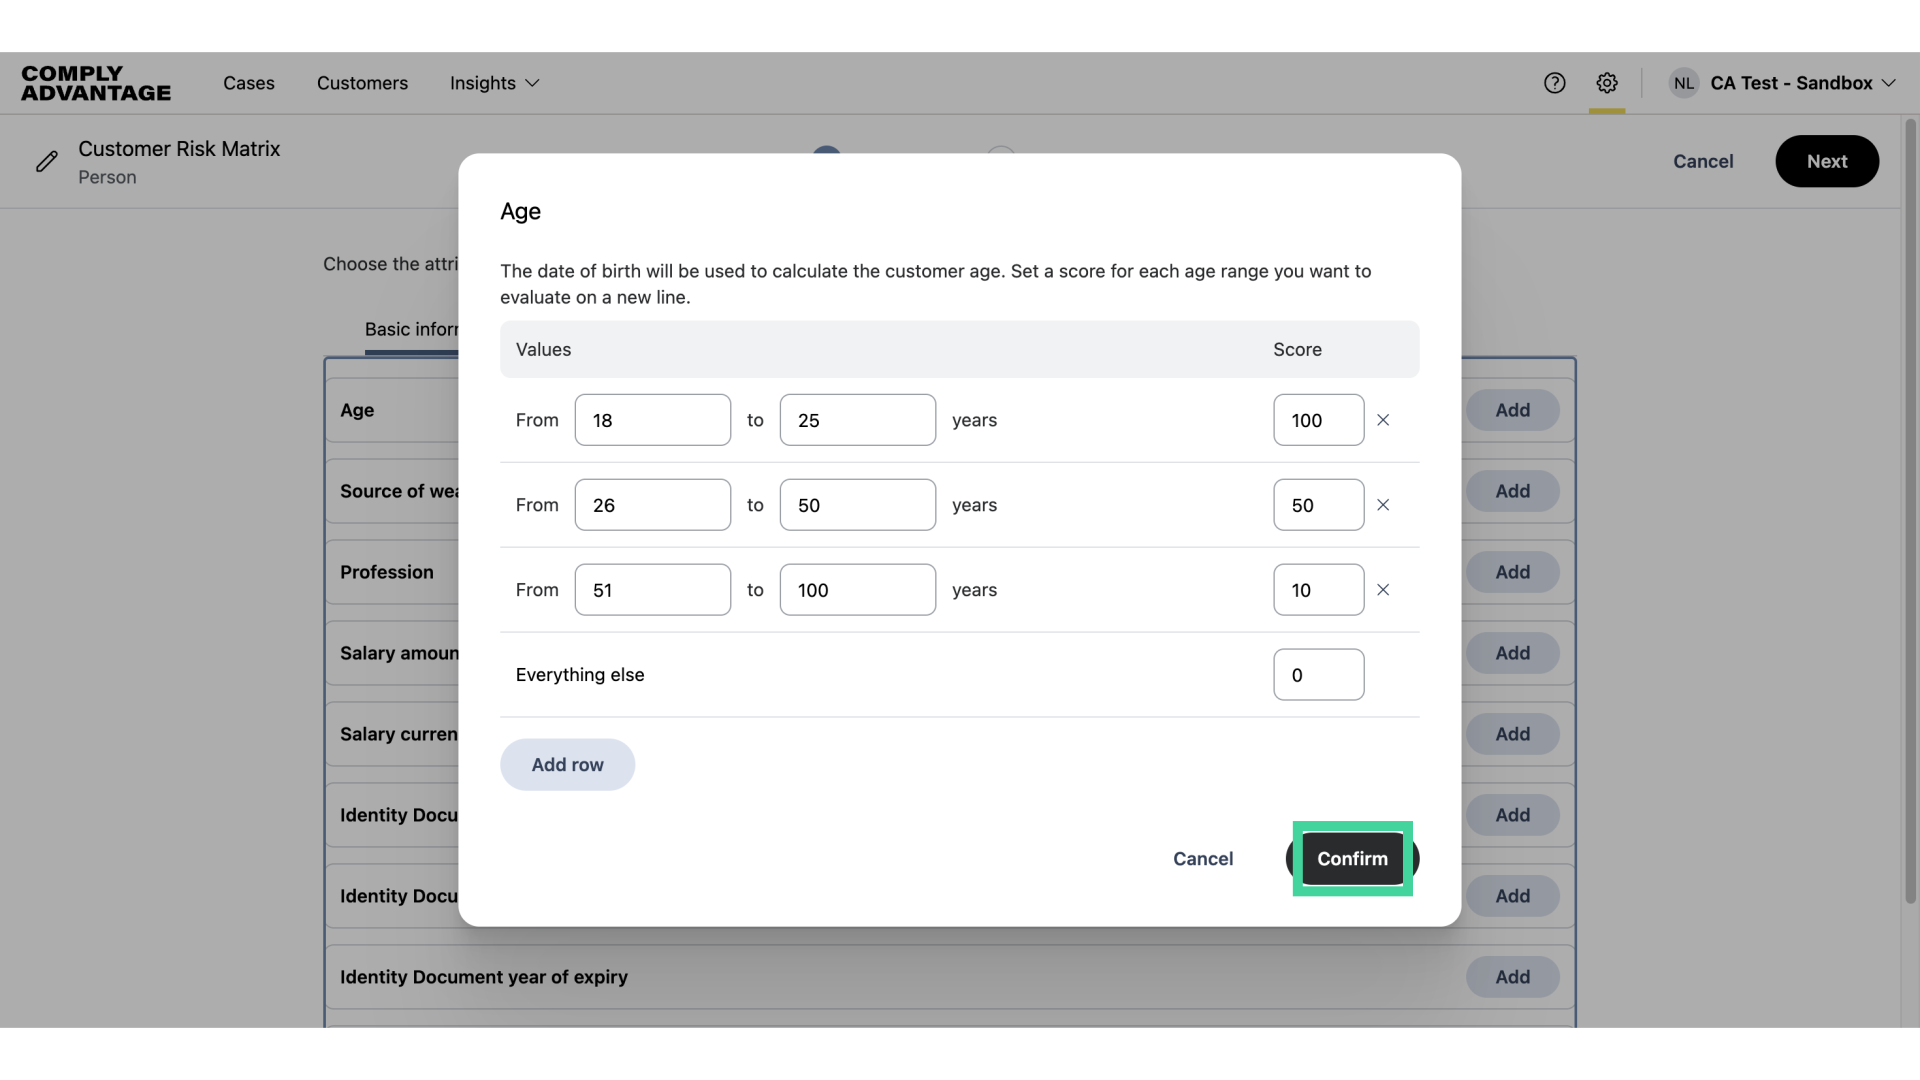
14. Click "Confirm"
Click "Confirm" once complete.
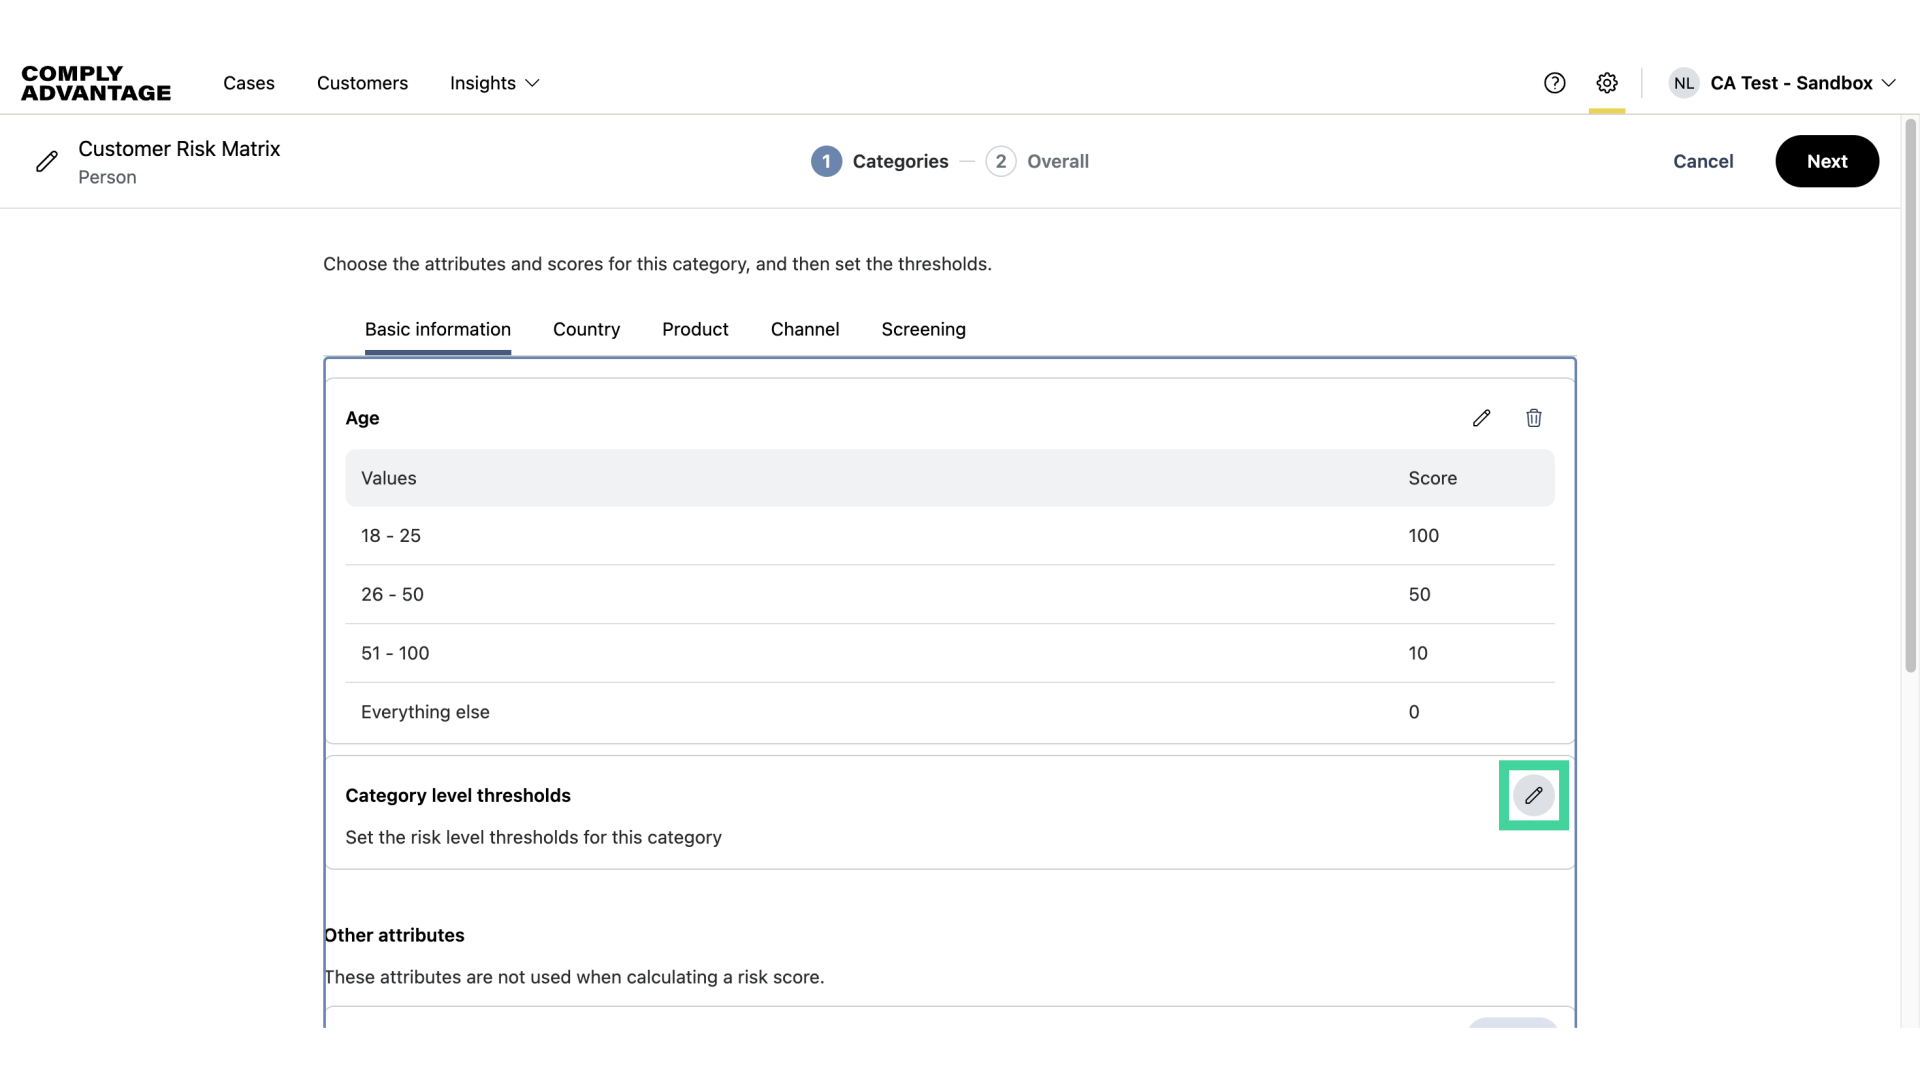
15. Click here
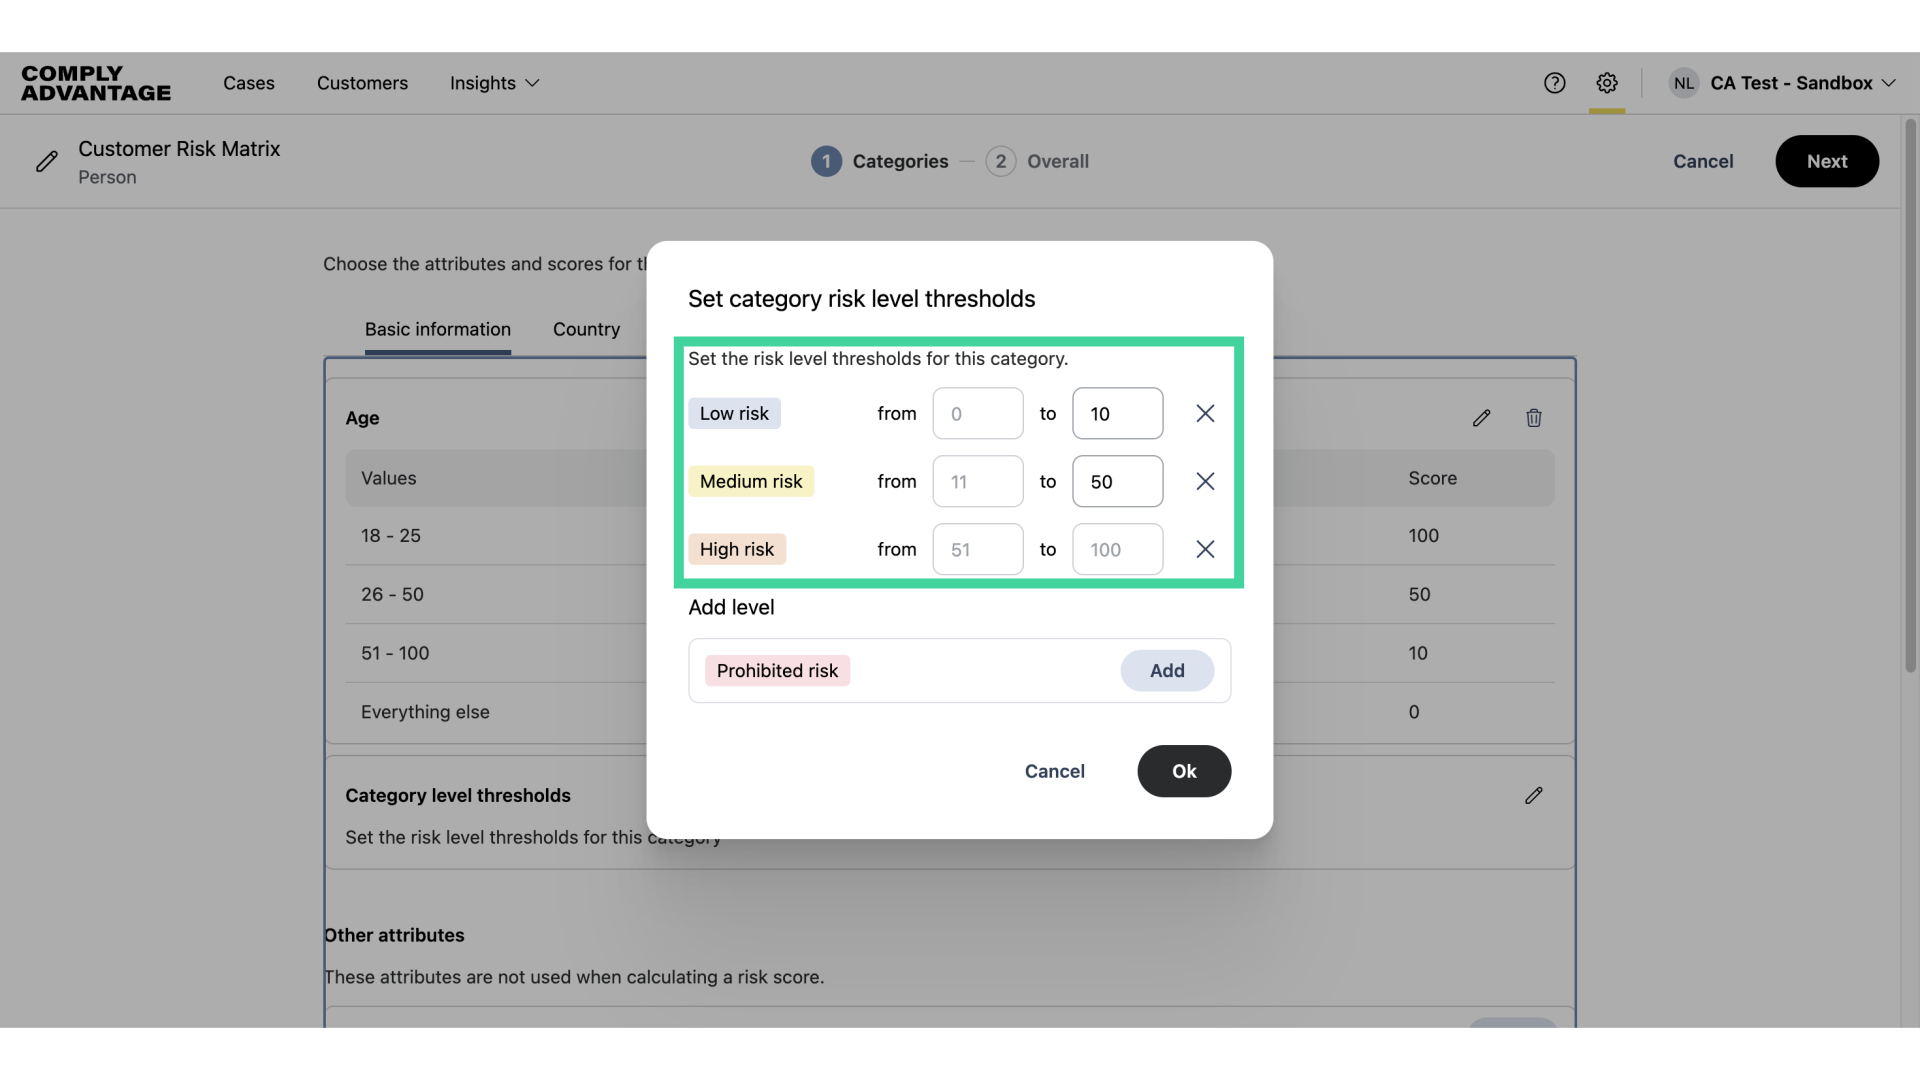
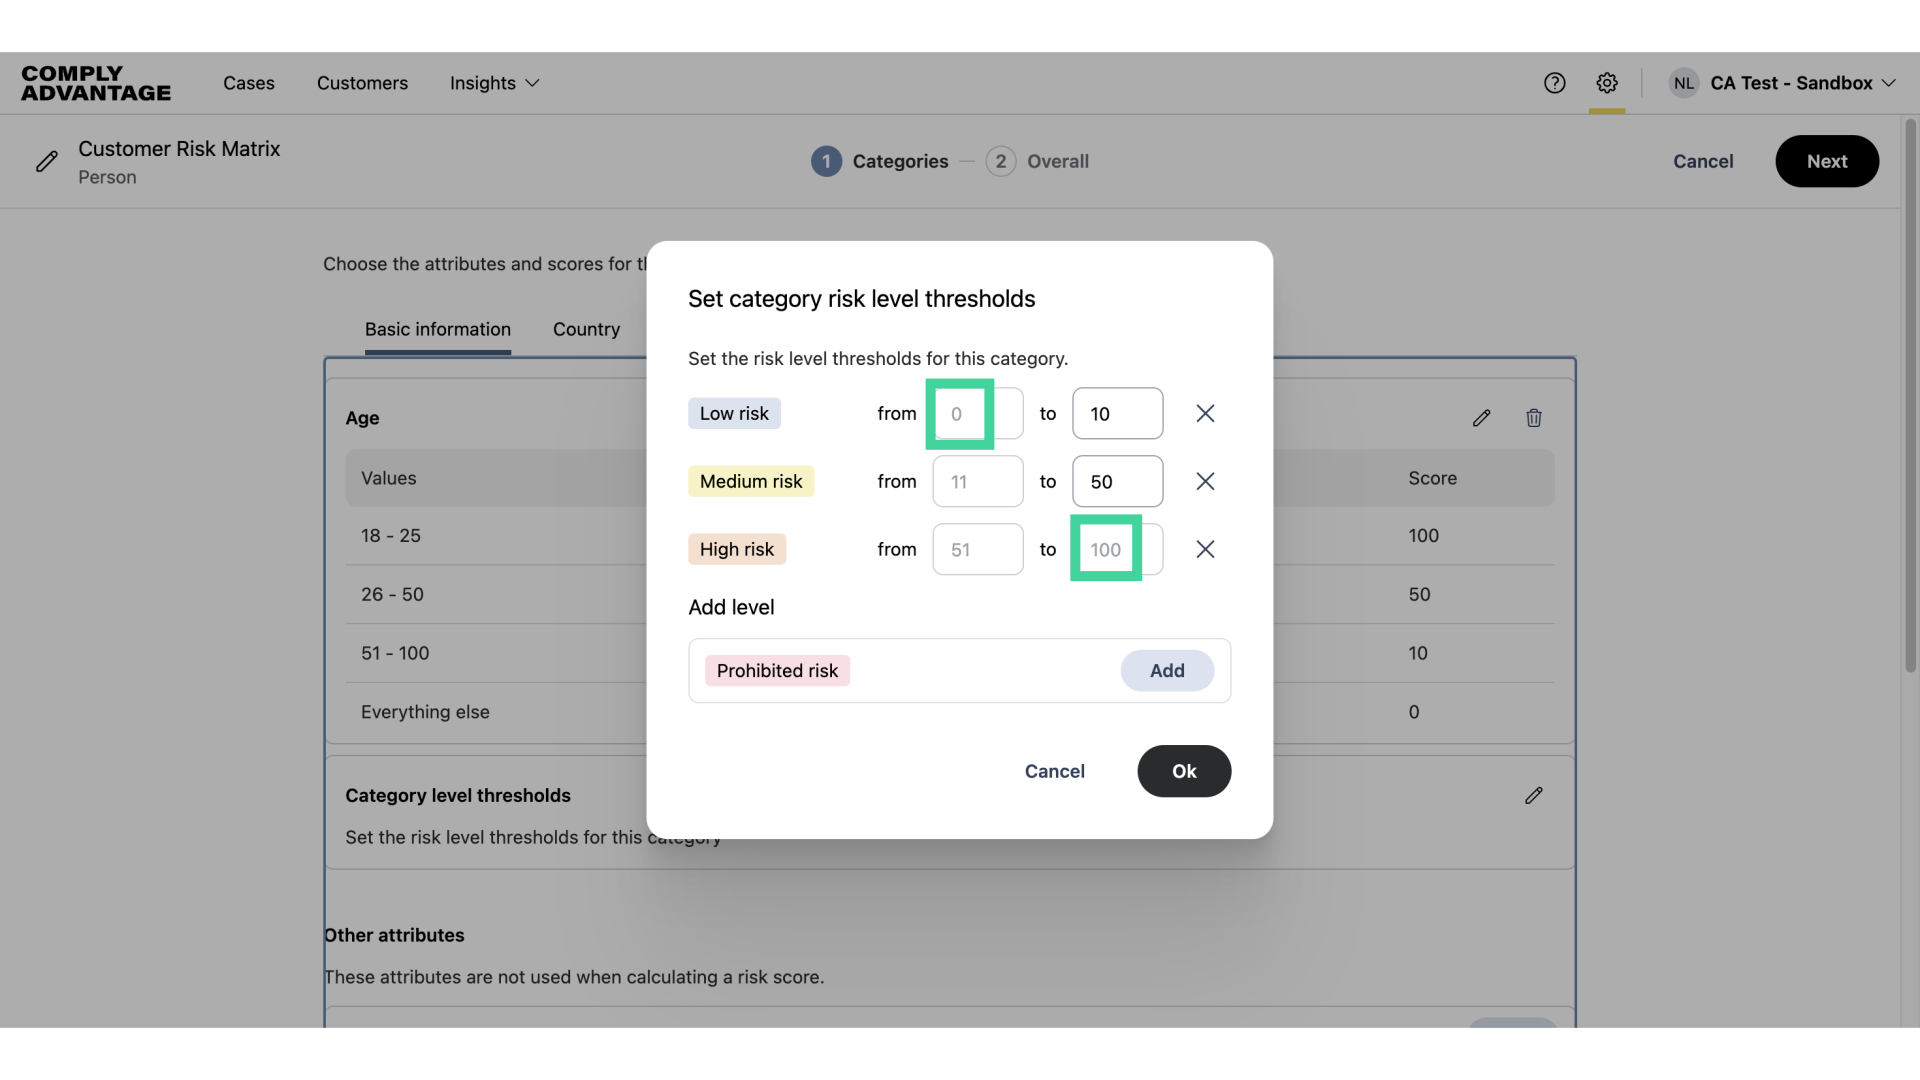
Now that the Age attribute has been saved, we need to set the risk level thresholds for this category to define what scores we consider as low, medium, or high risk. To do this, click on the pencil icon.
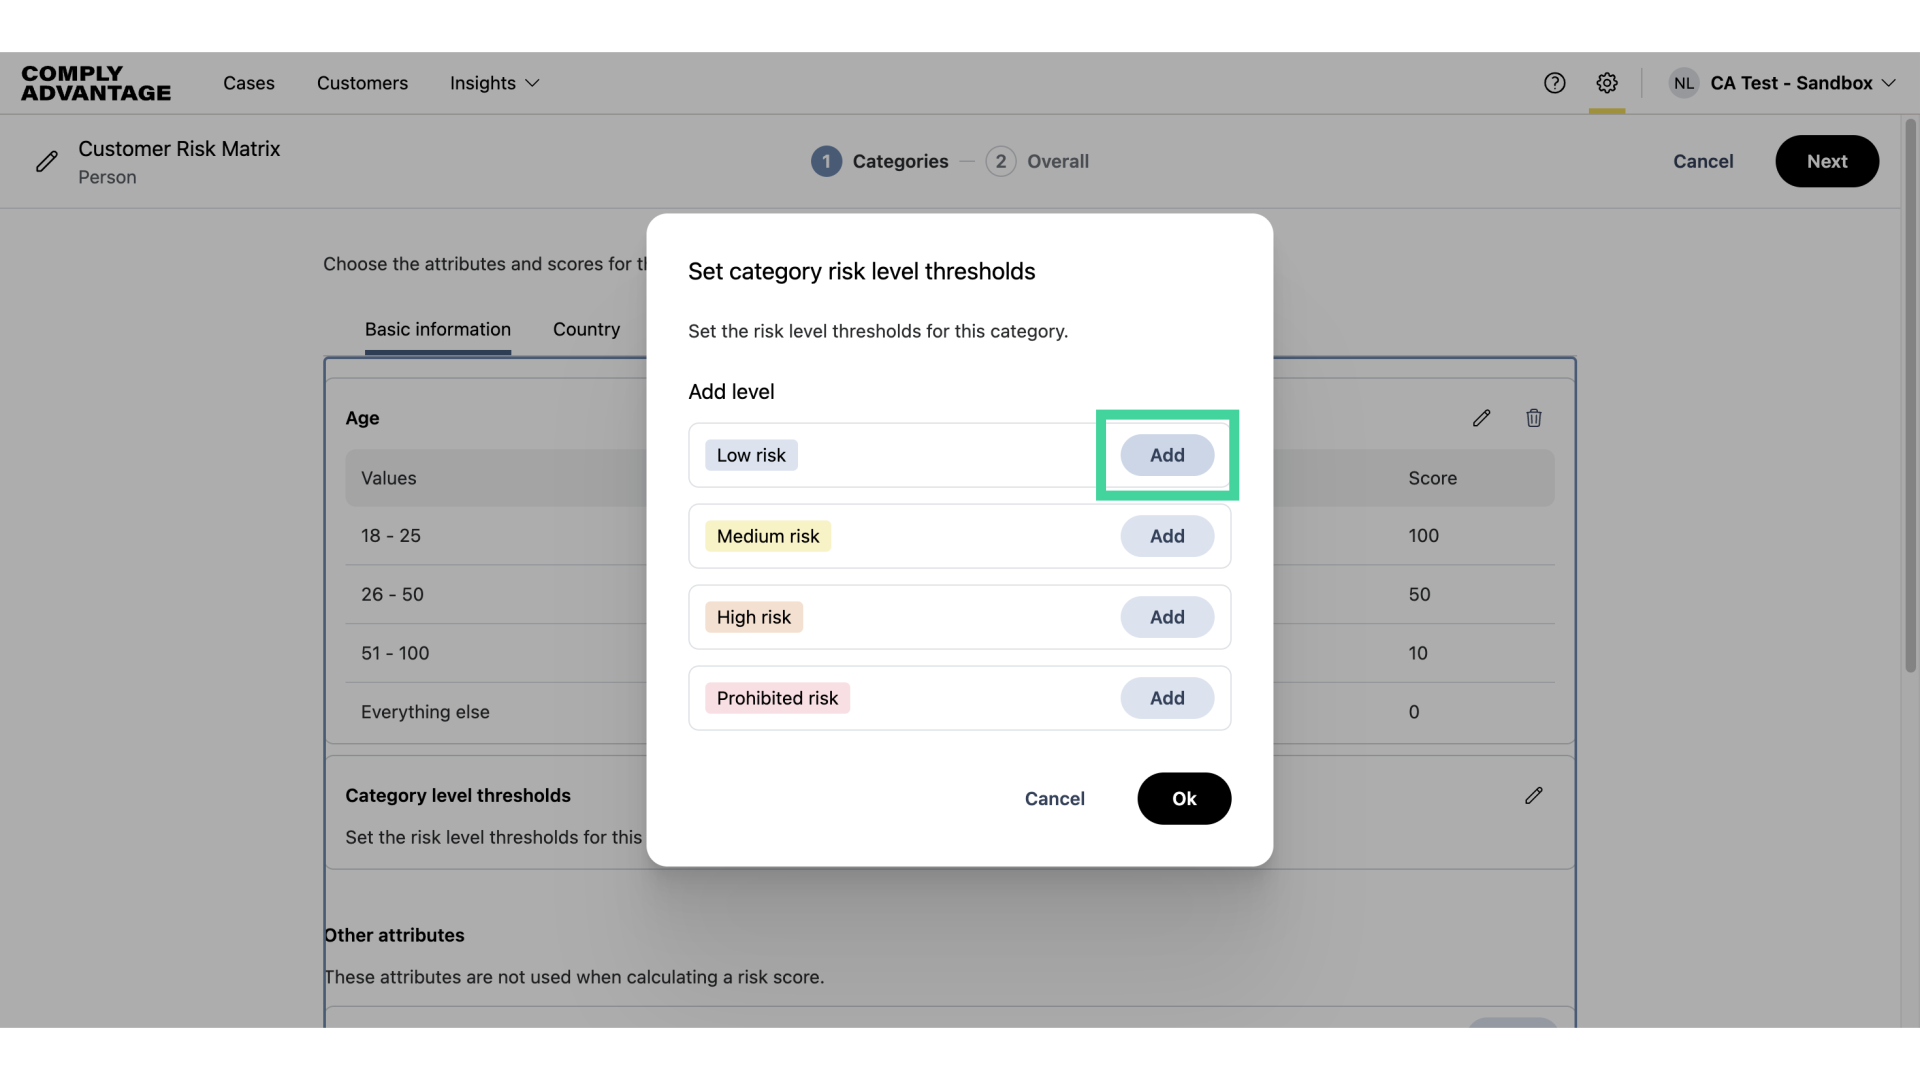
16. Click "Add"
Click "Add" next to the risk levels you wish to add.
17. Enter threshold numbers
Enter your desired threshold number for each risk level.
18. Automatic calculations
We will automatically calculate the absolute minimum and maximum values based on your provided scores.
19. Automatic calculations
We also calculate the lower limit per level when you enter the upper limit in the box on the right. You can see that the automatically calculated values are grayed out.

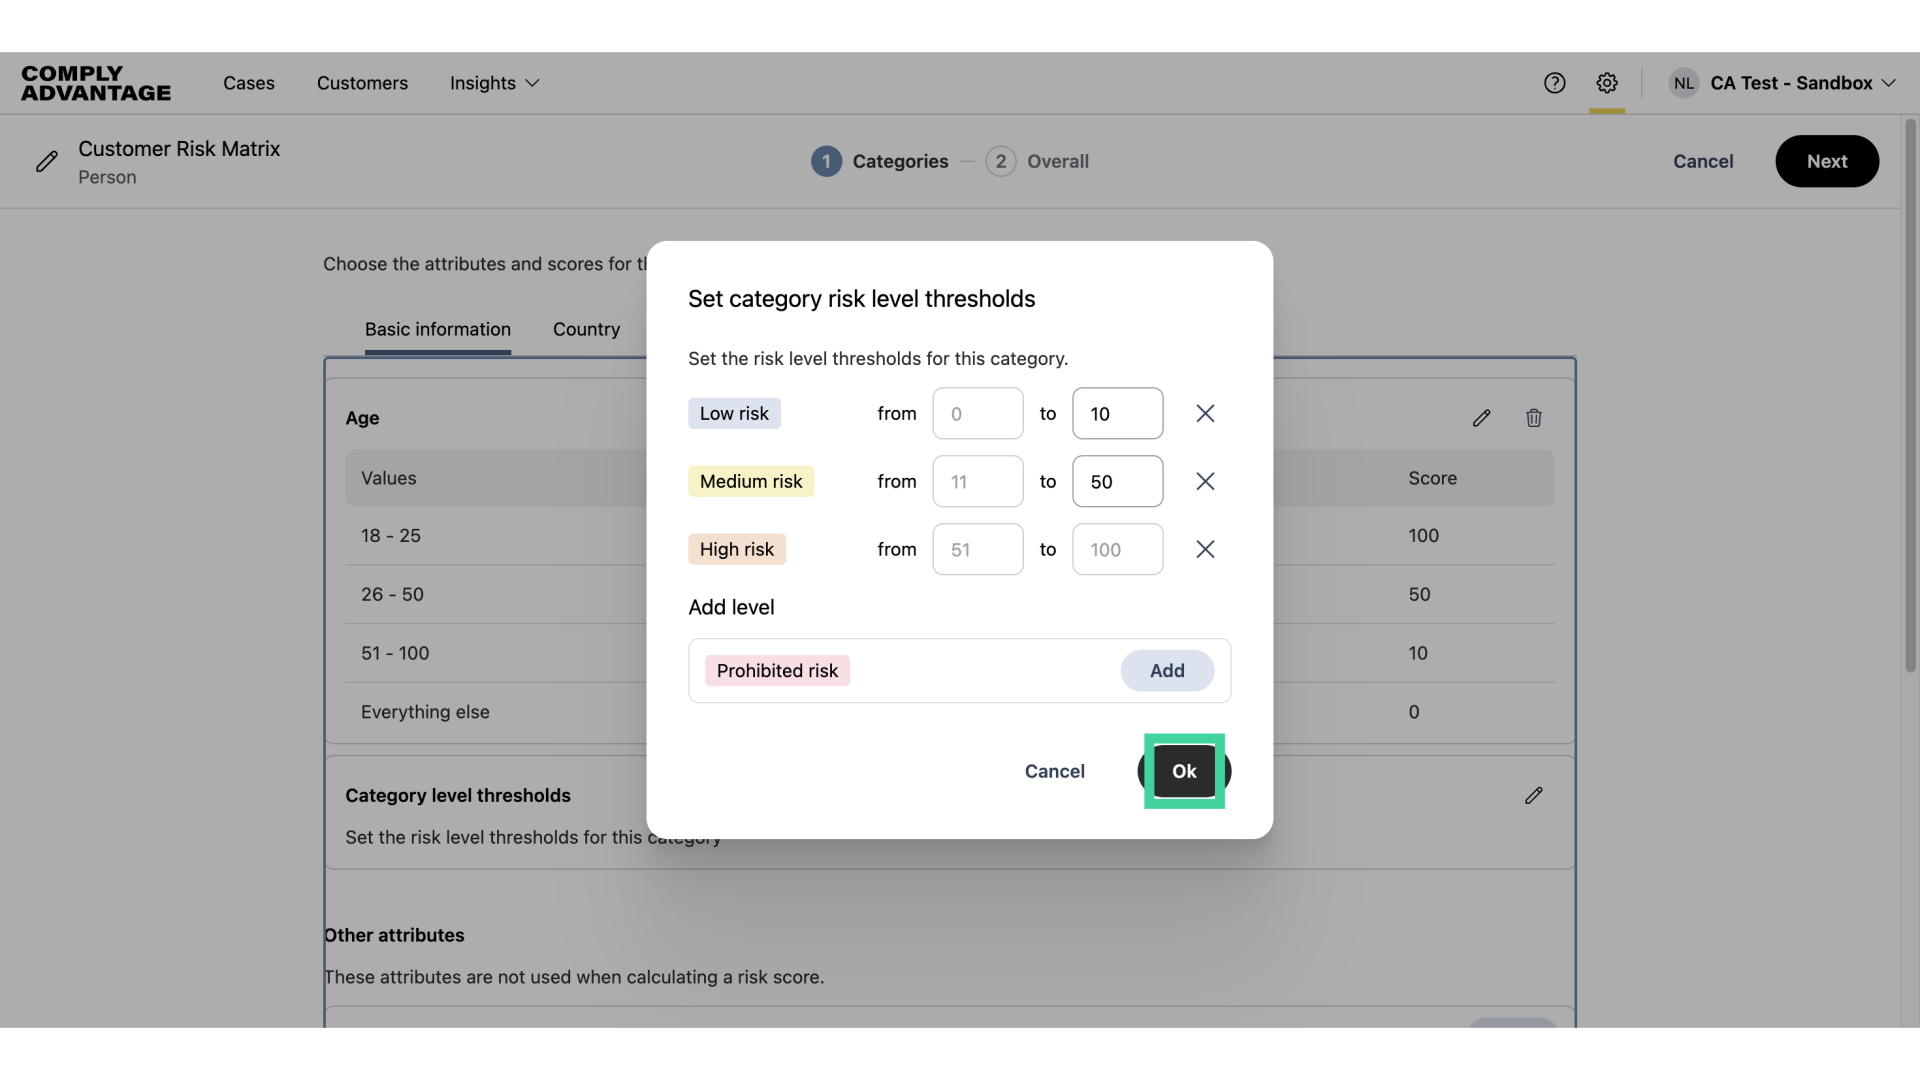
20. Click "Ok"
Click "Ok" once complete.
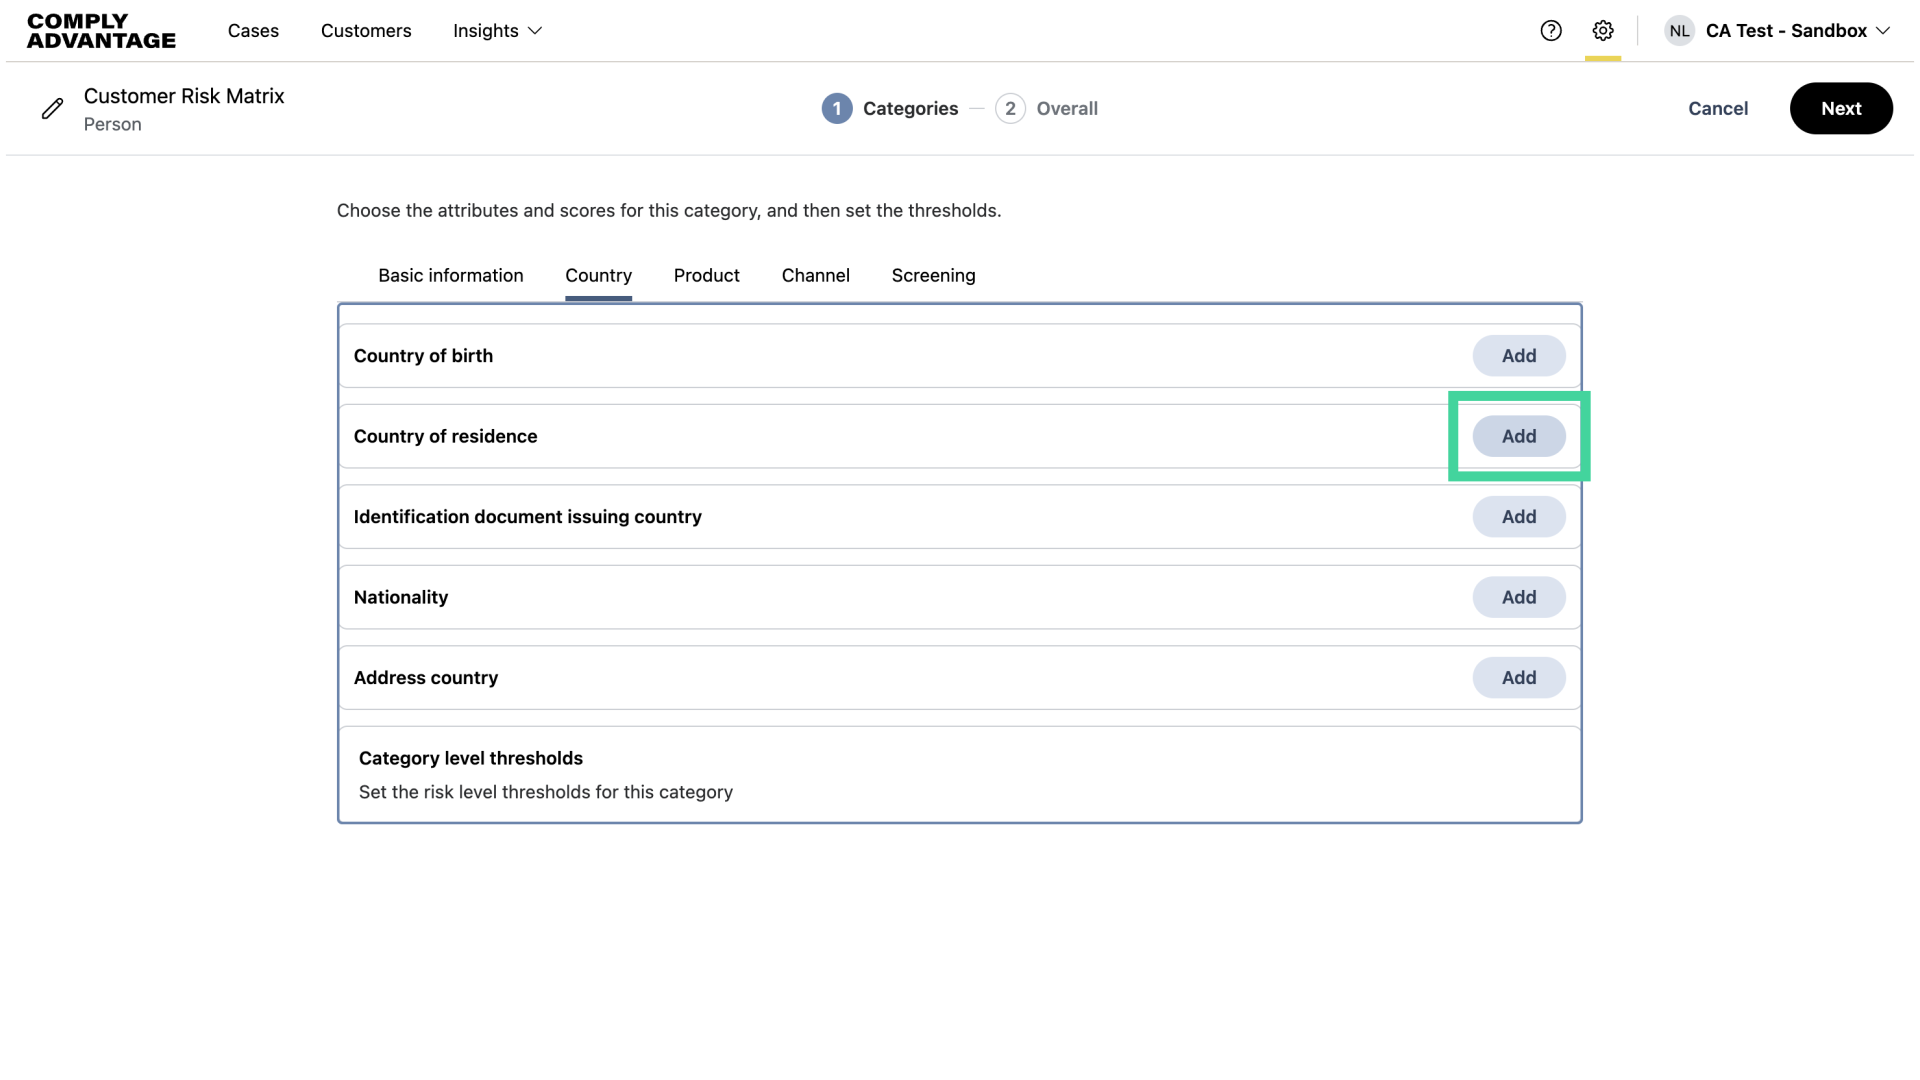
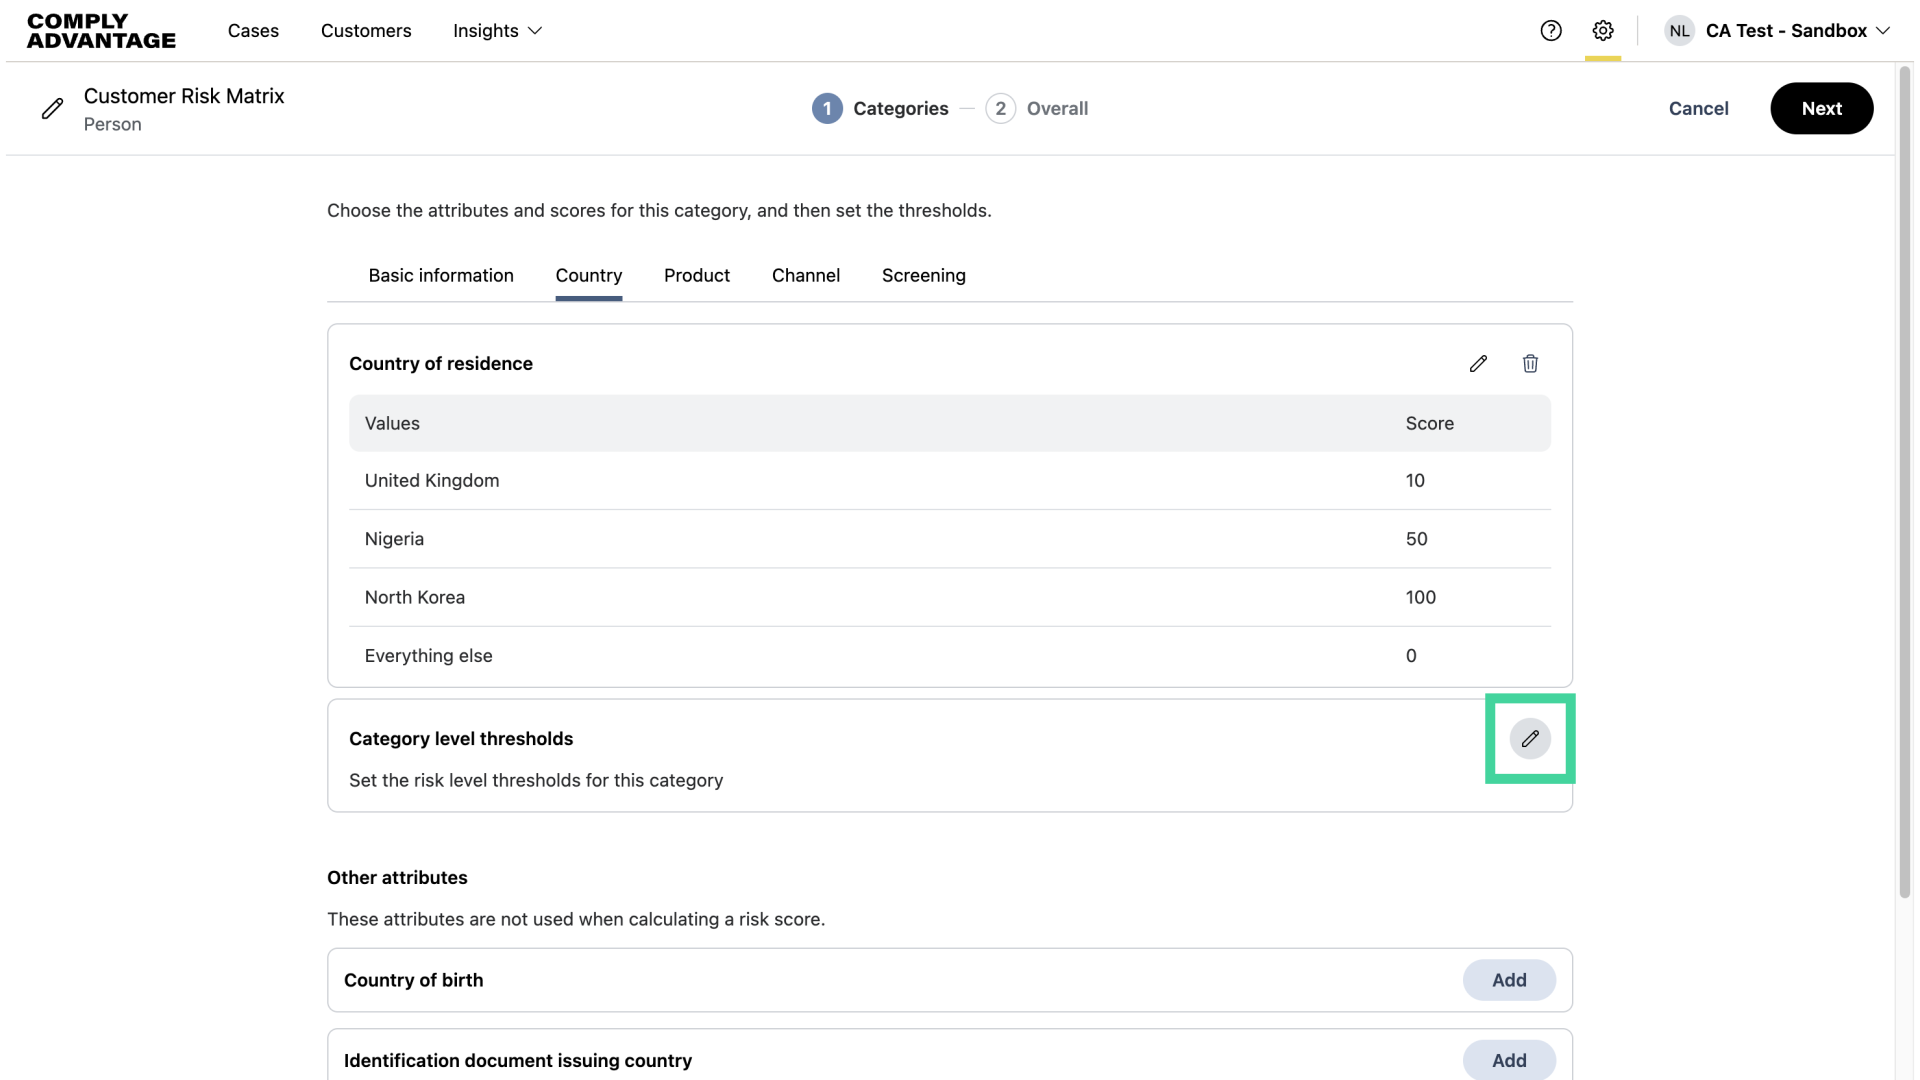
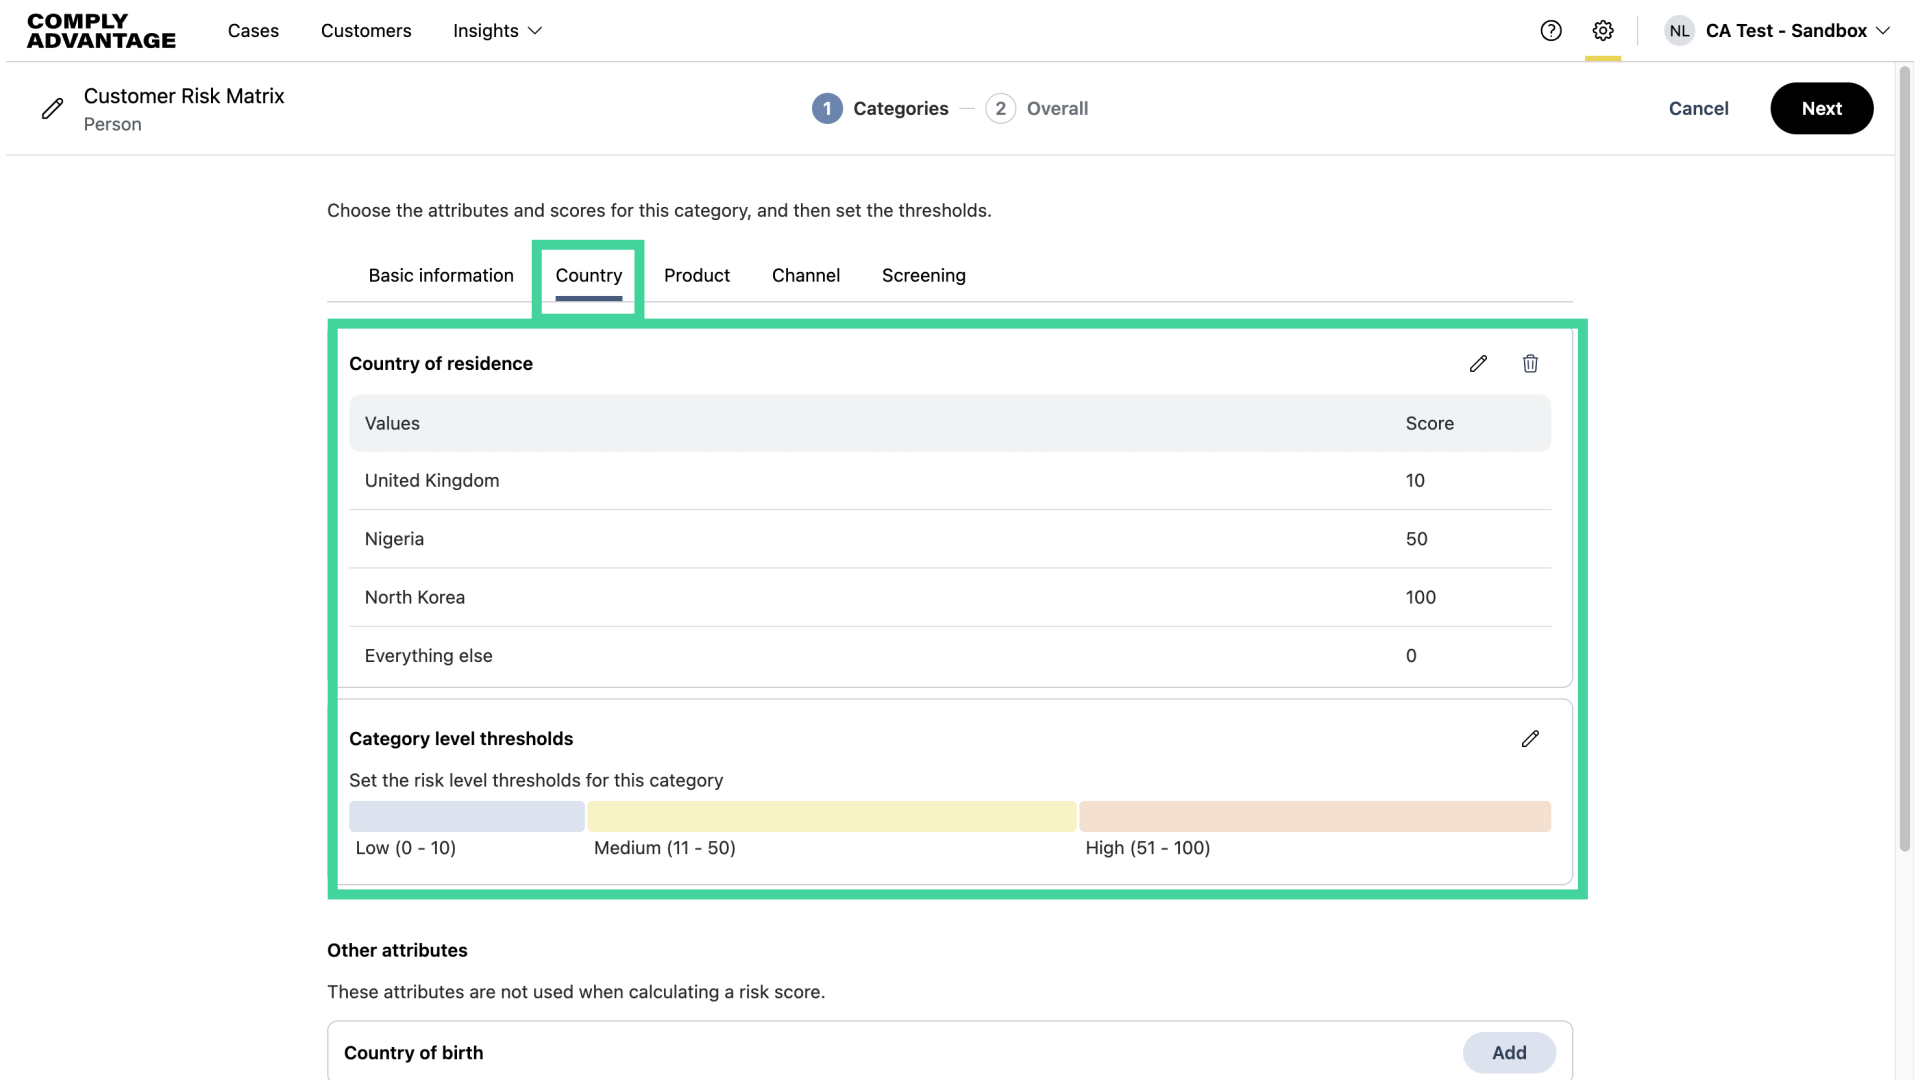
21. Click "Country"
Now, we'll add attributes under the "Country" category.
22. Click "Add"
For this example, I will add Country of residence.
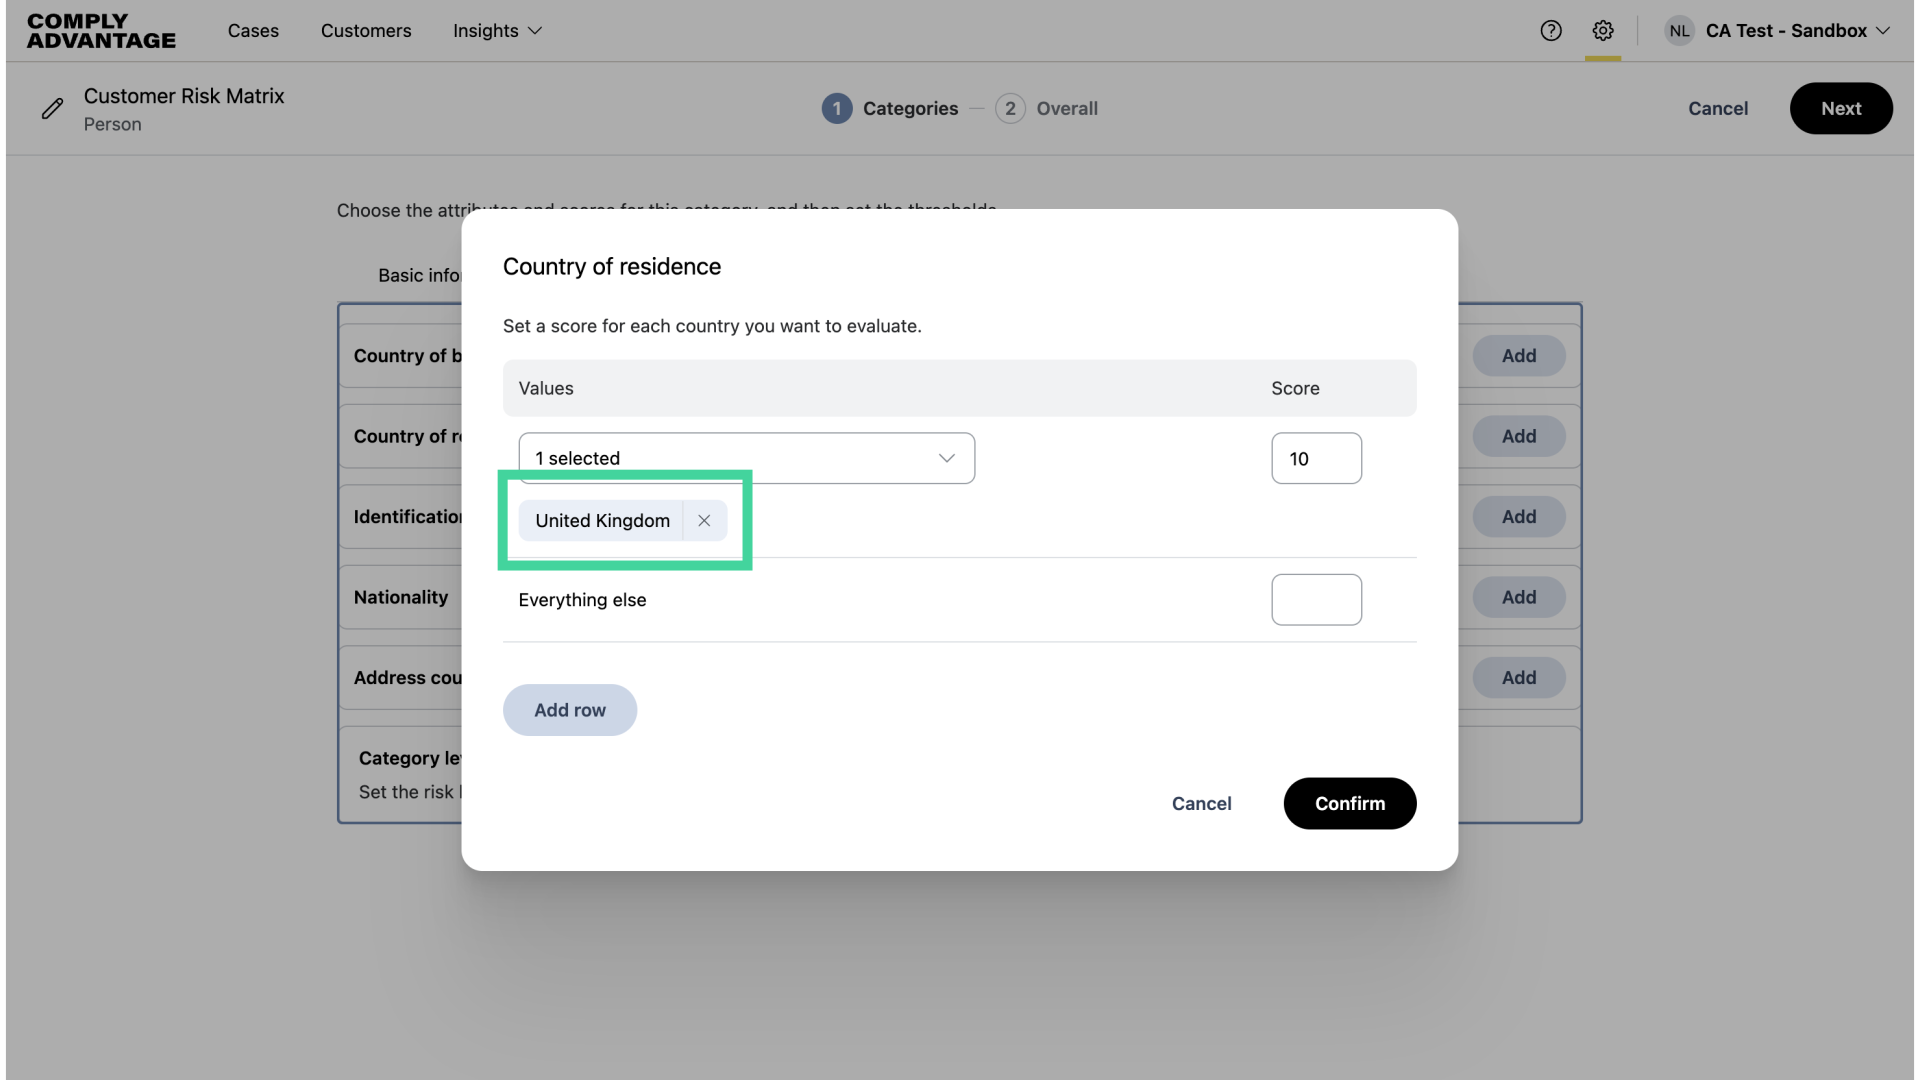
23. Add country or countries
Here, I'm adding "United Kingdom" as a low-risk country with a score of 10.
24. Add country or countries
"Nigeria" as a medium-risk country with a score of 50.
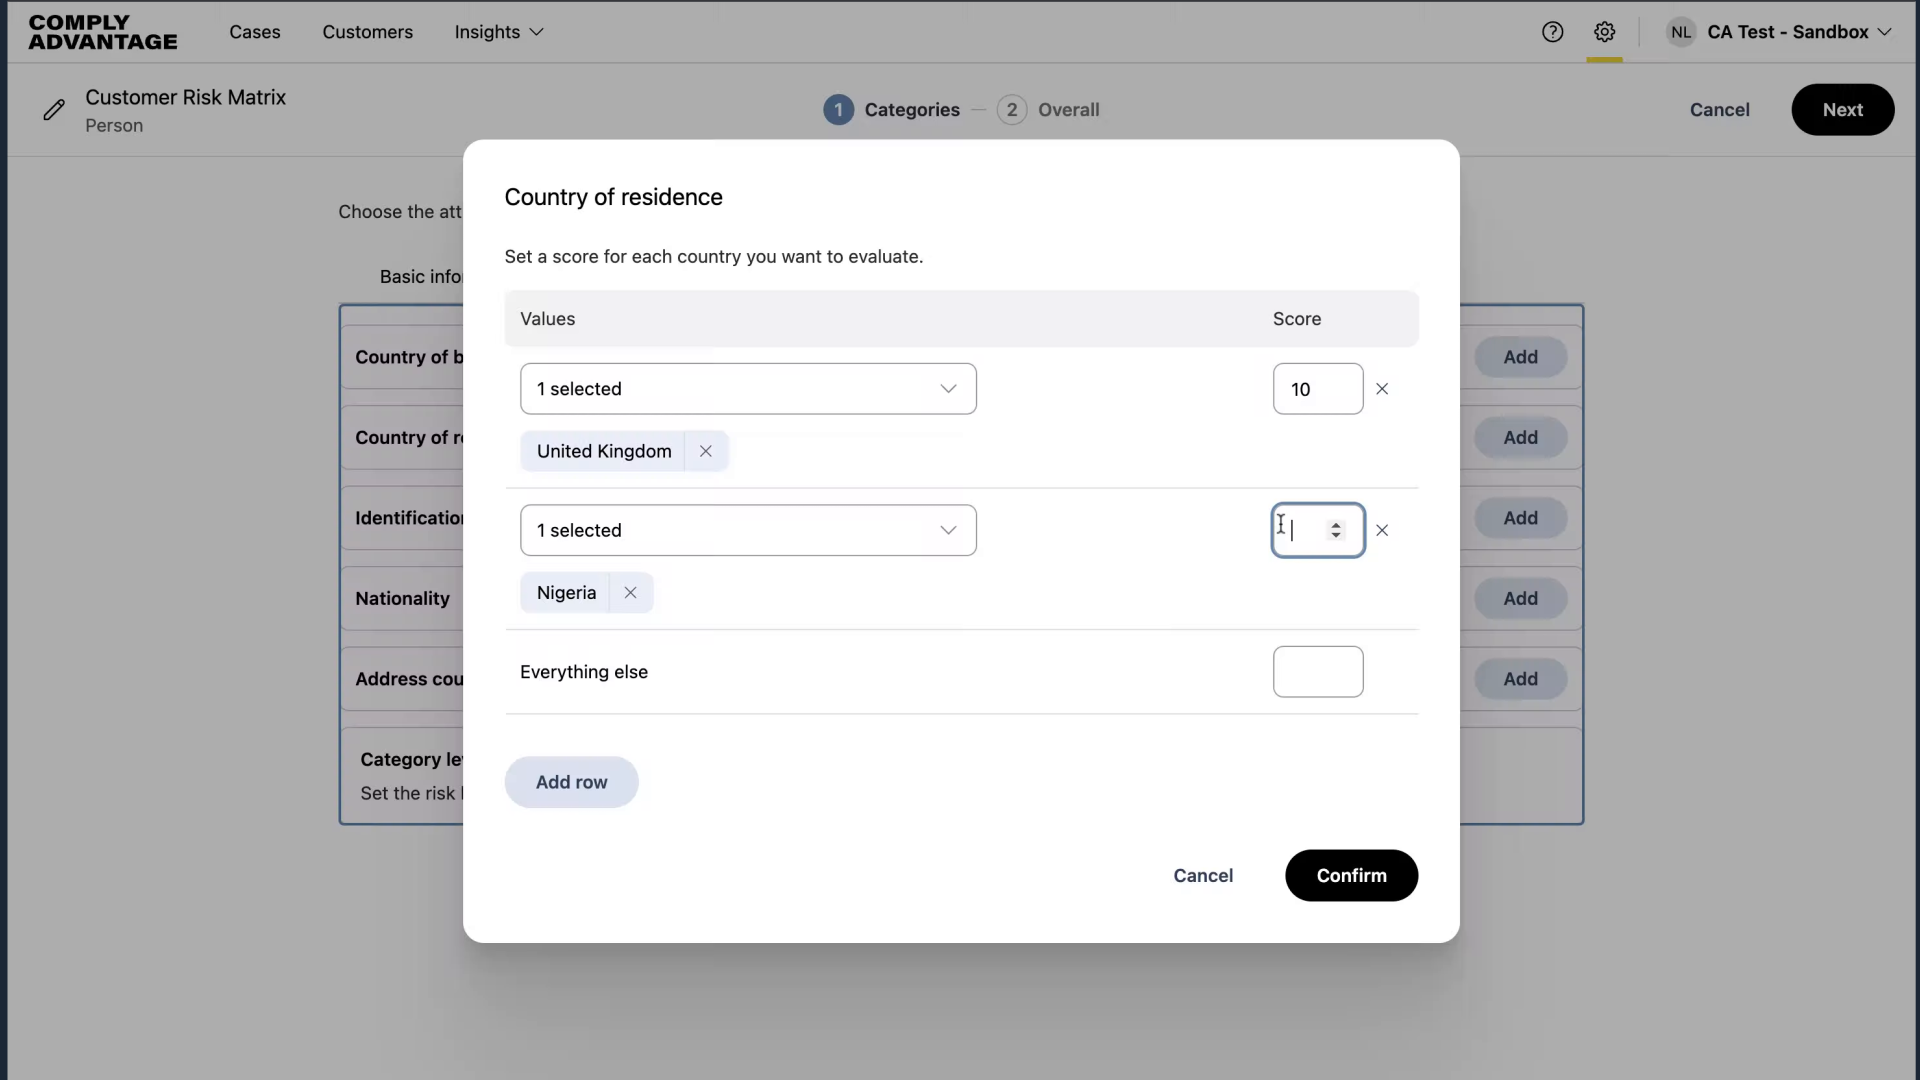
25. Add country or countries
And North Korea as a high-risk country with a score of 100.
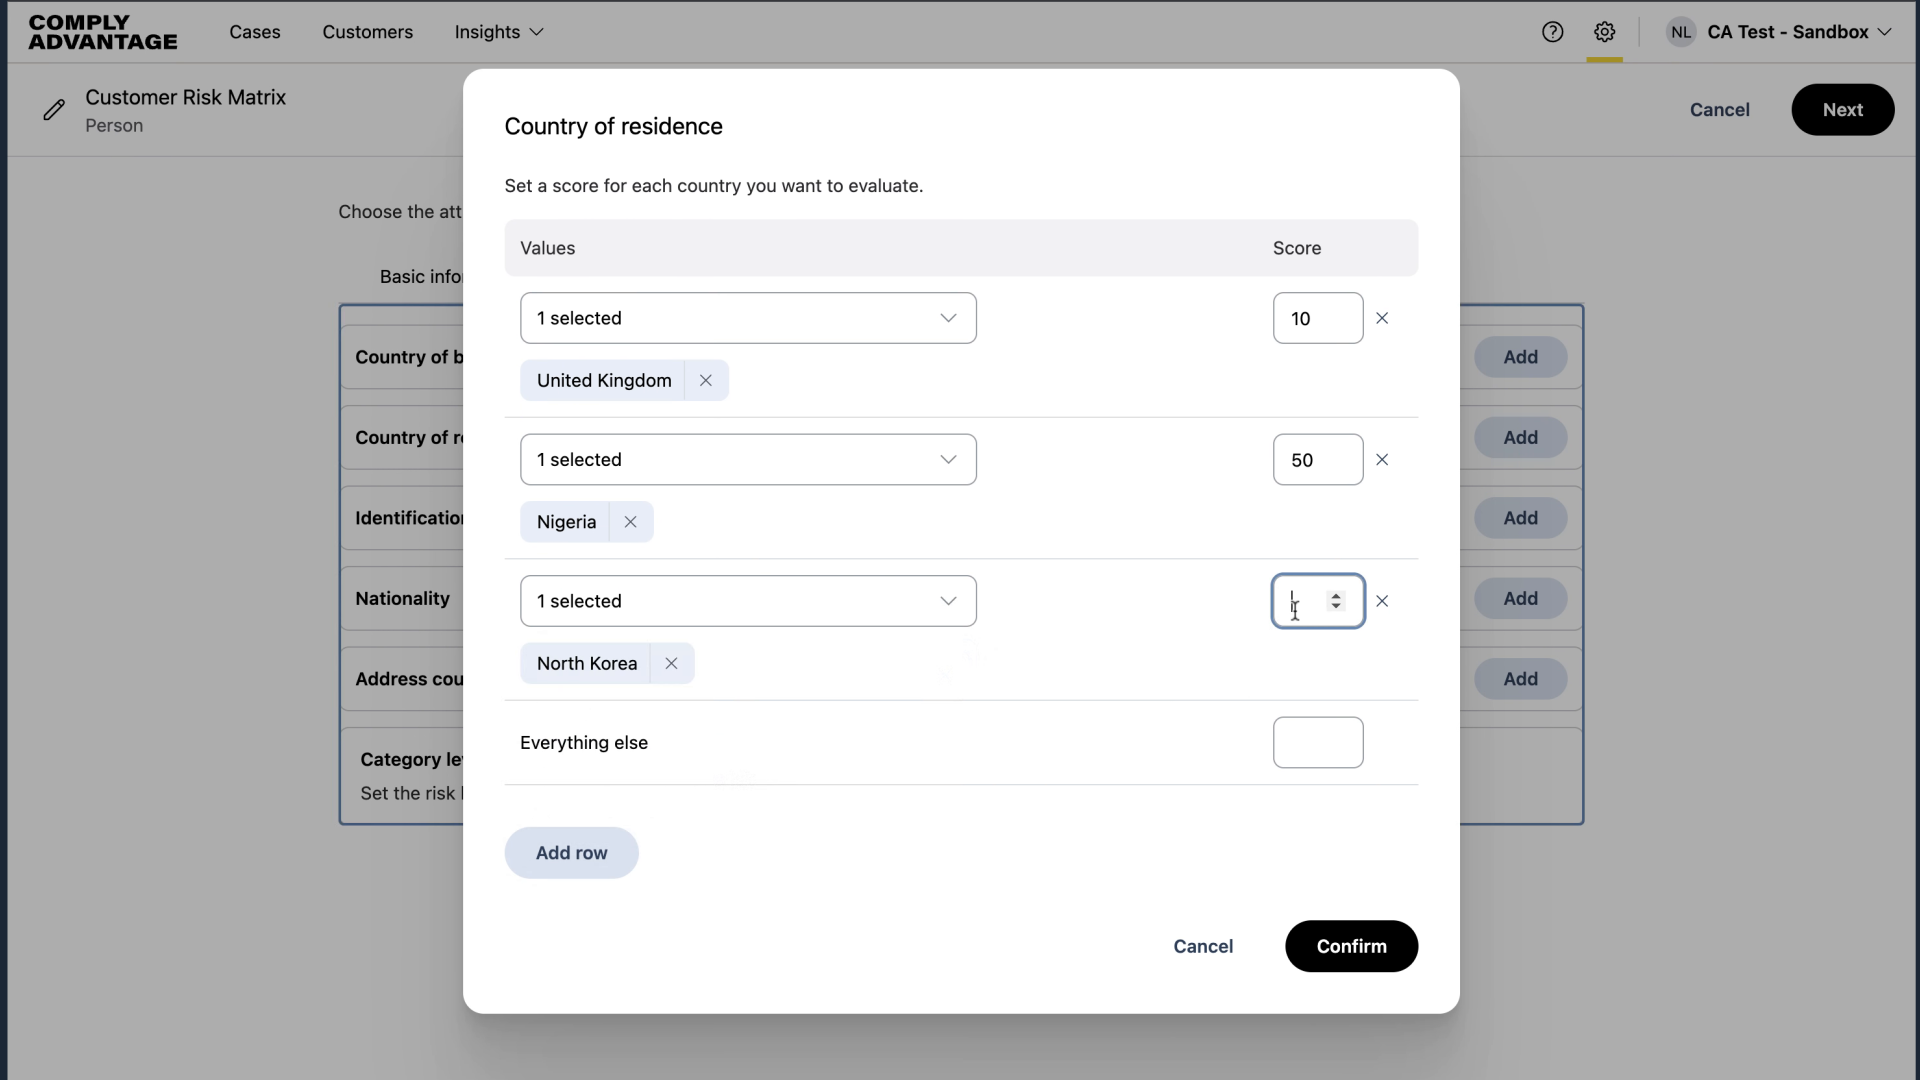
26. Everything else
For all other entries, I've added a score of 0.
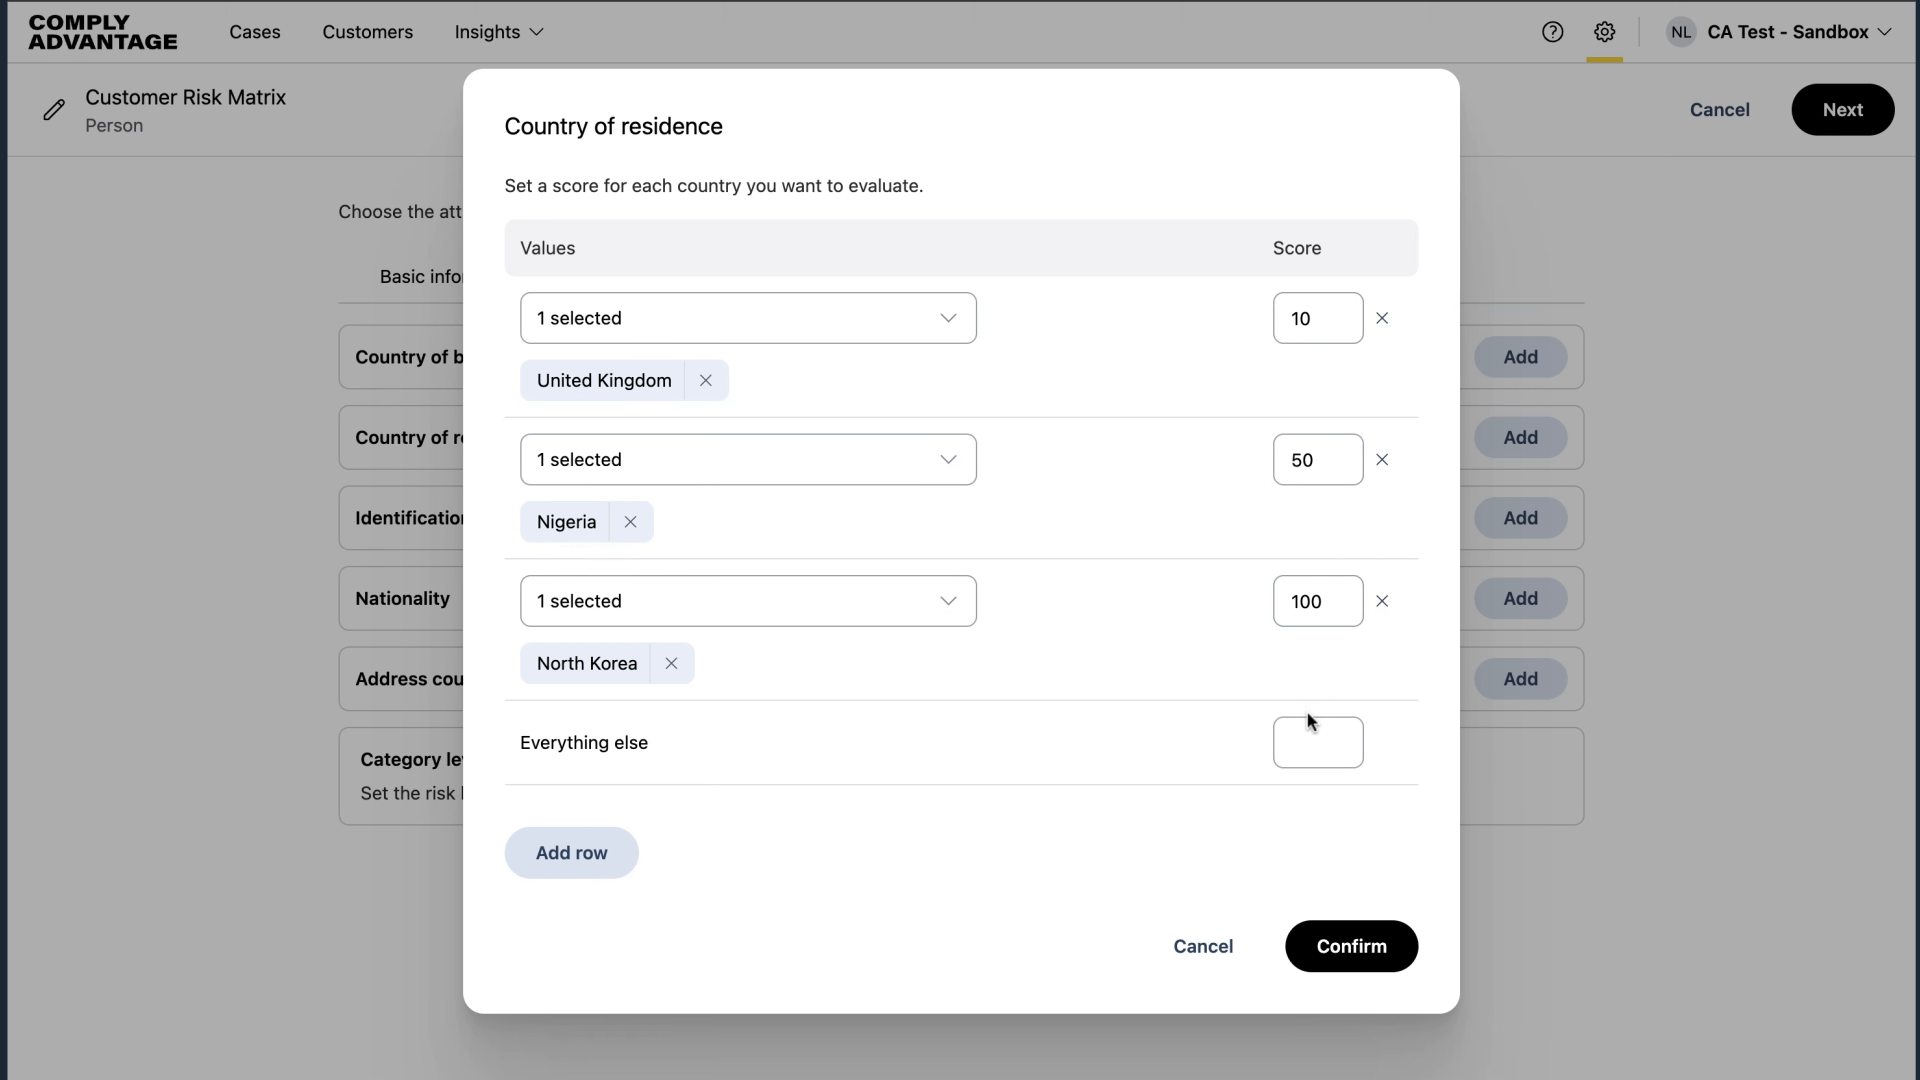
27. Click "Confirm"
Click "Confirm."
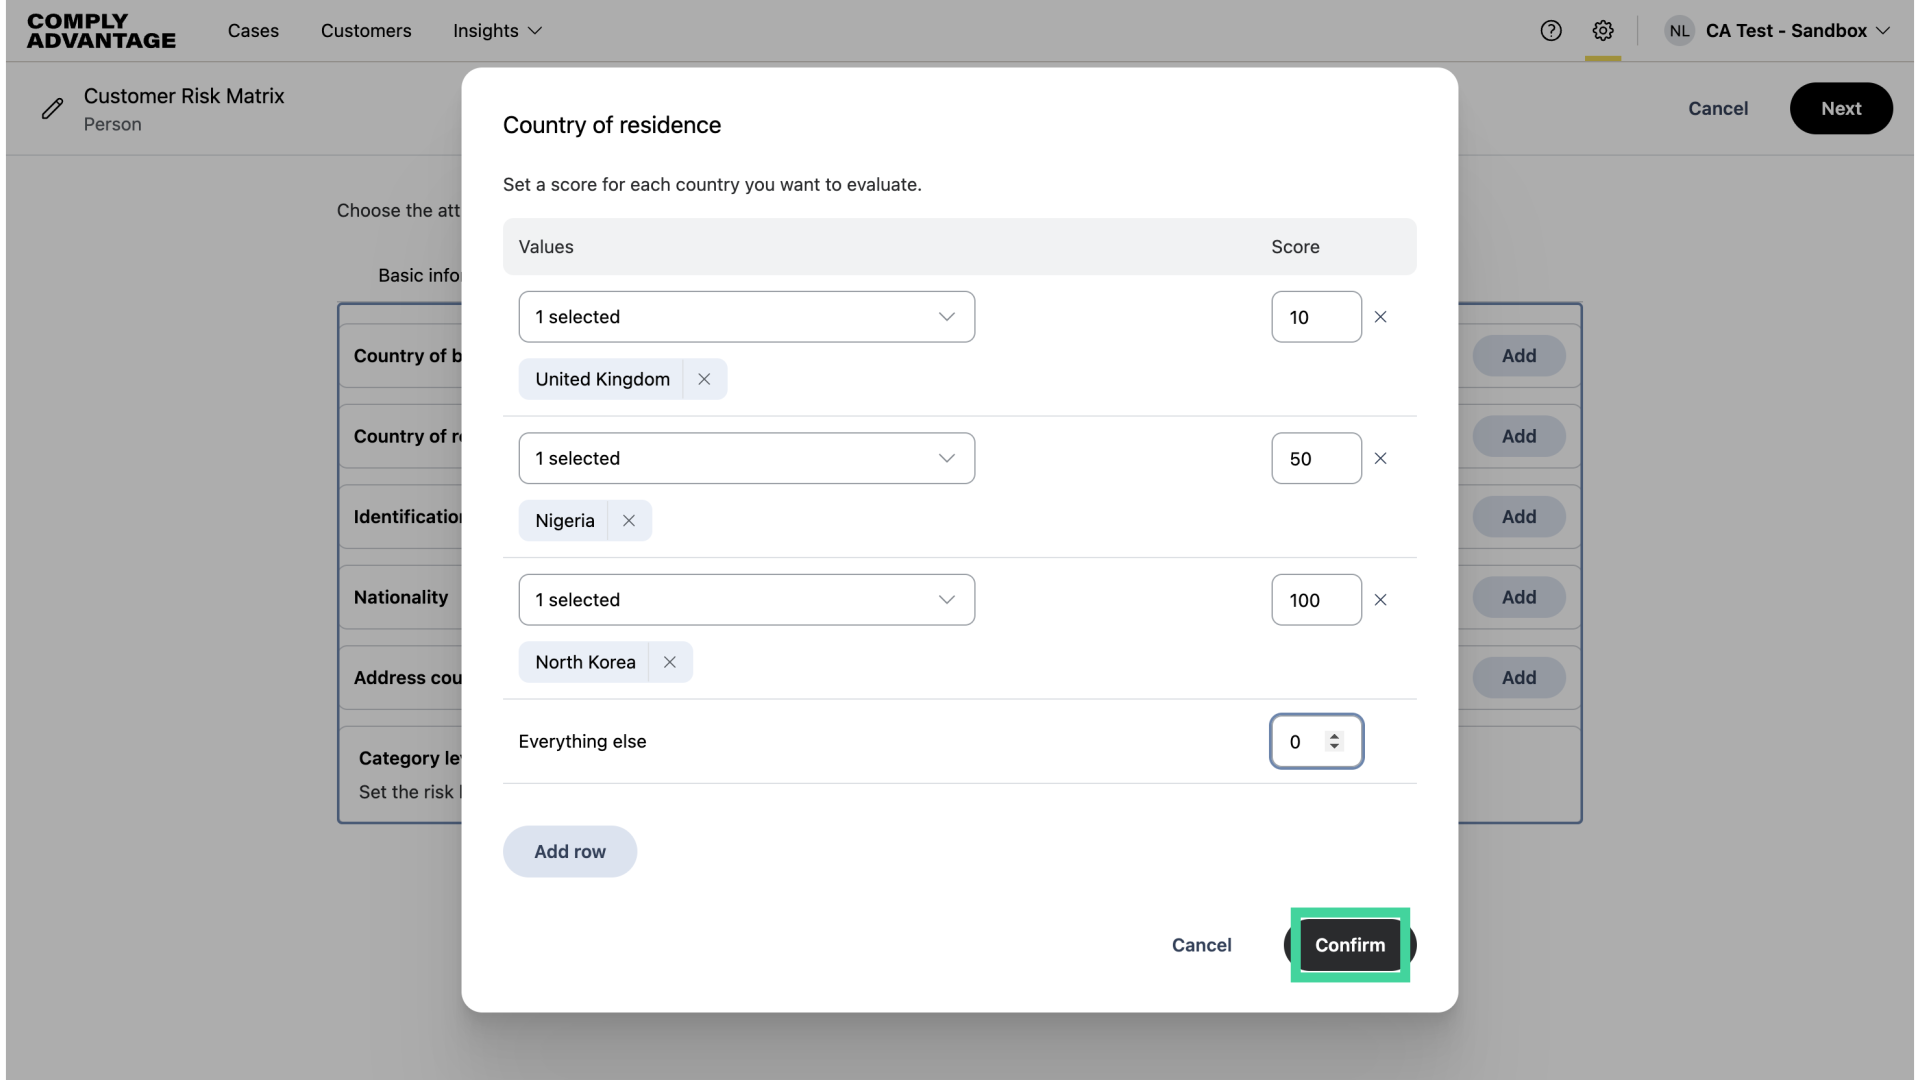
28. Click here
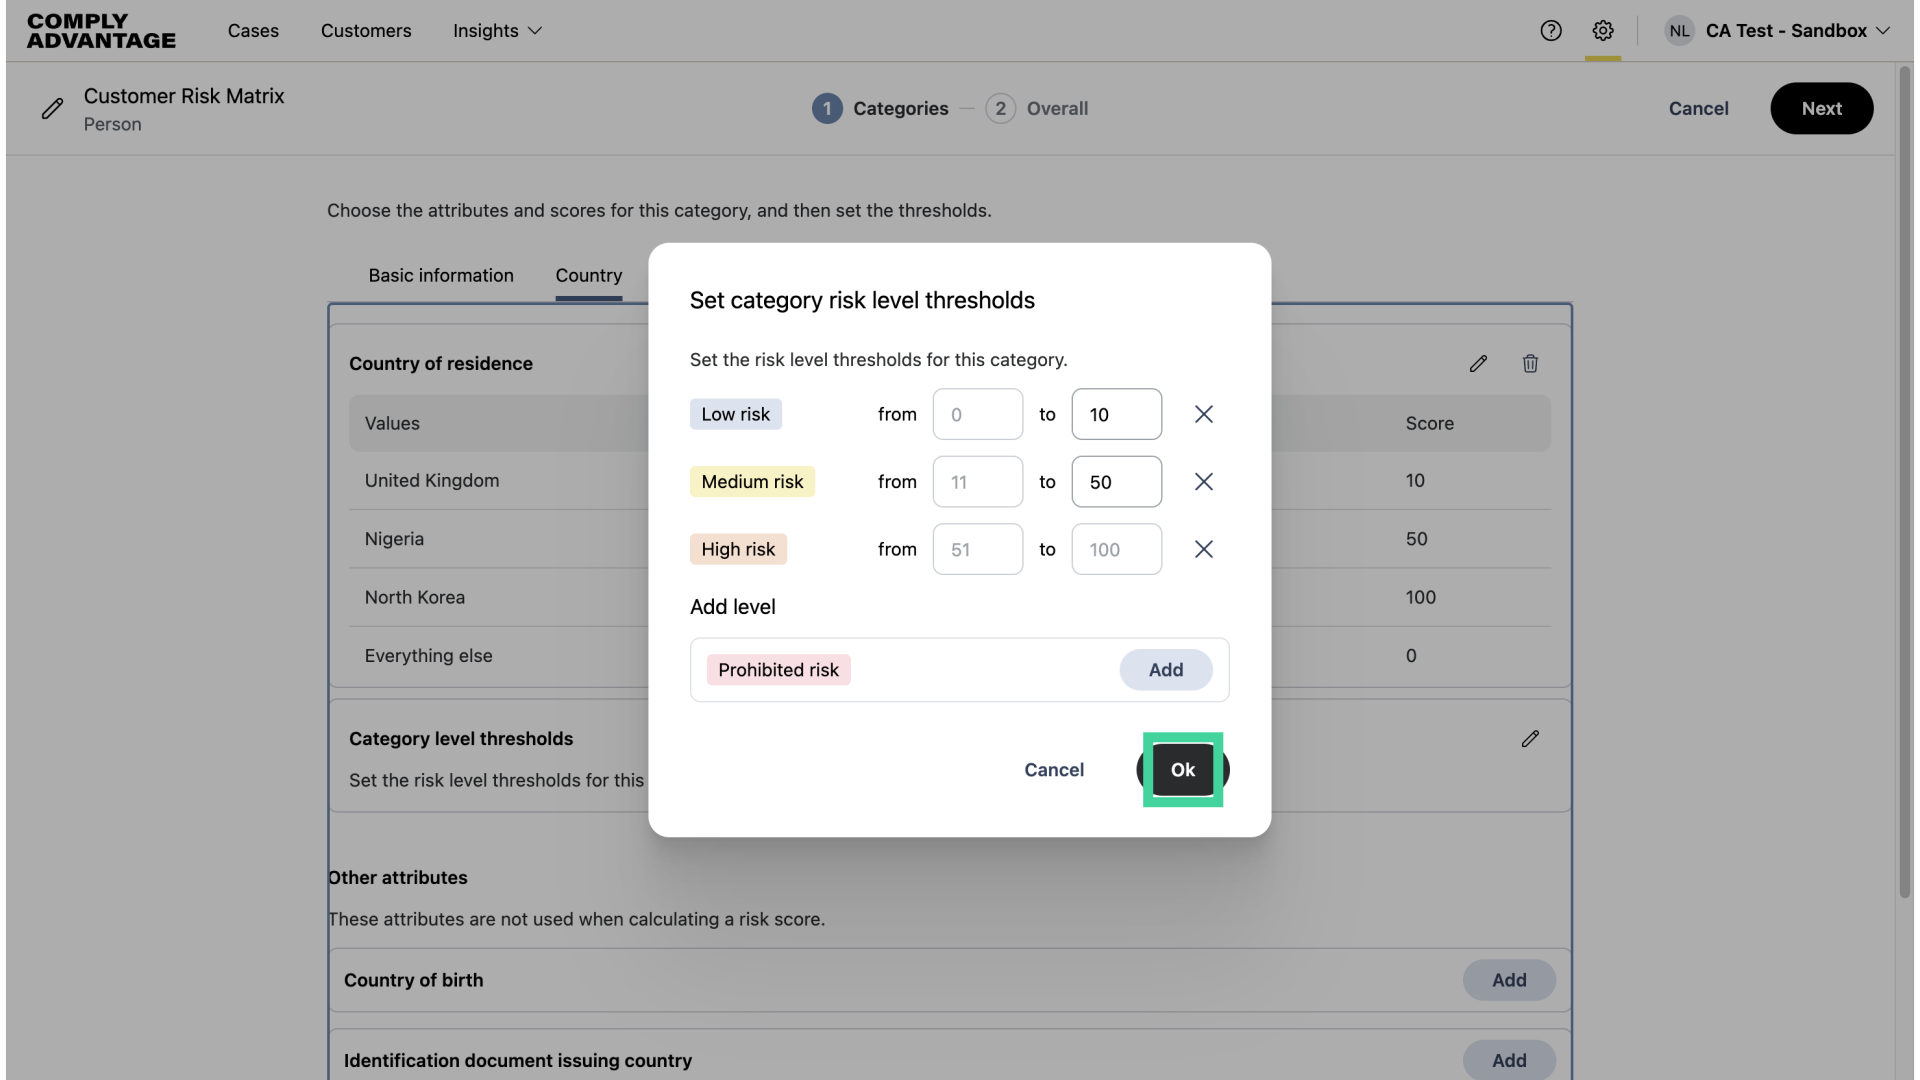
Proceed by adding your category level thresholds.
29. Click "Ok"
Click "Ok" once complete.
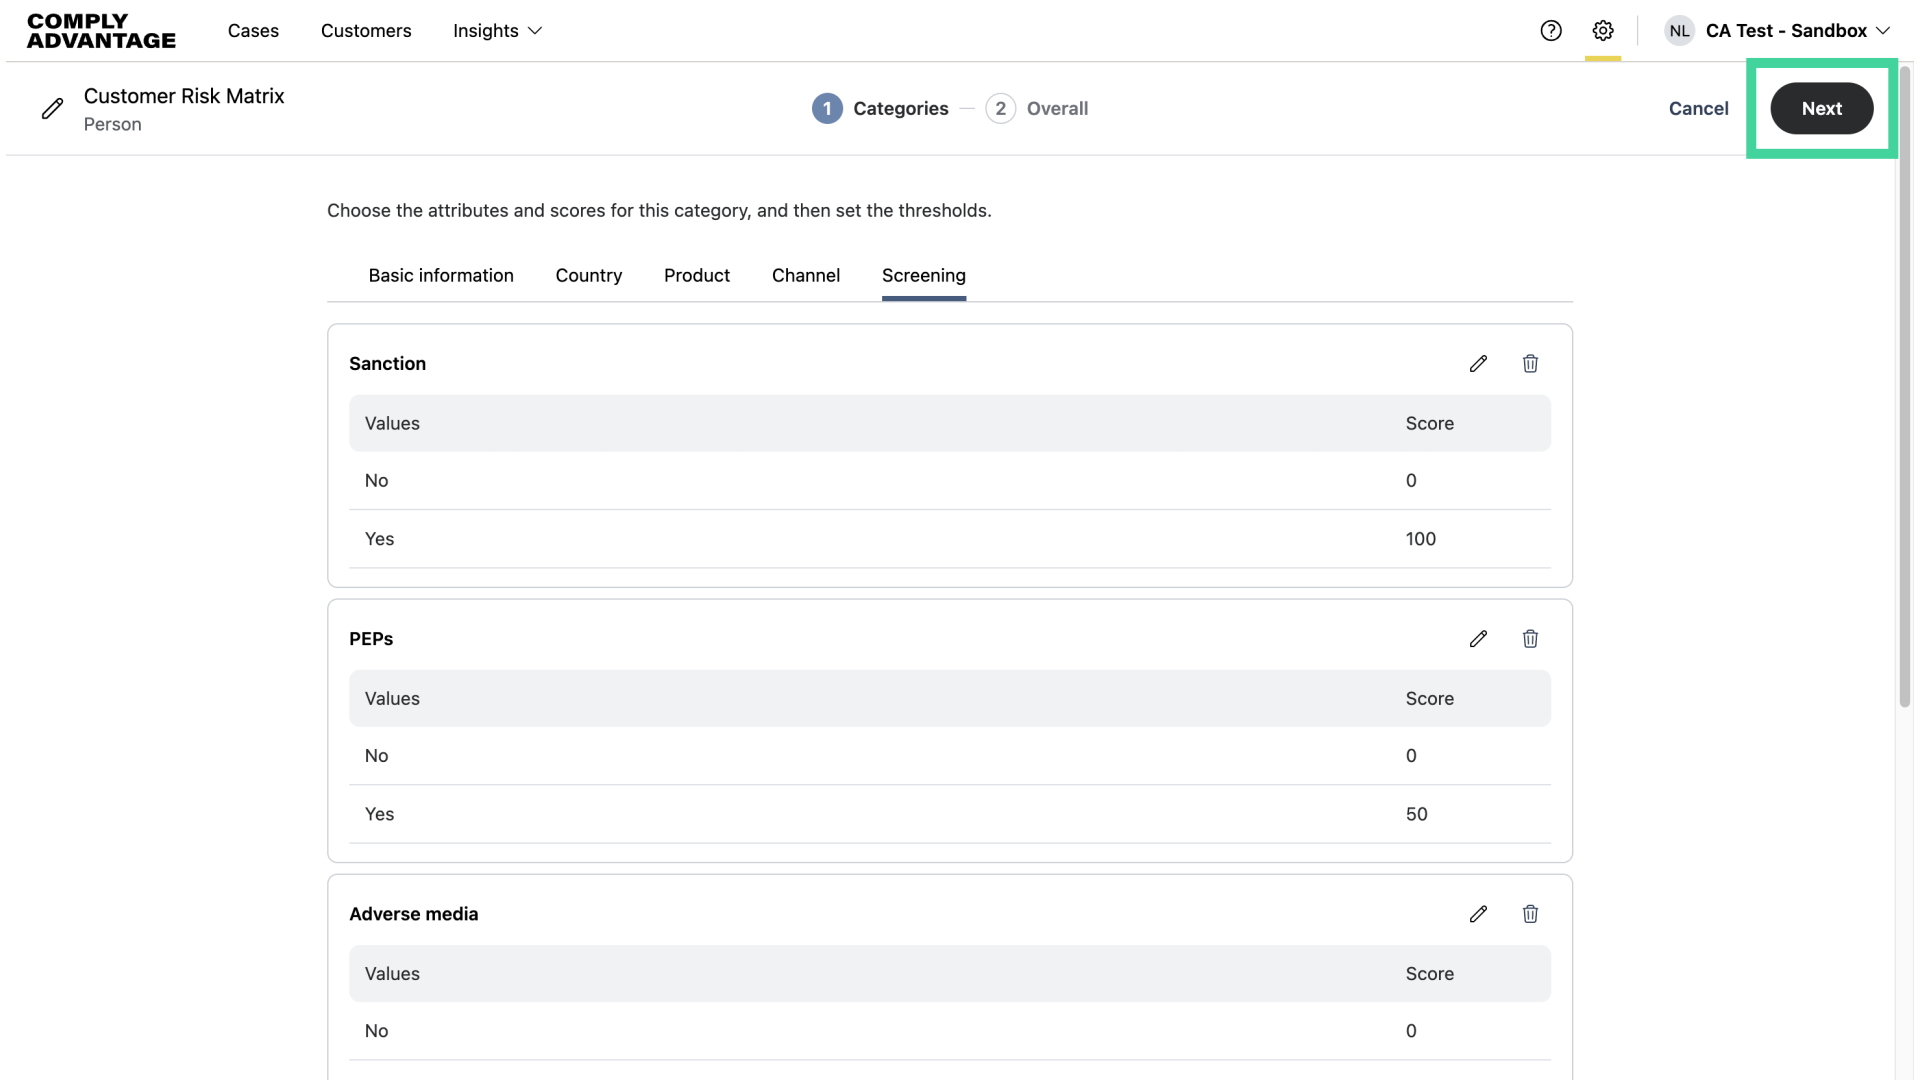
30. Click "Screening"
Lastly, let's select the "Screening" attributes.
31. Click "Add"
I will be adding attributes for sanctions, PEPs, and adverse media.

32. Adding attributes to the Screening category
When adding attributes to the Screening category, only two values are available: Yes and No, depending on whether a data type applies to the customer. By default, No has a score of 0. You can set a score for Yes. To prevent customers from being incorrectly marked as higher risk until you have made a decision, risk scoring will only consider the true positive decisions once the case has been closed.
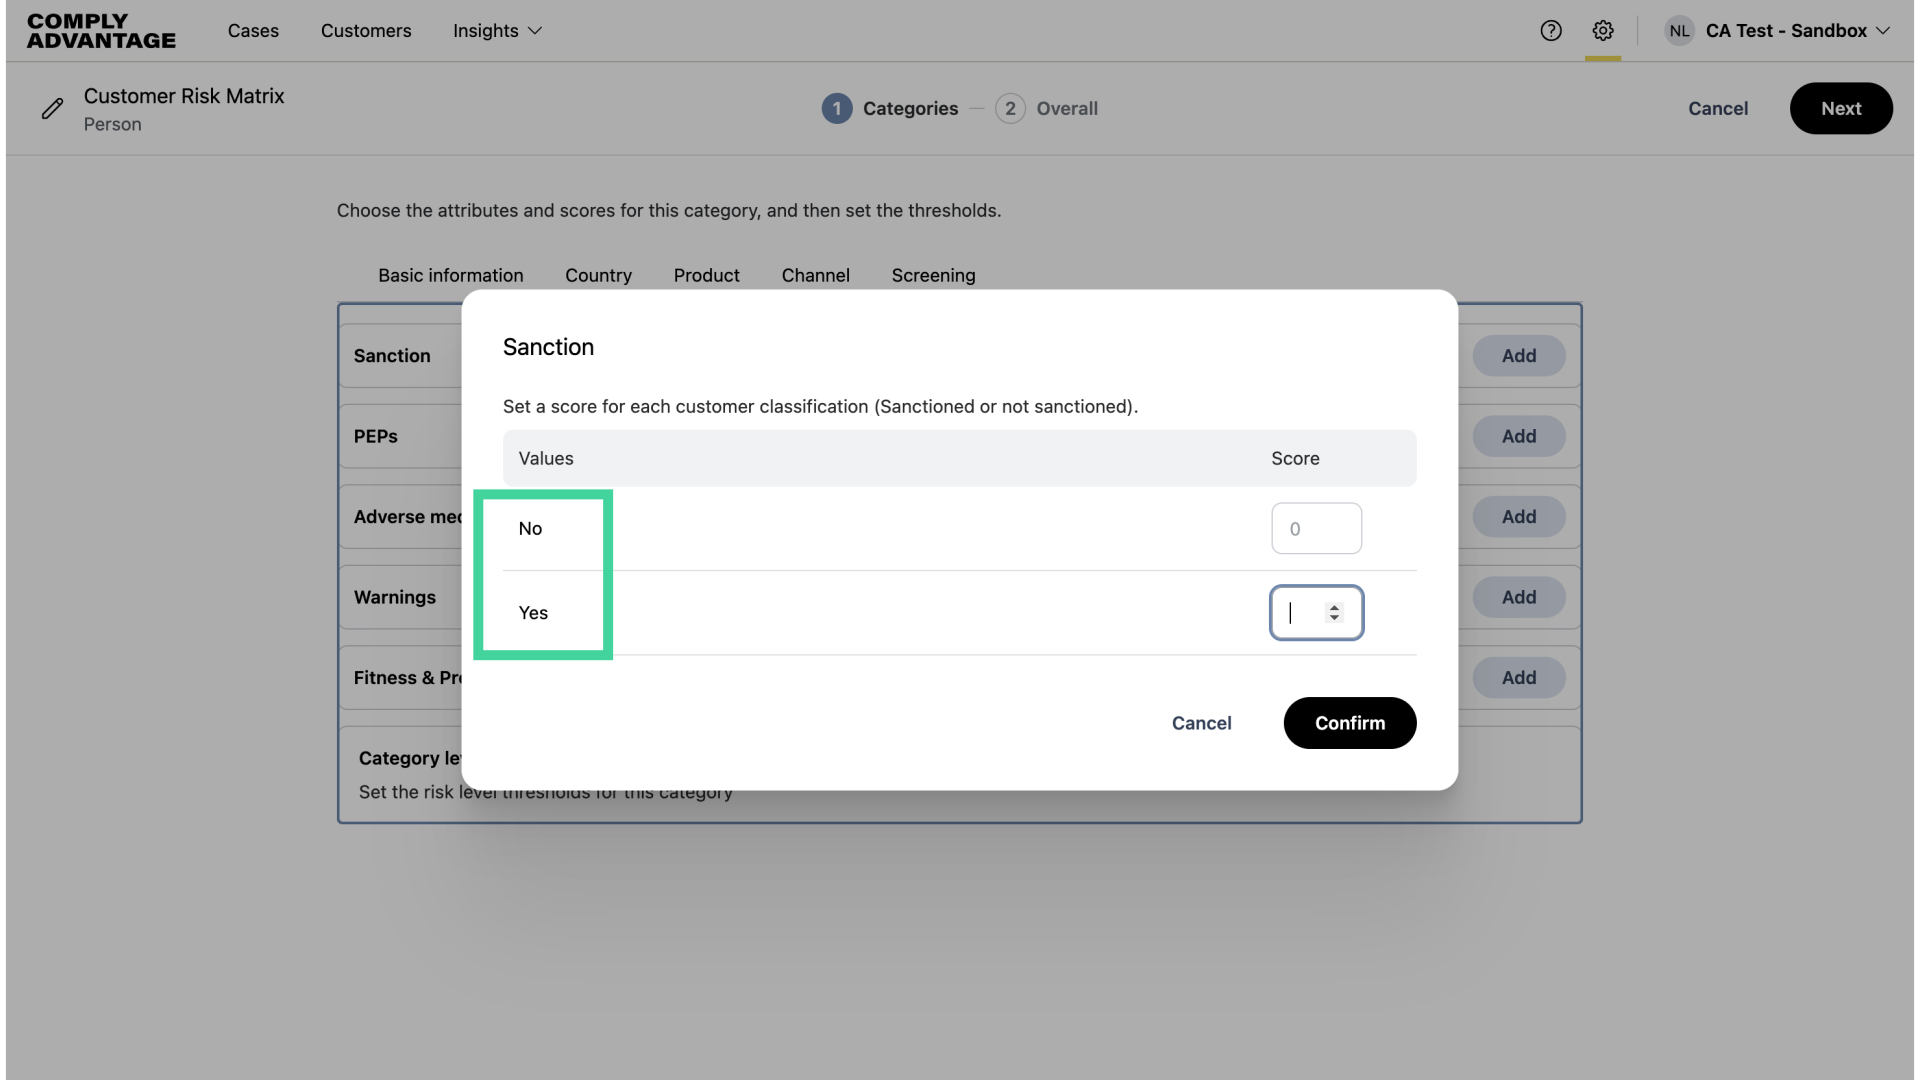
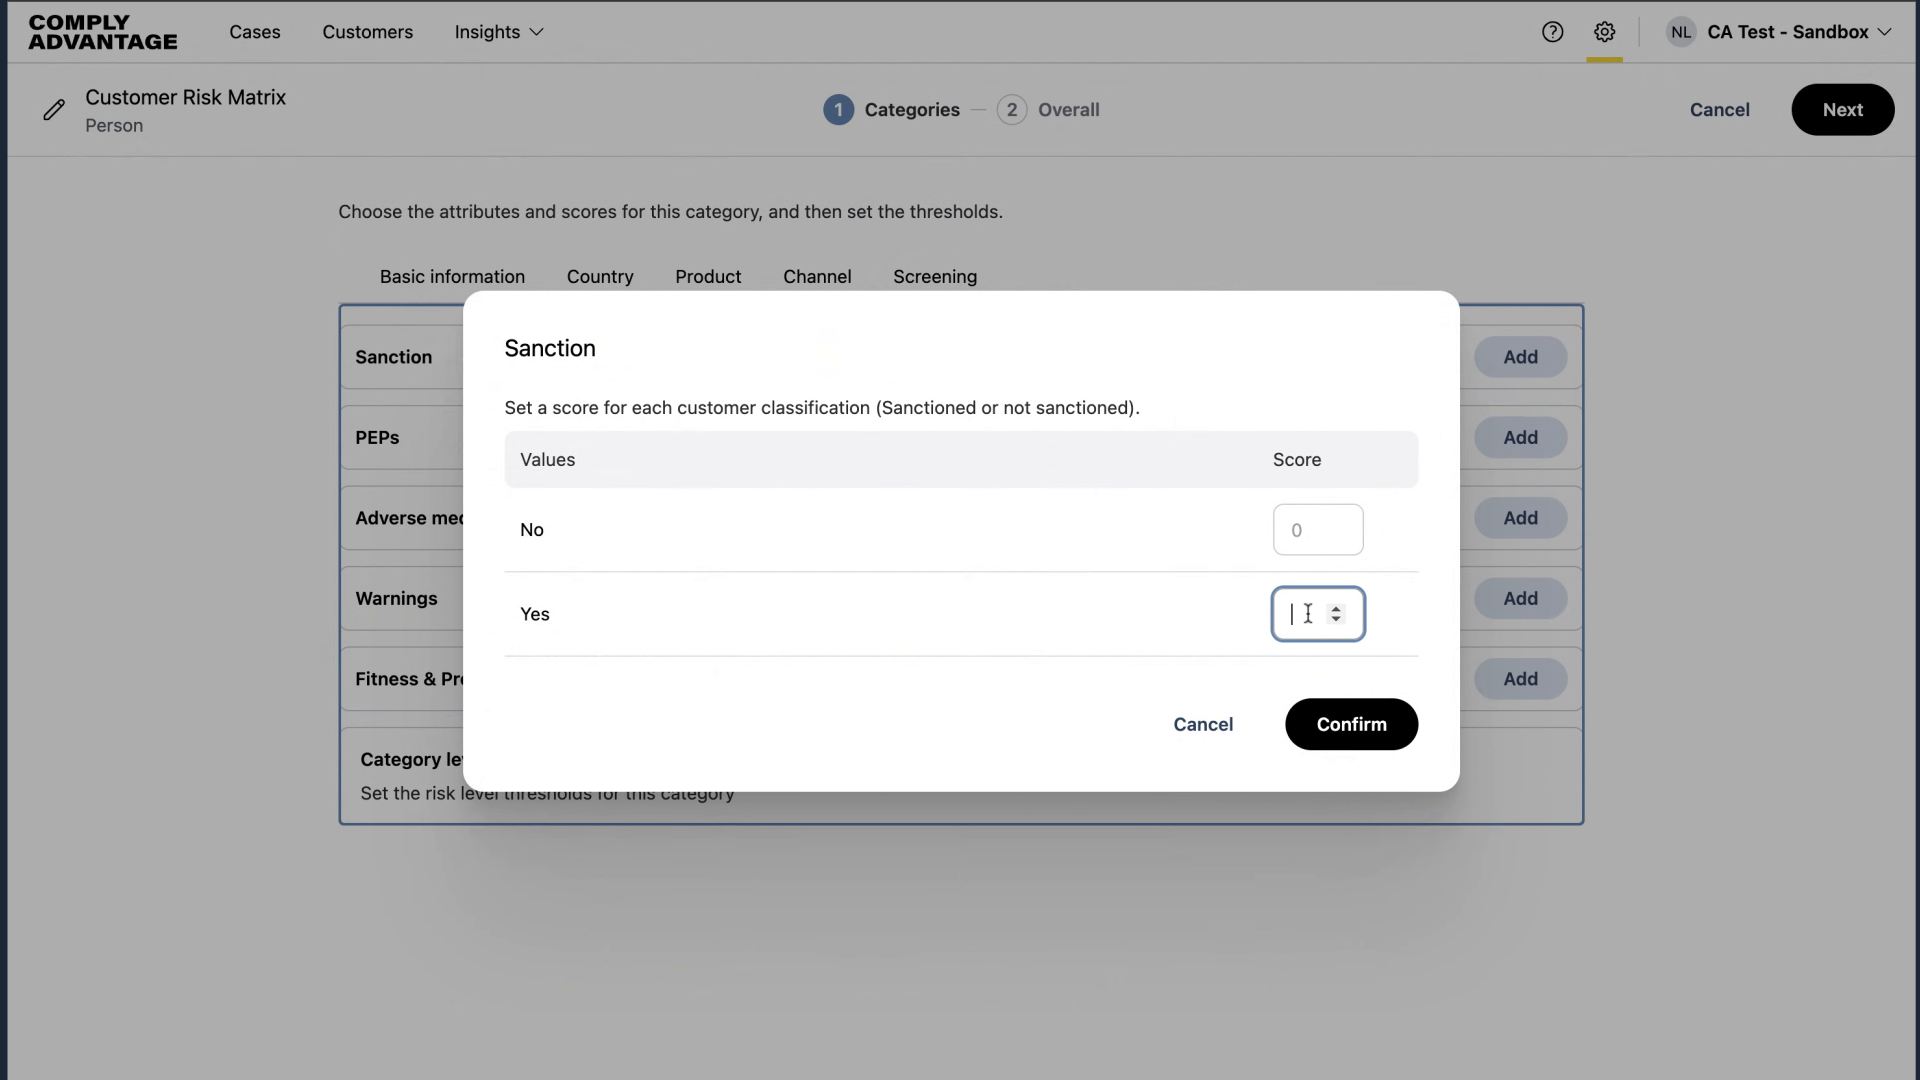
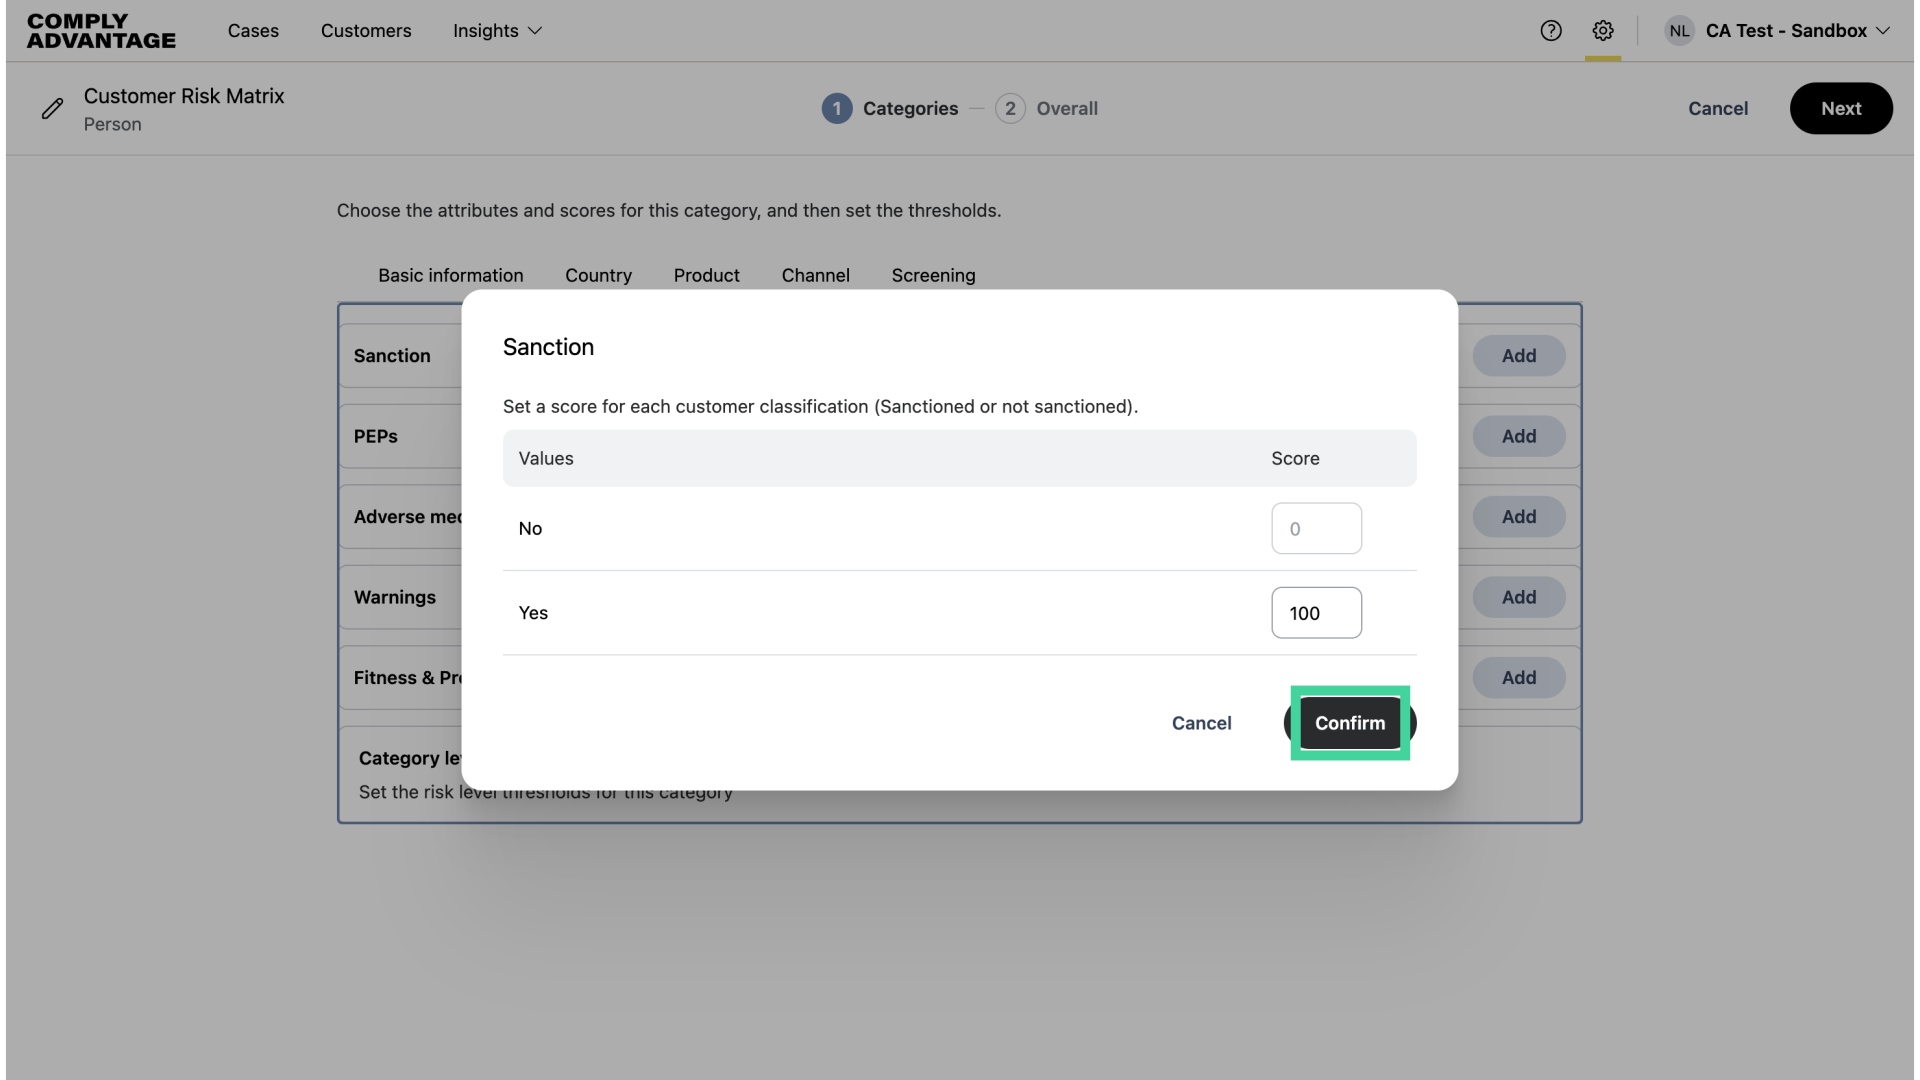
33. Add score
Here, I will set a score of 100 for sanctions, which will only apply if a sanctions case for a customer is marked as a true positive.
34. Click "Confirm"
Click "Confirm."
35. Add score and click "Confirm"
For PEPs, I'm adding a score of 50.
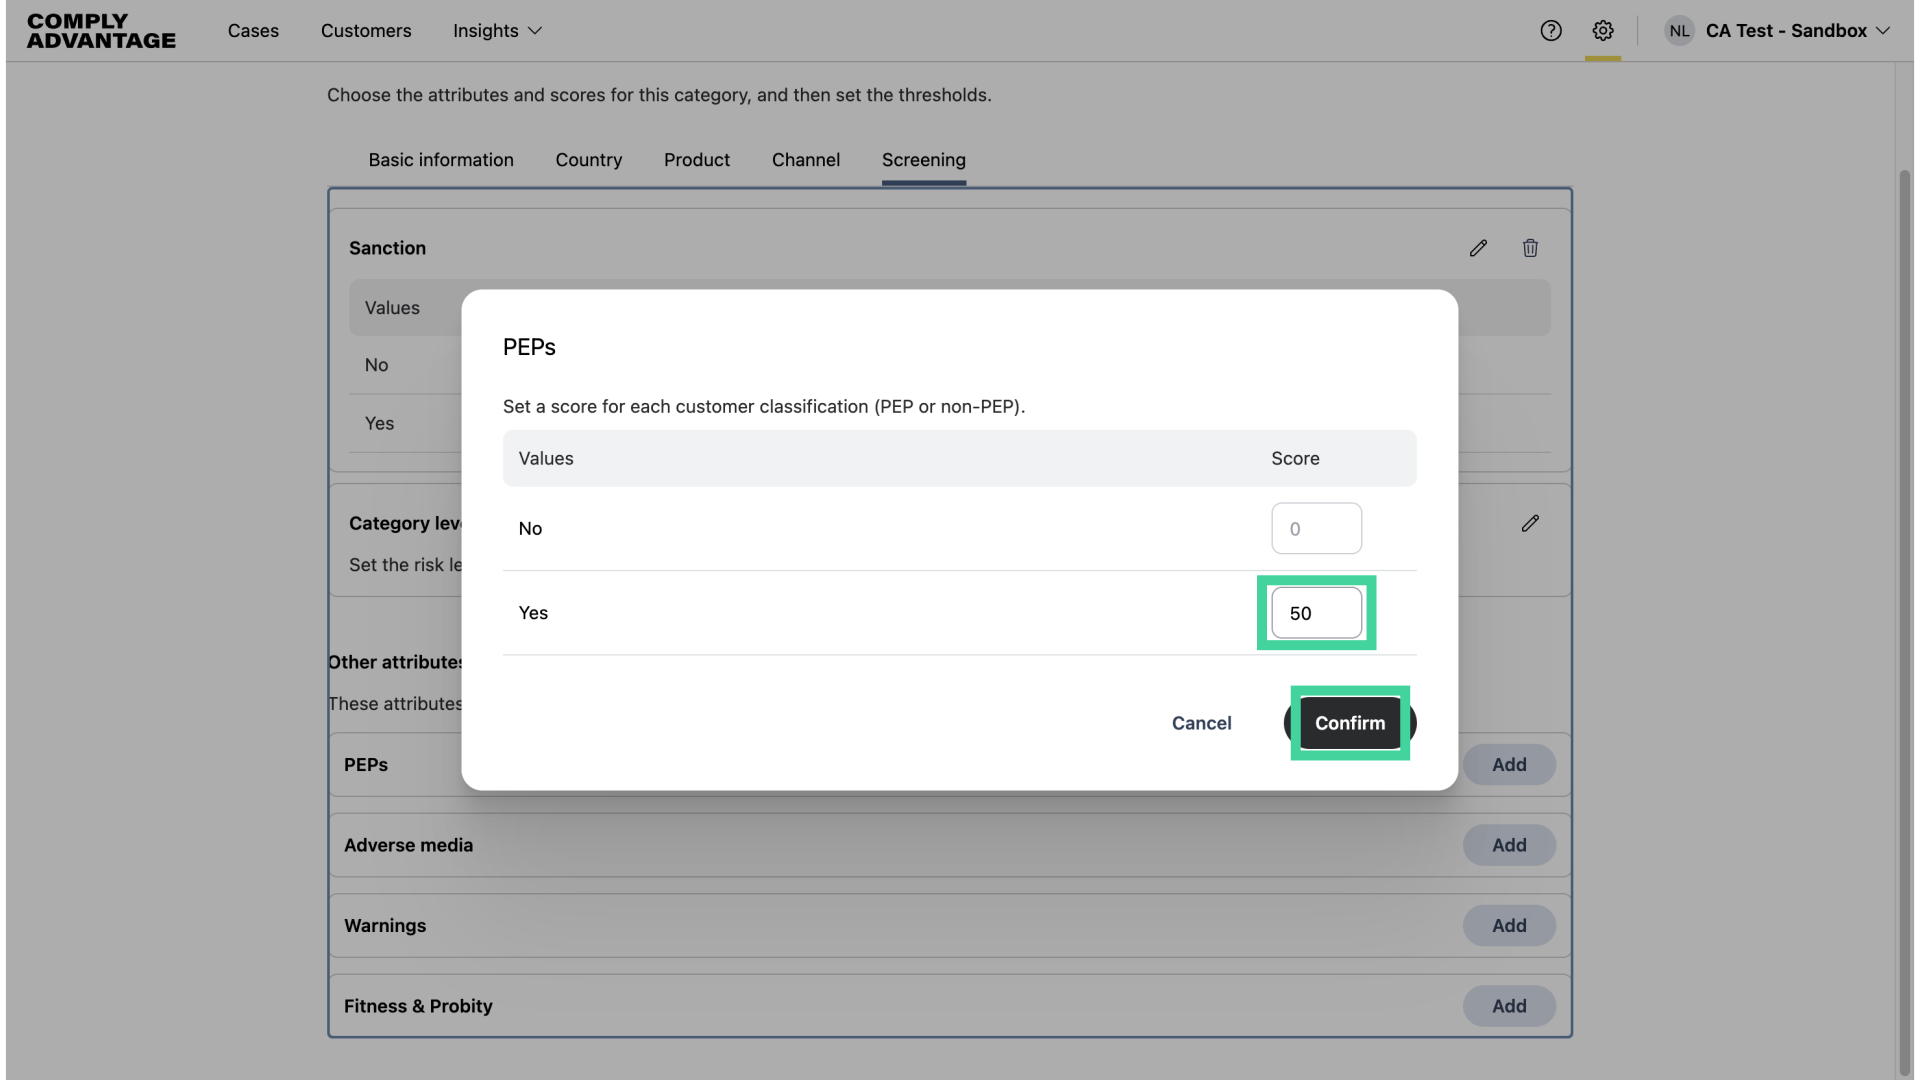
36. Click "Confirm"
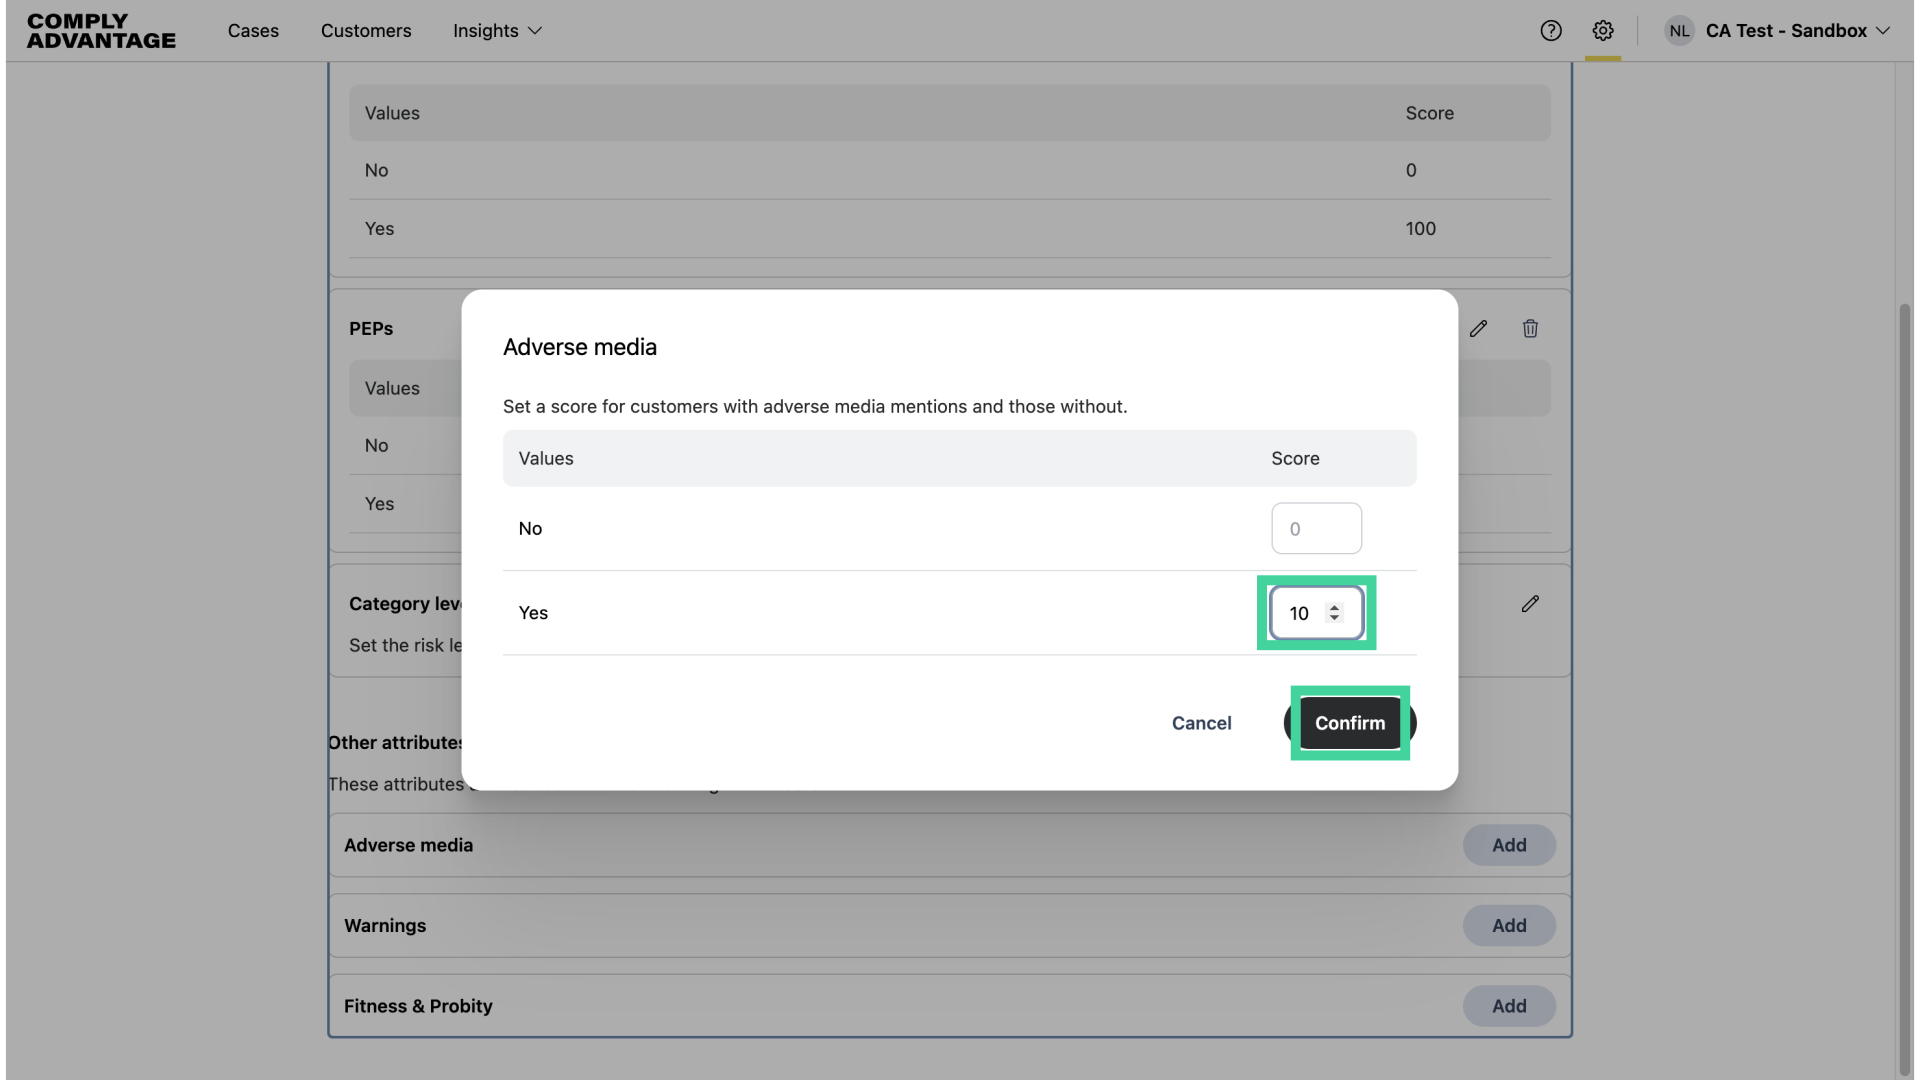
Lastly, I've added a score of 10 for Adverse Media and clicked confirm.
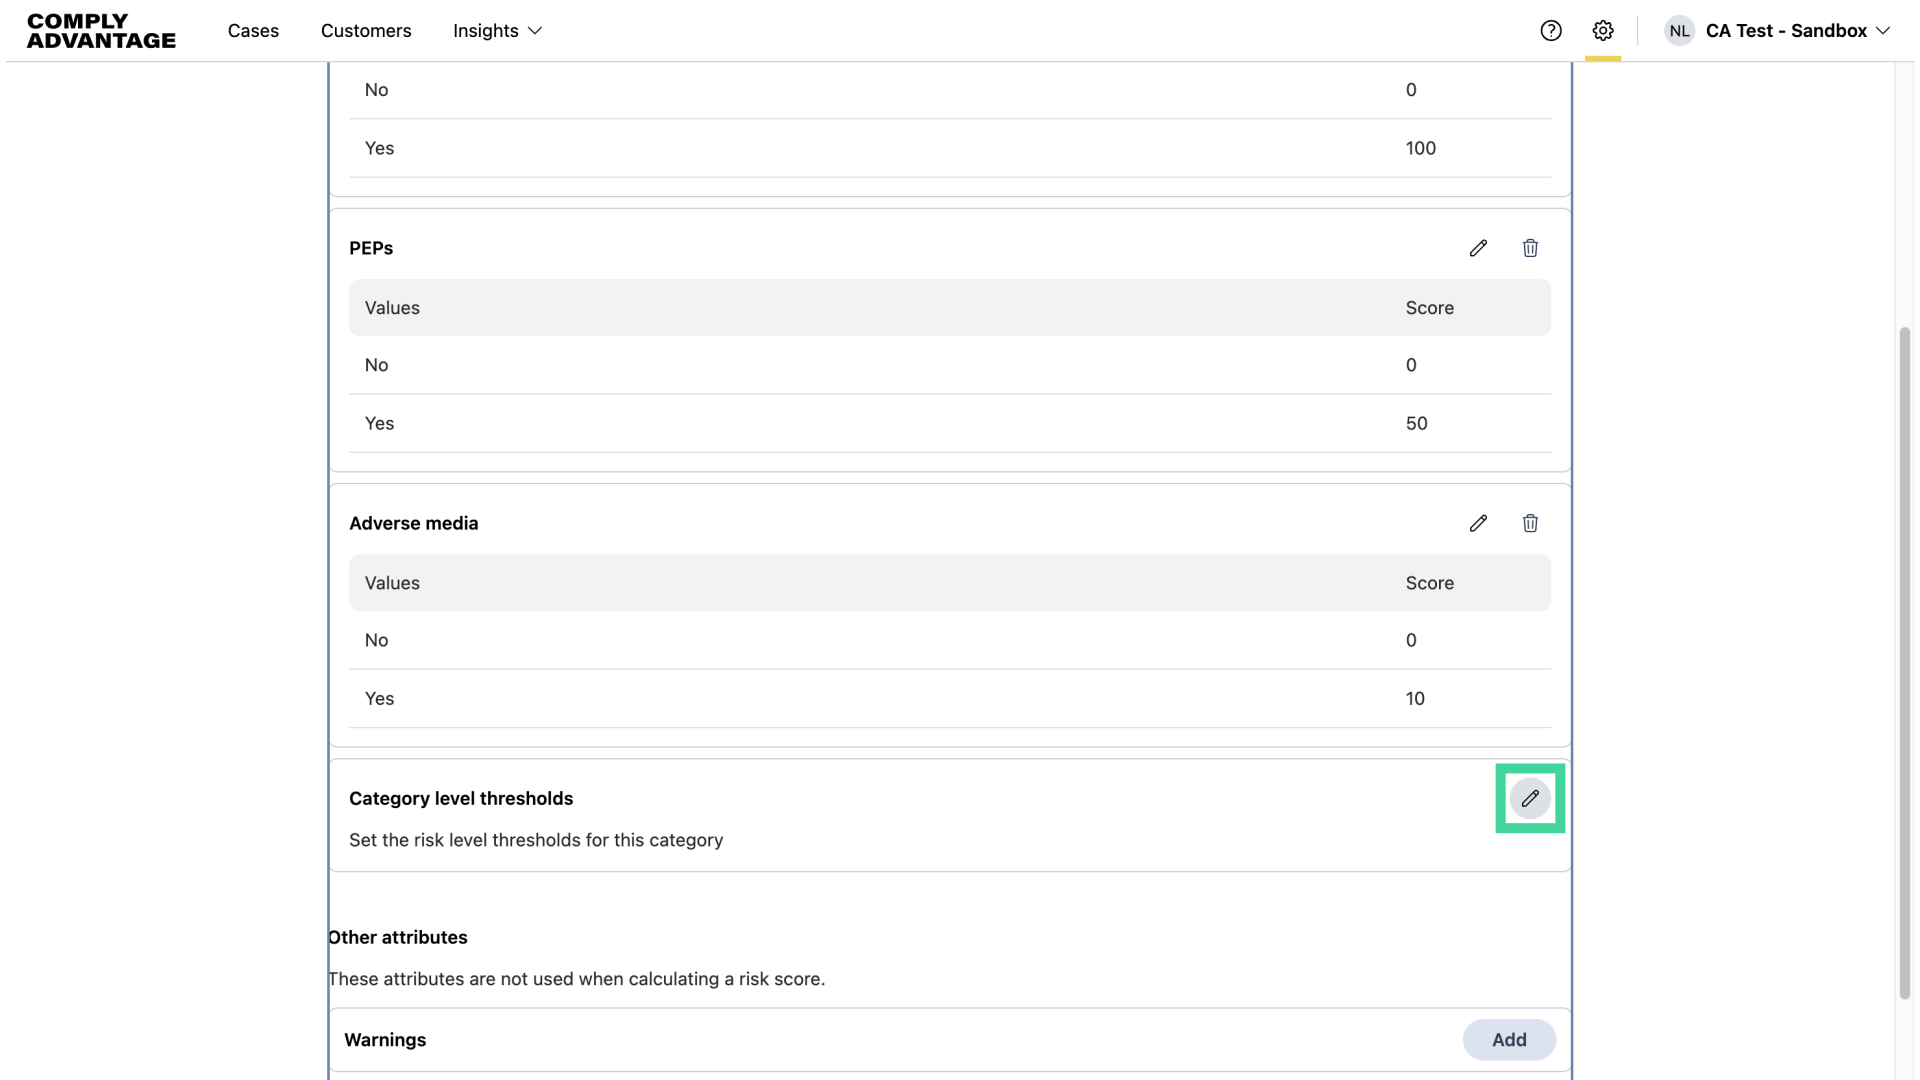
37. Select "Category level thresholds"
Finally, click the pencil icon here to add the Category level thresholds.
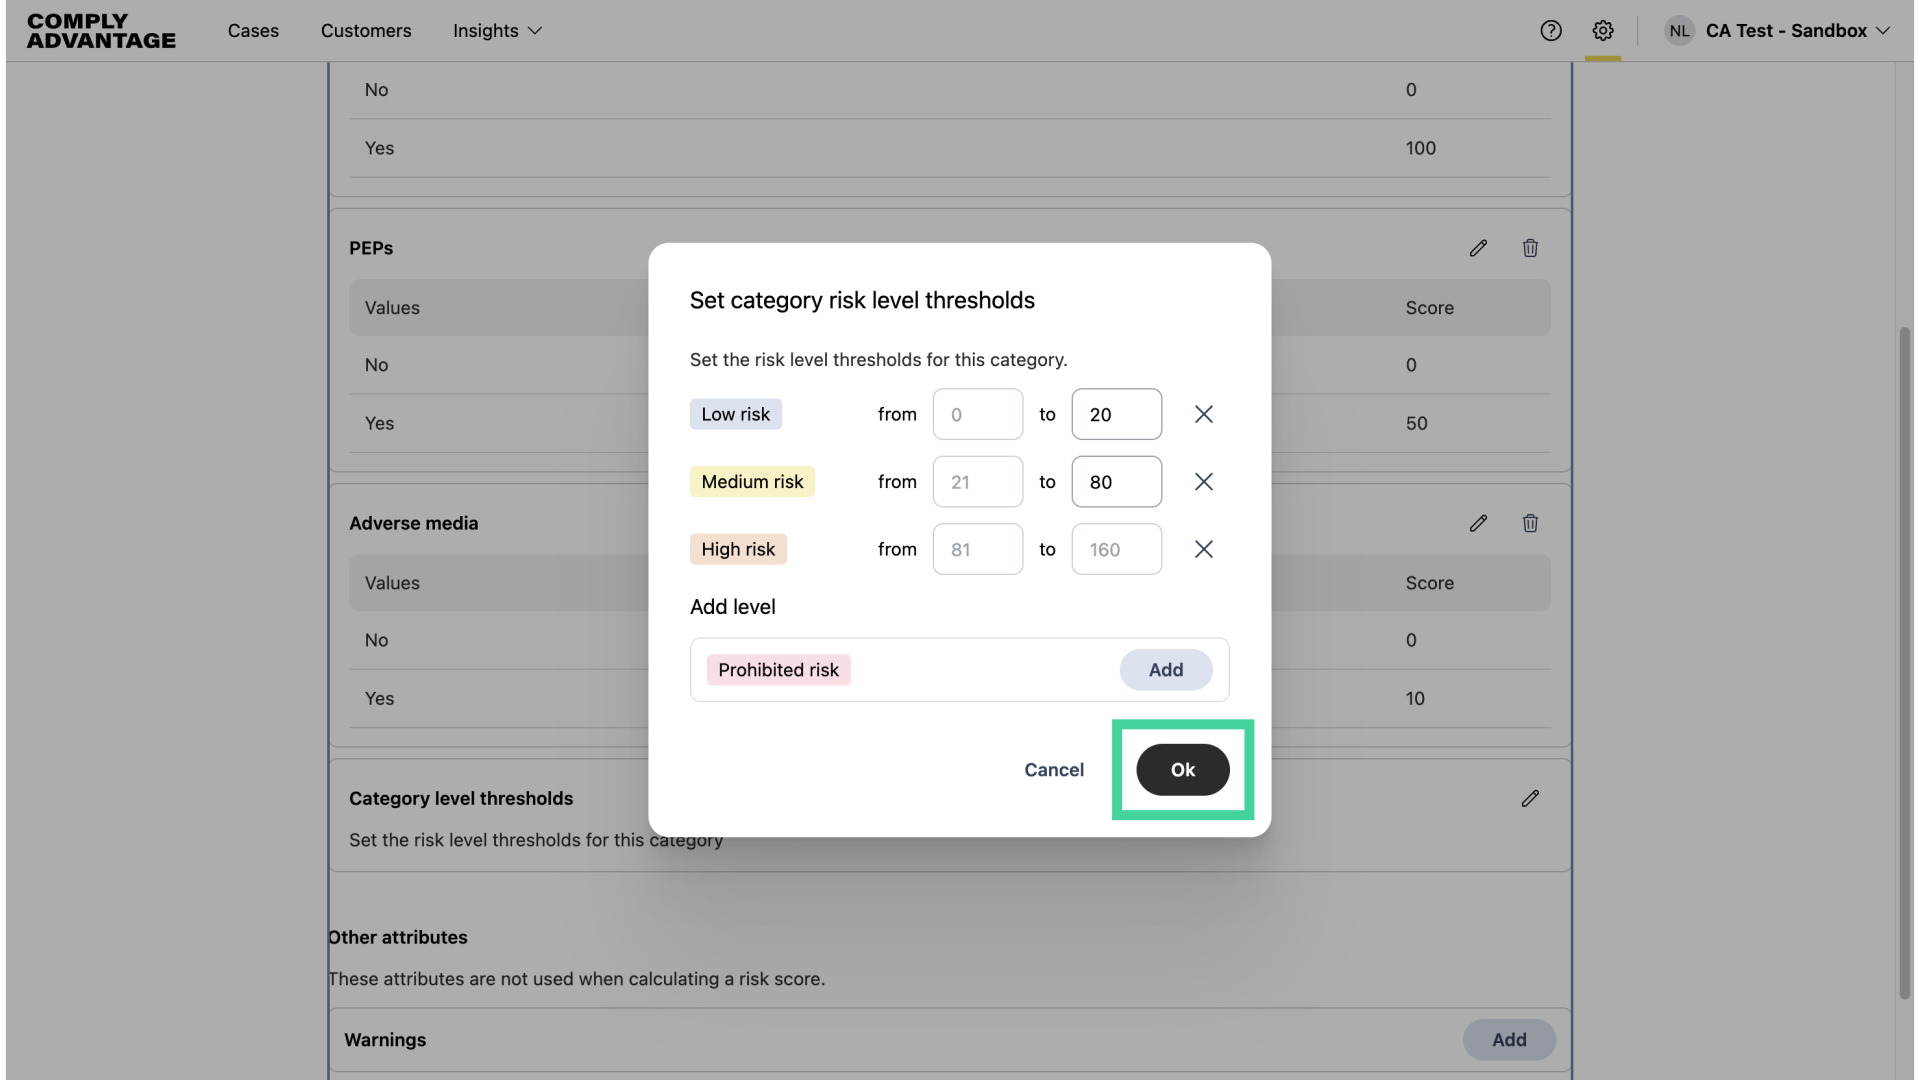
38. Click "Ok"
Click "Ok" once complete.
39. Click "Next"
Click "Next" to set the overall level threshold and category weighting, which will be reviewed in another video.
We hope this guide helped you create a new risk model, add category attributes, and set category thresholds. To learn how to change category weightings and save your risk model, visit the Changing category weightings video.