Creating a risk model
Last updated: May 4, 2026
A risk model enables you to assess the risk of your customers against the same criteria. You can only have one active risk model at a time. By default, the newest risk model is used.
When a risk model is active, customer records will be scored against the latest active risk model aligning to the customer type (Individual or Business) through the following scenarios:
Newly created customers
Risk scored when created via the create-and-screen API
Risk scored when created via the batch customer upload
Risk scored when created via the UI
Updated customers
Risk scored when updated via the update-and-rescore API
Risk scored when updated via the UI
Existing customers
Risk scored the next time an open case for the customer is closed
The overall risk score for a customer is calculated by assigning risk scores against attributes held against the following categories:
Basic Information: Profile data relating to your customer
Country: Fields relating to countries associated with your customer
Product: Static fields relating to the products held by your customer
Channel: Channel used by your customer in setting up their account
Screening: Fields aligned to the AML risk types found in our screening solution. Only outcomes from screening cases will be used here.
Custom Fields: Ability to connect bespoke fields added on the account against the Individual or Business schemas.
Weightings are then applied to each category, for example the screening results or geographic exposure of a customer may have a more significant impact on the overall risk score than the channel the customer used to open their account.
The overall risk score will then be calculated by multiplying each category score by its weighting, and then adding them all together.
To create a risk model, you need to follow these steps:
Create a new risk model and choose which customer type it applies to.
Add attributes to the risk-scoring categories. For example, one category is 'basic information'. You can give this category a 'profession' attribute to assign risk scores based on the customer's profession.
Set category-level thresholds. This enables you to assign a risk level (low, medium, high, or prohibited) based on the category's risk score across all attributes.
Set category weightings. This enables you to decide how much each risk category affects the overall risk score.
Set overall risk level thresholds. This enables you to assign a risk level (low, medium, high, or prohibited) to the customer based on the weighted category risk scores.
You can rename or edit the risk models you have created.
Creating a new risk model
Click the Settings cog in the top-right. The default page in settings is Risk models. This page shows all the risk models in your account, ordered by the created date.
Click Create at the top right.
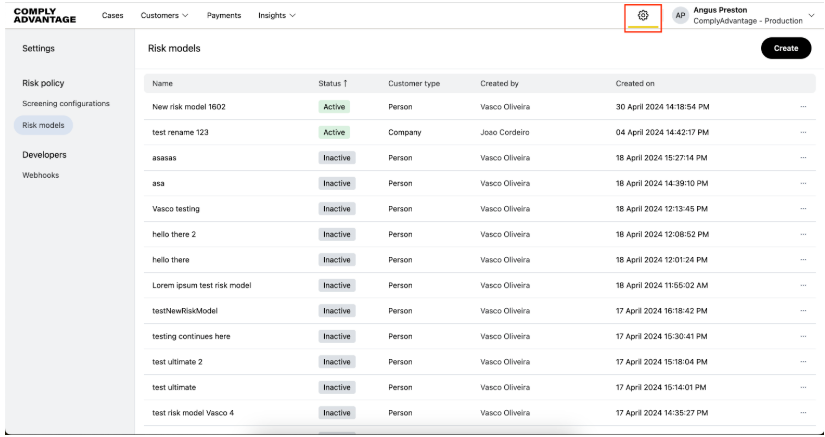
Type the name of your new risk model into the pop-up. The name must be unique.
Choose which Customer Type it applies to, Person or Company.
Click Confirm.
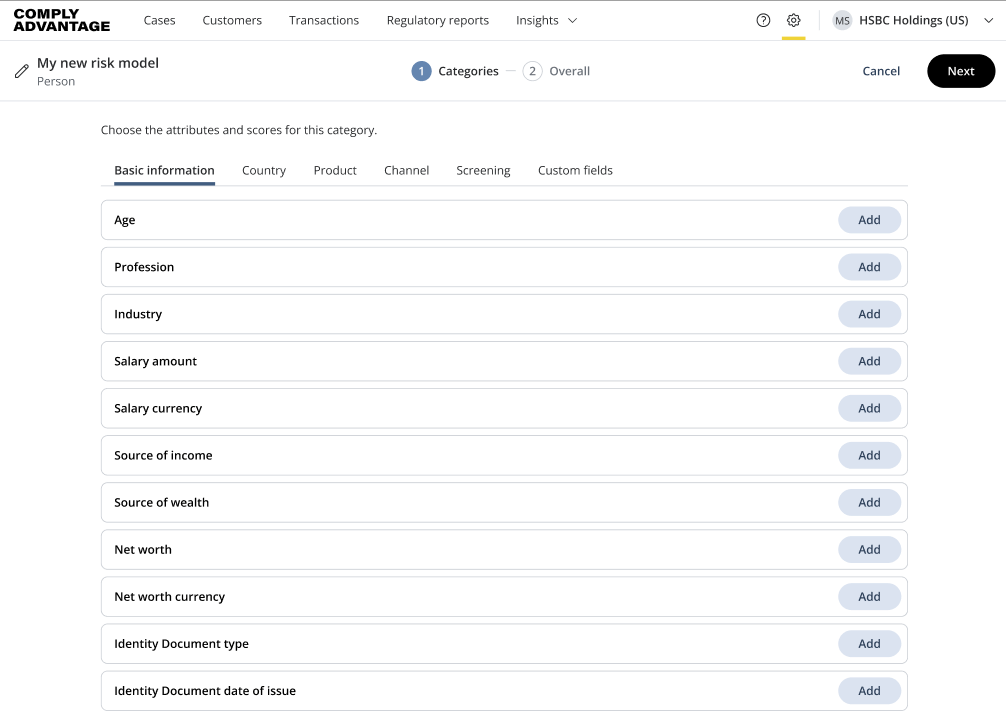
The Categories page opens. Here, you choose which attributes (from across six categories) will be checked when this risk model is used.
Creating a new risk model
The categories page has six category tabs.
Basic Information: Profile data relating to your customer
Country: Fields relating to countries associated with your customer
Product: Static fields relating to the products held by your customer
Channel: Channel used by your customer in setting up their account
Screening: Fields aligned to the AML risk types found in our screening solution. Only outcomes from screening cases will be used here.
Custom Fields: Ability to connect bespoke fields added on the account against the Individual or Business schemas.
You assign attributes to each category that you want to include in your risk score.
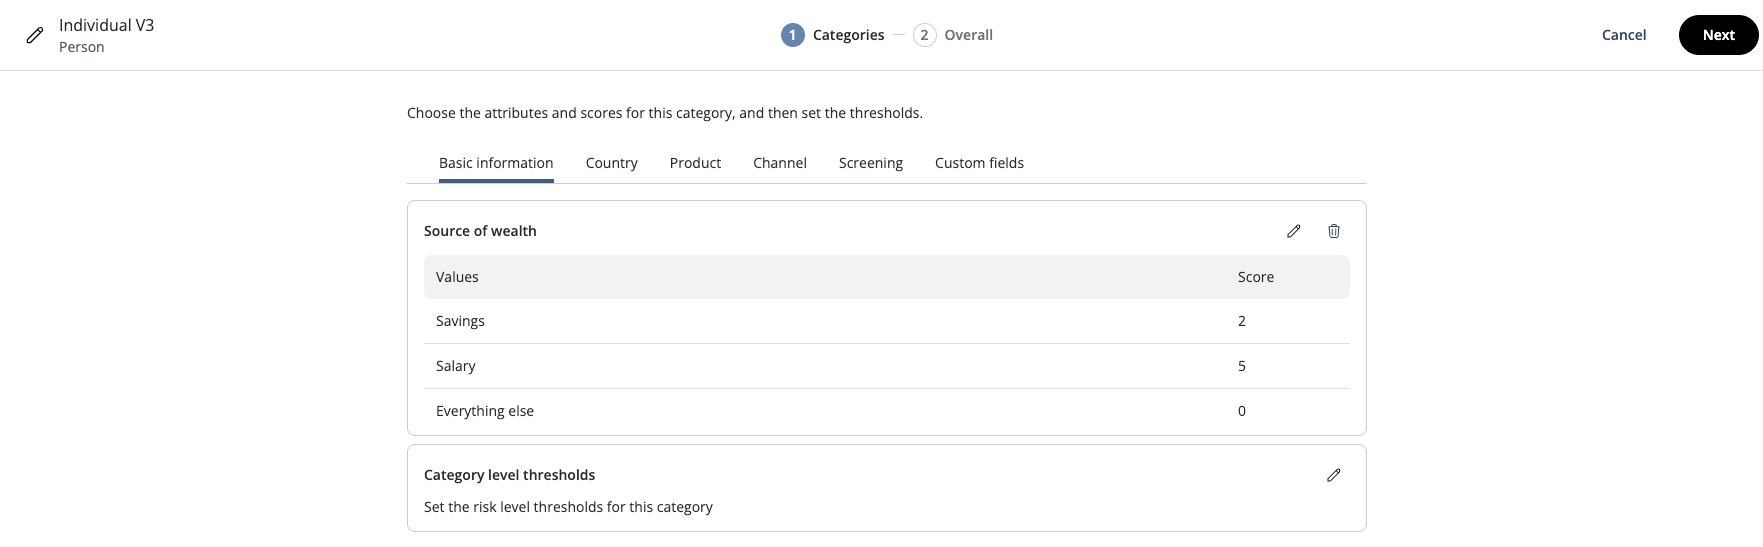
Below is a screenshot of the attributes for the category 'Basic information'.
Adding category attributes
Category attributes allow you to assign different risk scores against different customer attributes within a single risk model.
The Categories page opens with the following six category options: basic information, country, product, channel, screening, and custom fields.
The attributes shown in each category align to the data within our customer schema and the AML risk types we generate screening results for.
Click Add for the attribute you want to include and a dialog box will open. In this example, we're adding the Source of wealth attribute. This has free-text entry fields, meaning you have full control over the options you specify. Other attributes may have fixed parameters that you can't change.
Click Add row to add a new parameter and its score.
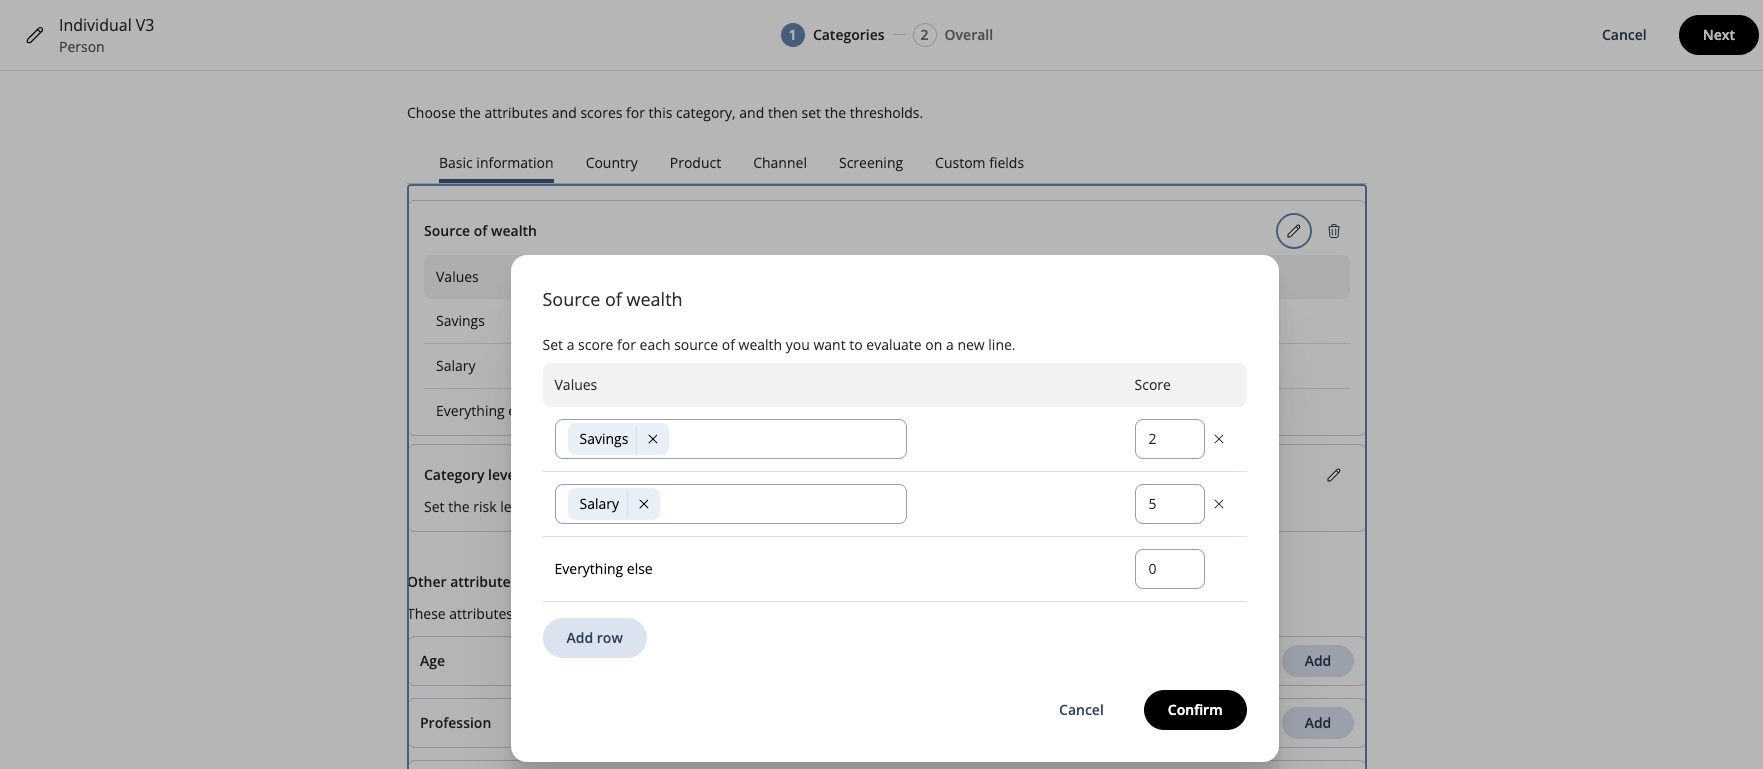
For free text entry fields (including the values for Source of wealth) each unique value must be on a new row.
Add as many rows as you need. Anything that doesn’t fall into the defined values will be scored as Everything else. To remove a value click the X next to the score.
Click Confirm.
The attributes, with the values and scores you have just defined, will show at the top of the Basic information tab
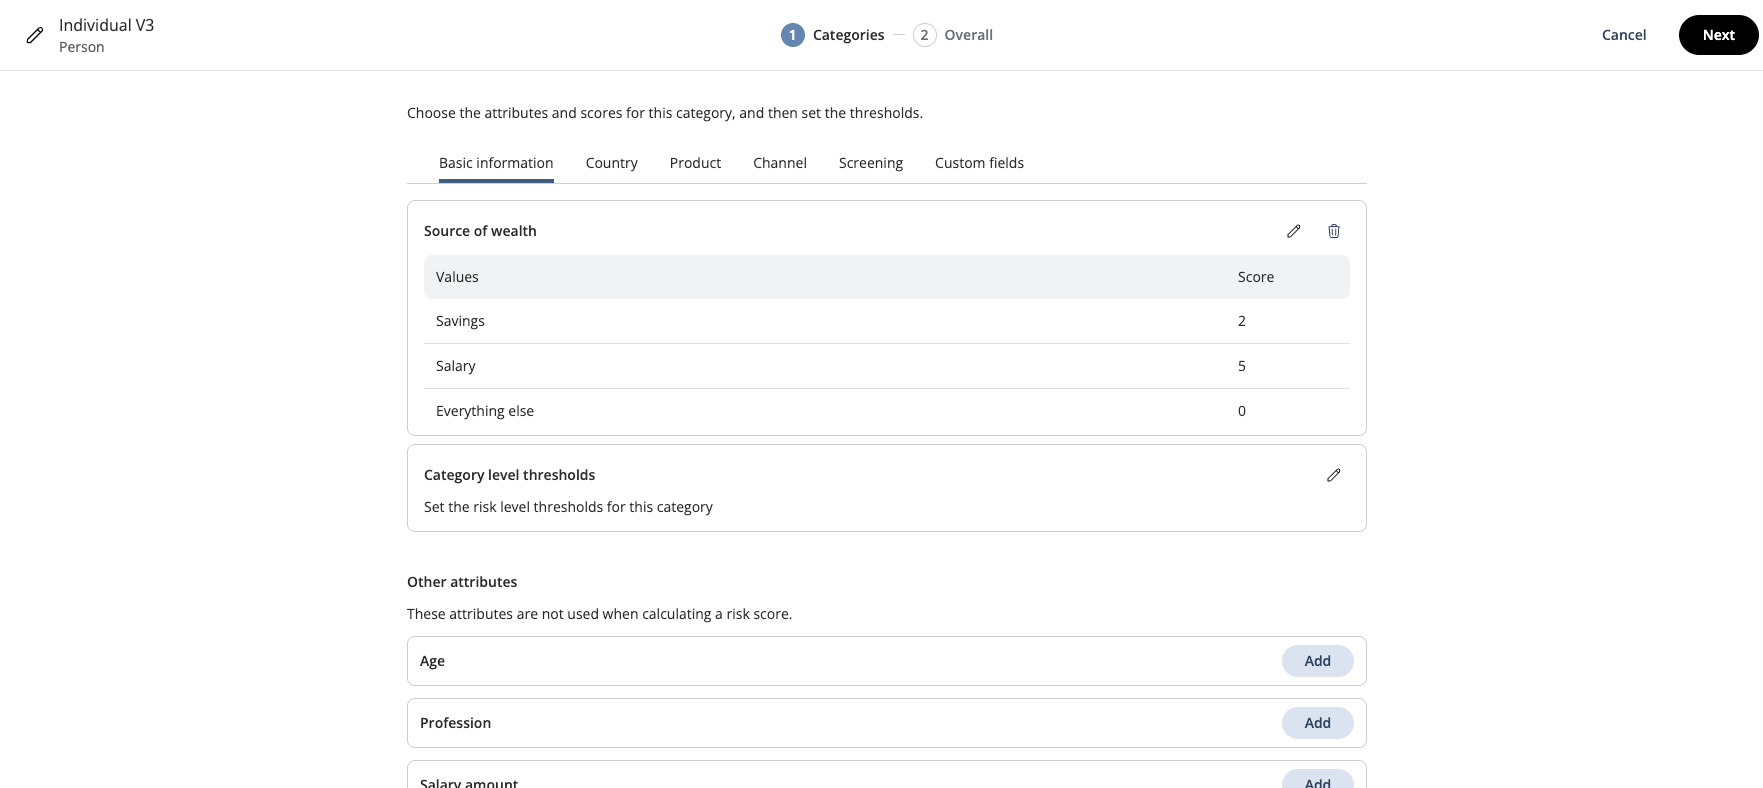
Repeat the process for any other attributes you want to include in this category.
Then repeat the process for any of the other categories you wish to use.
Adding attributes to the Screening category
You can assign scores based on the results from your customer screening in Mesh.
Scores are assigned on the top level AML risk type, with the following options available:
Sanctions
PEPs
Adverse Media
Warnings
Fitness & Probity
Custom lists (these being internal lists added to a screening configuration)
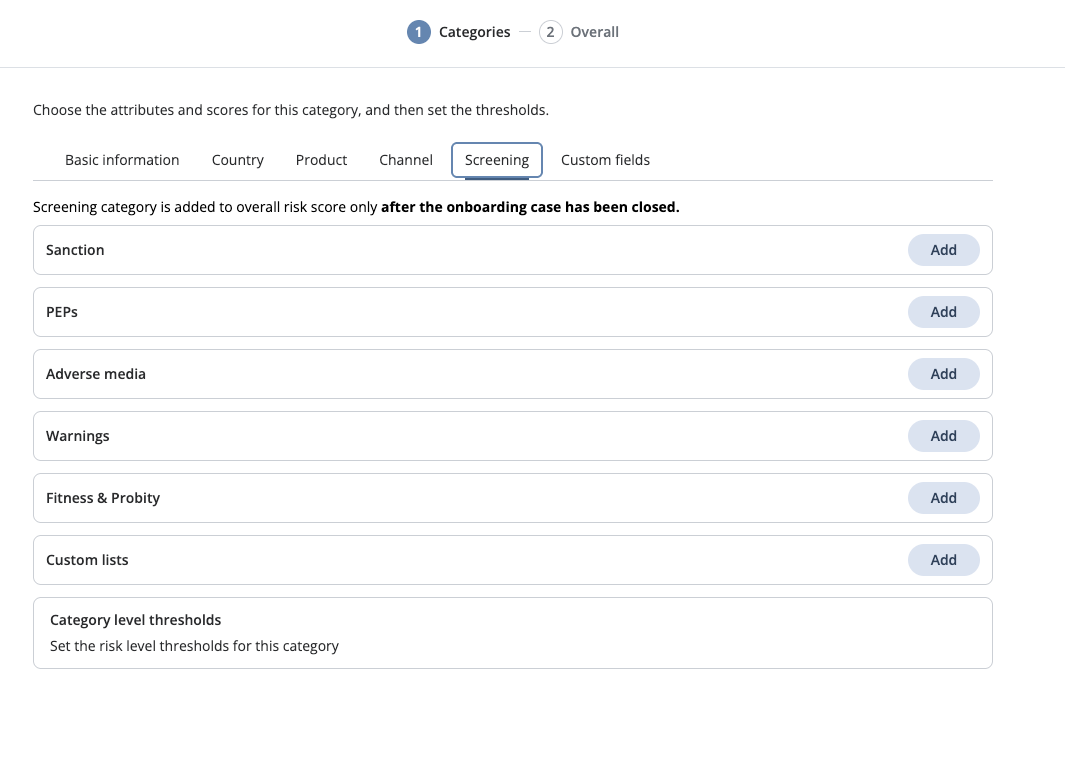
When adding attributes to the Screening category there are only two values available, Yes or No, depending on whether an anti-money laundering (AML) type, such as Sanctions, applies to the customer. By default, No has a score of 0.
You can set a score for Yes.
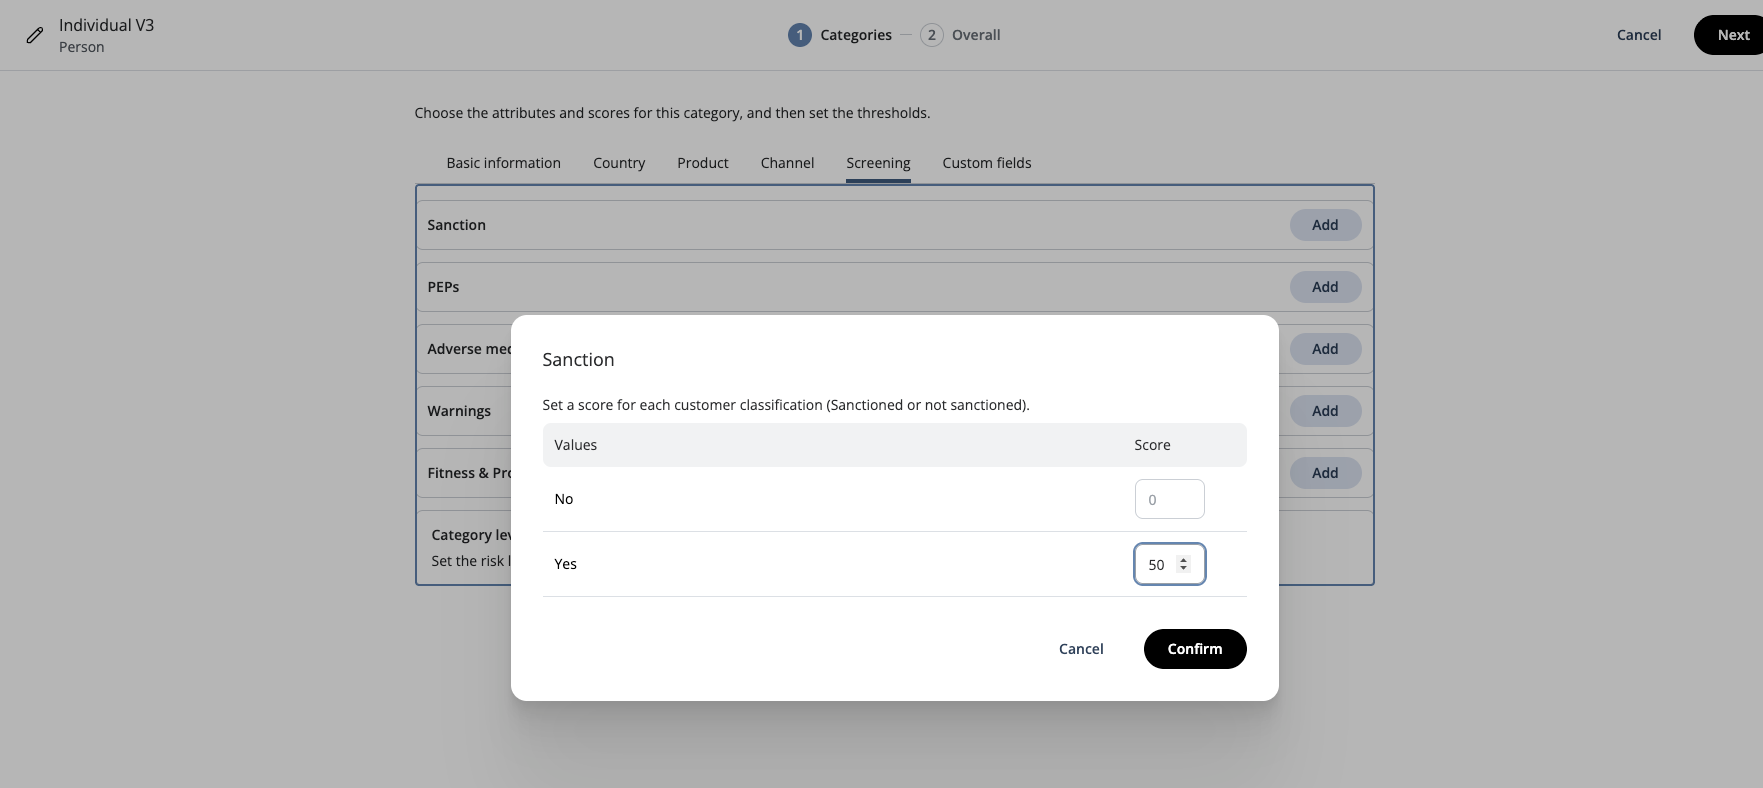
Important note: Only true positive decisions affect the risk score
To prevent customers being incorrectly marked as higher risk until you have made a decision, which may have unintended effects downstream, risk scoring will only take into account the true positive decisions once the case has been closed.
You can reopen a case and change a decision. When the case is closed again the score will be automatically updated.
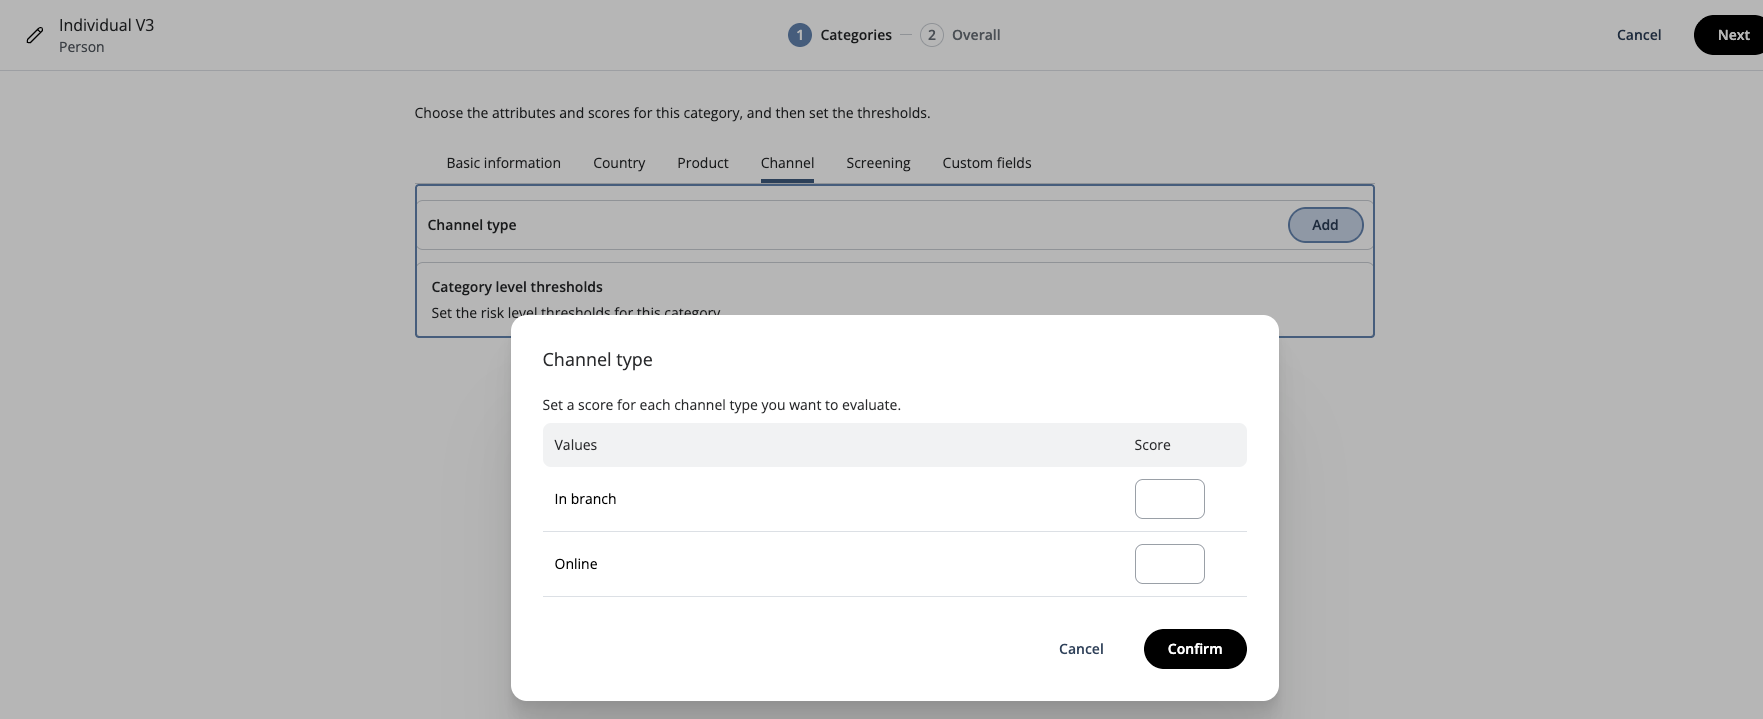
Adding attributes to the Channel category
There is one attribute available for the Channel category, which is Channel type. This is the onboarding channel the customer used to sign up. The values are predefined as In branch and Online.
Adding attributes to the Custom fields category
Customer custom fields allow you to tailor the Mesh platform to your specific business needs by storing your own data points not covered by the standard customer schema available in Mesh. These extended fields can be used within the risk model.
The Custom fields category will show only fields that have been set up for the specific Customer Type the model applies to (Individual or Business).
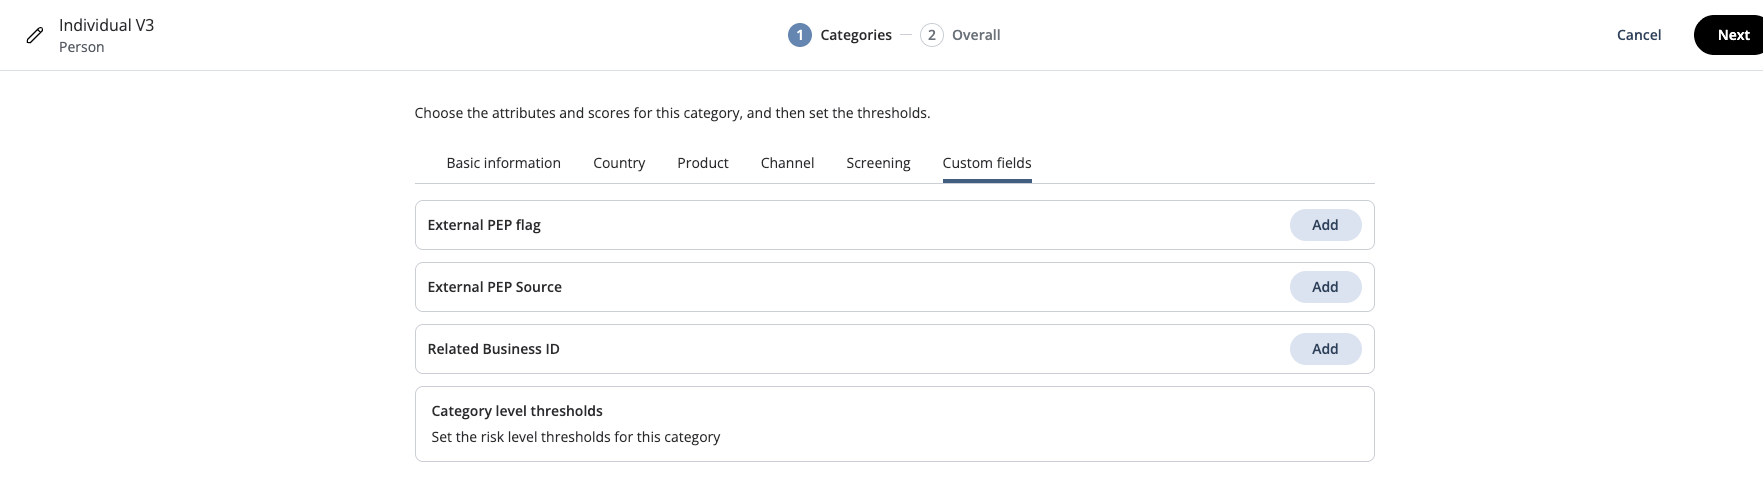
The attribute options for each custom field will mirror the field type of the custom field when it was created.
A custom field of type String will have a free text
A custom field of type
This will only show existing custom fields. To incorporate new customer custom fields, a new model will need to be created.
Setting category thresholds
Setting category thresholds is step 3 in the process of creating a new risk model. The previous steps you need to have completed are:
1. Creating a risk model
2. Adding category attributes
Once you've added any attributes to a category, you'll need to set risk level thresholds for that category. In the previous step, we added the Source of wealth attribute to the Basic information category.
In the Basic information screen, click on the pencil icon next to Category level thresholds
Click Add next to the risk levels you want to add a threshold for.
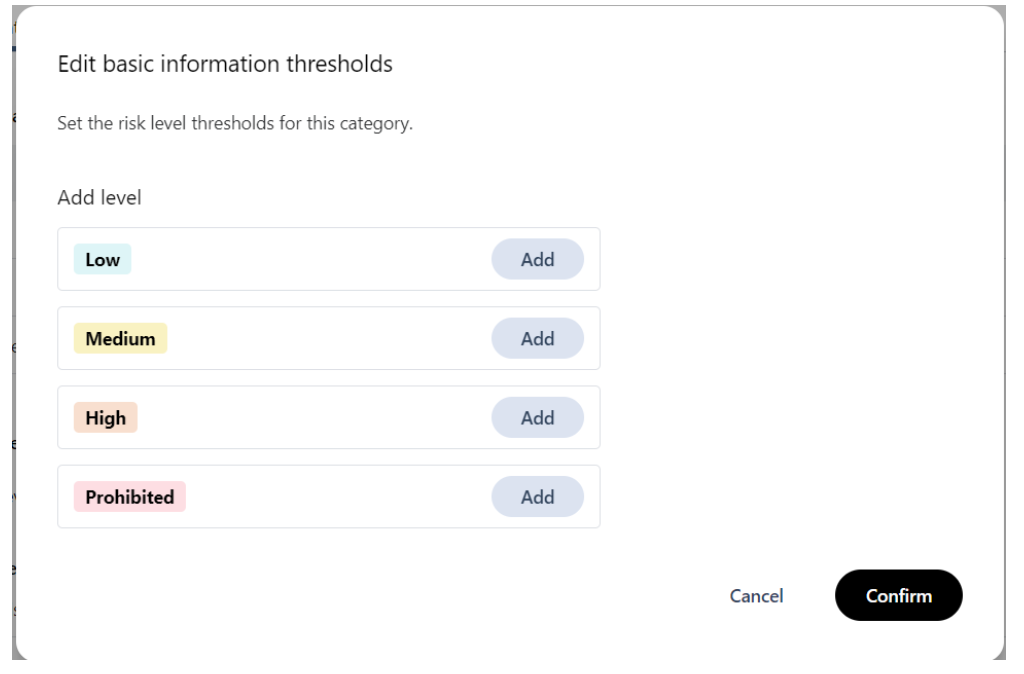
Enter the threshold number for each risk level.
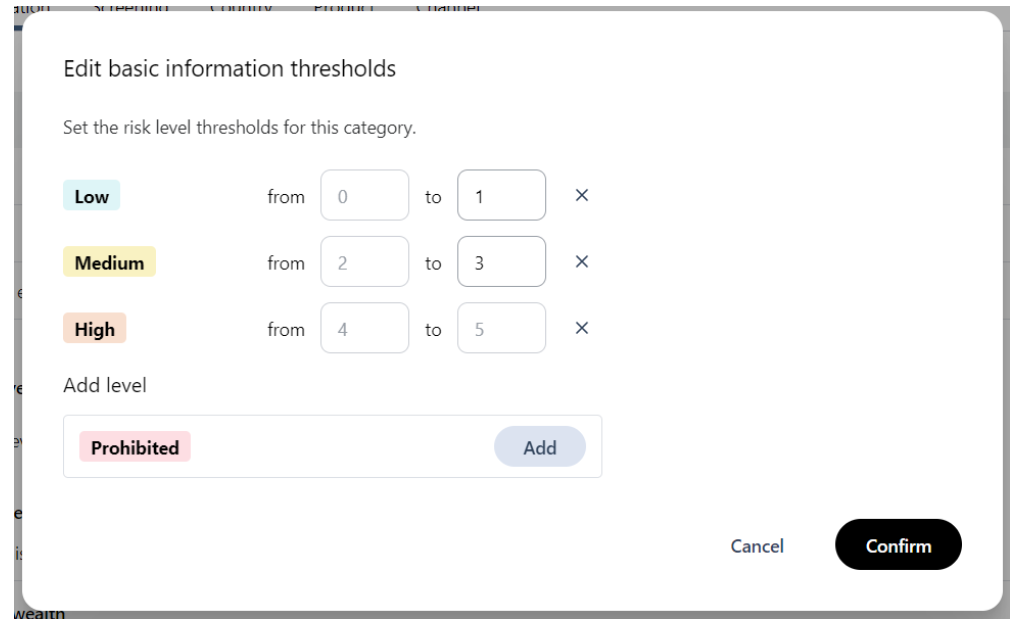
We will automatically calculate the absolute minimum and maximum values based on the scores you provided. We also calculate the lower limit per level when you enter the upper limit in the box on the right. You can see that the automatically calculated values are grayed out.
Click Confirm.
Your risk level thresholds show in the Basic information screen, underneath the values and scores of the attributes you added for this category.
Repeat this process to create category thresholds for every category you've added attributes to. If you haven't added attributes to a category, it will be blank.
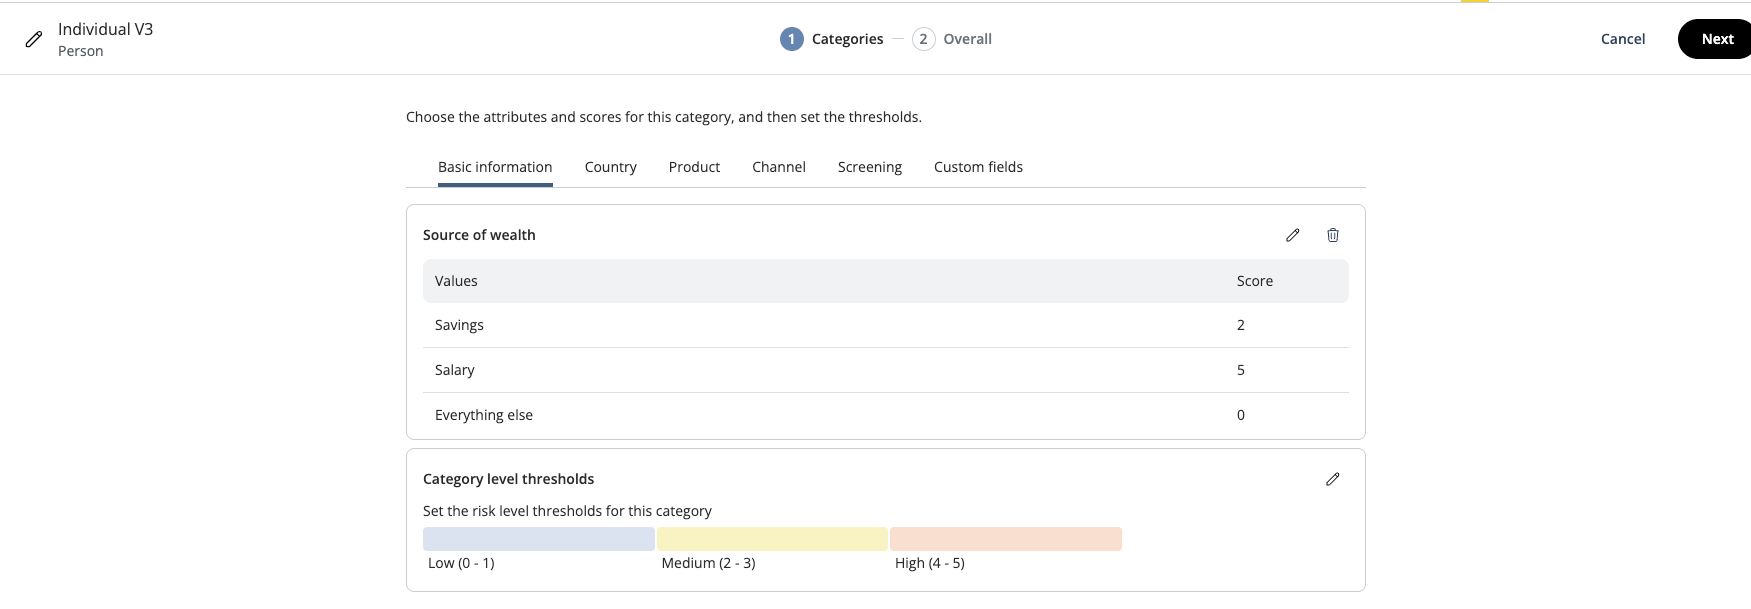
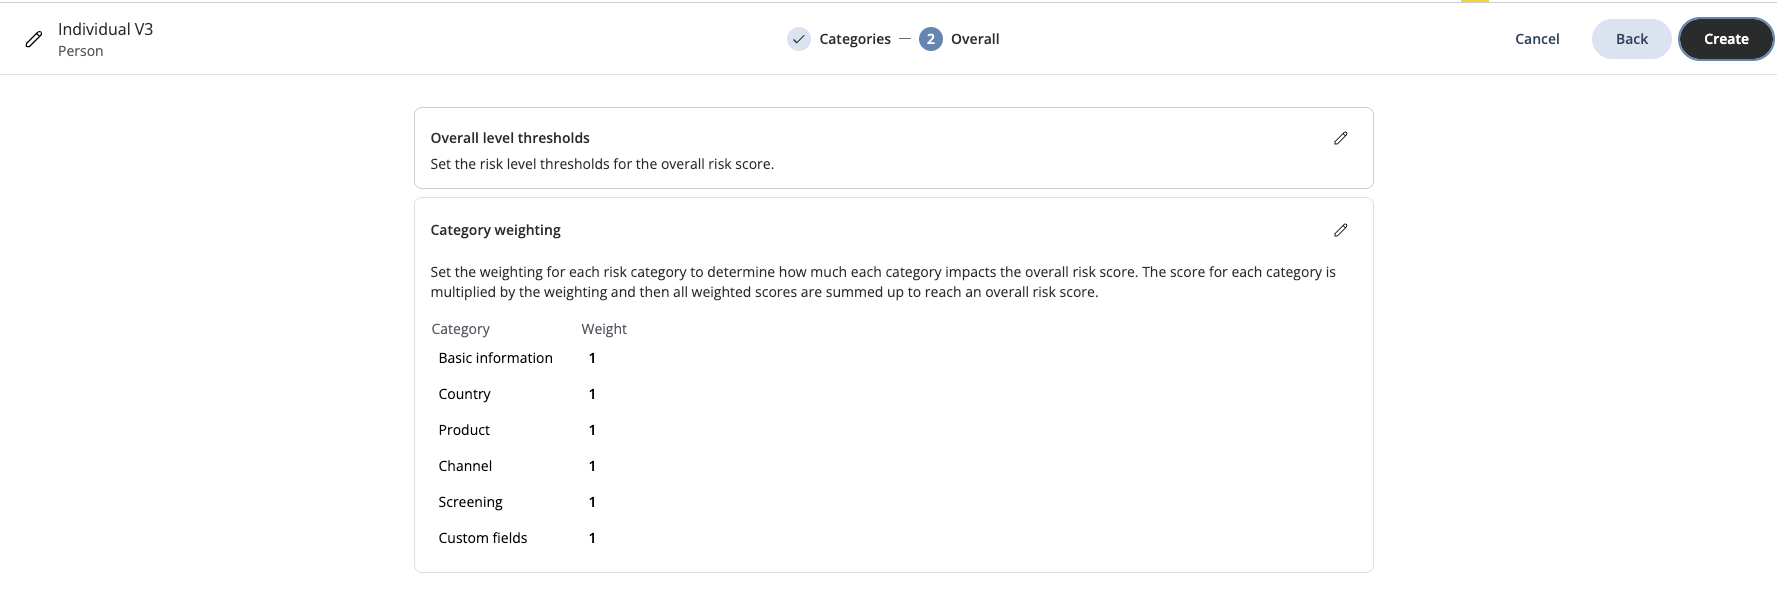
When you’ve finished creating category thresholds, click Next in the top right to move to the next screen to set the Overall level thresholds and to change Category weightings.
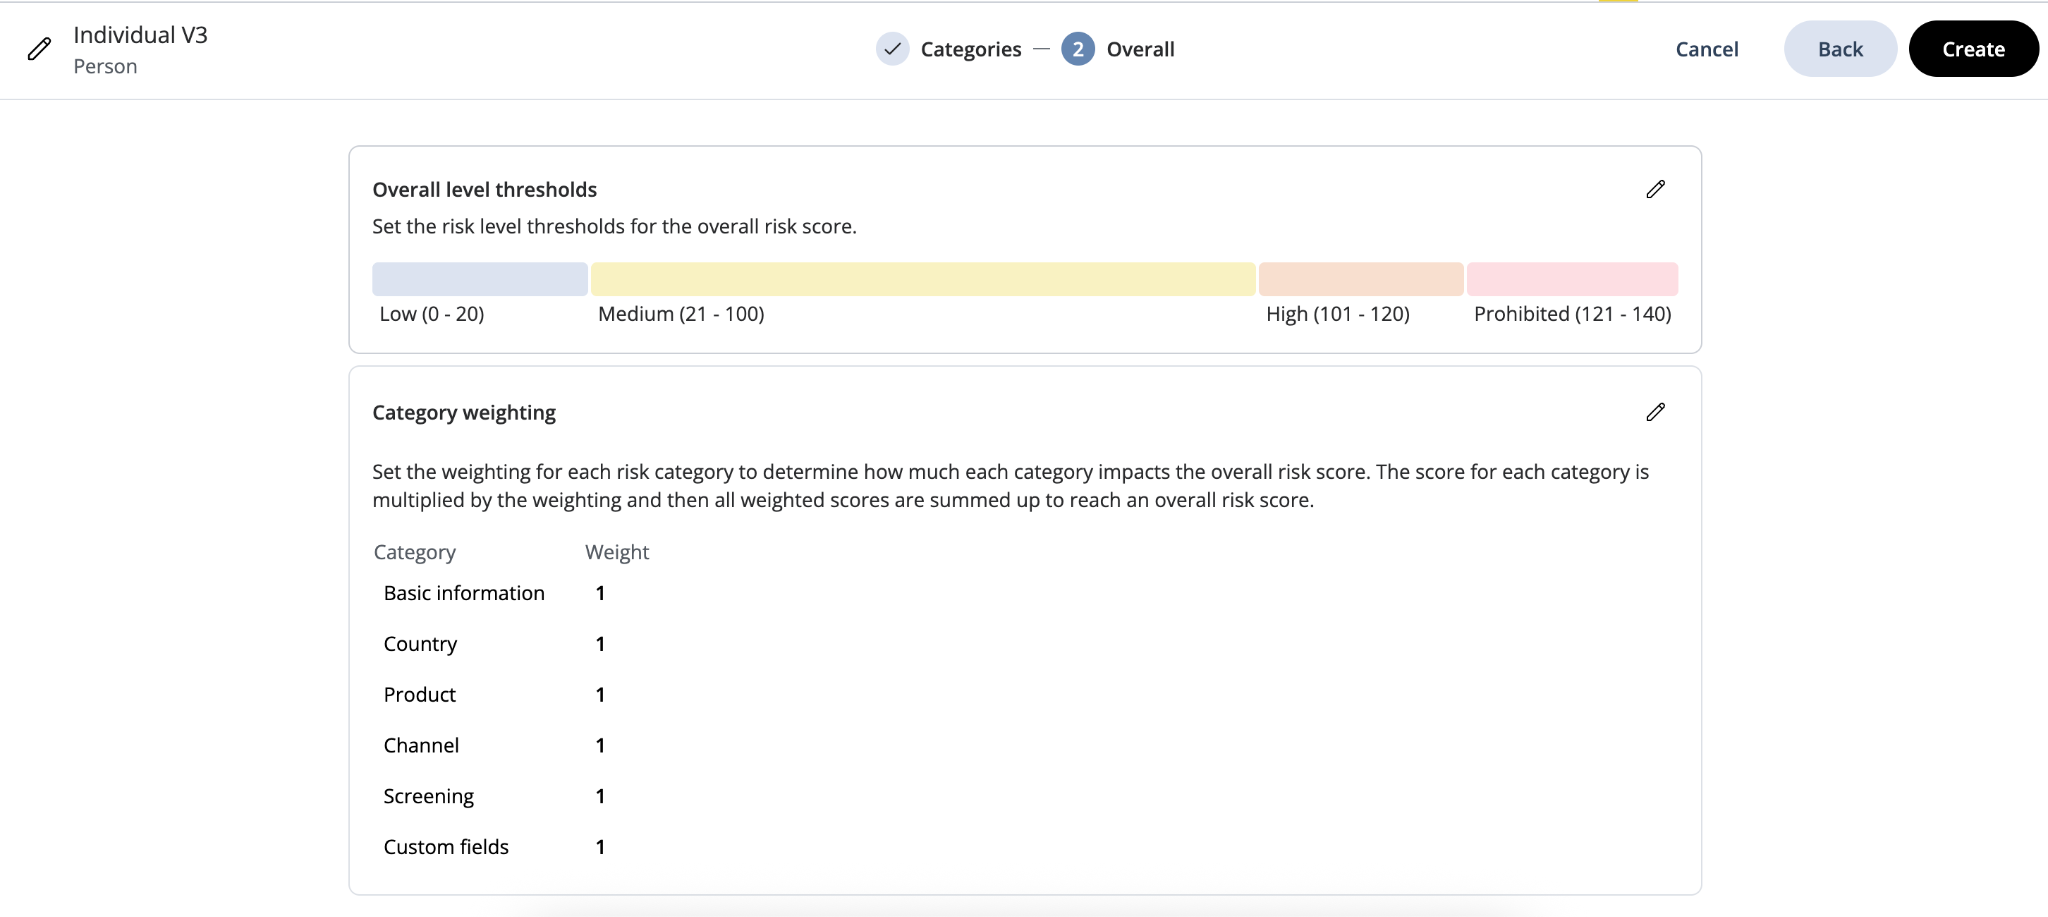
Changing category weightings
Changing category weightings is step 4 in the process of creating a new risk model. The previous steps you need to have completed are:
1. Creating a risk model
2. Adding category attributes
3. Setting category thresholds
The overall risk score for a customer is calculated by multiplying each category score by its weighting, and then adding them all together. The default weighting for all categories is 1, which makes the overall risk score a simple sum of all the category risk scores.
However, you can weight any of the categories so it contributes more or less to the overall risk score. Consider carefully before doing this, as weightings will affect the overall thresholds you set in your risk model, and therefore which overall risk level is assigned to the customer.
To change category weightings from the default, click on the pencil icon within the Category weighting box.
Enter the new weighting value for each category you want to change
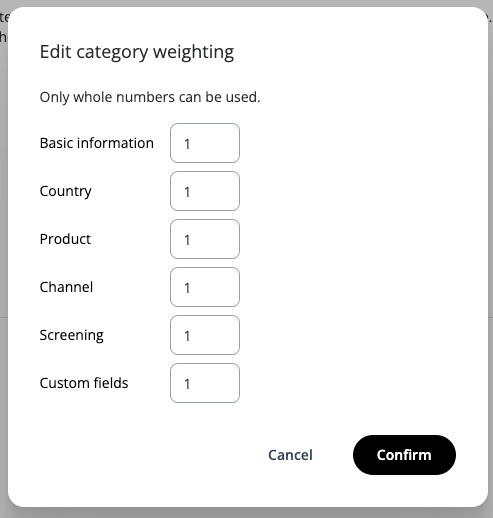
Click Confirm to return to the new risk model screen and see your amended weightings.
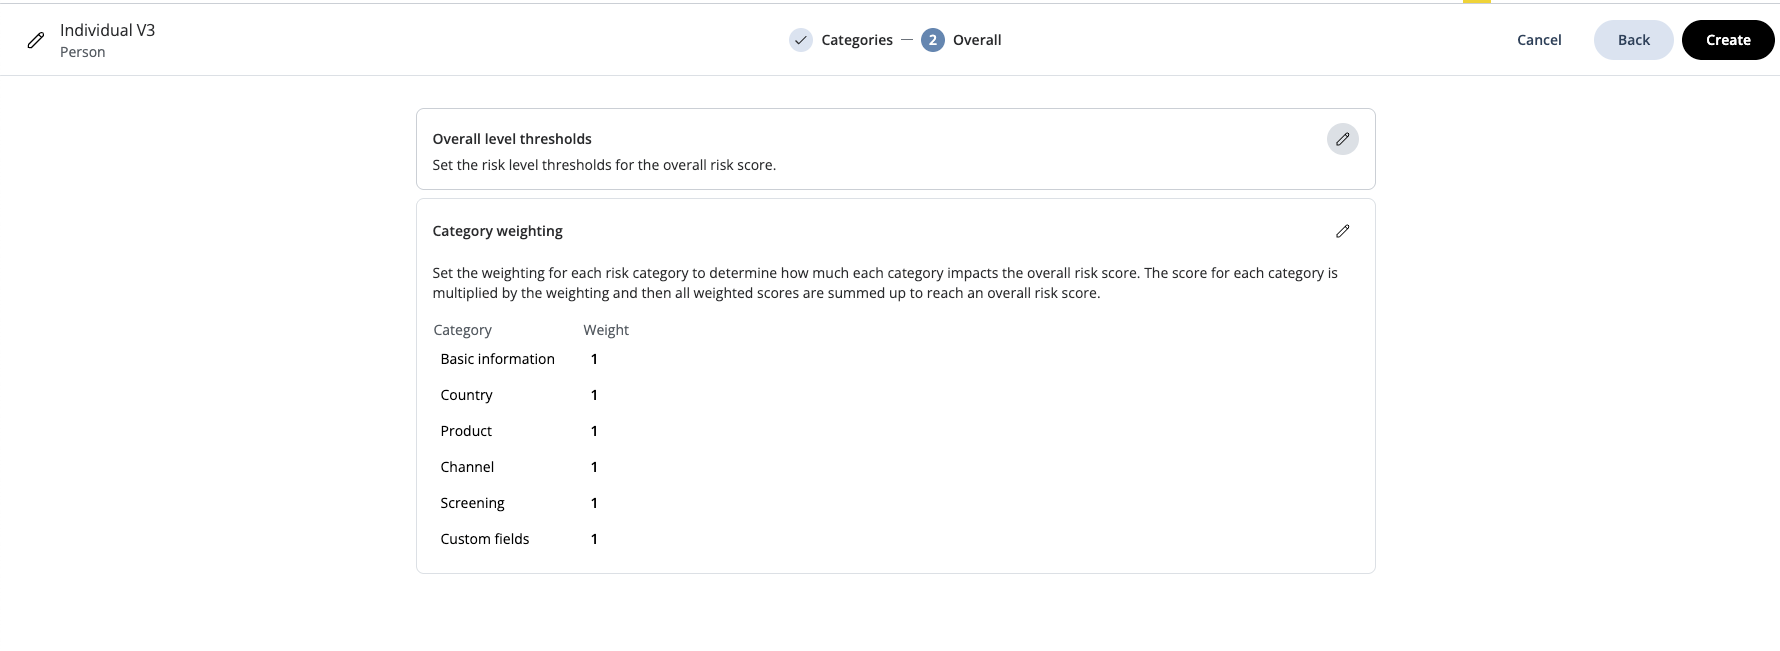
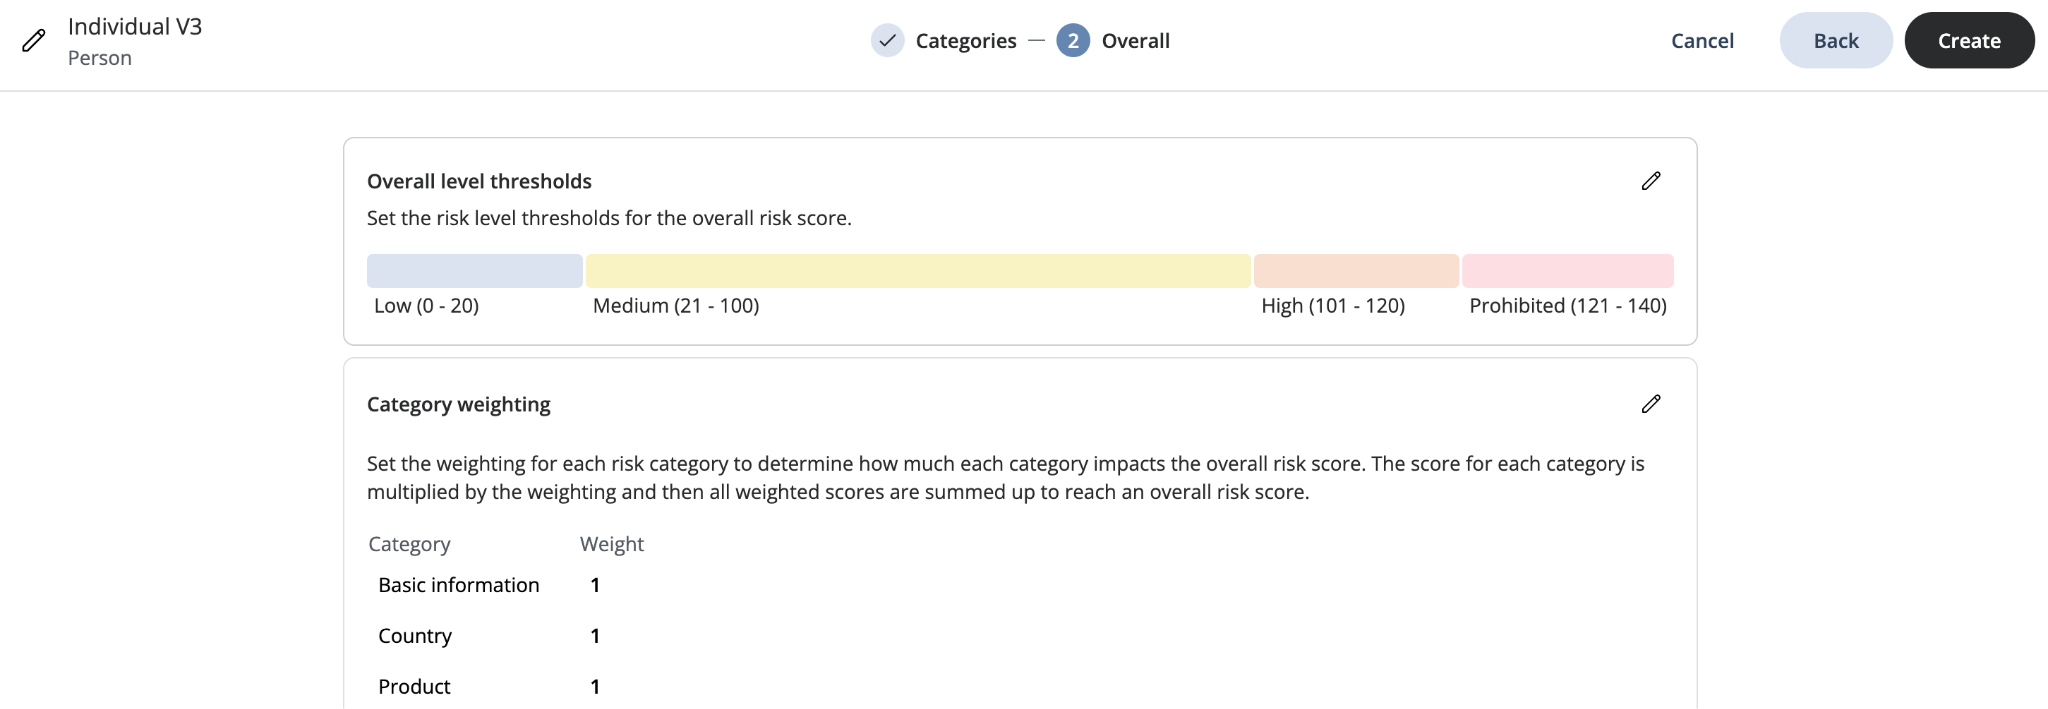
Setting overall risk level thresholds
Setting overall risk level thresholds is step 5 in the process of creating a new risk model. The previous steps you need to have completed are:
1. Creating a risk model
2. Adding category attributes
3. Setting category thresholds
4. Changing category weightings
Click the pencil icon, to the right of Overall level thresholds.
Click Add next to the overall risk levels you want to add a threshold for.

Enter the threshold number for each risk level. You need to set the upper and lower boundaries for each risk level yourself. Bear in mind the category weightings you previously set.
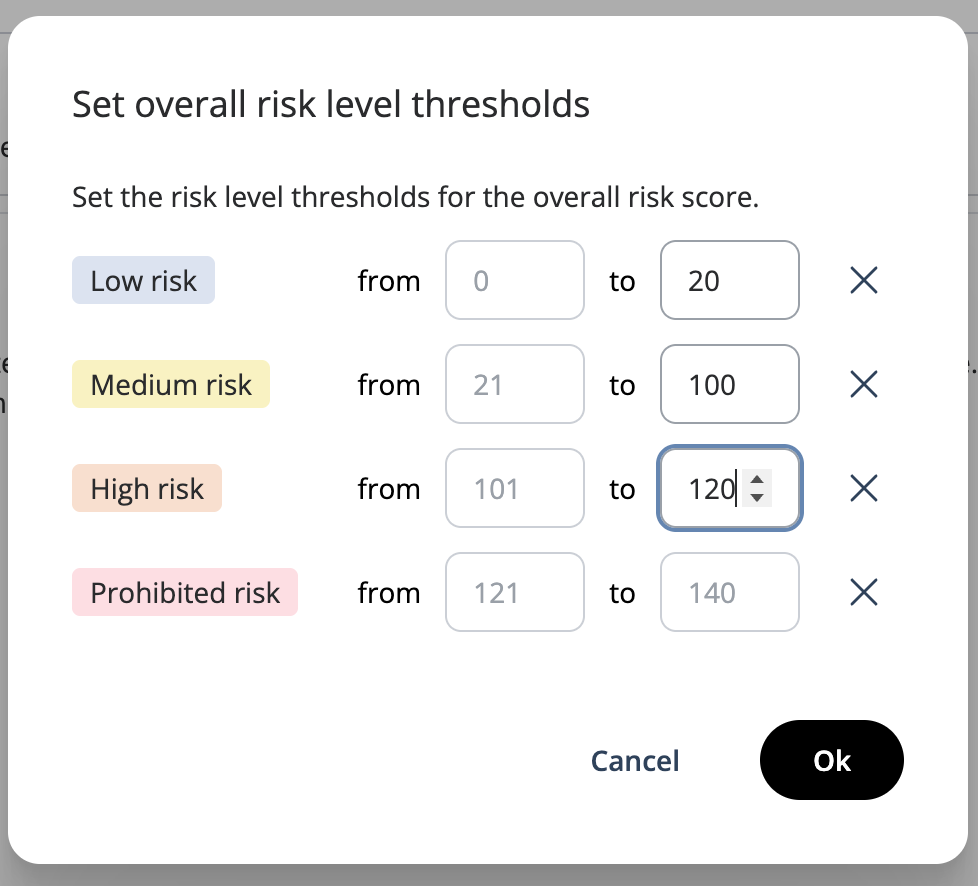
Click OK.
The overall risk level thresholds are displayed above the category weightings, as a line chart.
You're now ready to make your risk model active
Making a new risk model active
Making a new risk model active is step 6 in the process of creating a new risk model. The previous steps you need to have completed are:
1. Creating a risk model
2. Adding category attributes
3. Setting category thresholds
4. Changing category weightings
5. Setting overall risk level thresholds
After you've set up your risk model categories and thresholds, you need to finish creating the risk model and make it active.
Once your risk model is active, any new risk scores will be calculated using this risk model.
Customer records will be scored against the latest active risk model aligning to the customer type (Individual or Business) through the following scenarios:
Newly created customers
Risk scored when created via the create-and-screen API
Risk scored when created via the batch customer upload
Risk scored when created via the UI
Updated customers
Risk scored when updated via the update-and-rescore API
Risk scored when updated via the UI
Existing customers
Risk scored the next time an open case for the customer is closed
Important note Bulk recalculations of the risk score upon model update do not happen today.
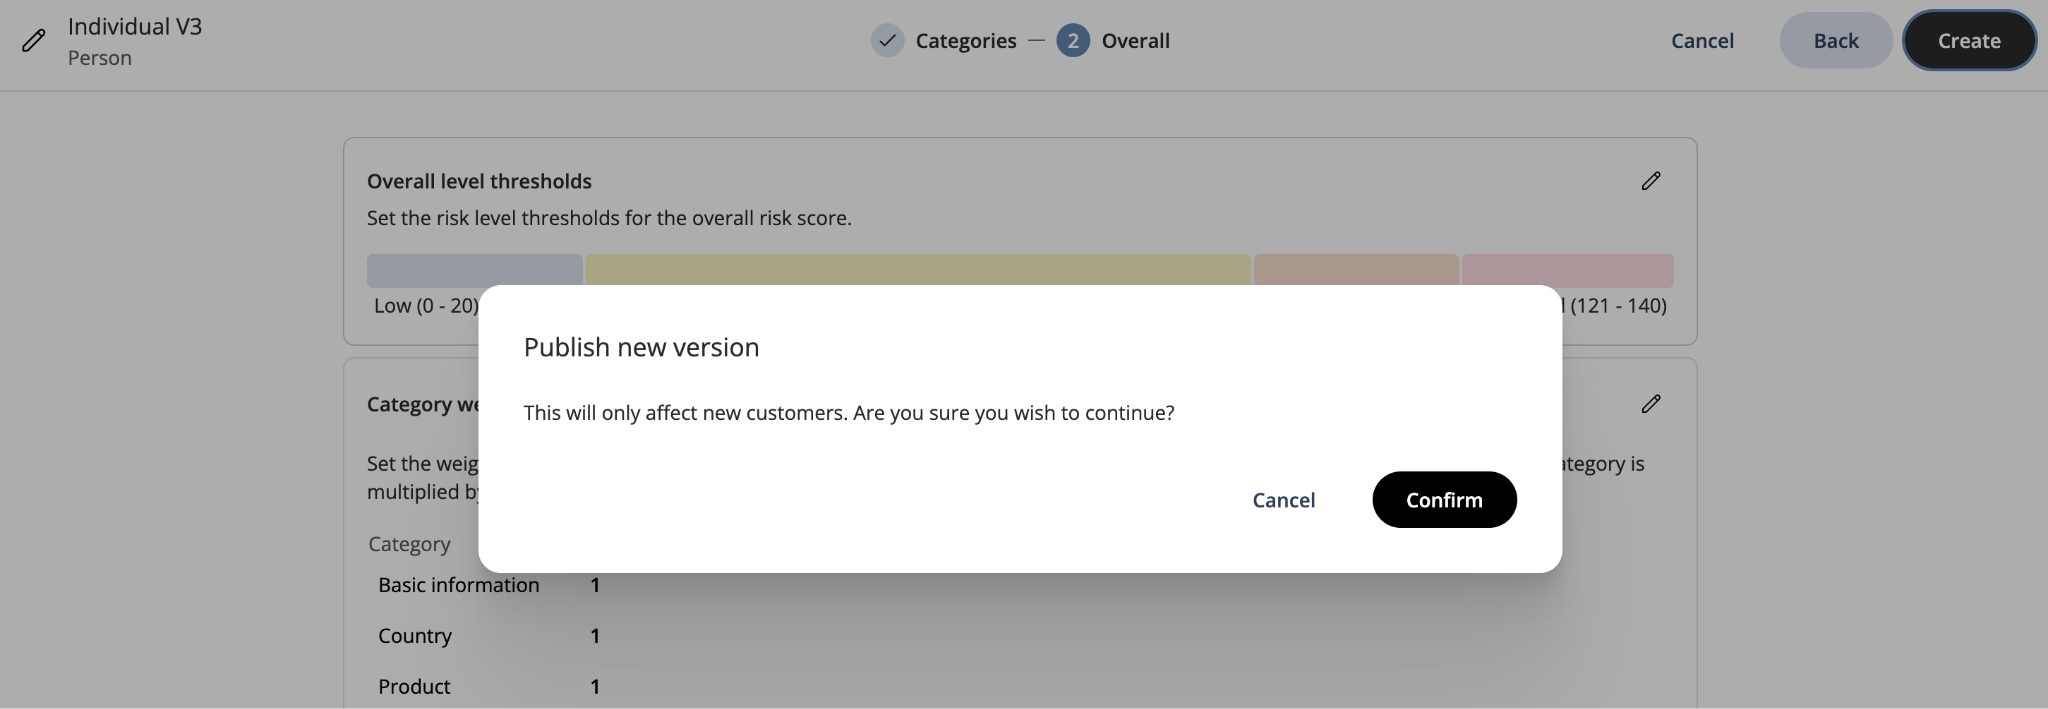
Click Create in the top right corner.
Click Confirm in the pop-up.
Find your new risk model on the risk models page. Click on the Settings cog and clicking on Risk models on the left.

The status column shows which models are active. You can have two risk models active at any time, one per customer type: person and company.