Video: Assigning cases
Last updated: April 7, 2026
In this guide, you will learn how to assign and unassign cases in Mesh.
When logging in to your account, please ensure you select the correct region, which will be one of the following:
Australia: https://au.mesh.complyadvantage.com/
You can find the link to your region in the onboarding email you received (look for the "Welcome to ComplyAdvantage" email).
If you can’t find the email, don't worry! You can always contact our support team at [email protected].
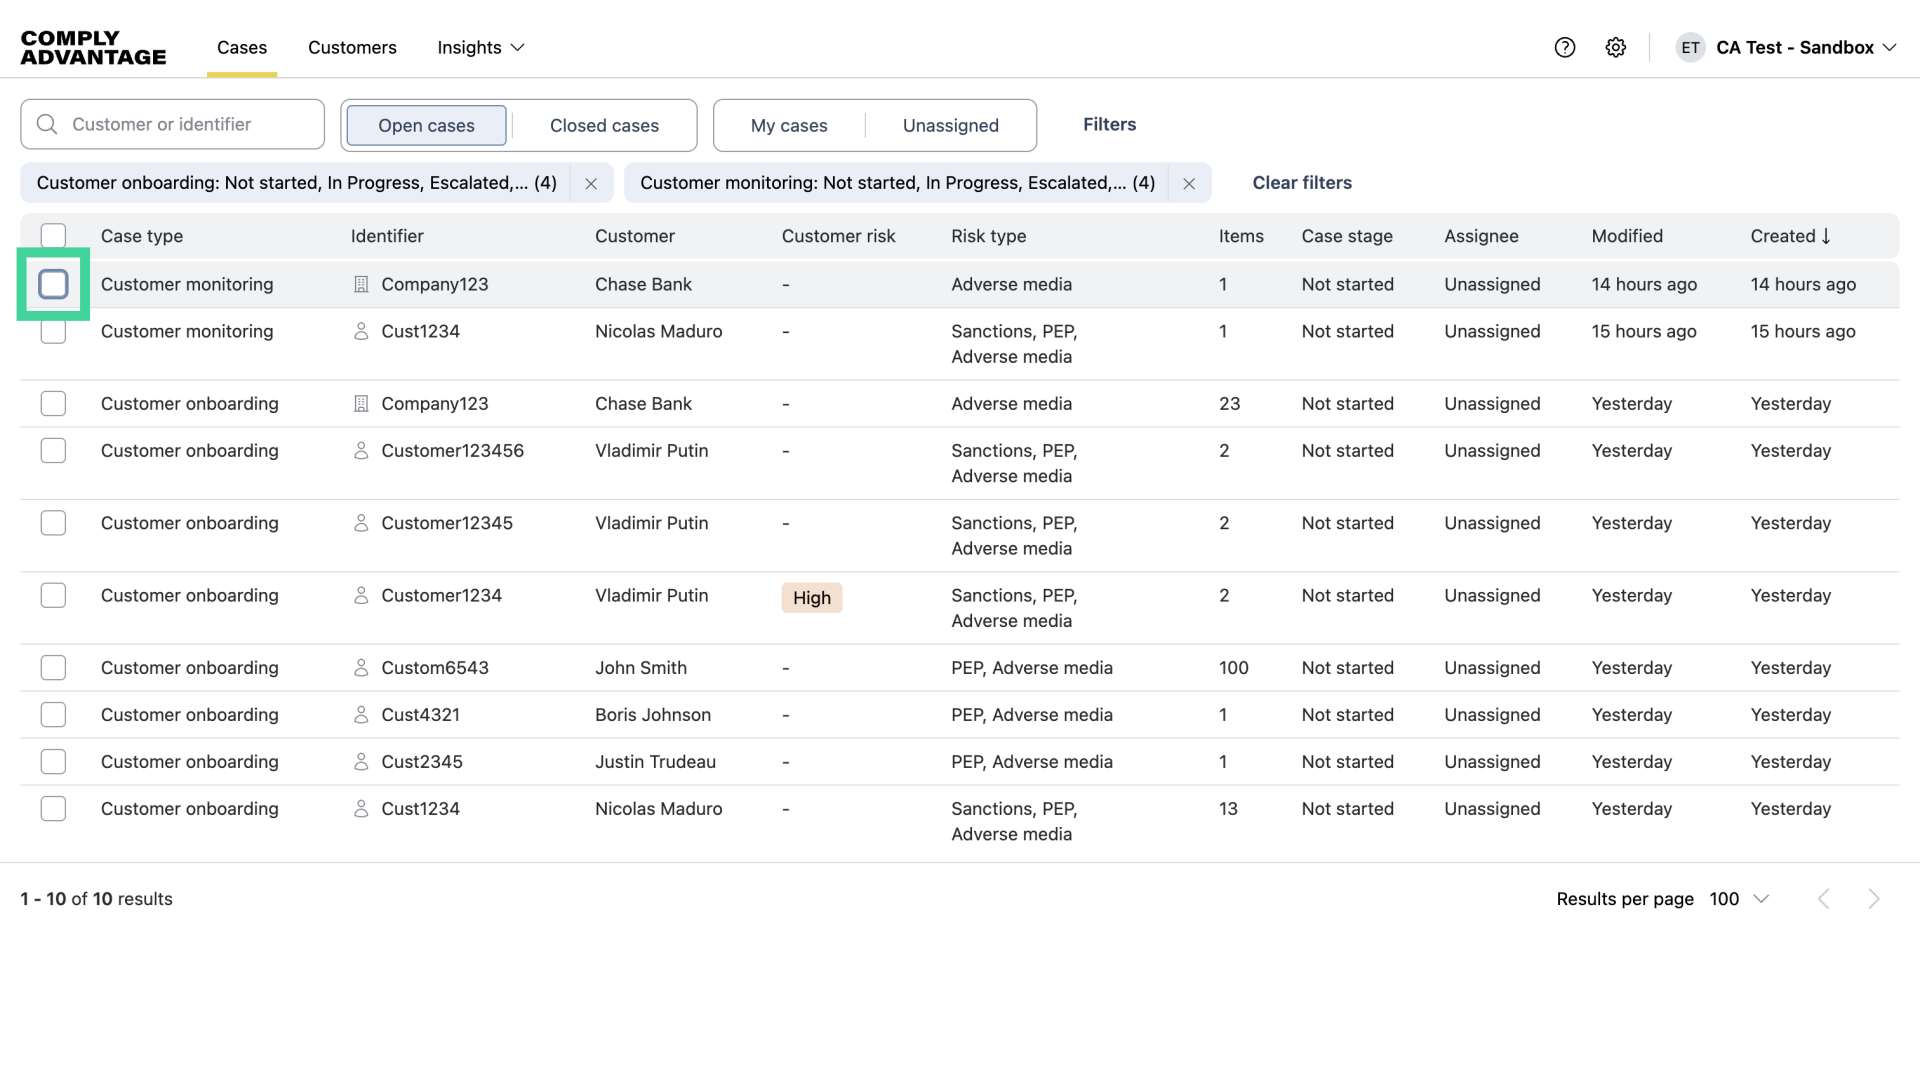
1. Select a case
First, select the desired case.
2. Click "Actions"
Click on the actions menu.
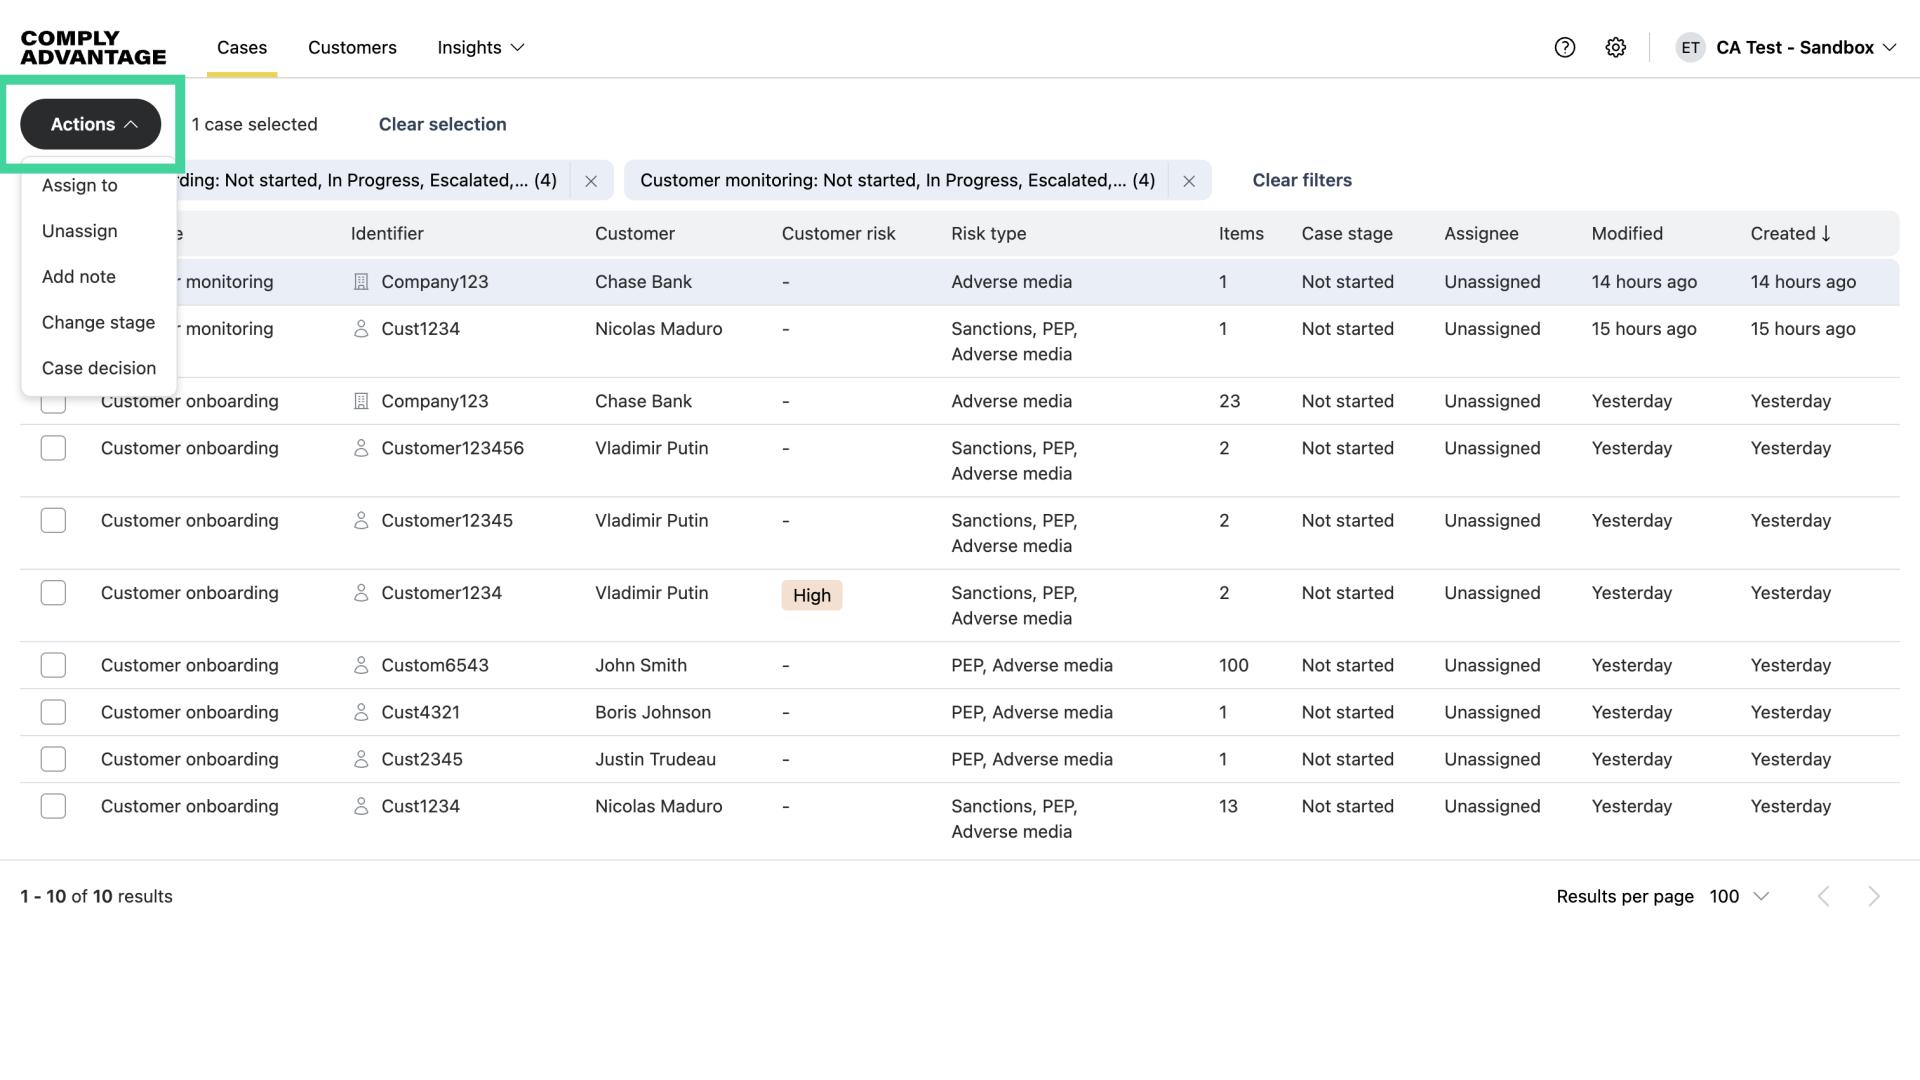
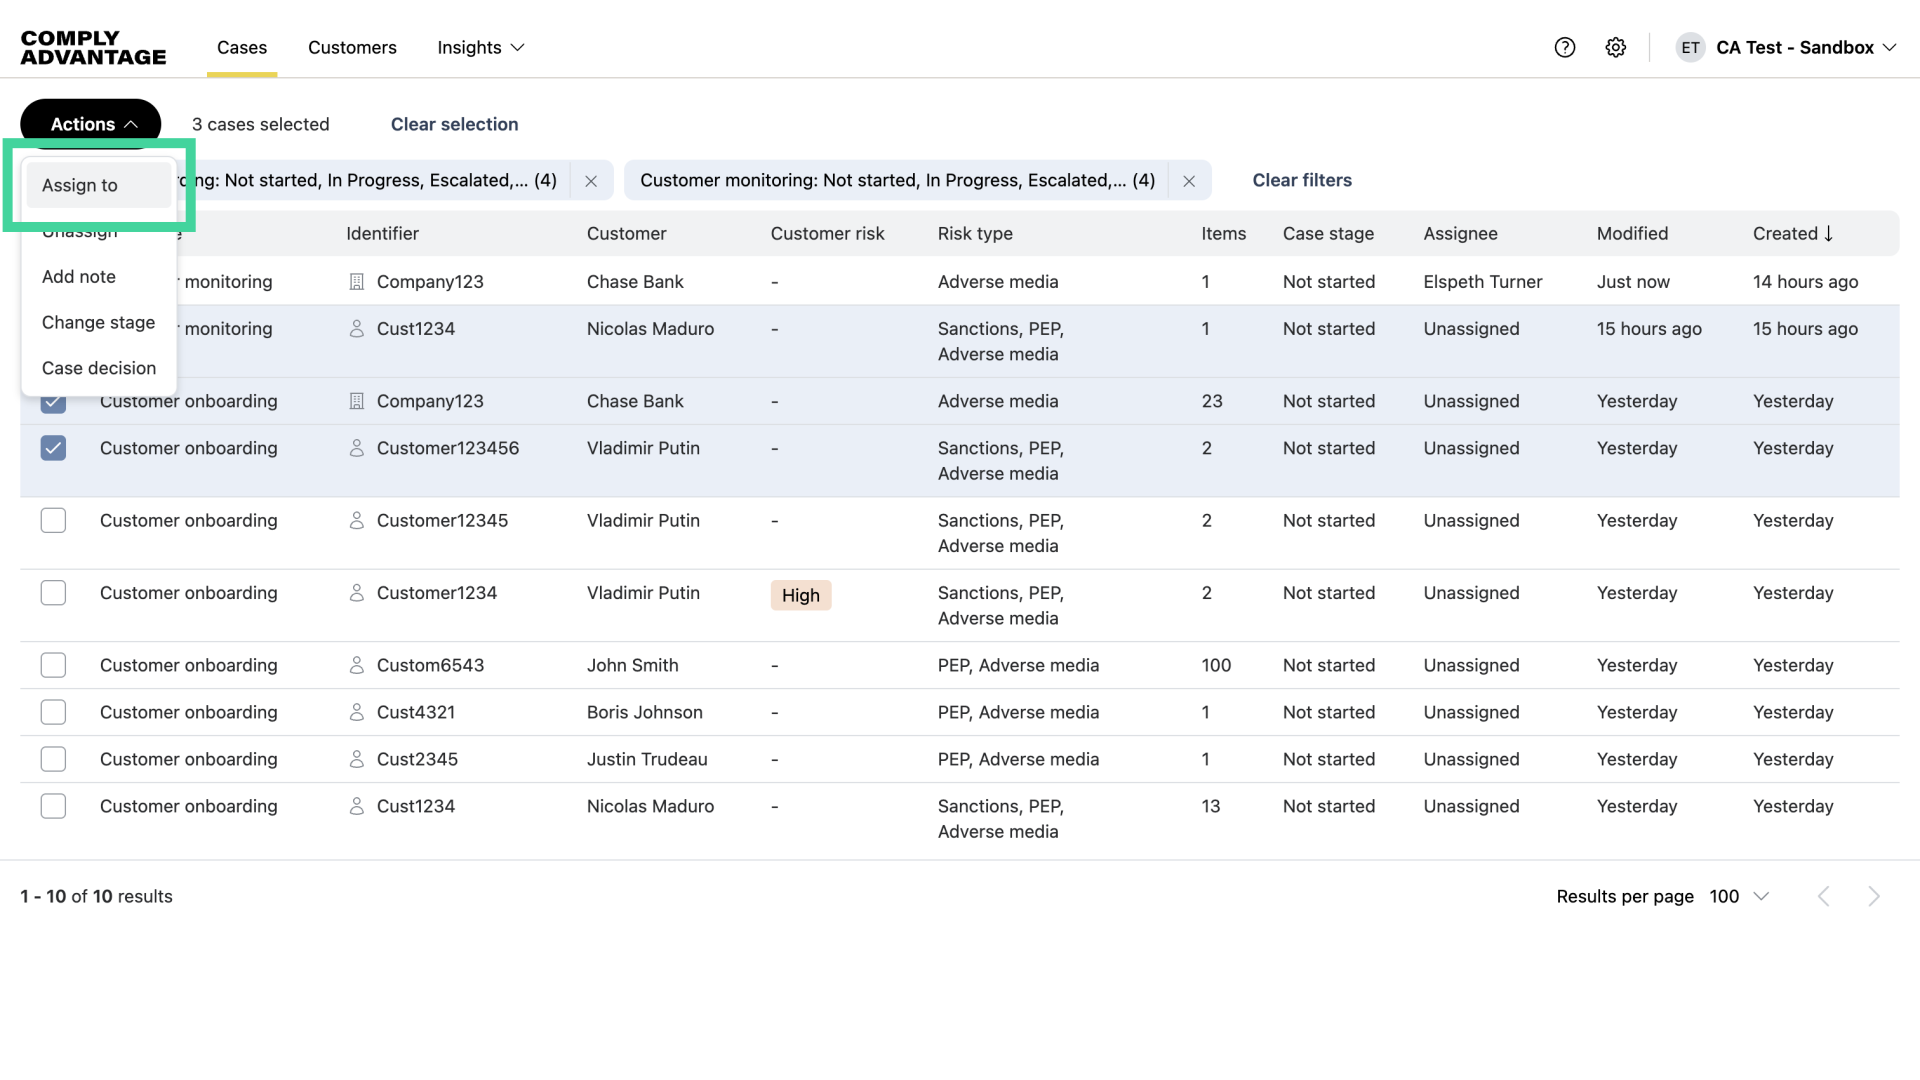
3. Click "Assign to"
Choose the "Assign to" option.

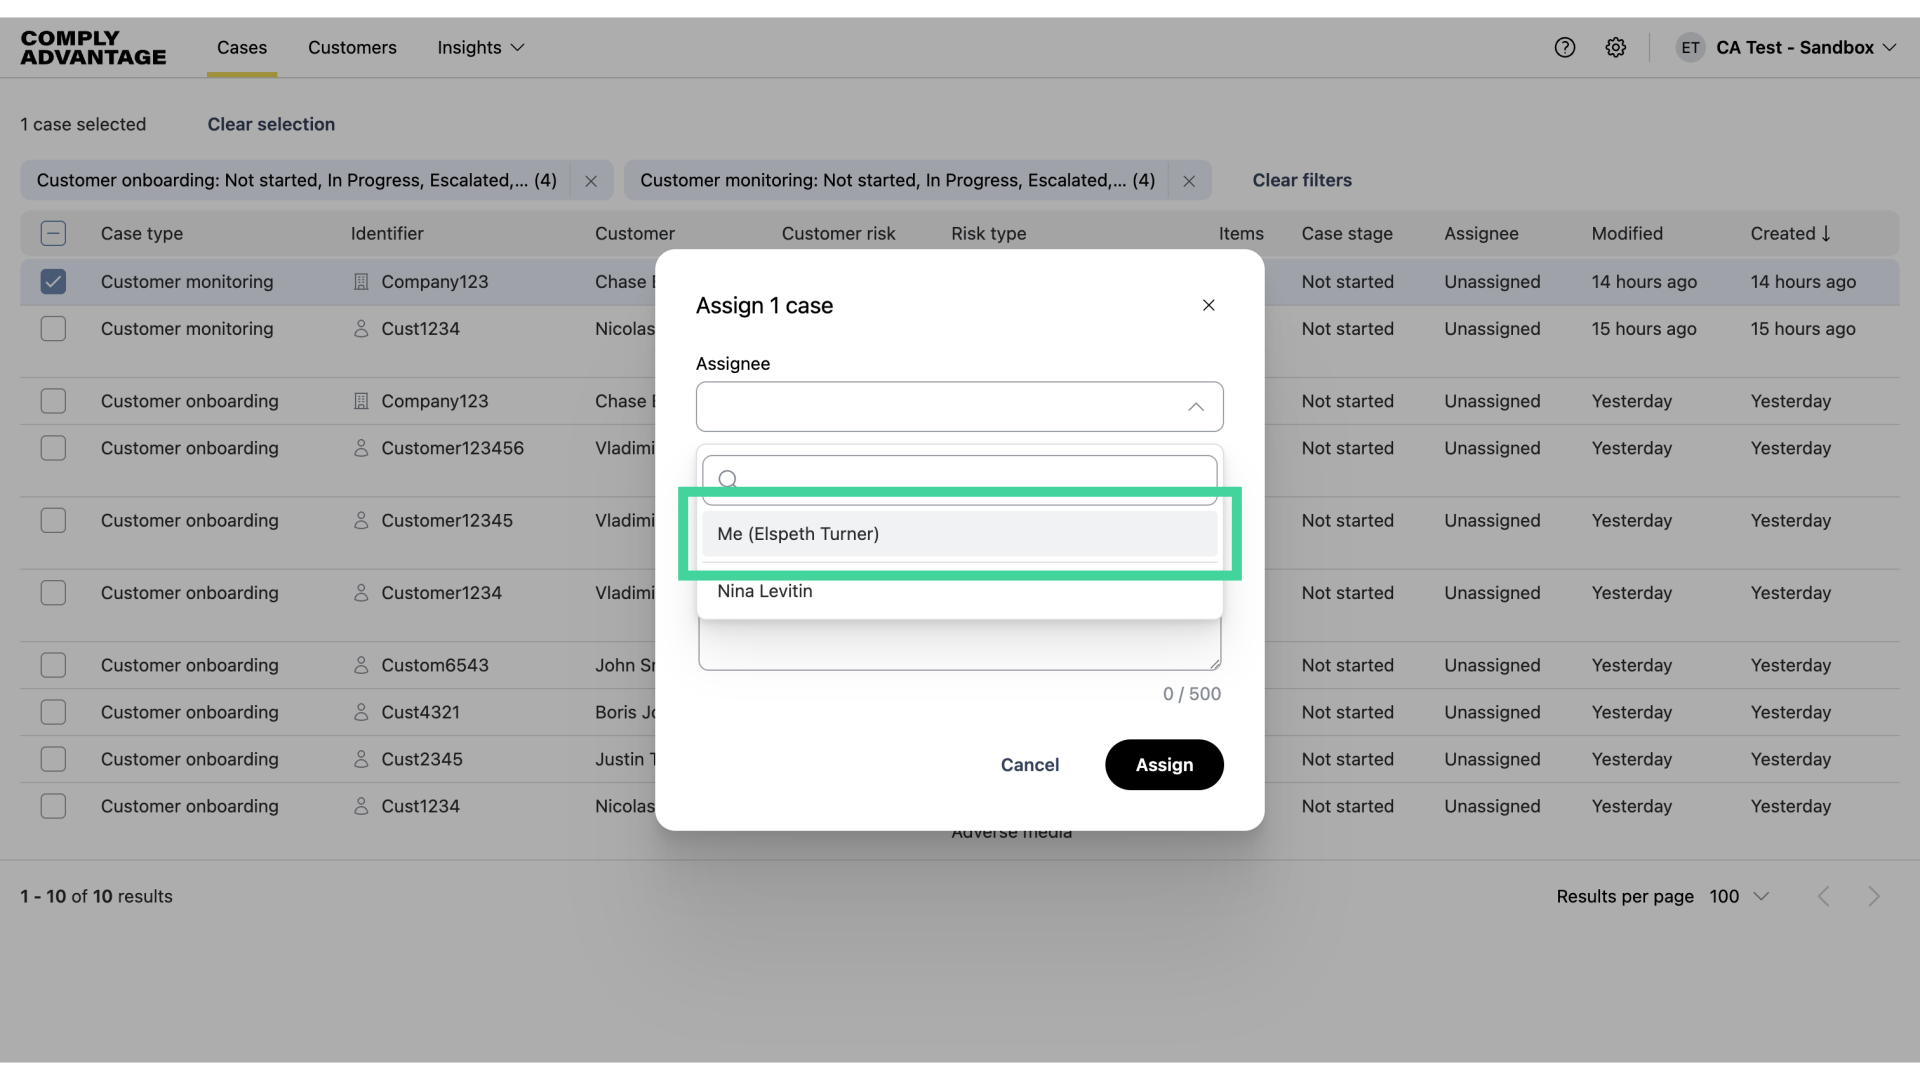
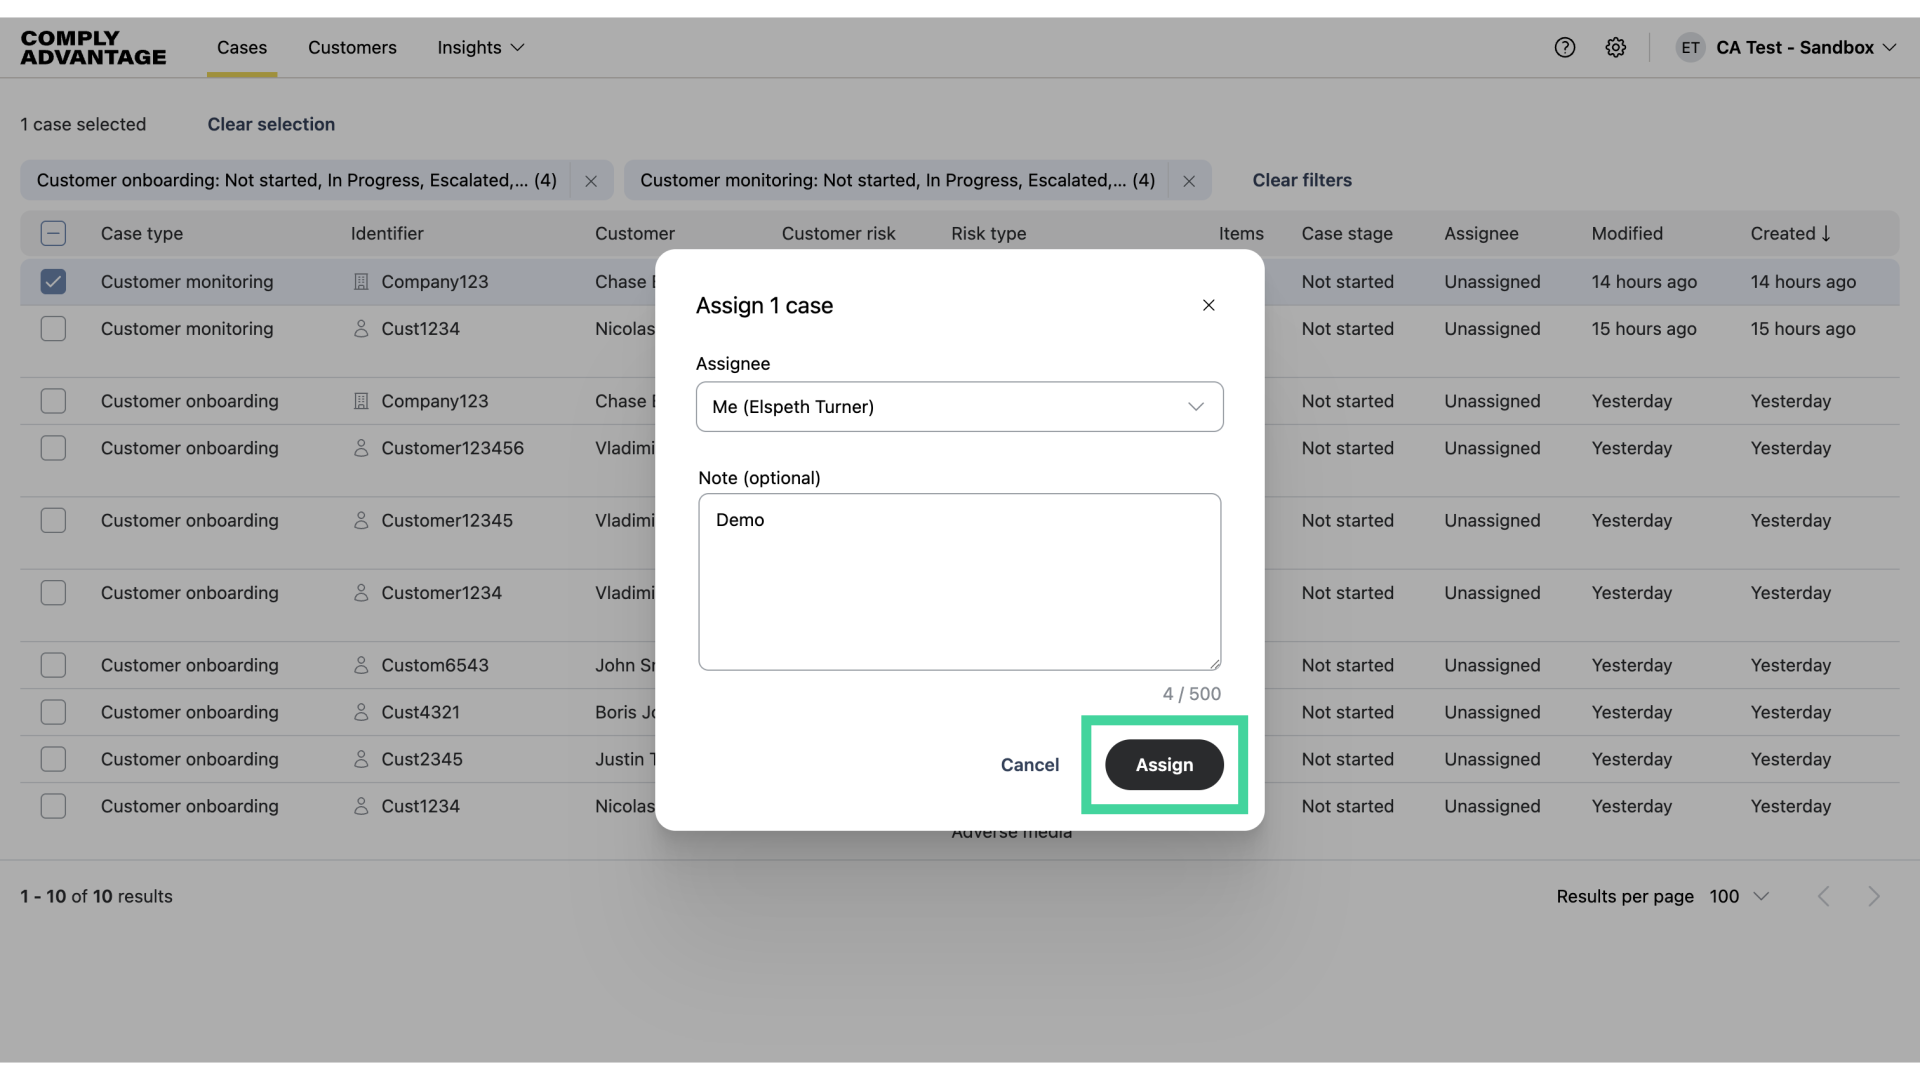
4. Choose a user
Click the dropdown and choose from the list of users.
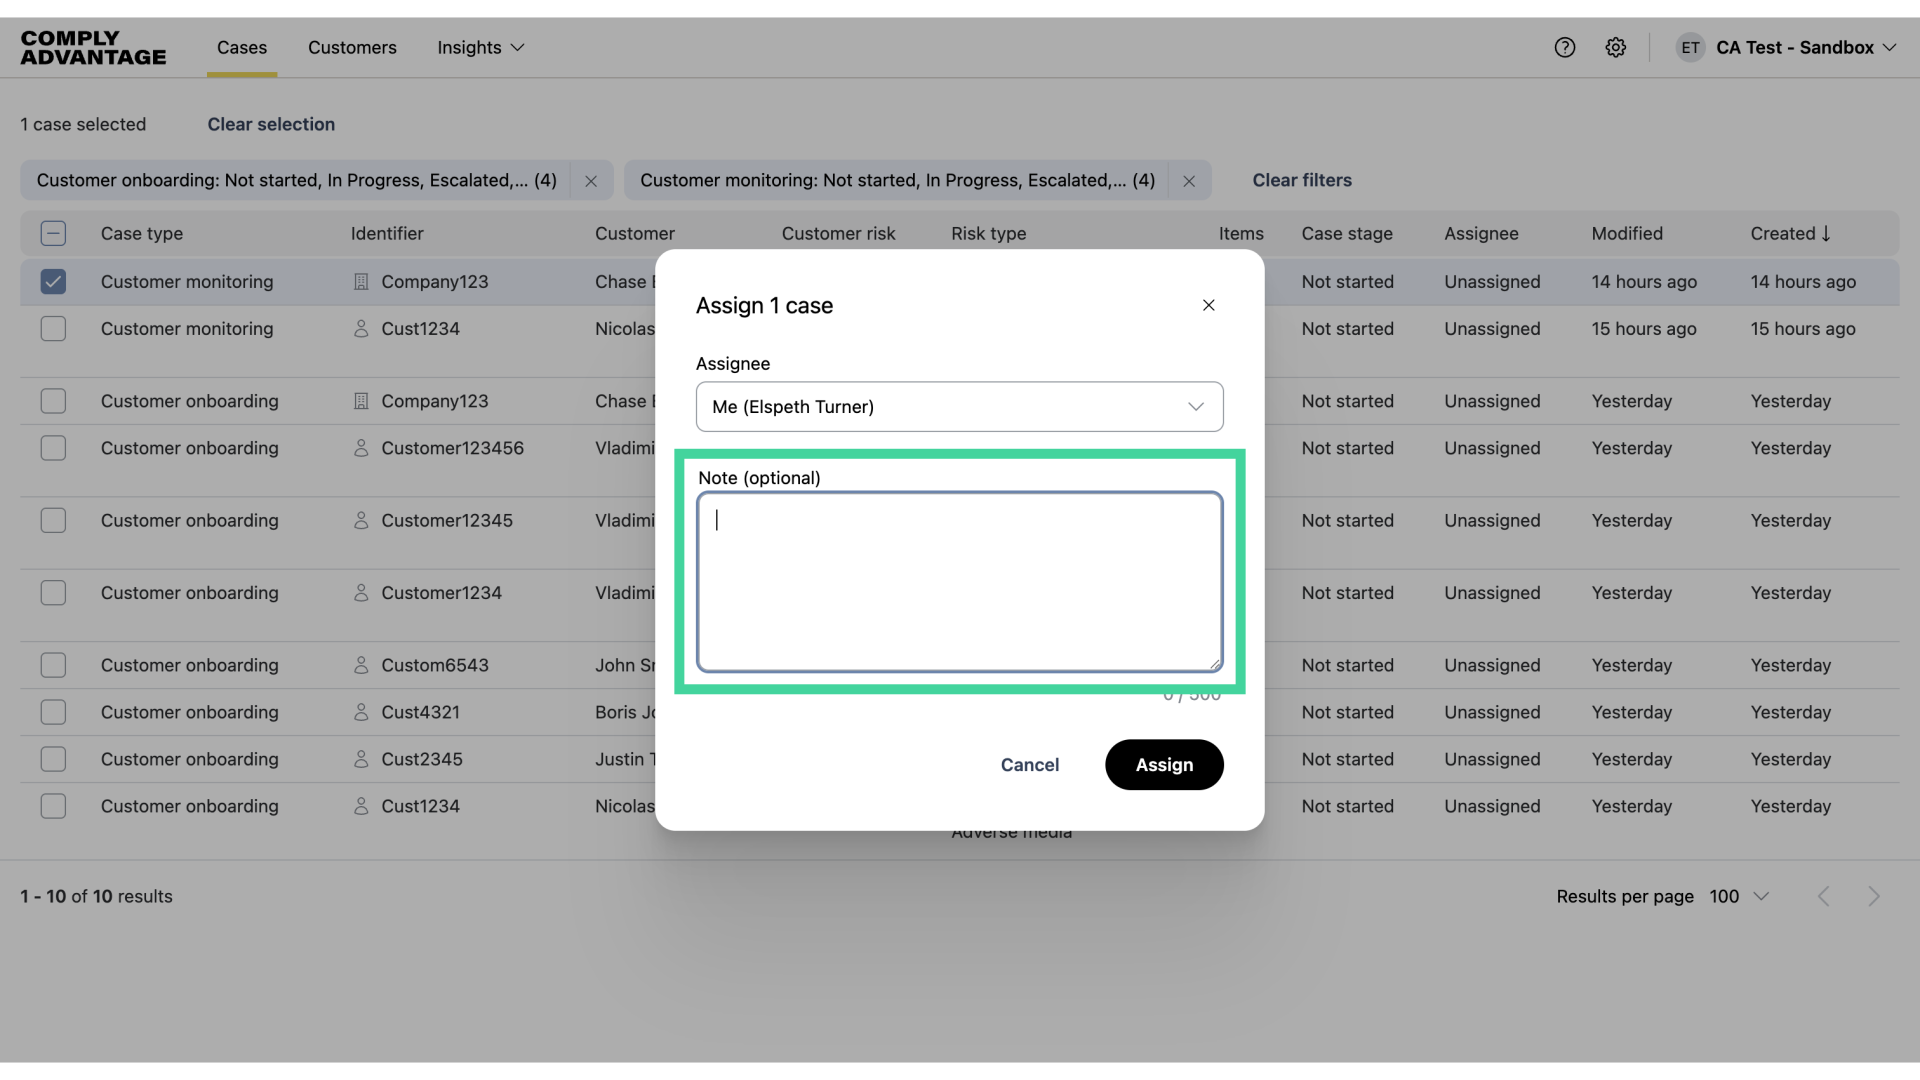
5. Add a note
Feel free to include a note here.
6. Click "Assign"
Finalize the action by clicking "Assign."
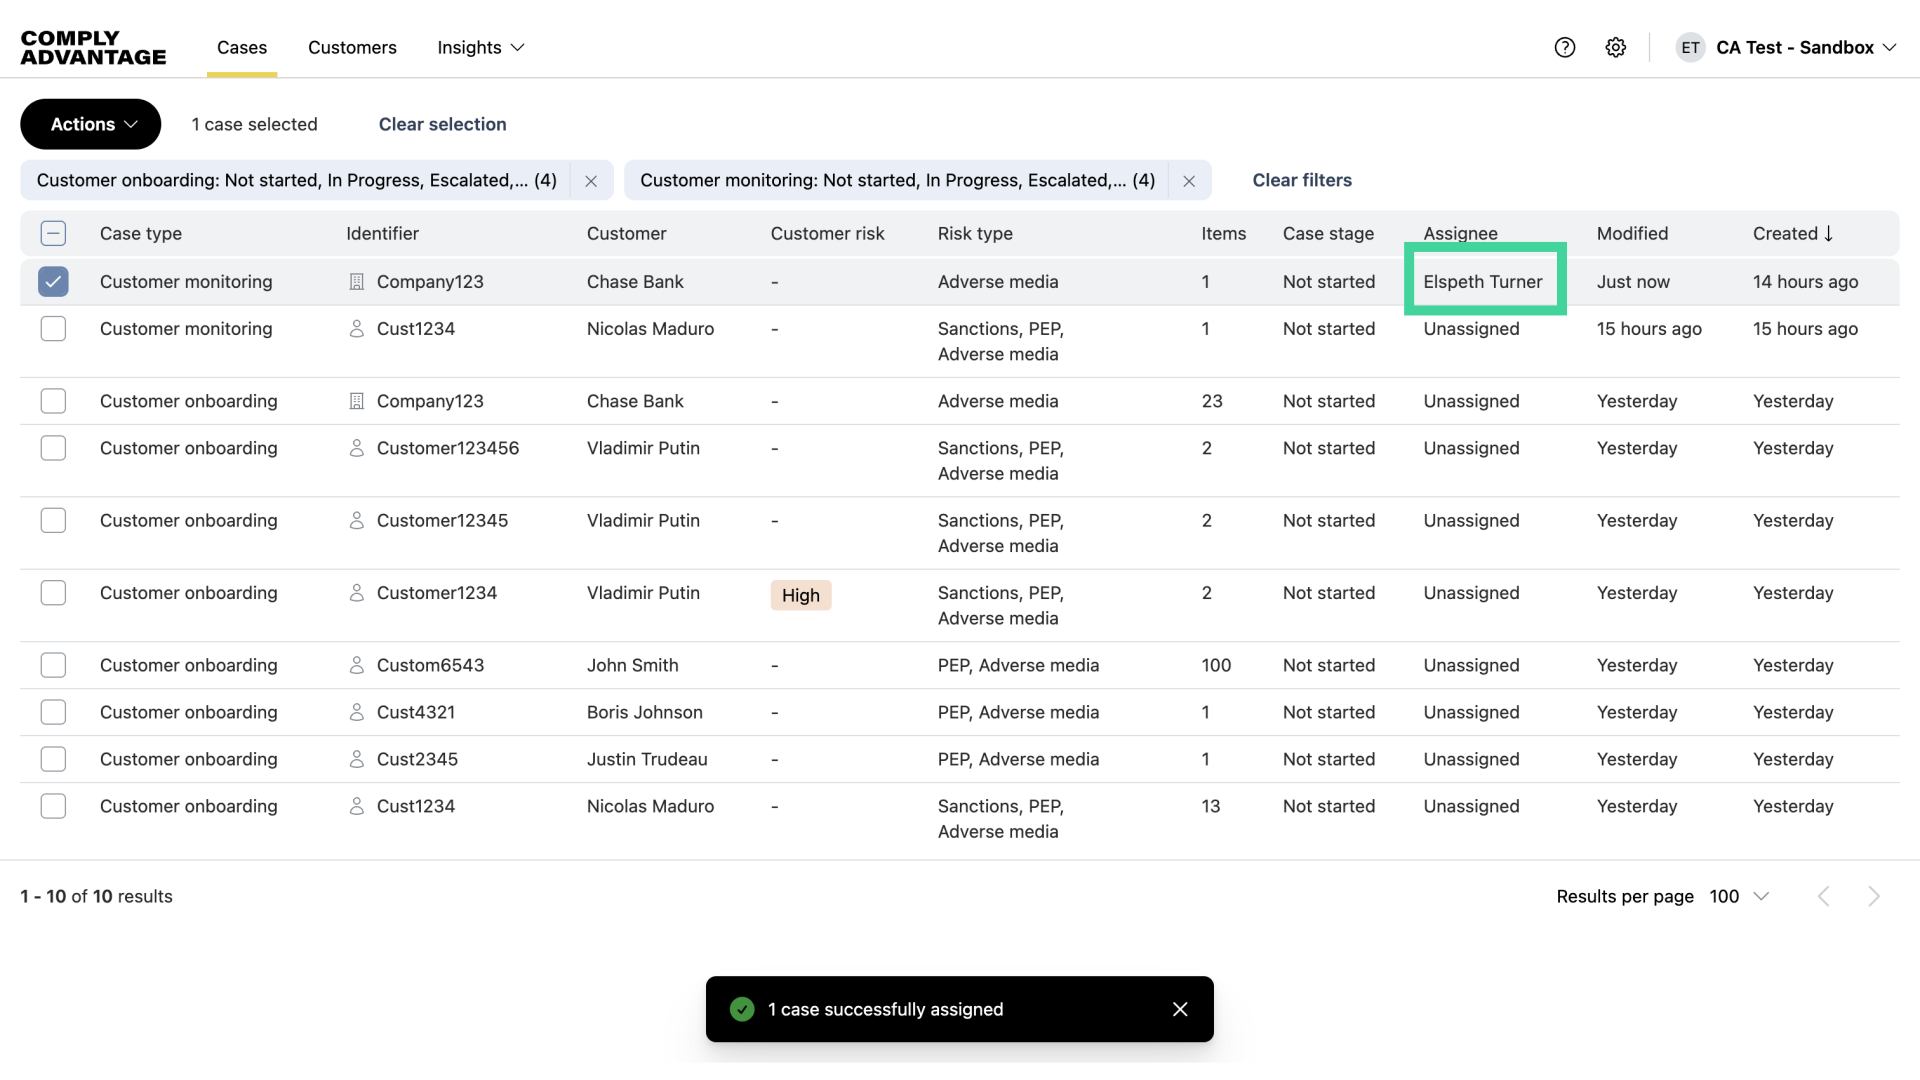
7. Case Assigned
Now this case has been assigned to a user.
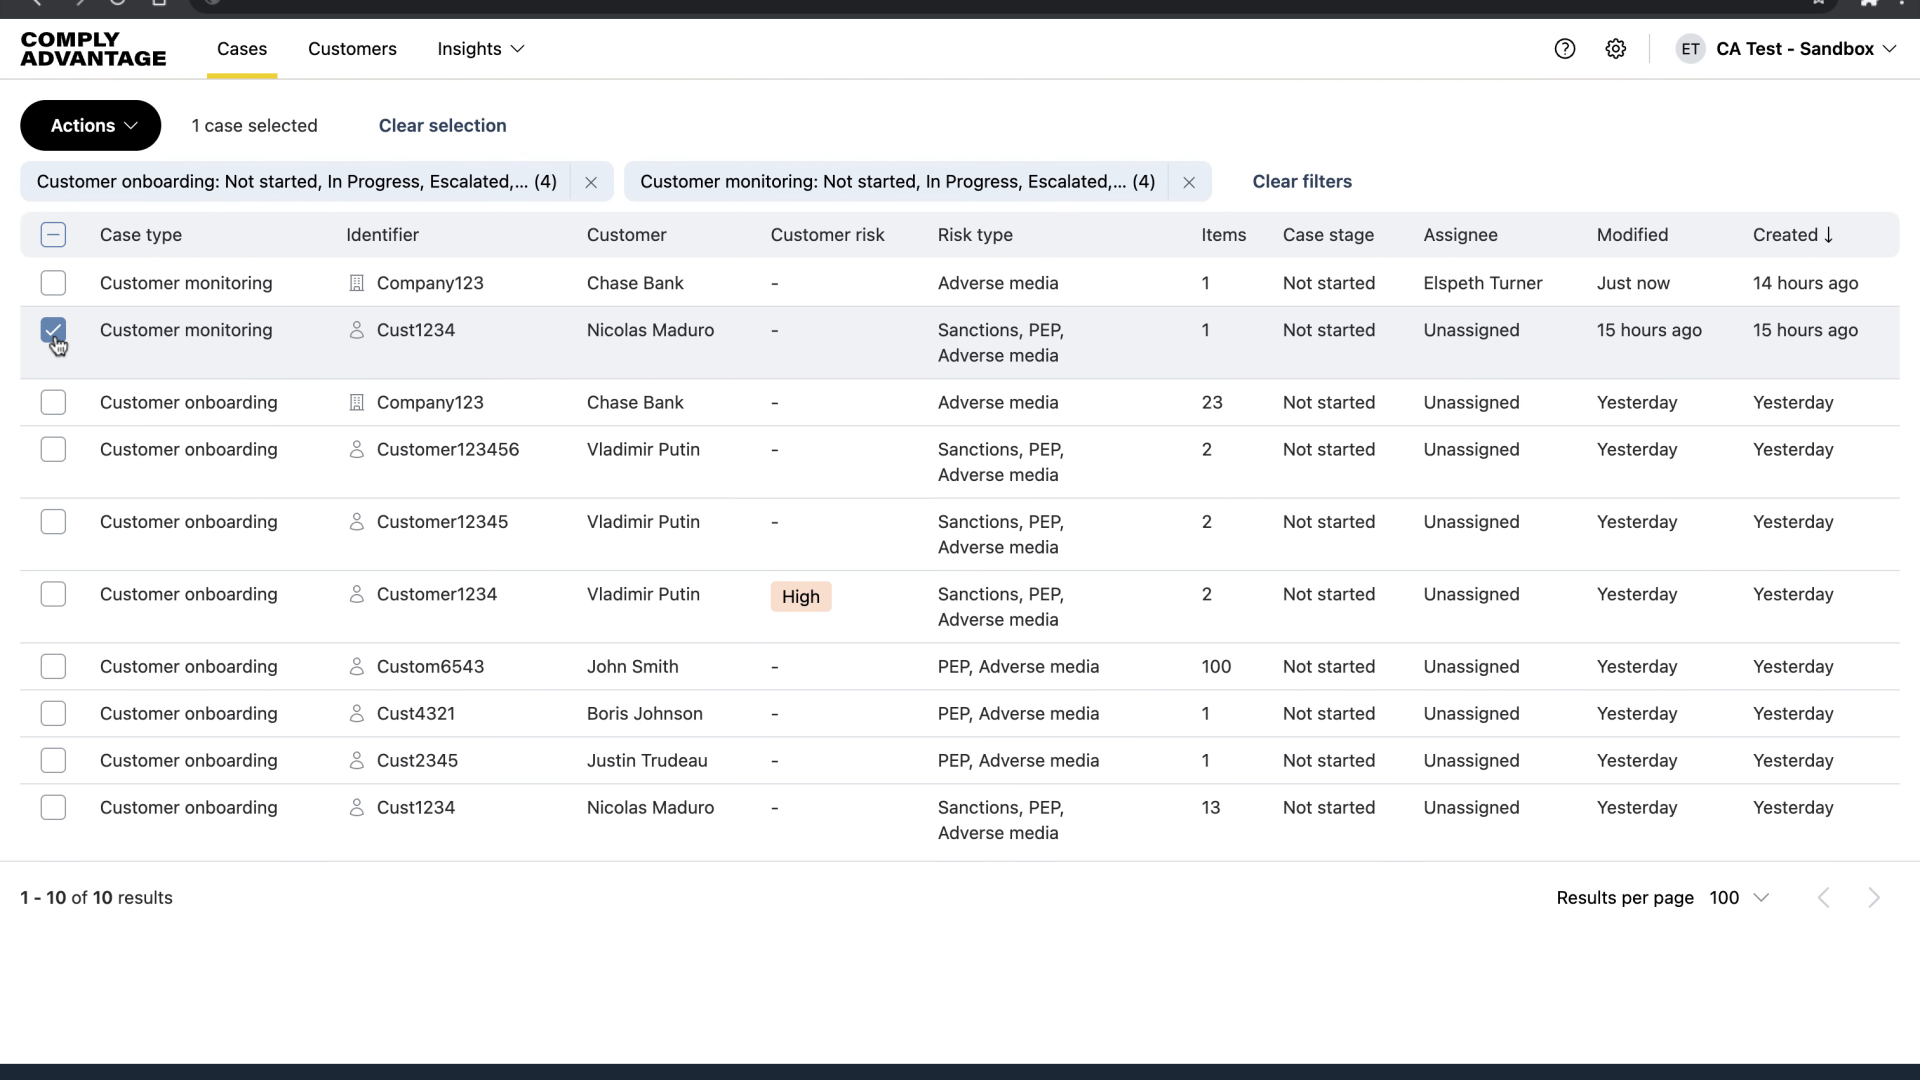
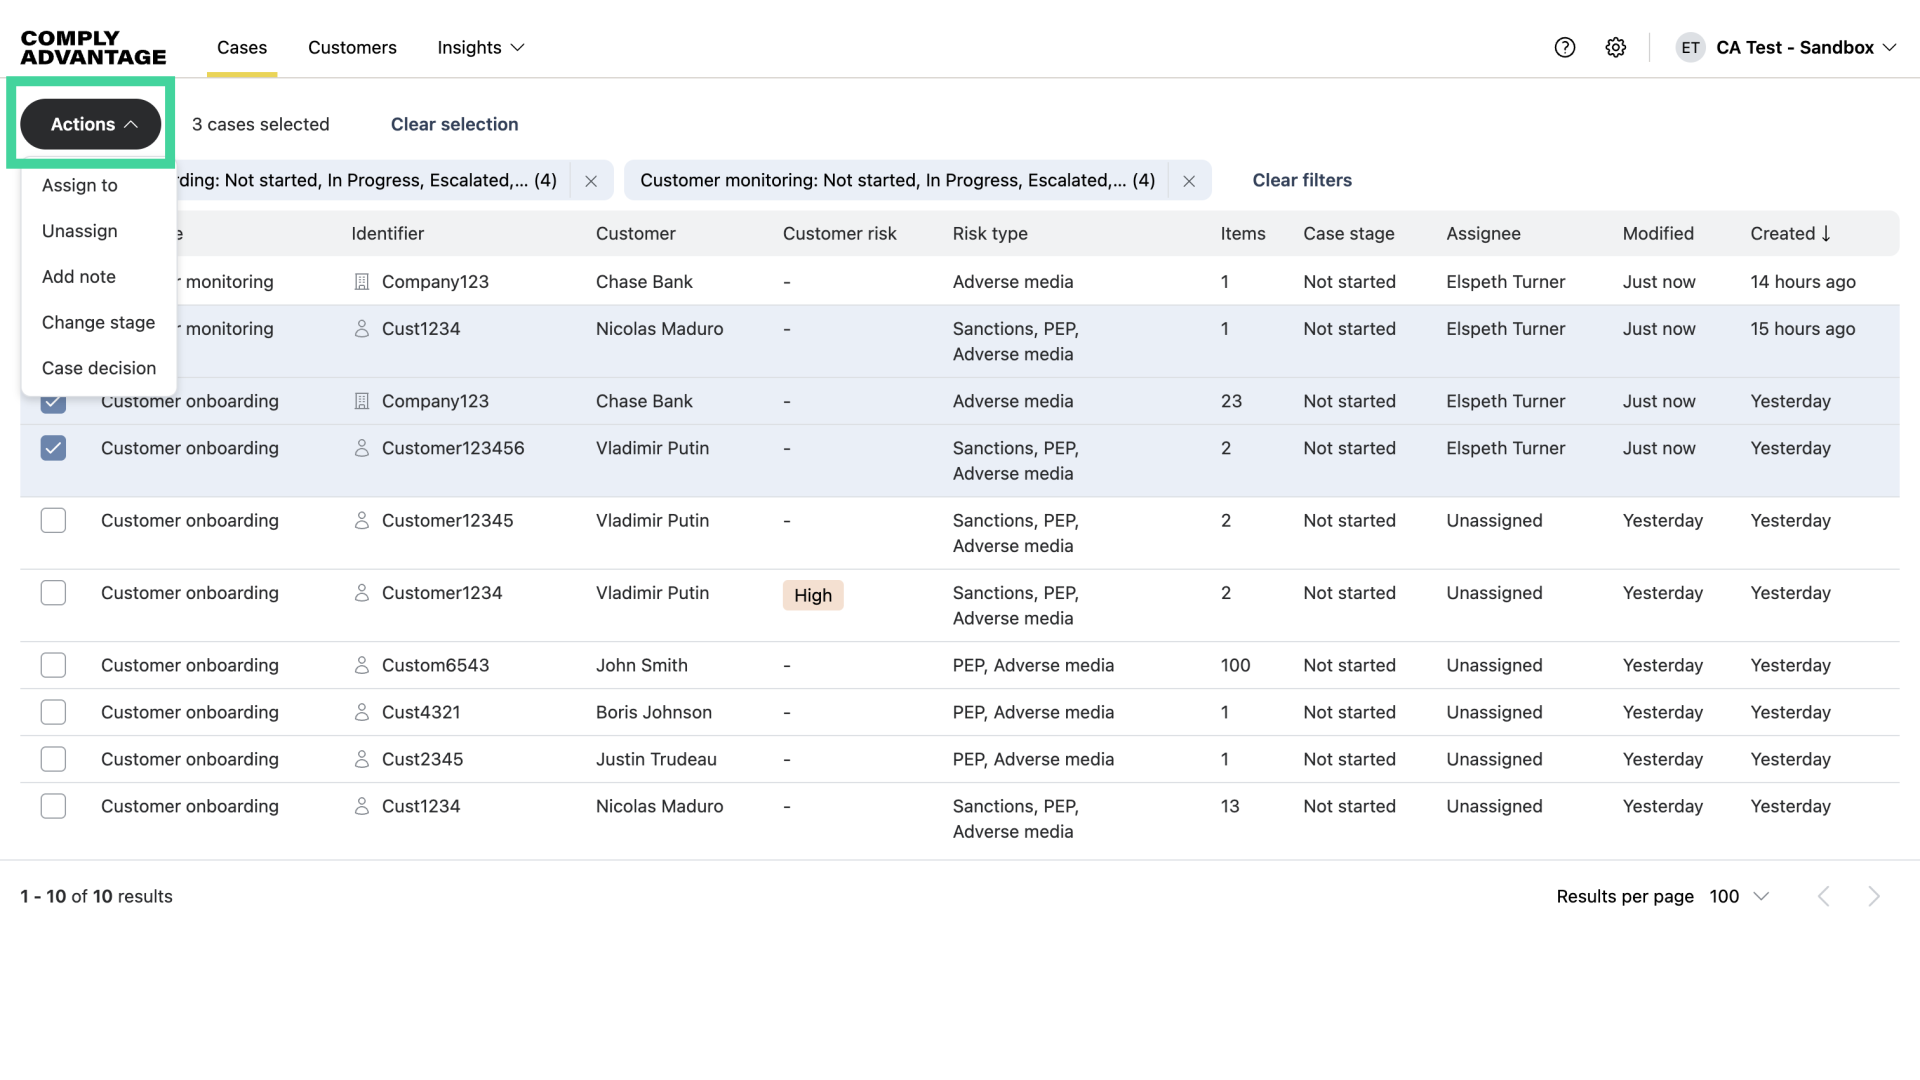
8. Assign multiple cases out
You can also assign multiple cases to a user at one time.
9. Select the relevant cases
Select the relevant cases.
10. Click "Actions"
Click the actions menu.

11. Click "Assign to"
Choose the "Assign to" option and follow the same steps as before.
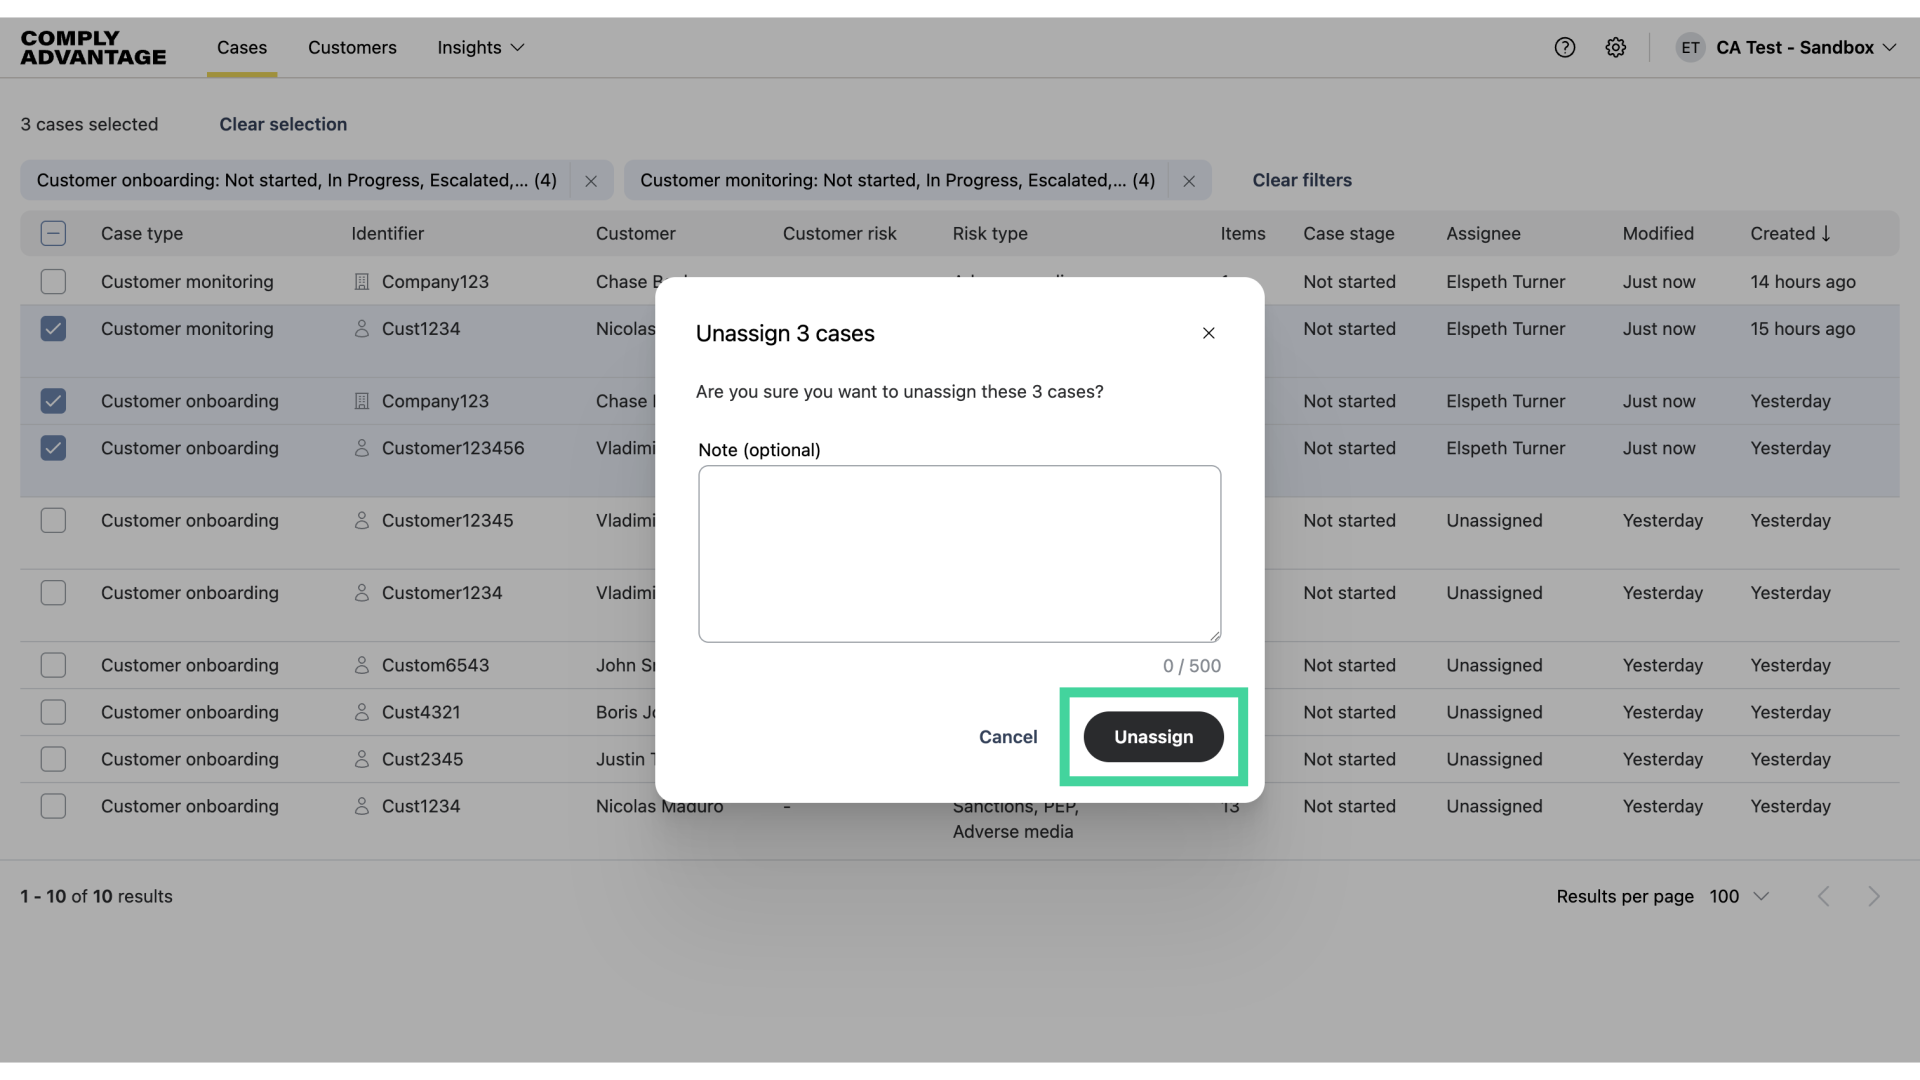
12. Unassign cases
You can also unassign cases.

13. Click "Actions"
To do so, click on the "Actions" dropdown menu.
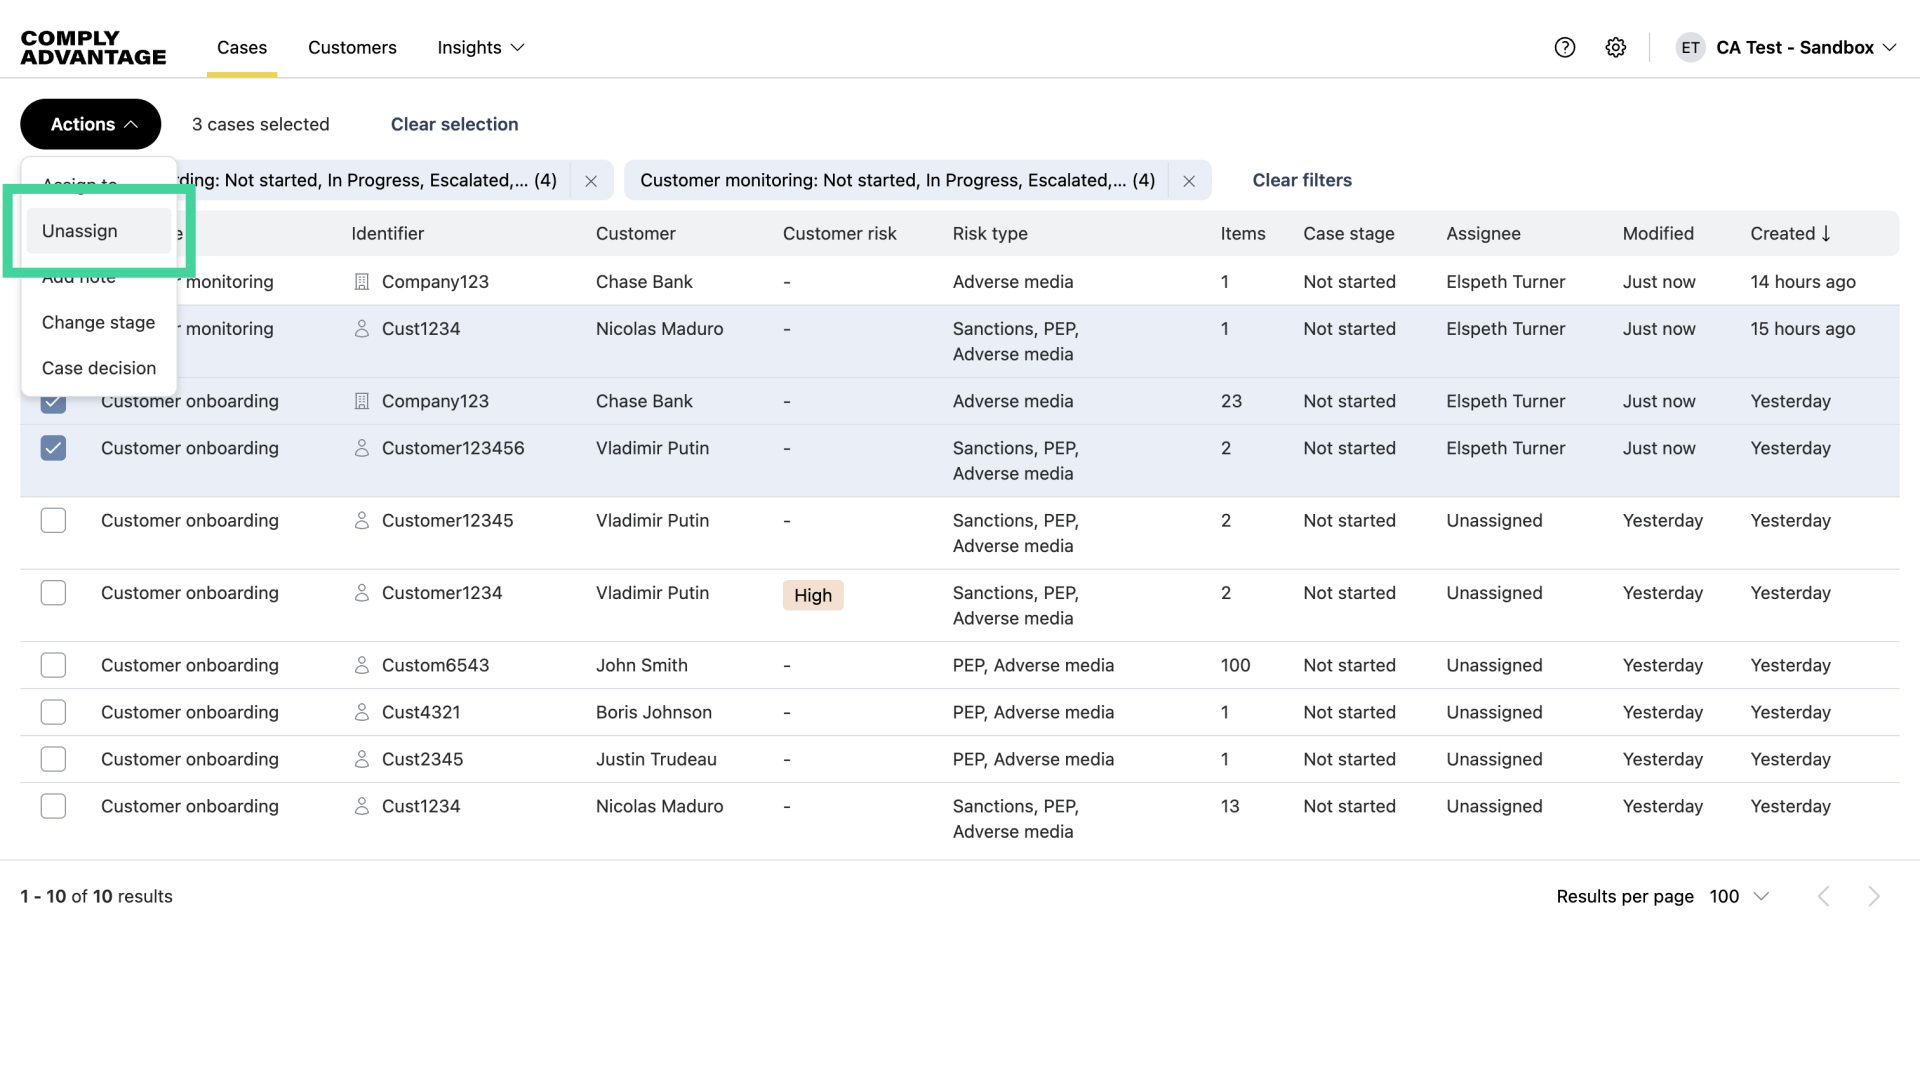
14. Click "Unassign"
Select "Unassign."
15. Add a note
Feel free to include a note.
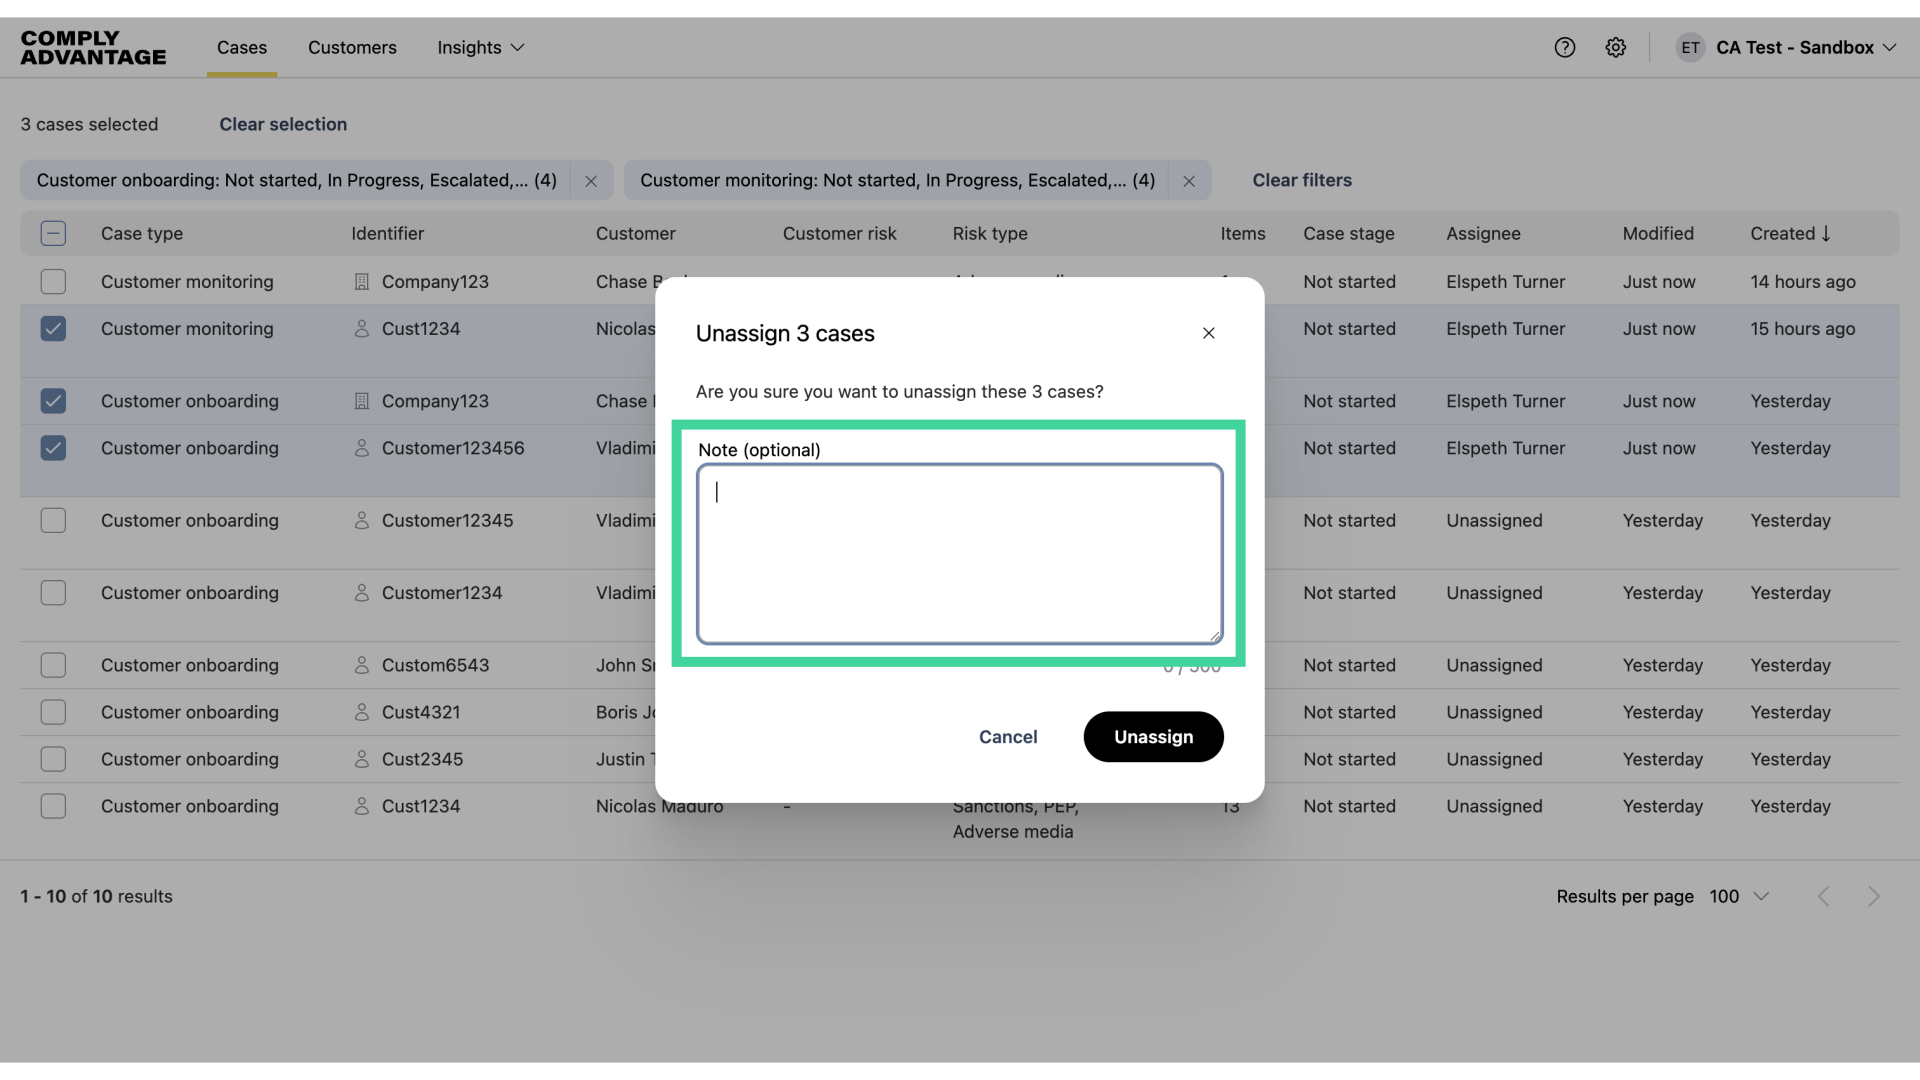
16. Click "Unassign"
Confirm the action by selecting "Unassign."
We hope this guide helped you learn how to assign and unassign cases in Mesh.