Assigning a case
Last updated: April 7, 2026
You assign a case to a user to show that it is their case to investigate.
You can assign a case from the case view page or the case list page.
Assigning a case from the case view page
Click Unassigned in the top right of the case details page.
Search for the user to assign the case to or select them from the menu.
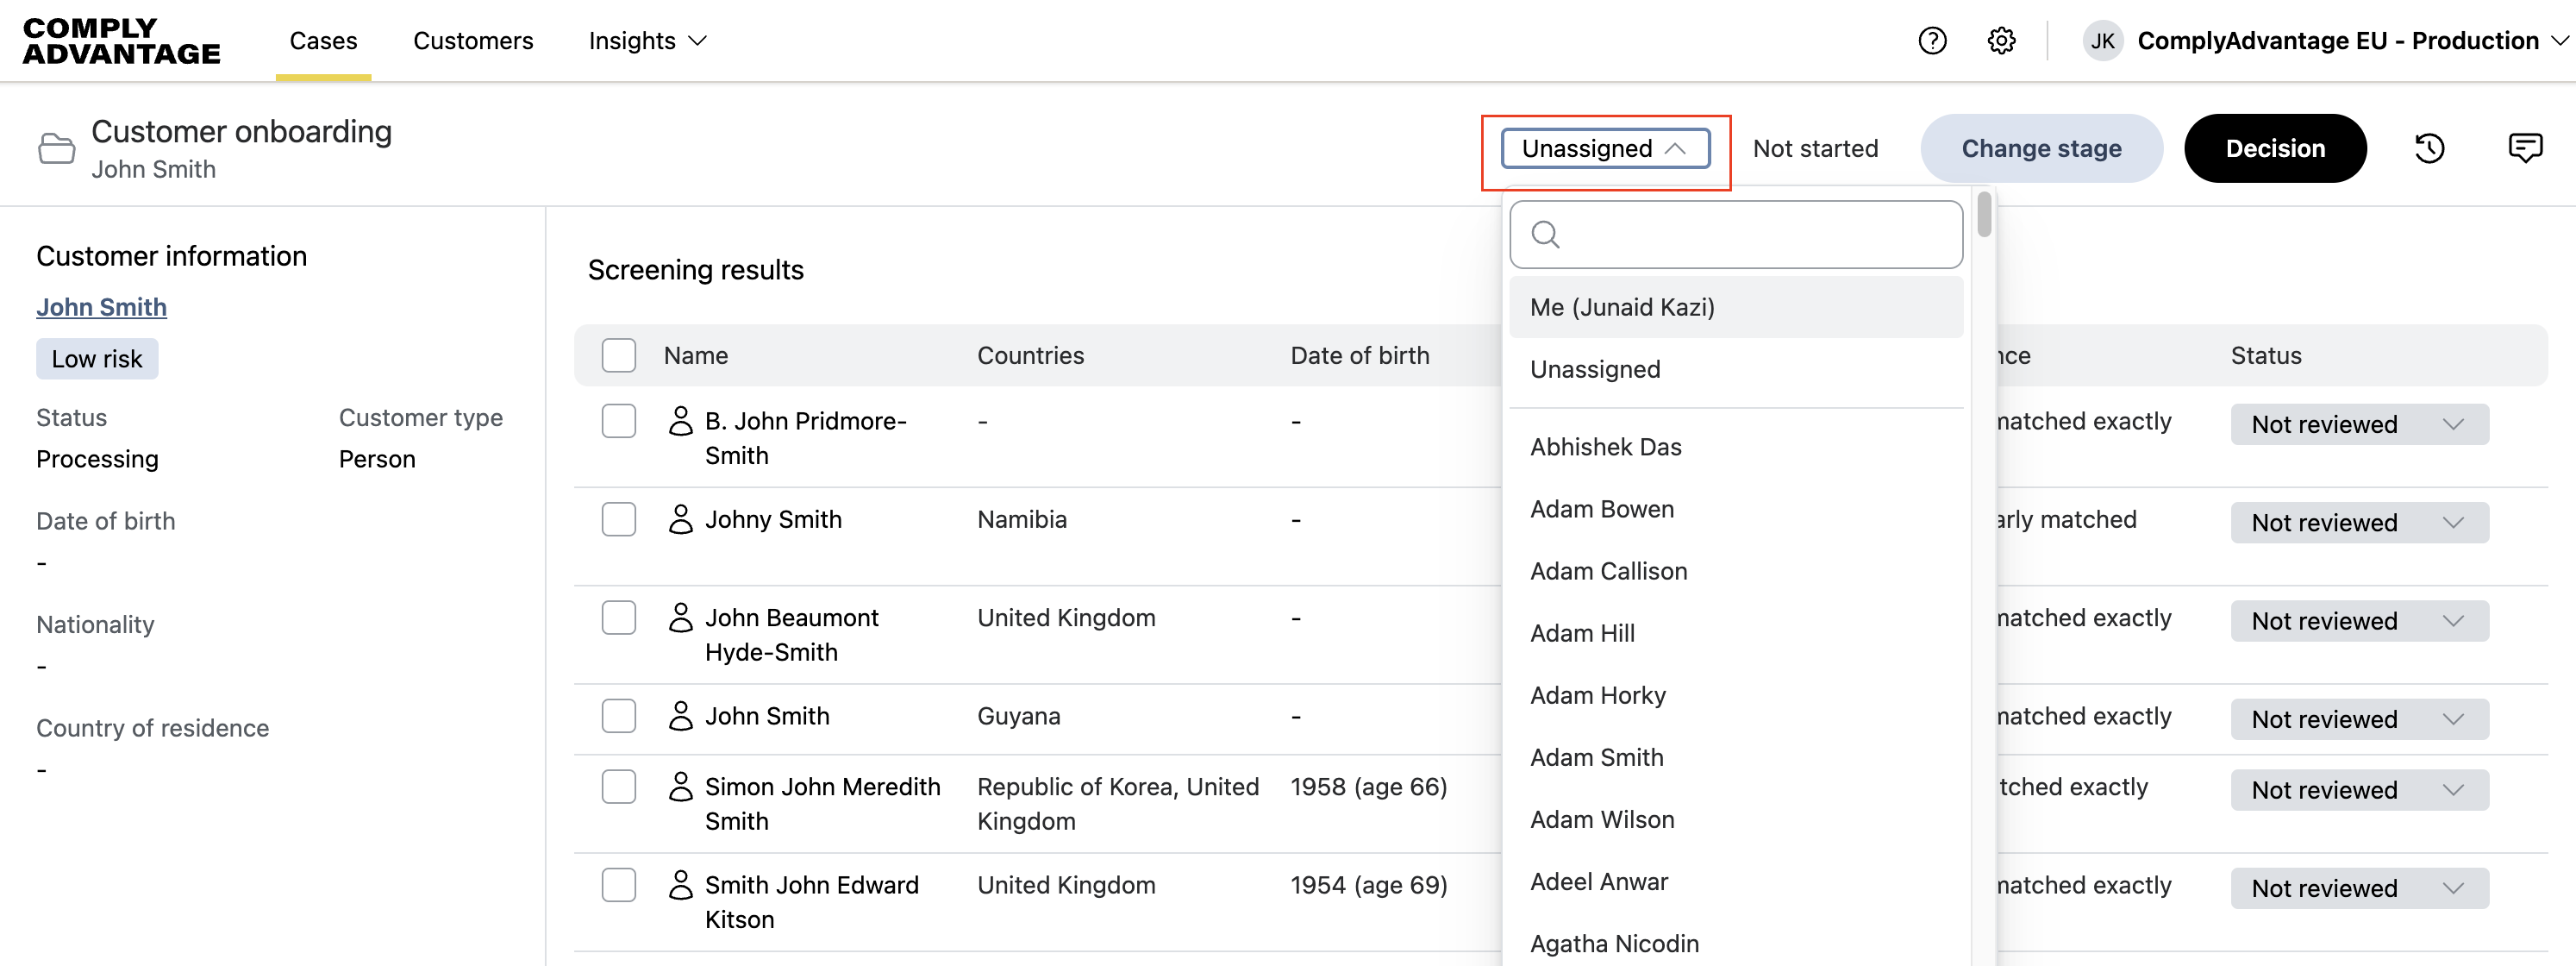
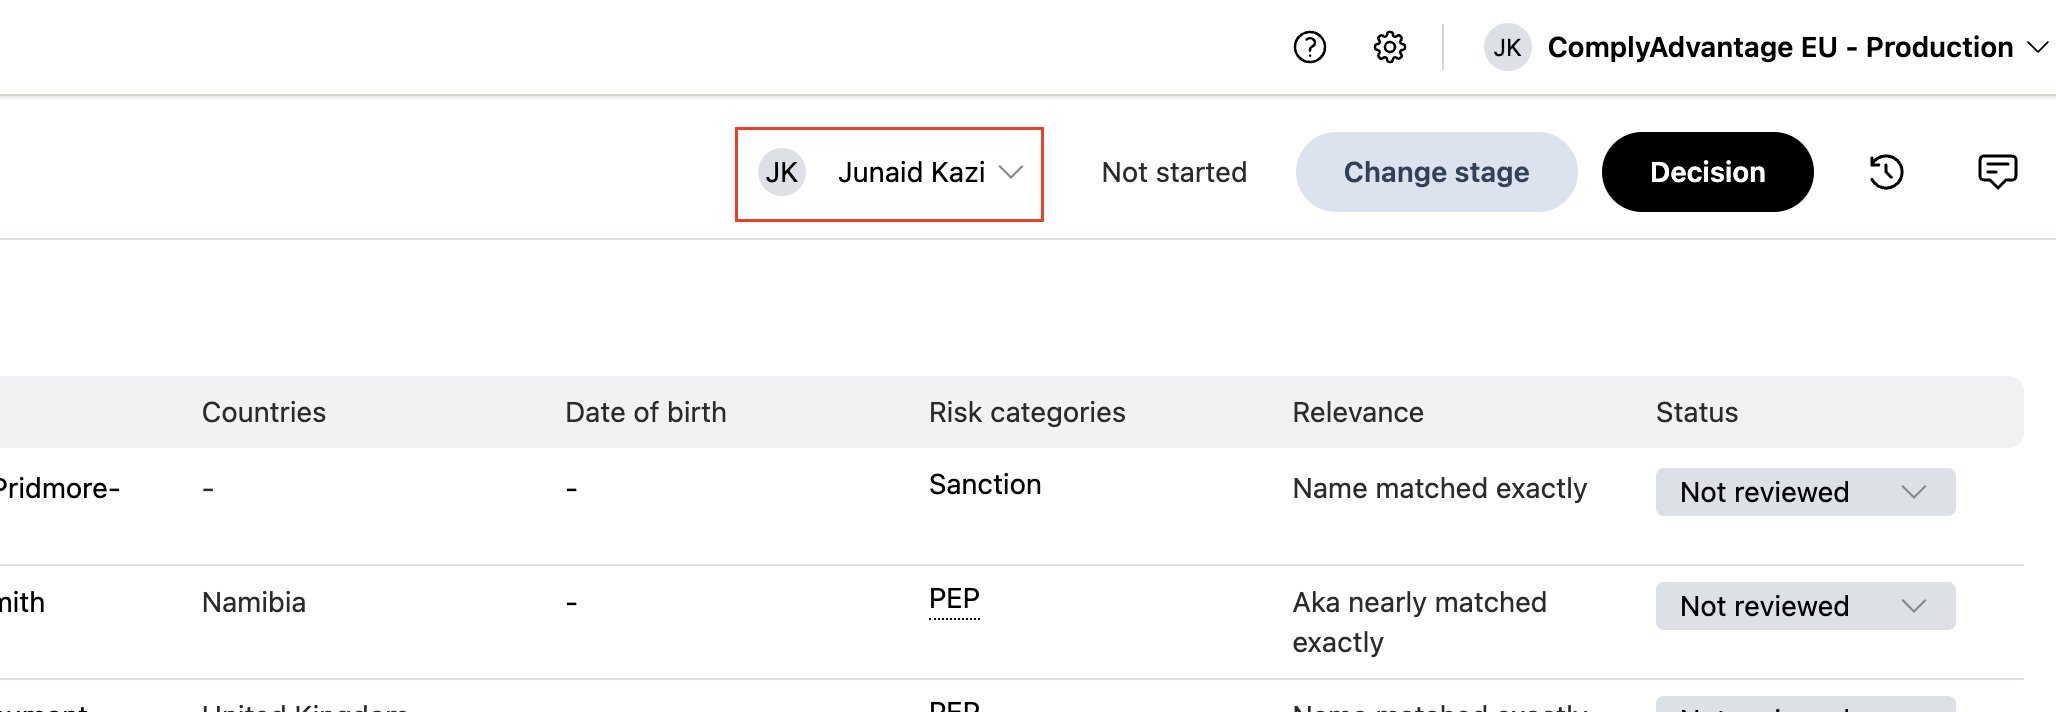
The case is then assigned to that user and their name appears in place of Unassigned in the case header.
Assigning a case from the case list page
Go to the case list page by clicking Cases in the top left.
Find the case to be assigned using the search box or filters. See our article on searching for a case.
Select the checkbox beside the case. You can select multiple checkboxes to assign several cases at the same time.
When one or more cases are selected the Actions button appears in the top left. Click it.
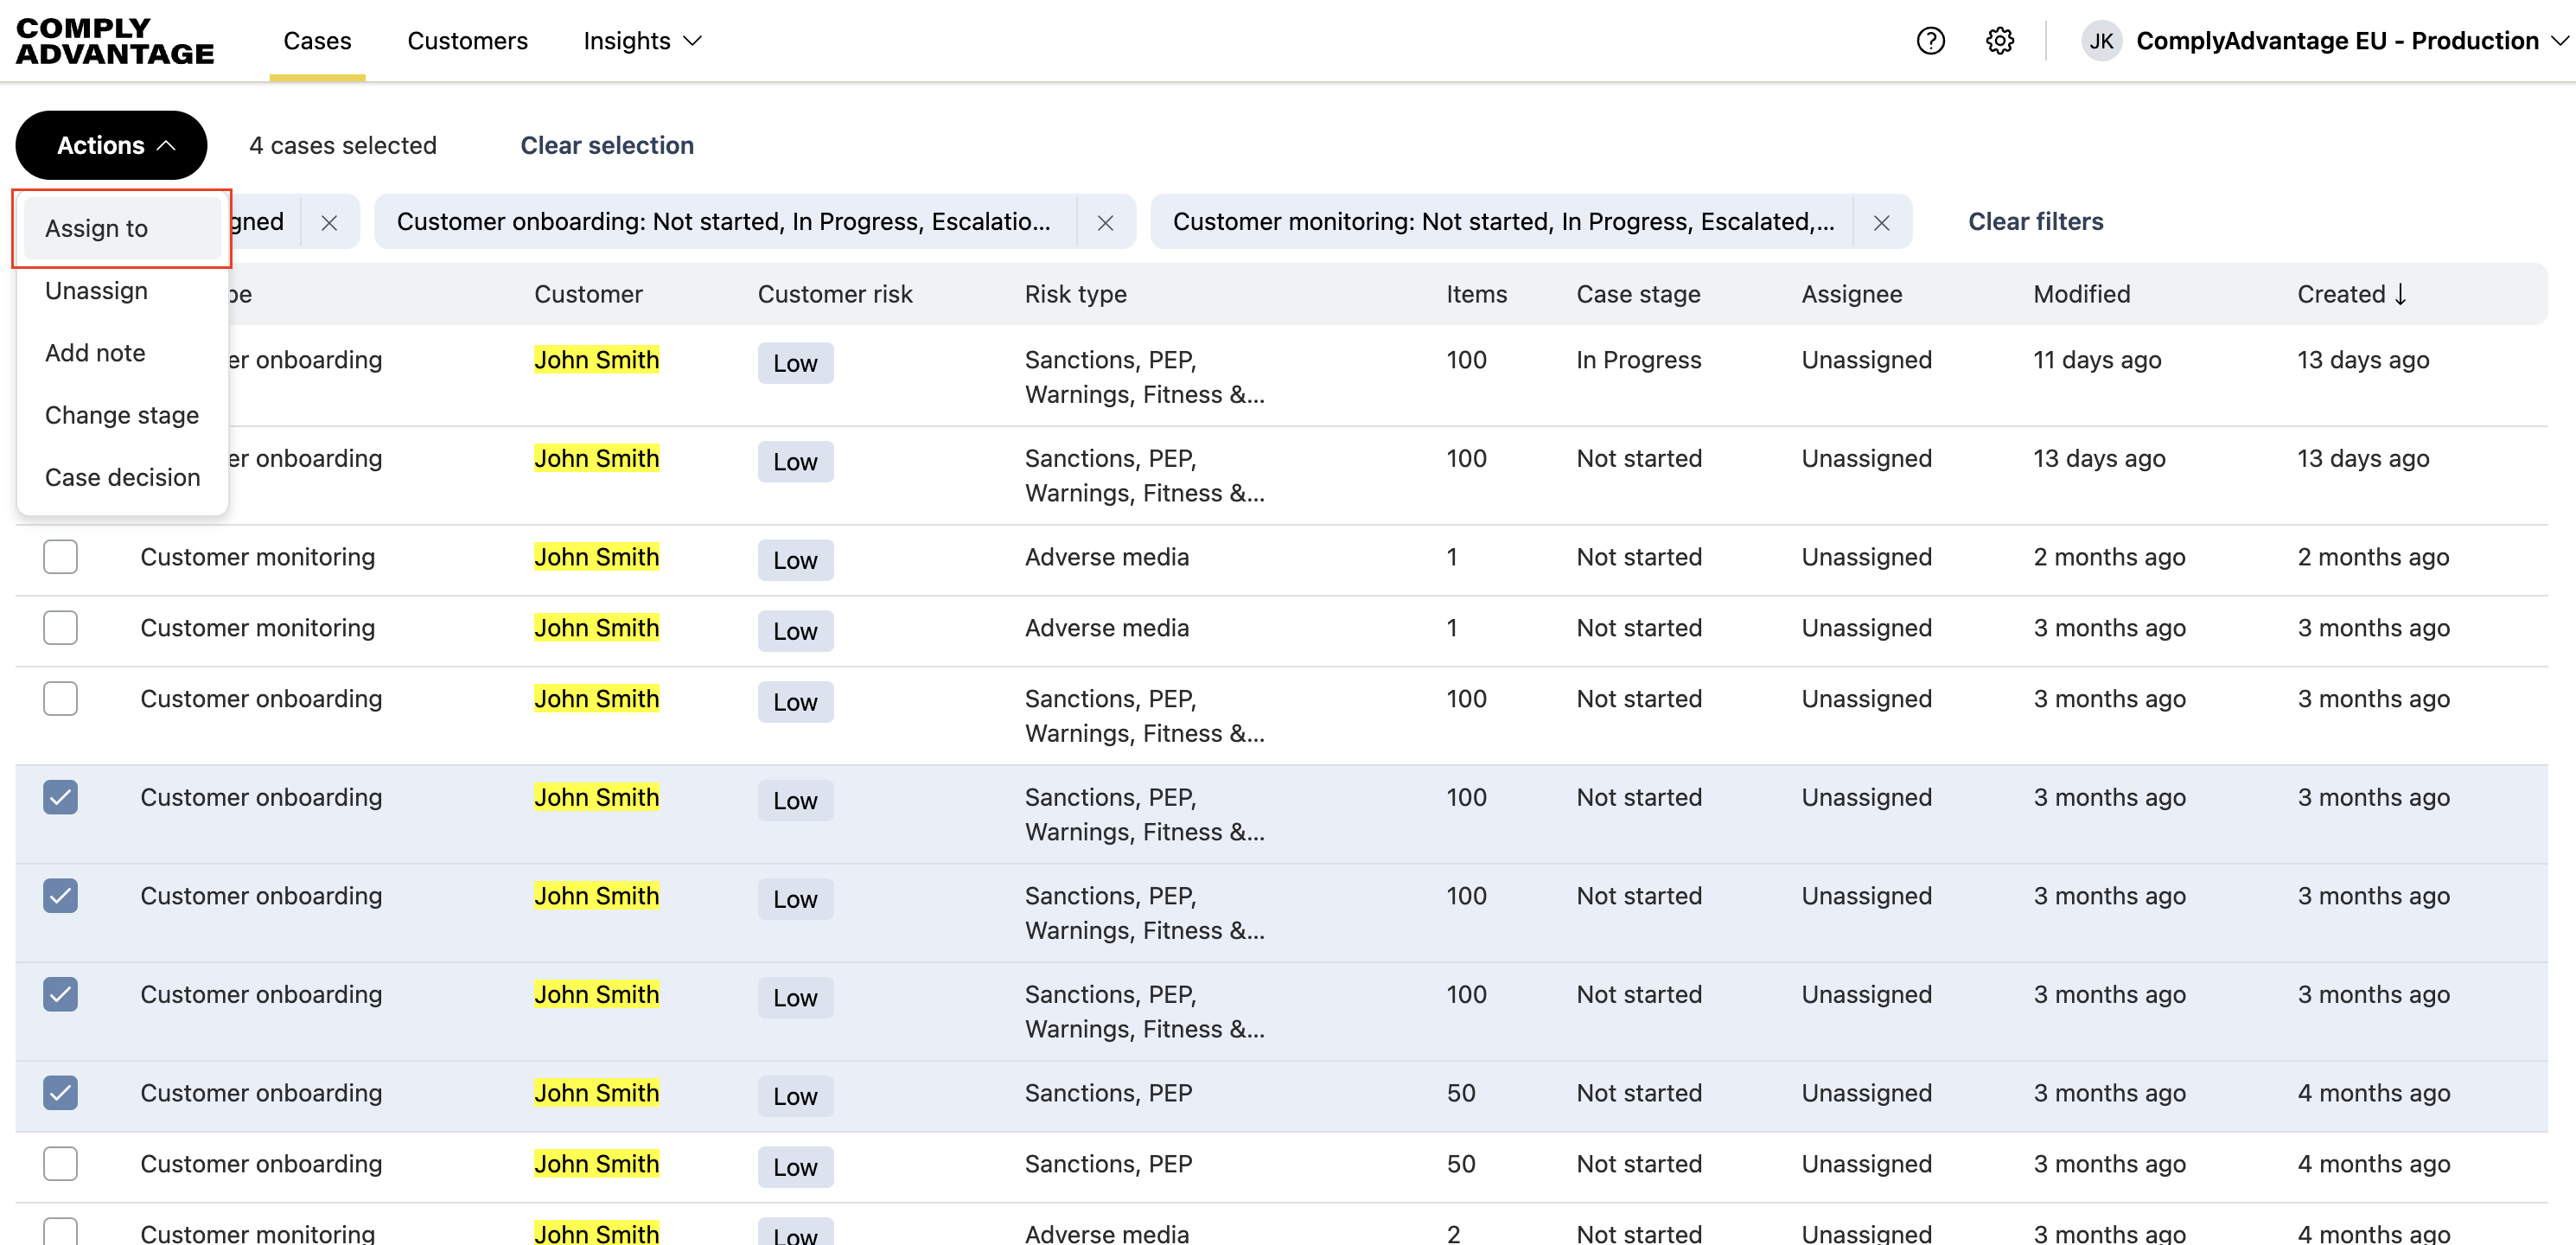
Select Assign to from the menu.
Search for the user to assign the case to or select them from the Assignee dropdown menu.

When you assign a case from the case list page, you can choose to add a note. The note can be seen by the assignee and could provide additional information for them, such as the priority.
Click Assign. You'll see a success notification.

Cases are auto-assigned when a user changes the profile status
When a case is either unassigned or assigned to a different user, and you change the profile status, the case will be auto-assigned to you. See the clip below: