Video: Remediating an onboarding case
Last updated: April 7, 2026
In this guide, you will learn how to remediate an onboarding case in Mesh.
When logging in to your account, please ensure you select the correct region, which will be one of the following:
Australia: https://au.mesh.complyadvantage.com/
You can find the link to your region in the onboarding email you received (look for the "Welcome to ComplyAdvantage" email).
If you can’t find the email, don't worry! You can always contact our support team at [email protected].
1. Introduction
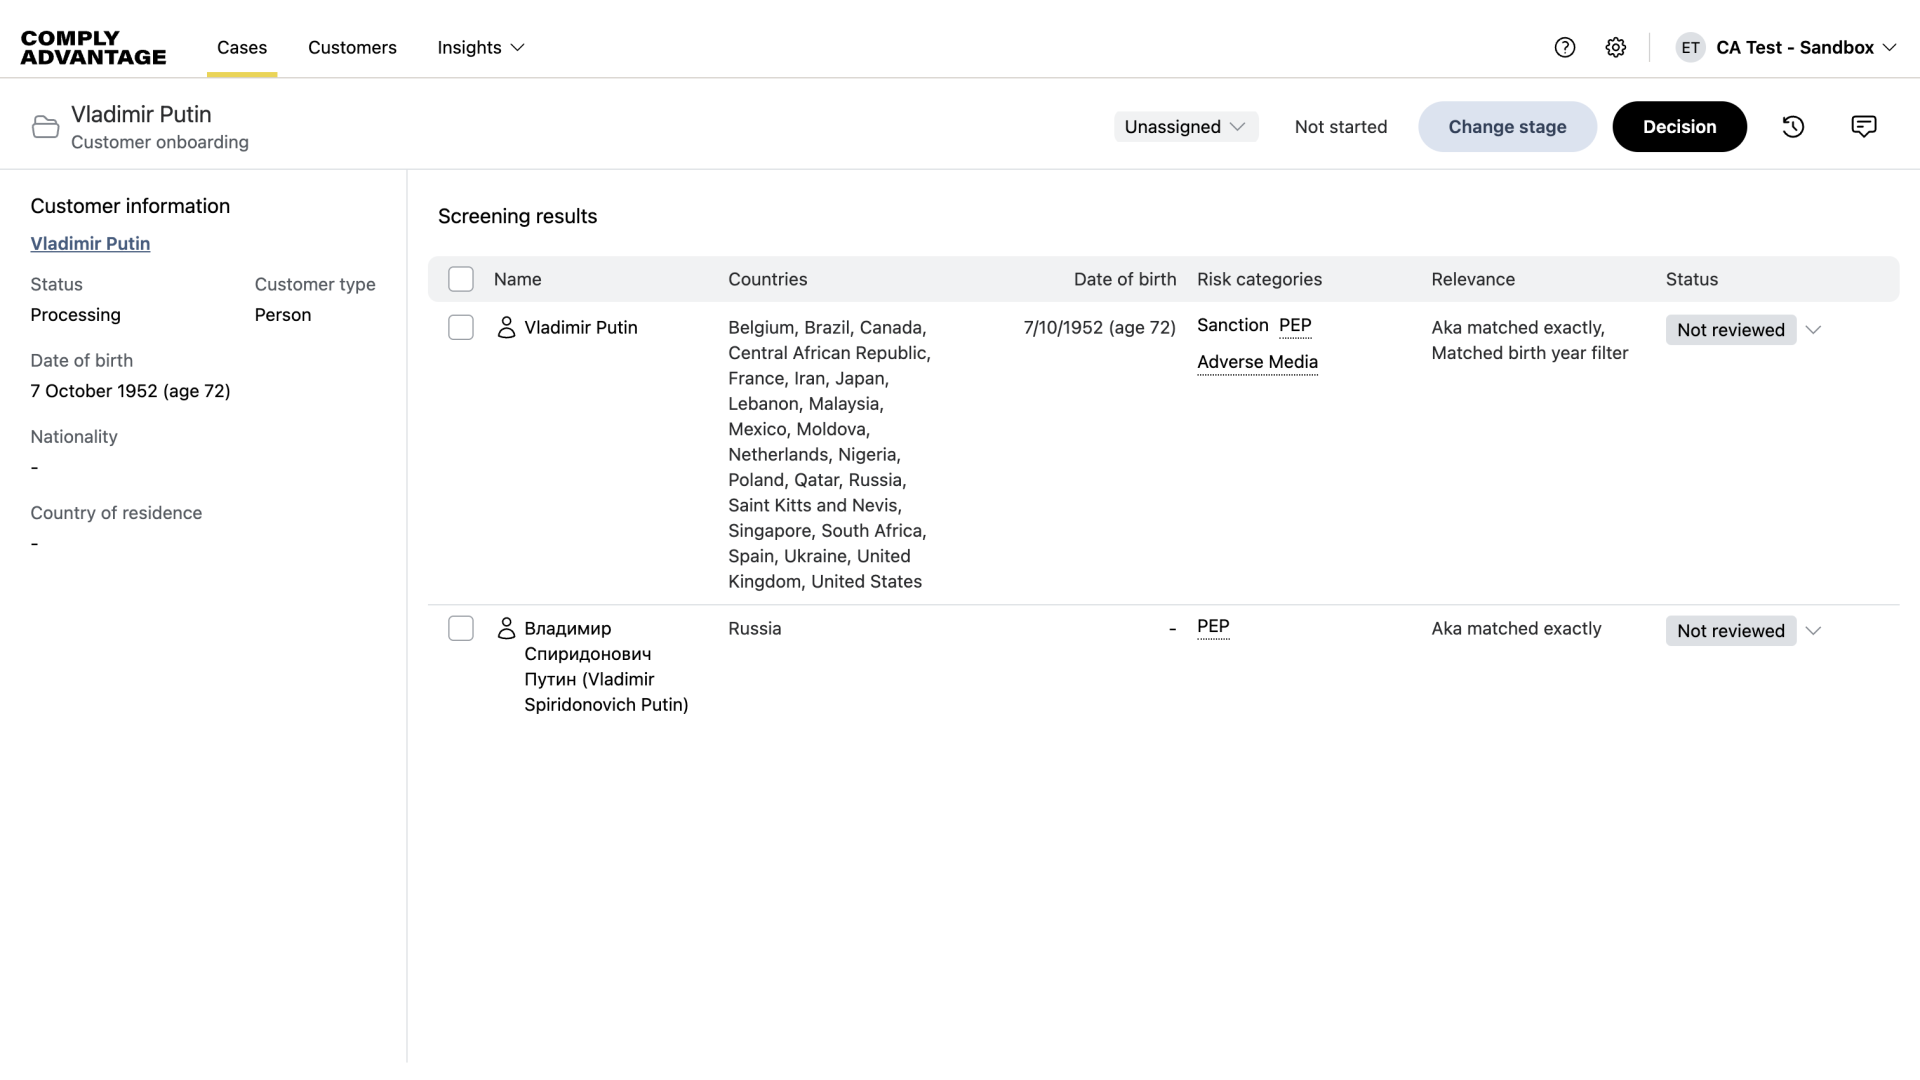
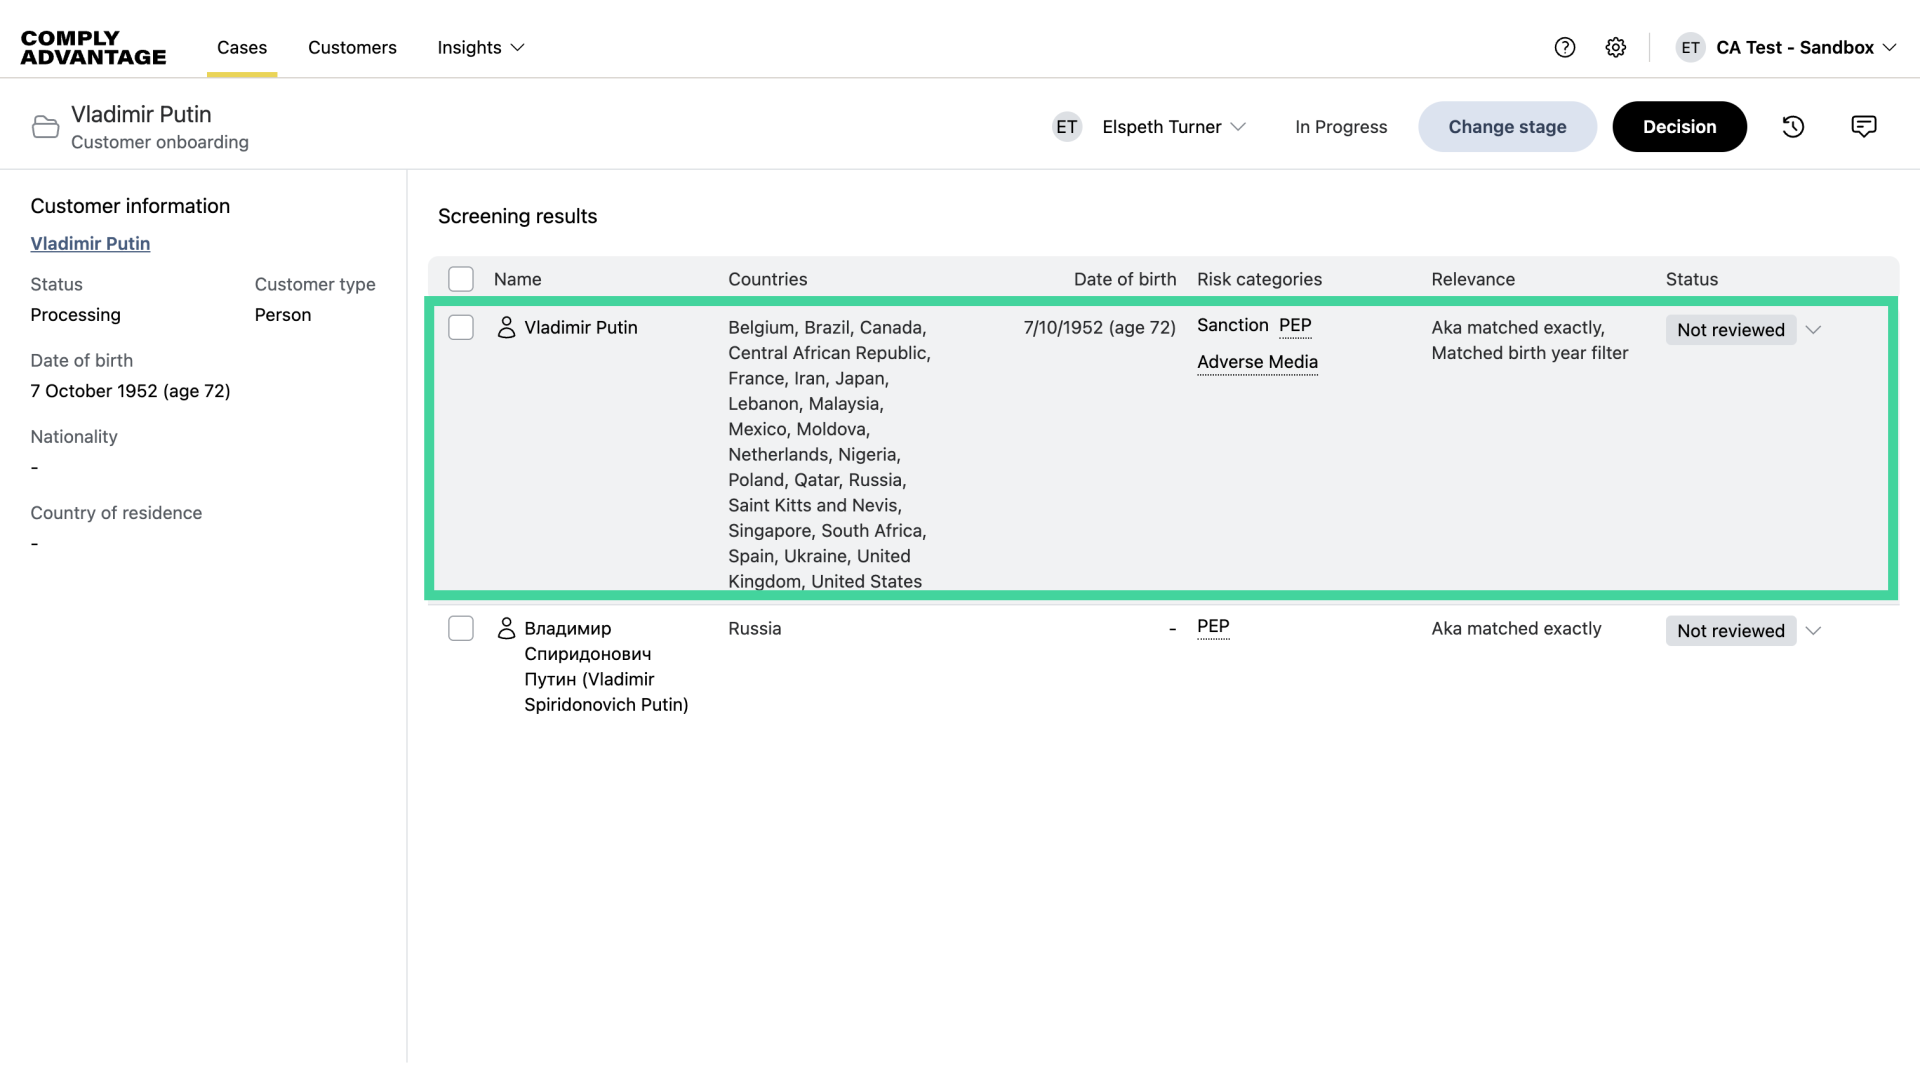
As you can see, we are now in a case and can start remediating the profiles, which are the individual line items you see here.
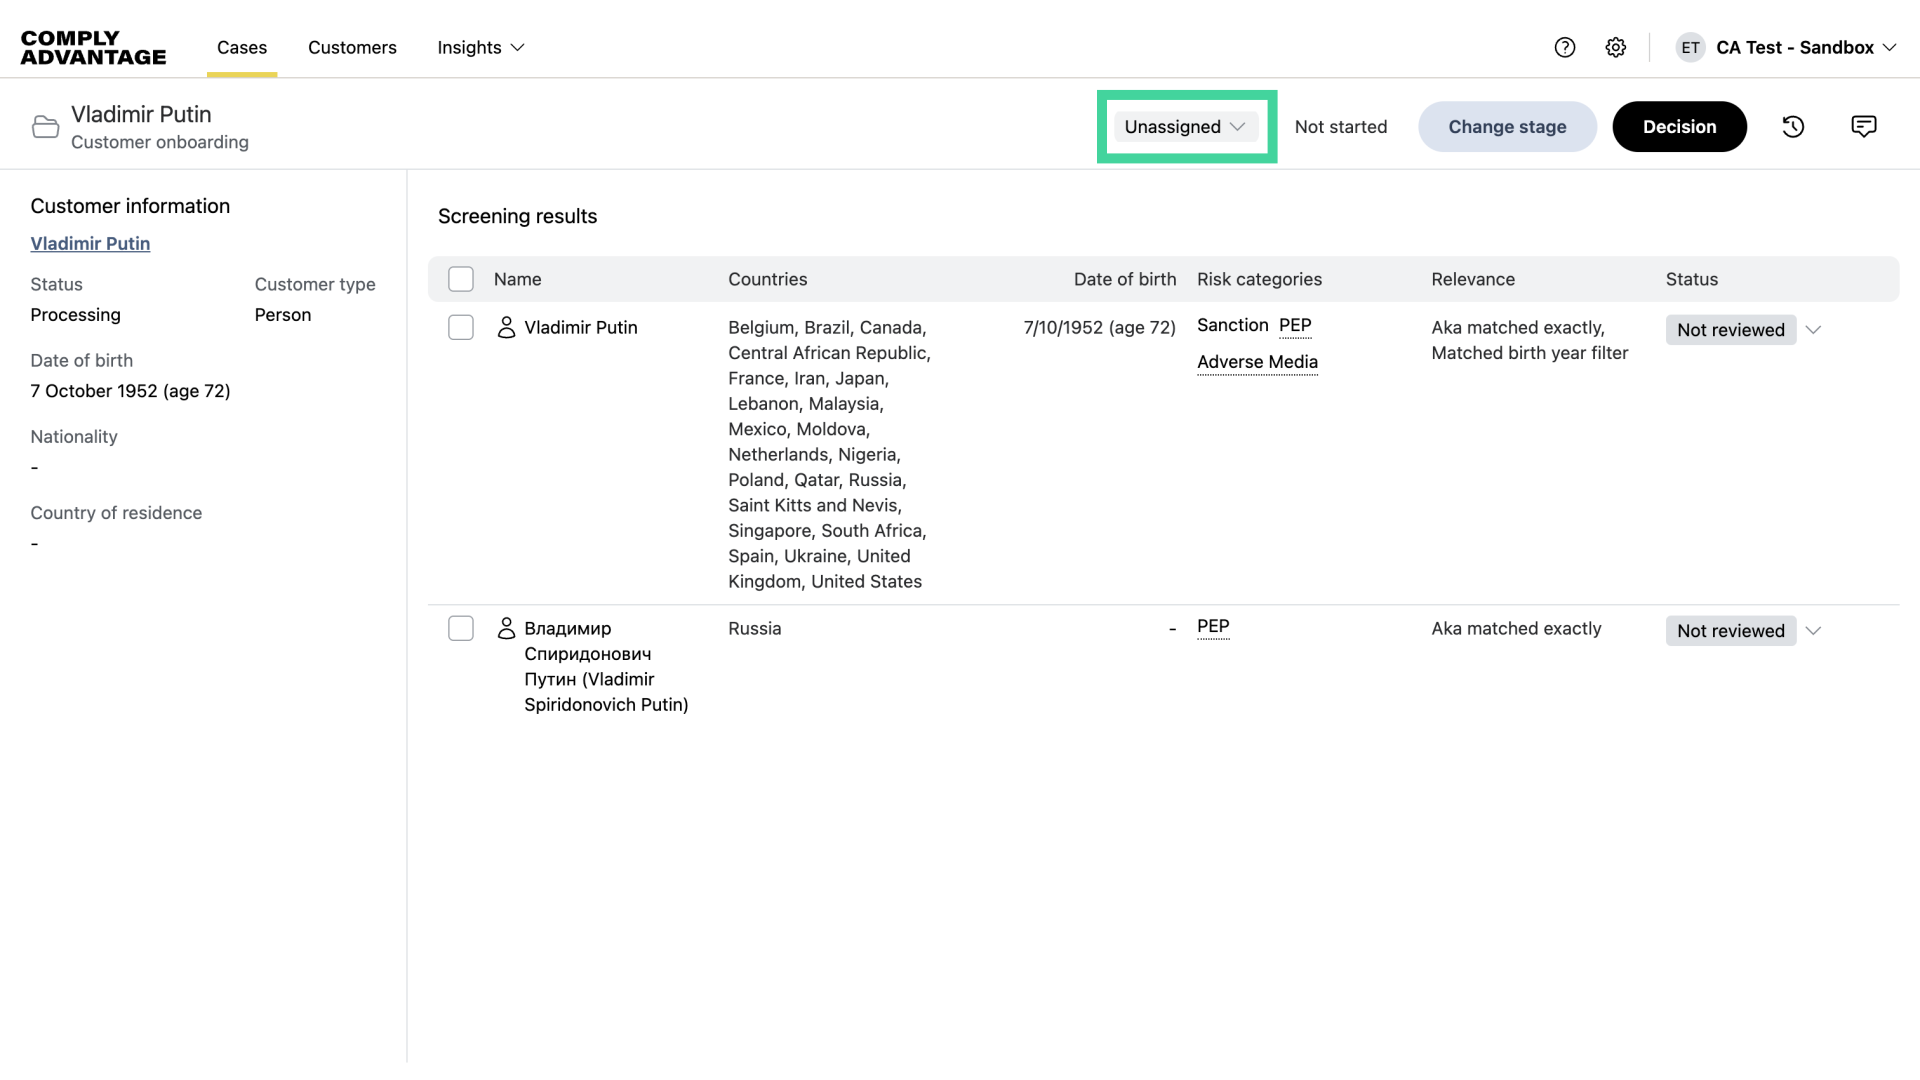
2. Assign a user to the case
To begin, we will assign the case to a specific user. This ensures that all other team members are aware that the case is currently being addressed.
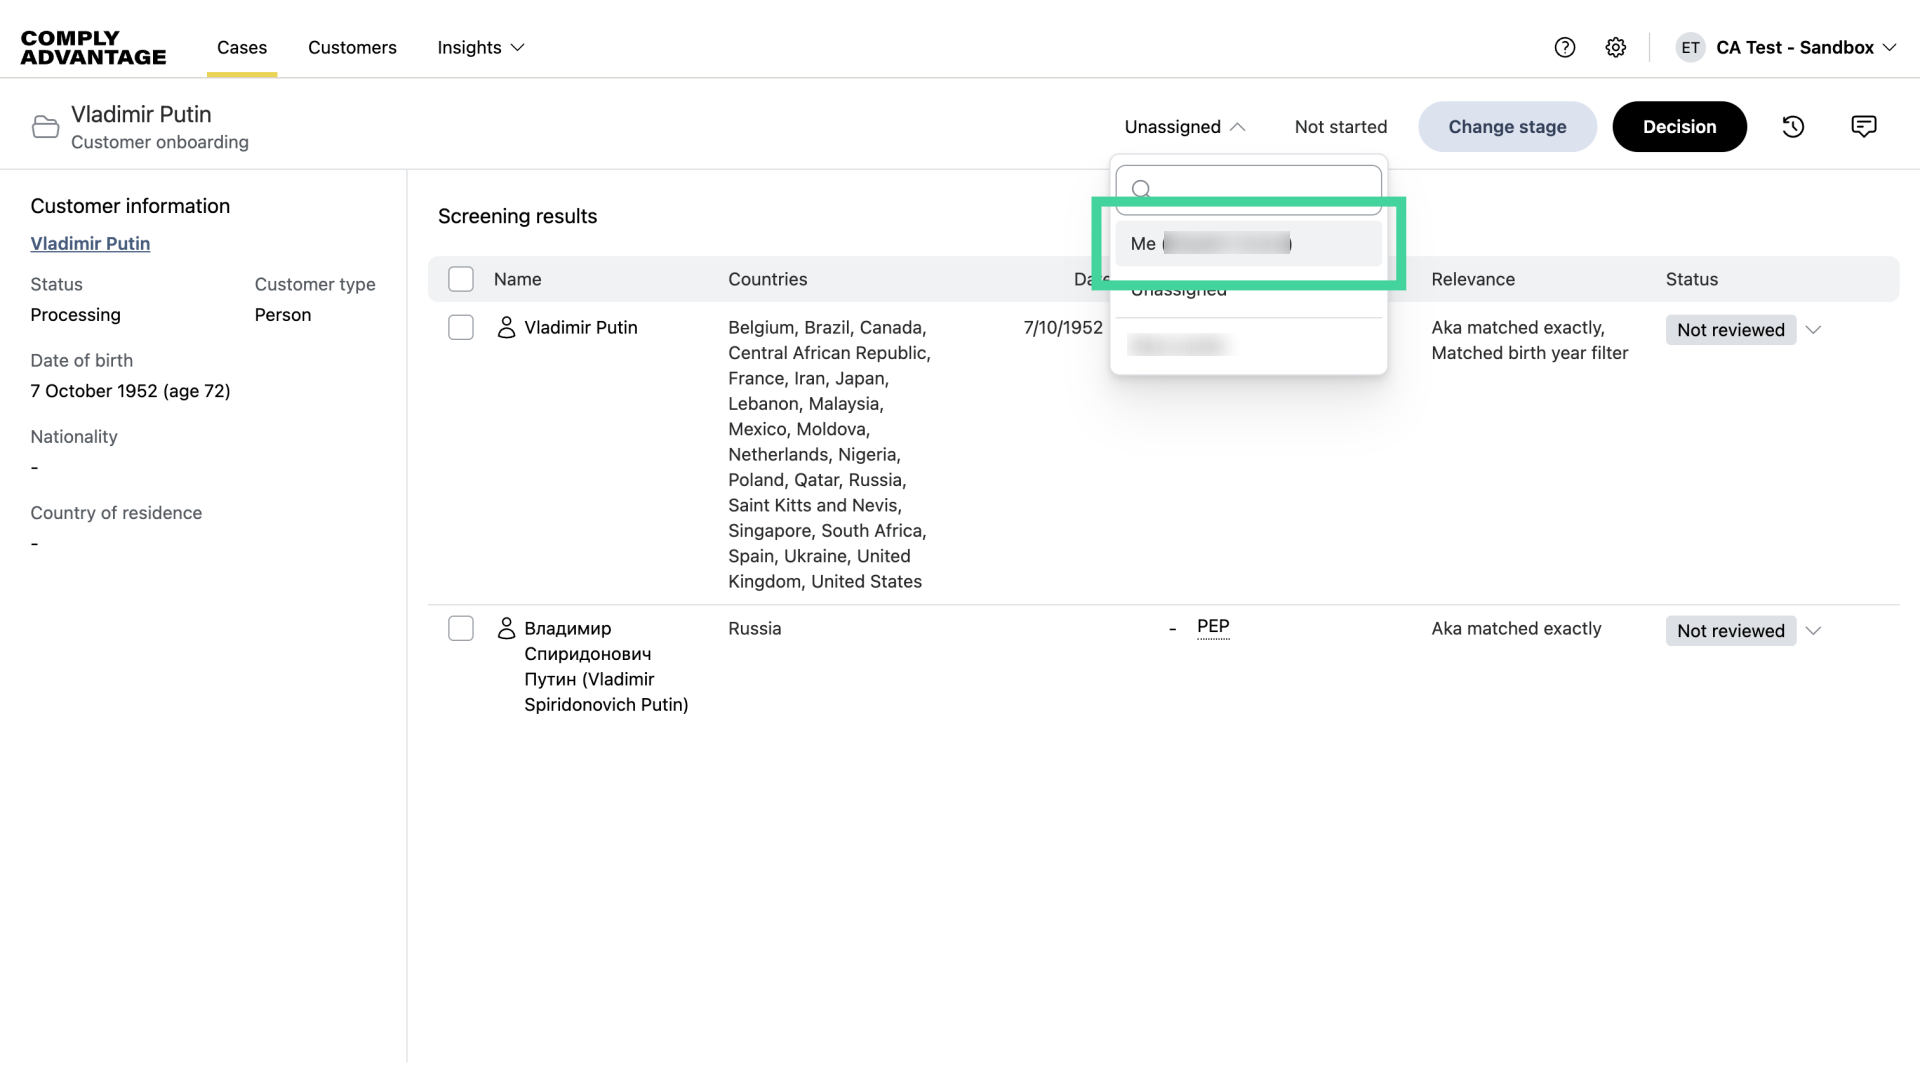
3. Select a user
Select the relevant user from the options available.
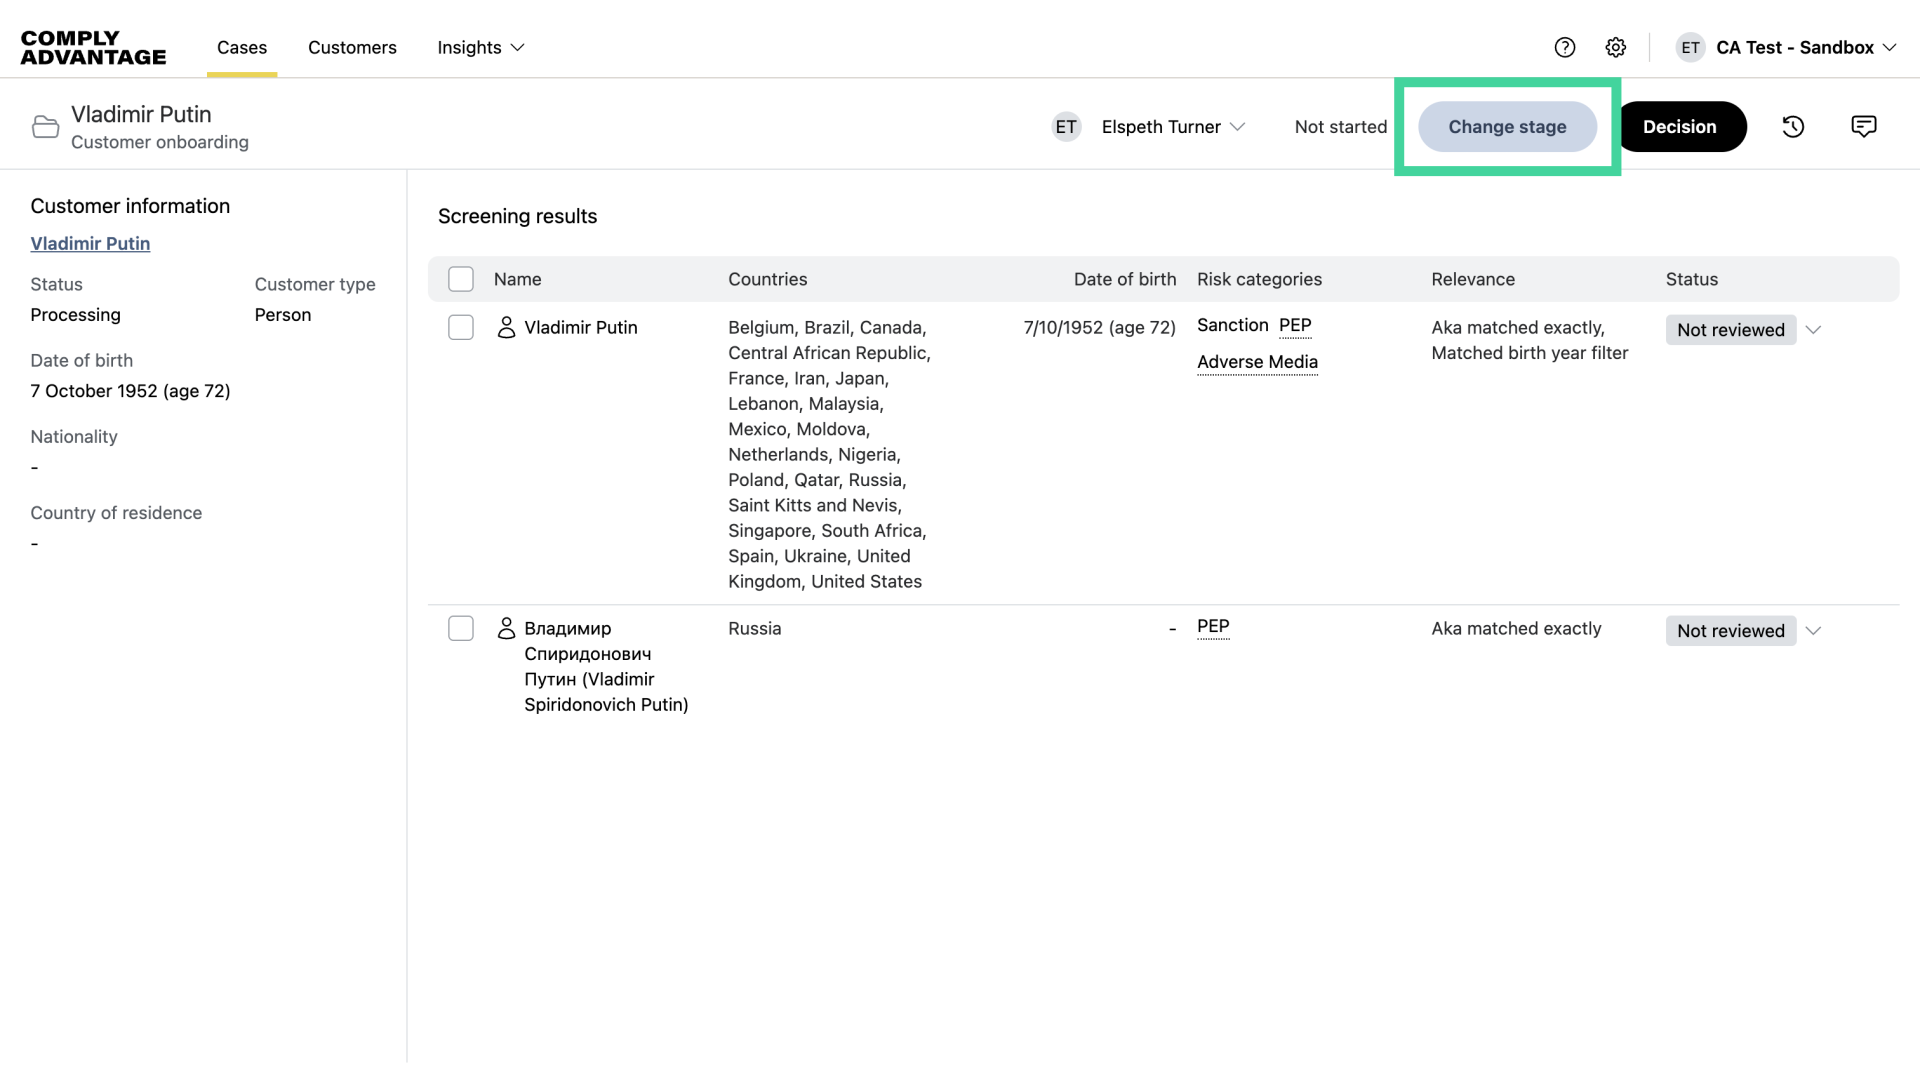
4. Click "Change stage"
Click "Change stage."
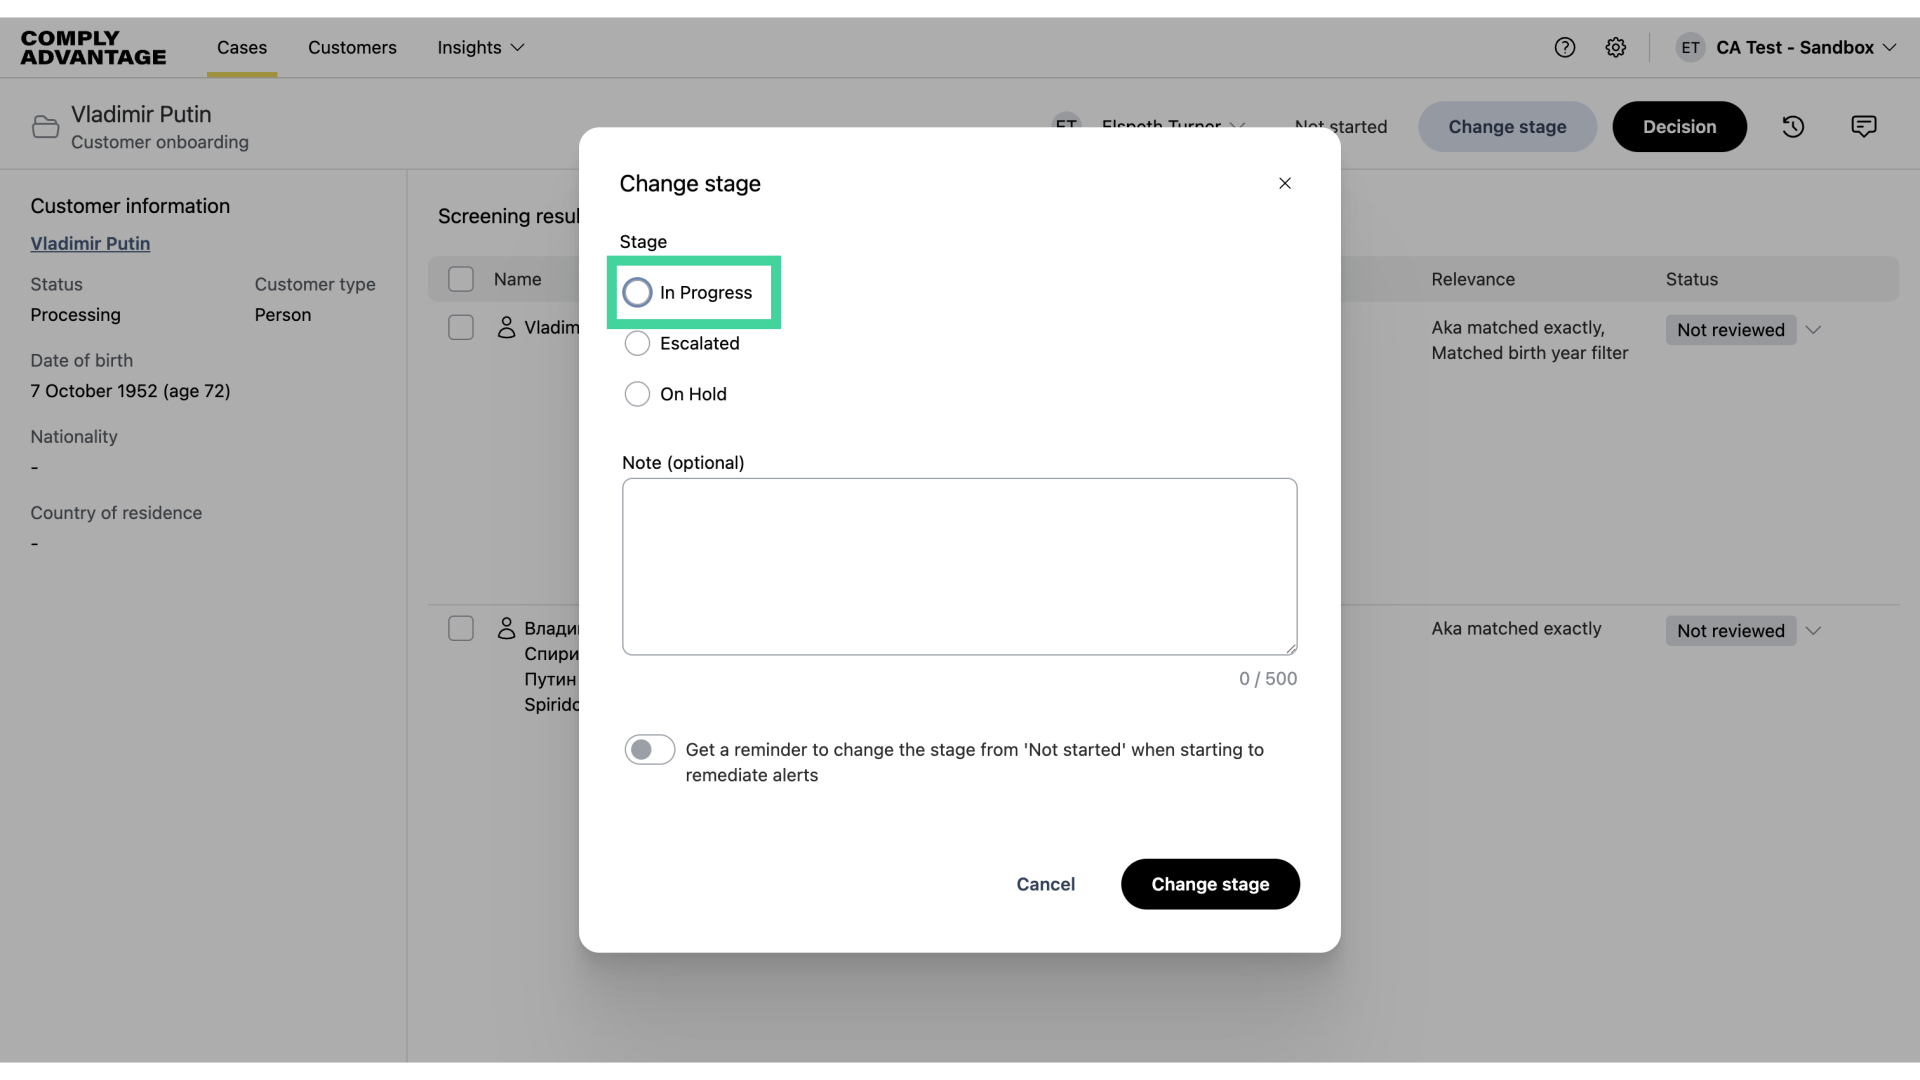
5. Select a stage
Select the stage for the case.
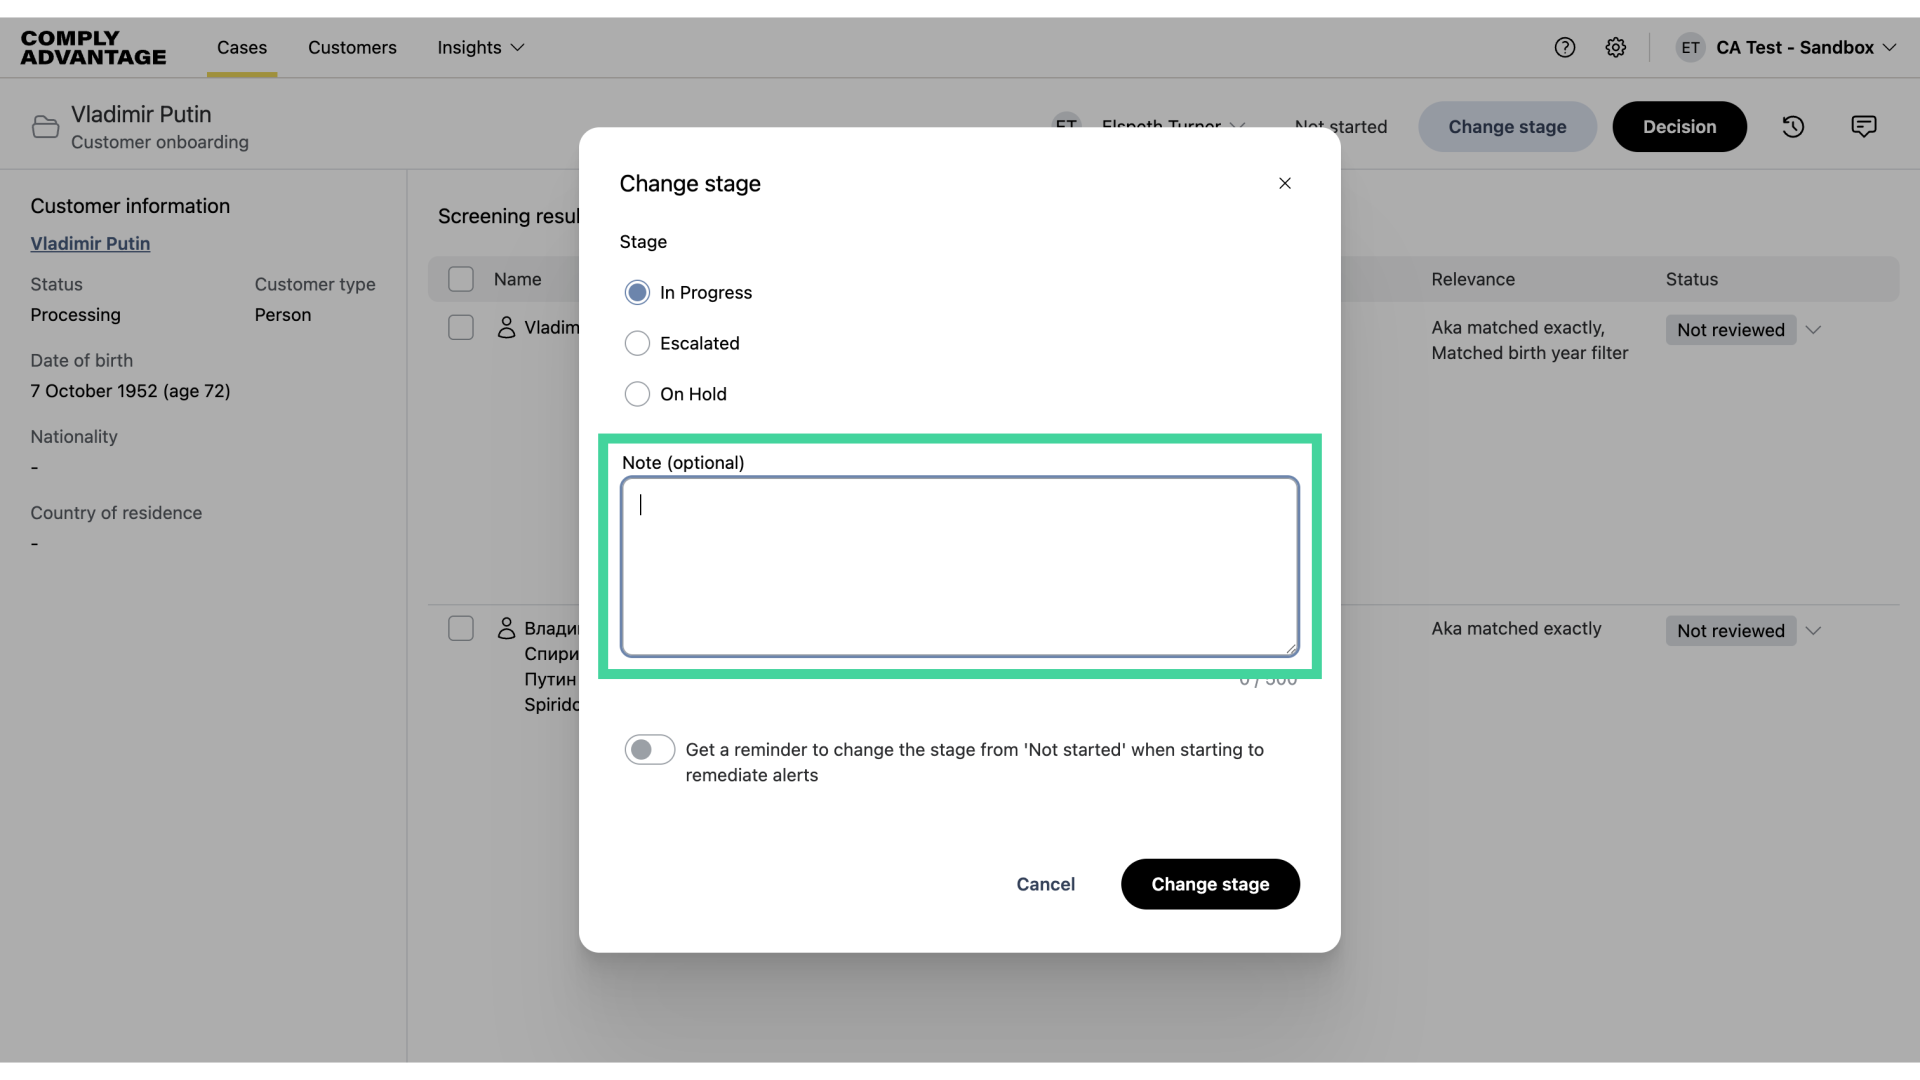
6. Add a note
Feel free to include a note.
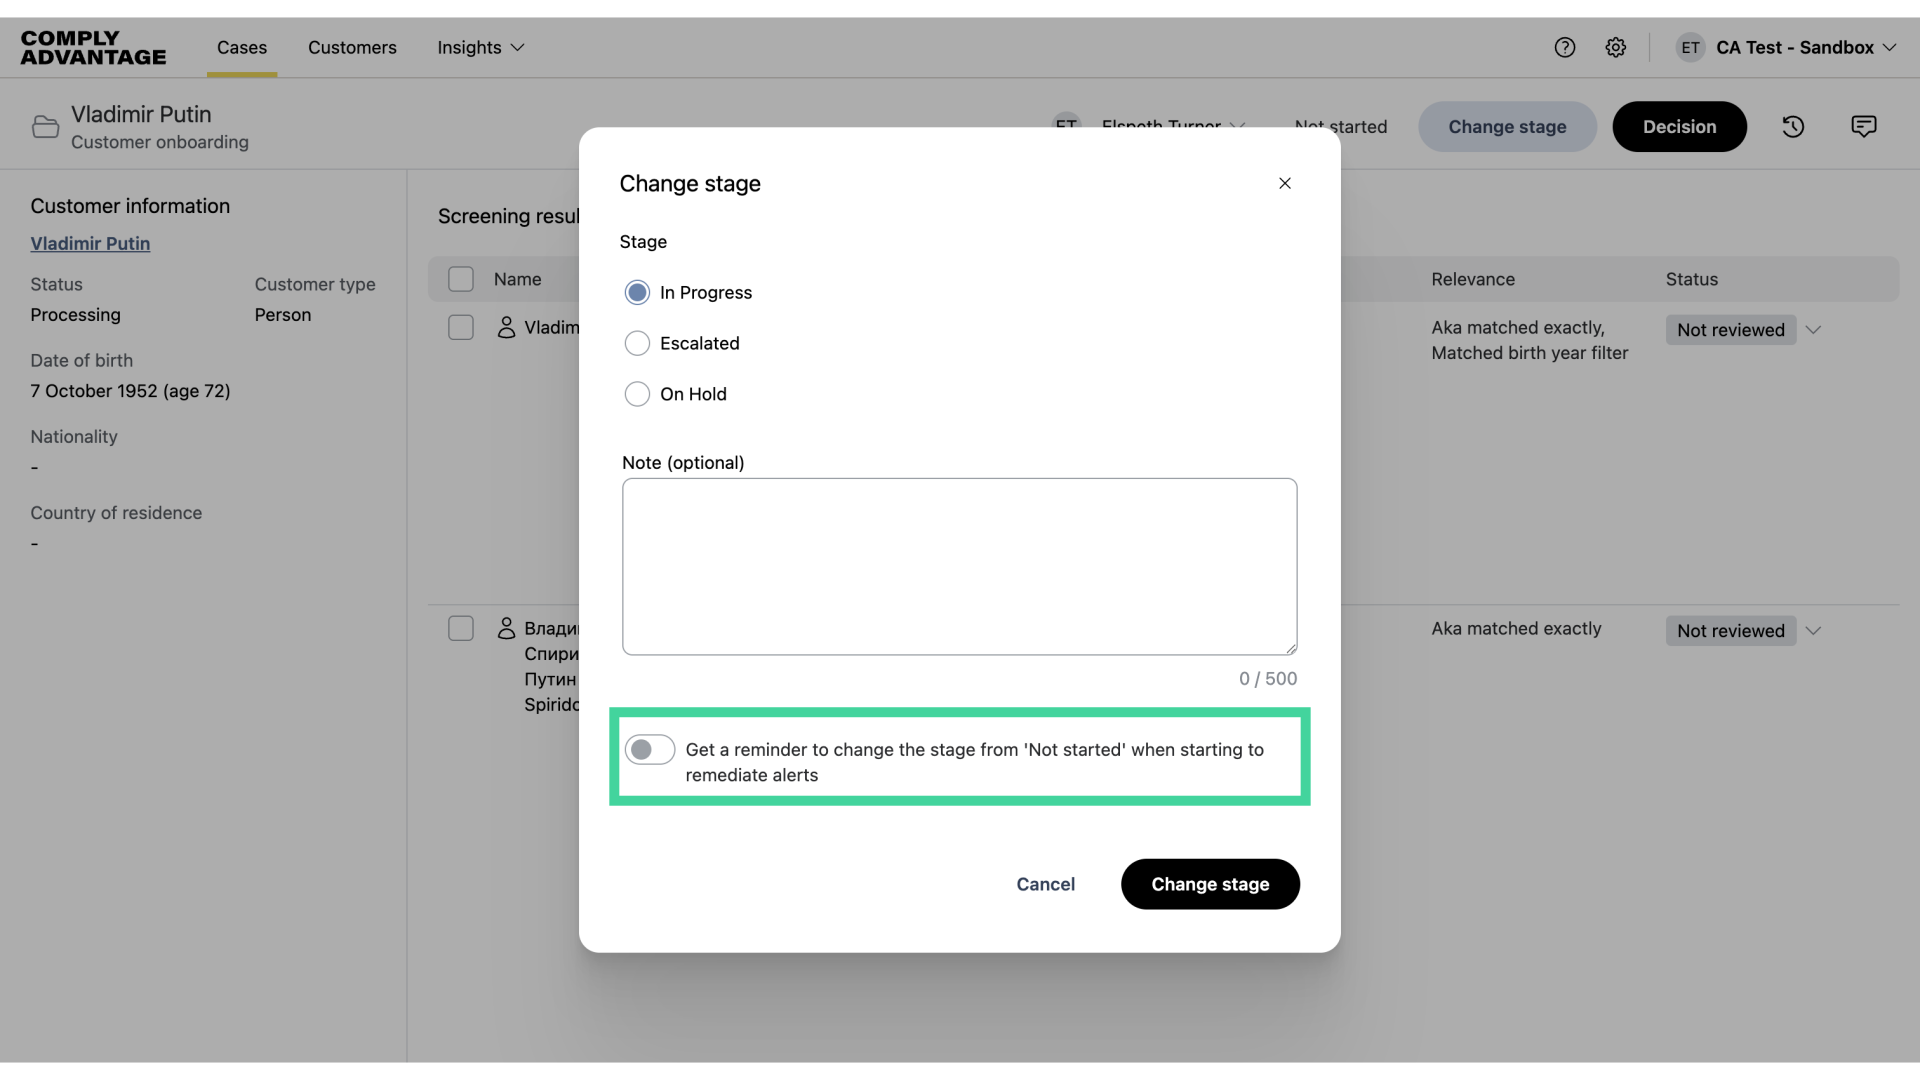
7. Toggle on
You can also enable the reminder to change the stage if you start remediating alerts while the case is still in "Not started."
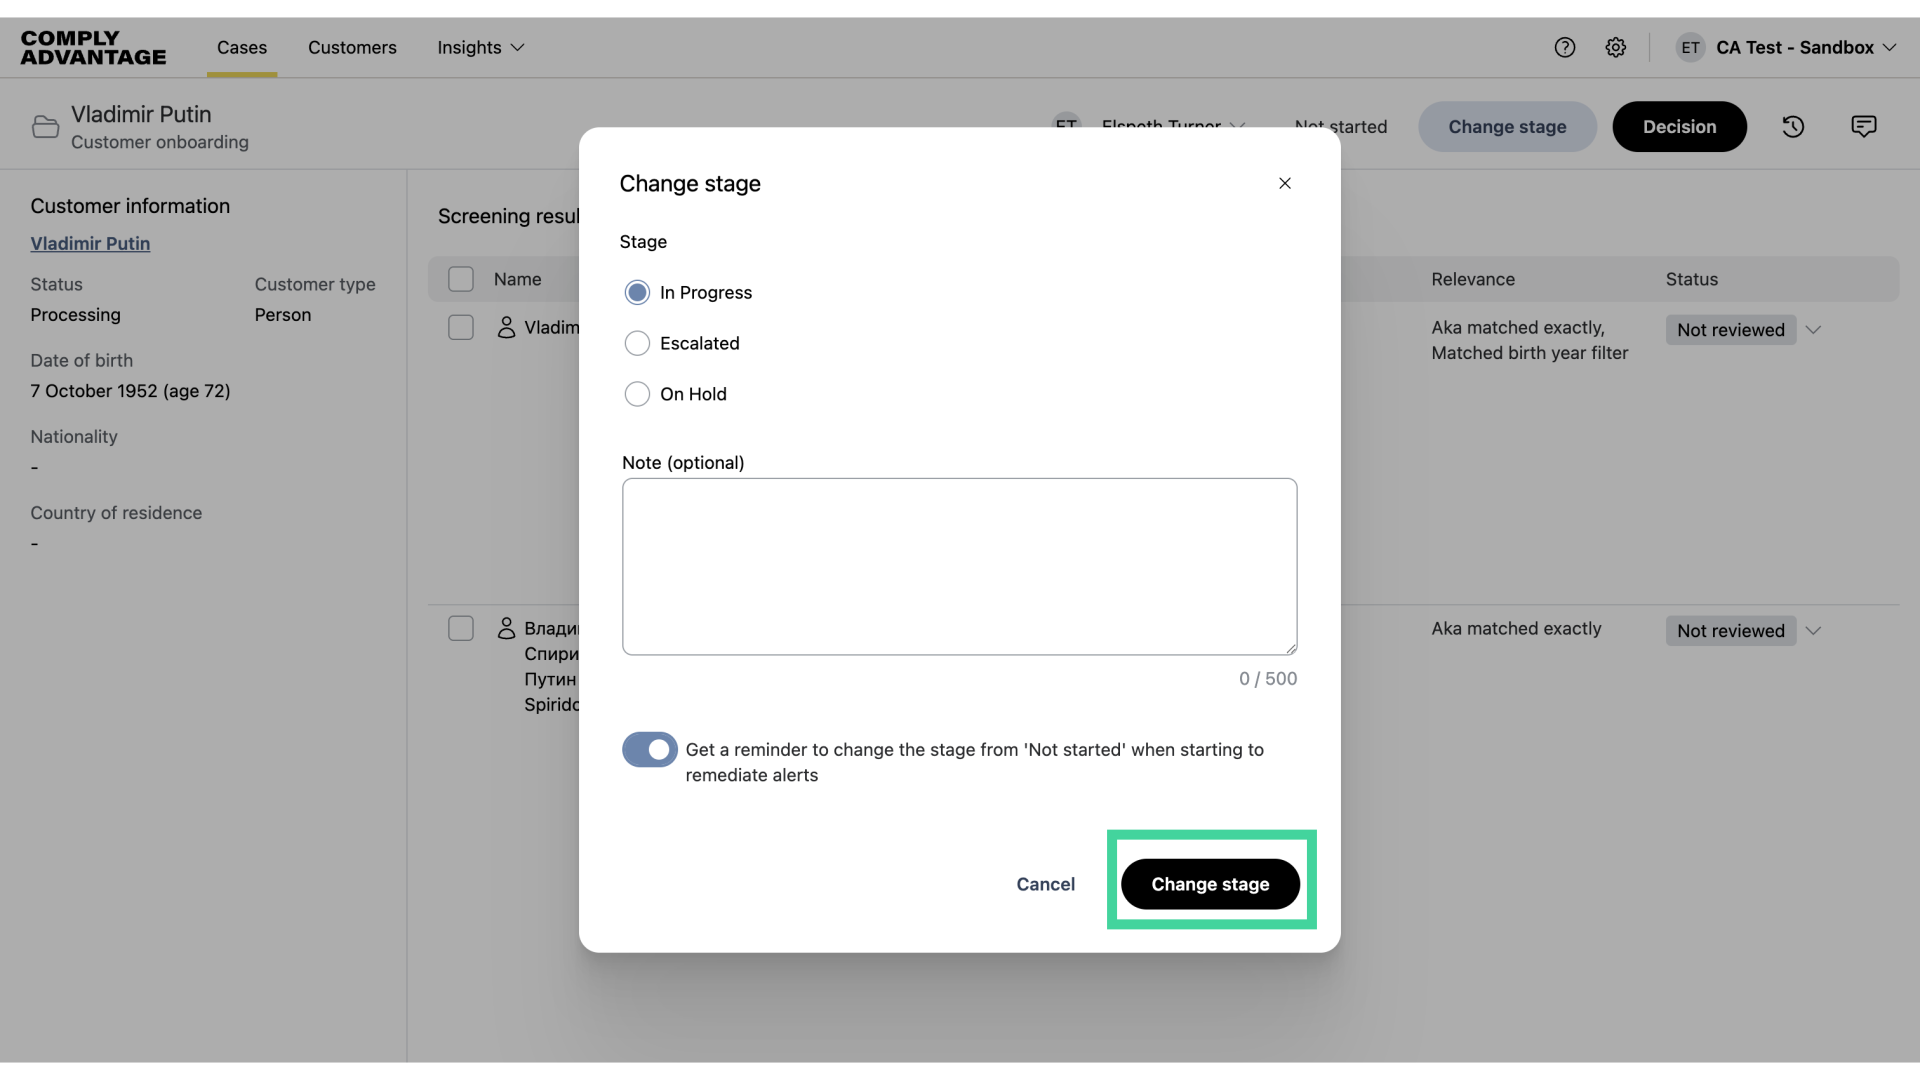
8. Confirm the stage change
Click on the change stage button when you are happy with your changes.
9. Click into the first profile
Select the profile you want to start remediating.
10. Review profile details
Now, you can see all the information for this case. You can scroll through the case or click on the links to the relevant sections located in the case details bar here.
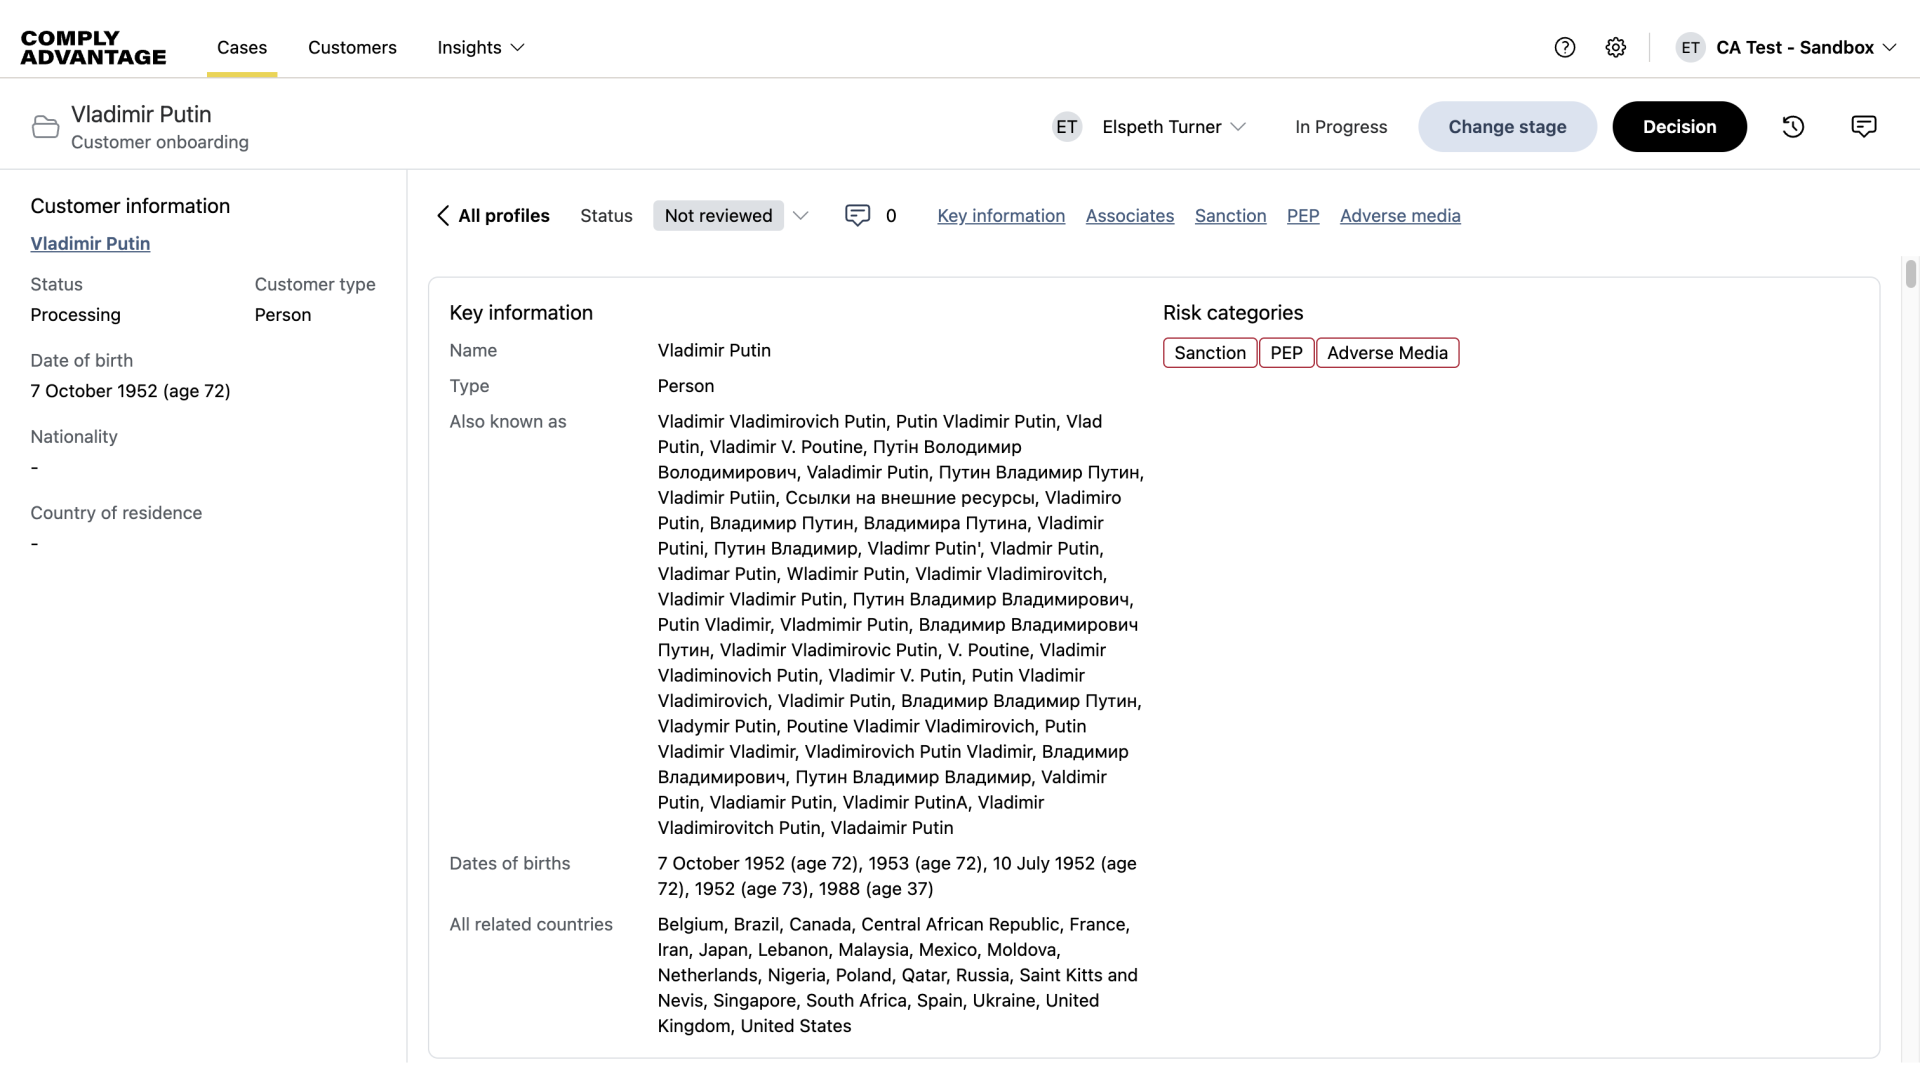
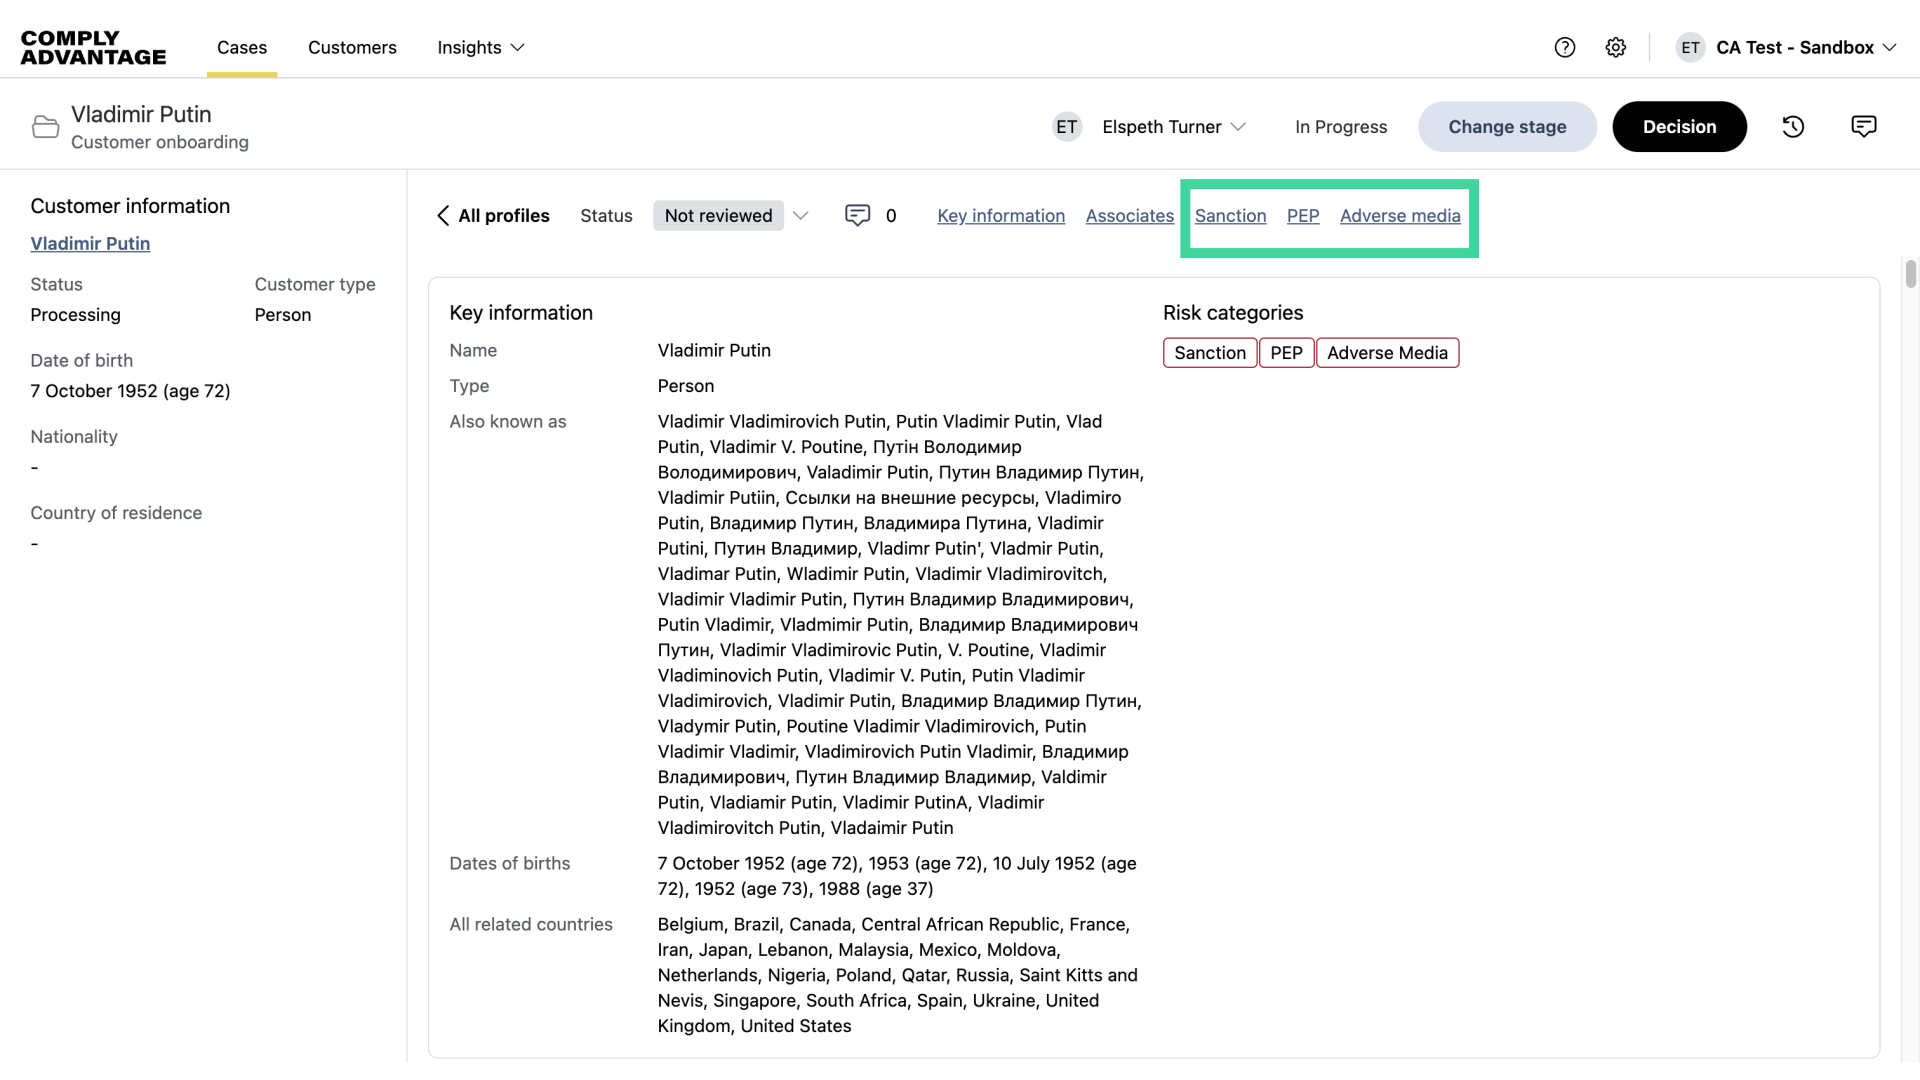
11. Select desired links
The screening sources that appear will be the ones selected in the relevant screening configuration. In our example, we have screened against Sanctions, PEPs, and Adverse media, which is why they appear in the case details bar.
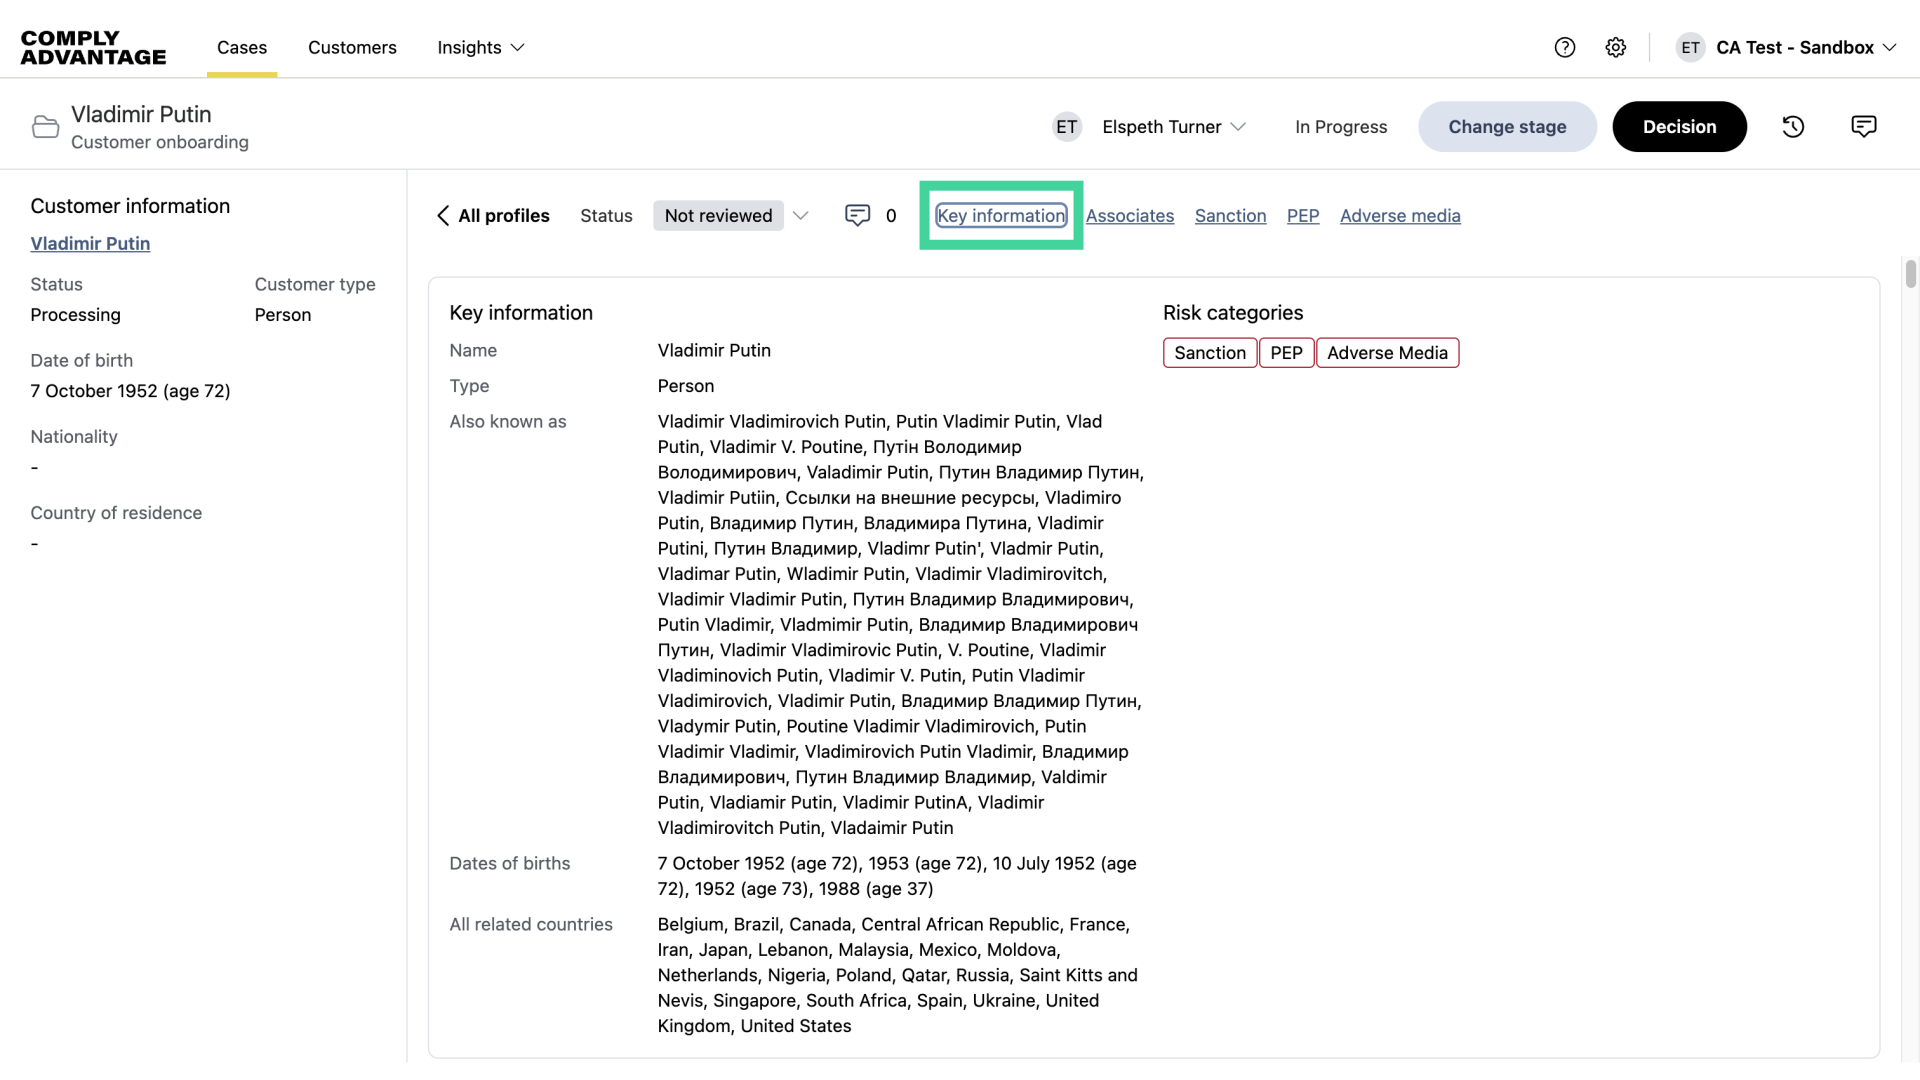
12. Click "Key information"
Navigate to "Key information."
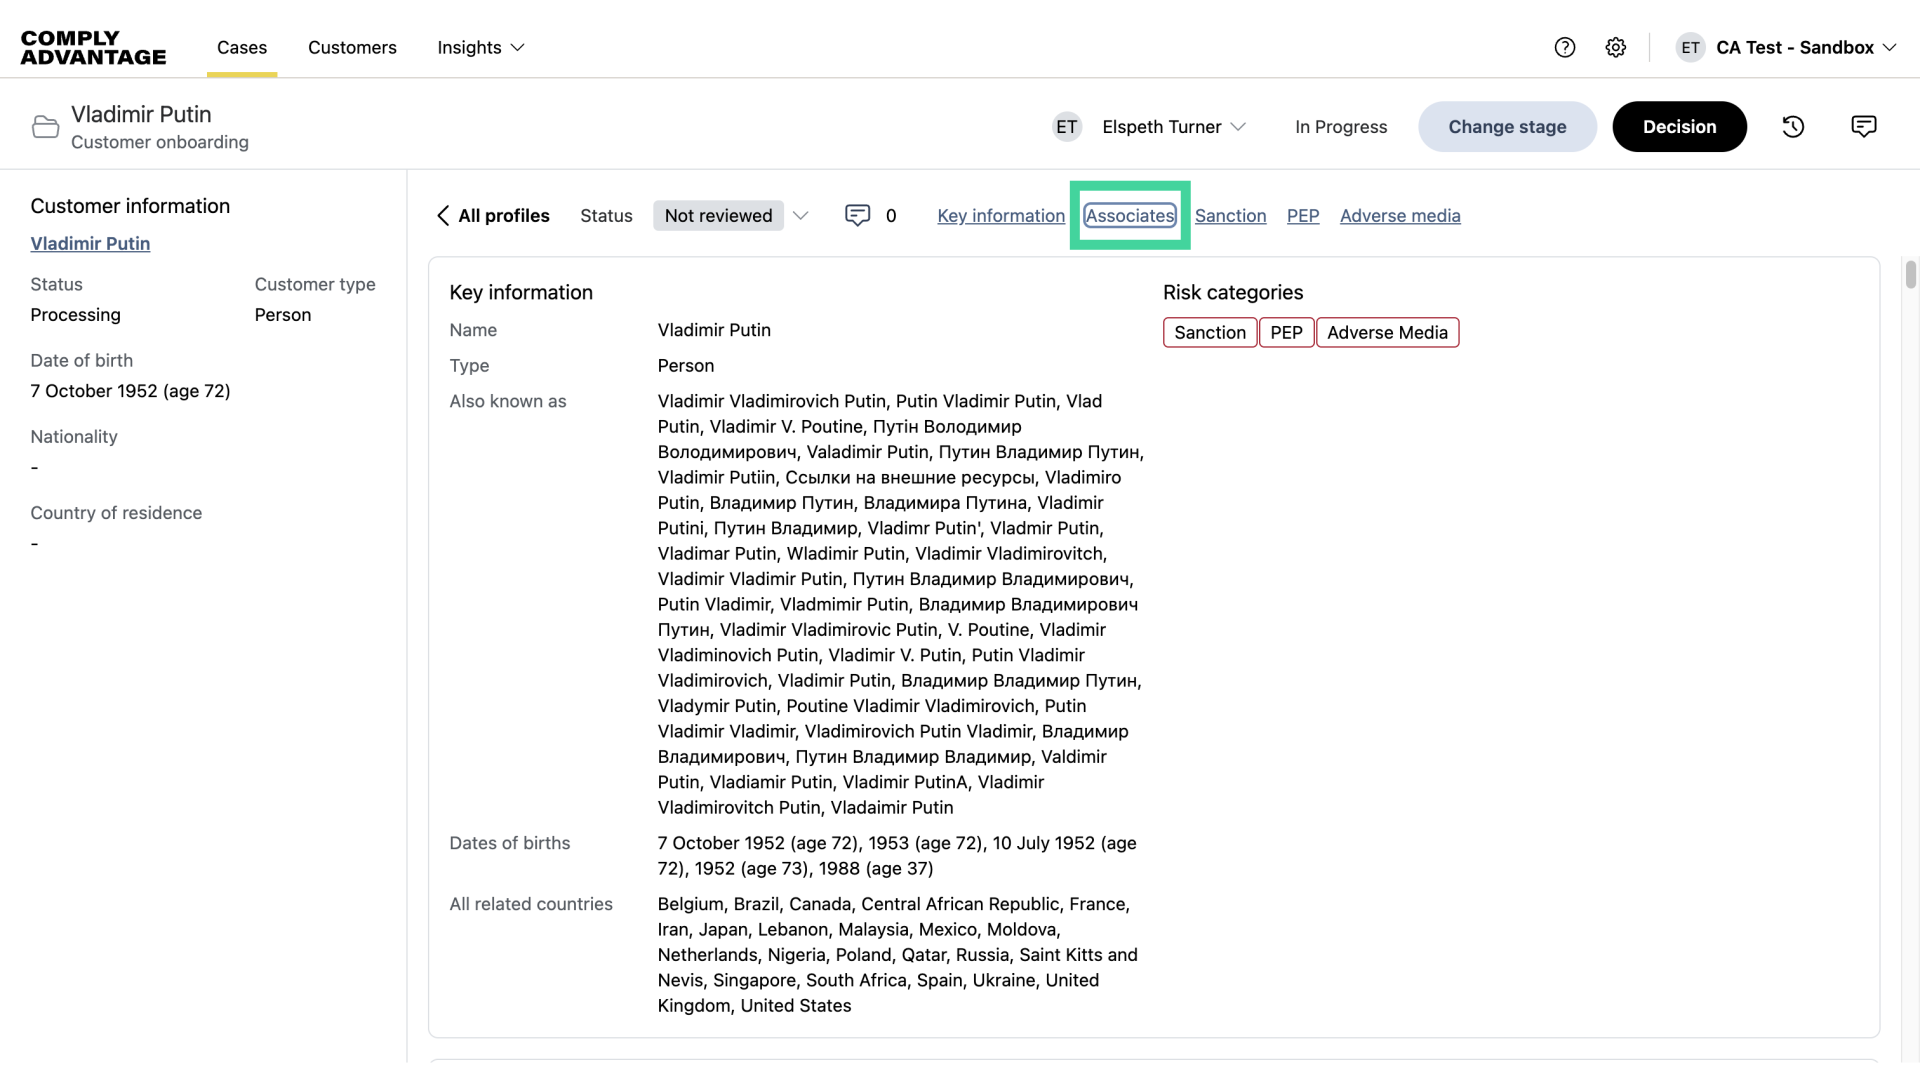
13. Click "Associates"
Explore associated profiles. While not all customers will have this section, it will be prominently displayed at the top if available.
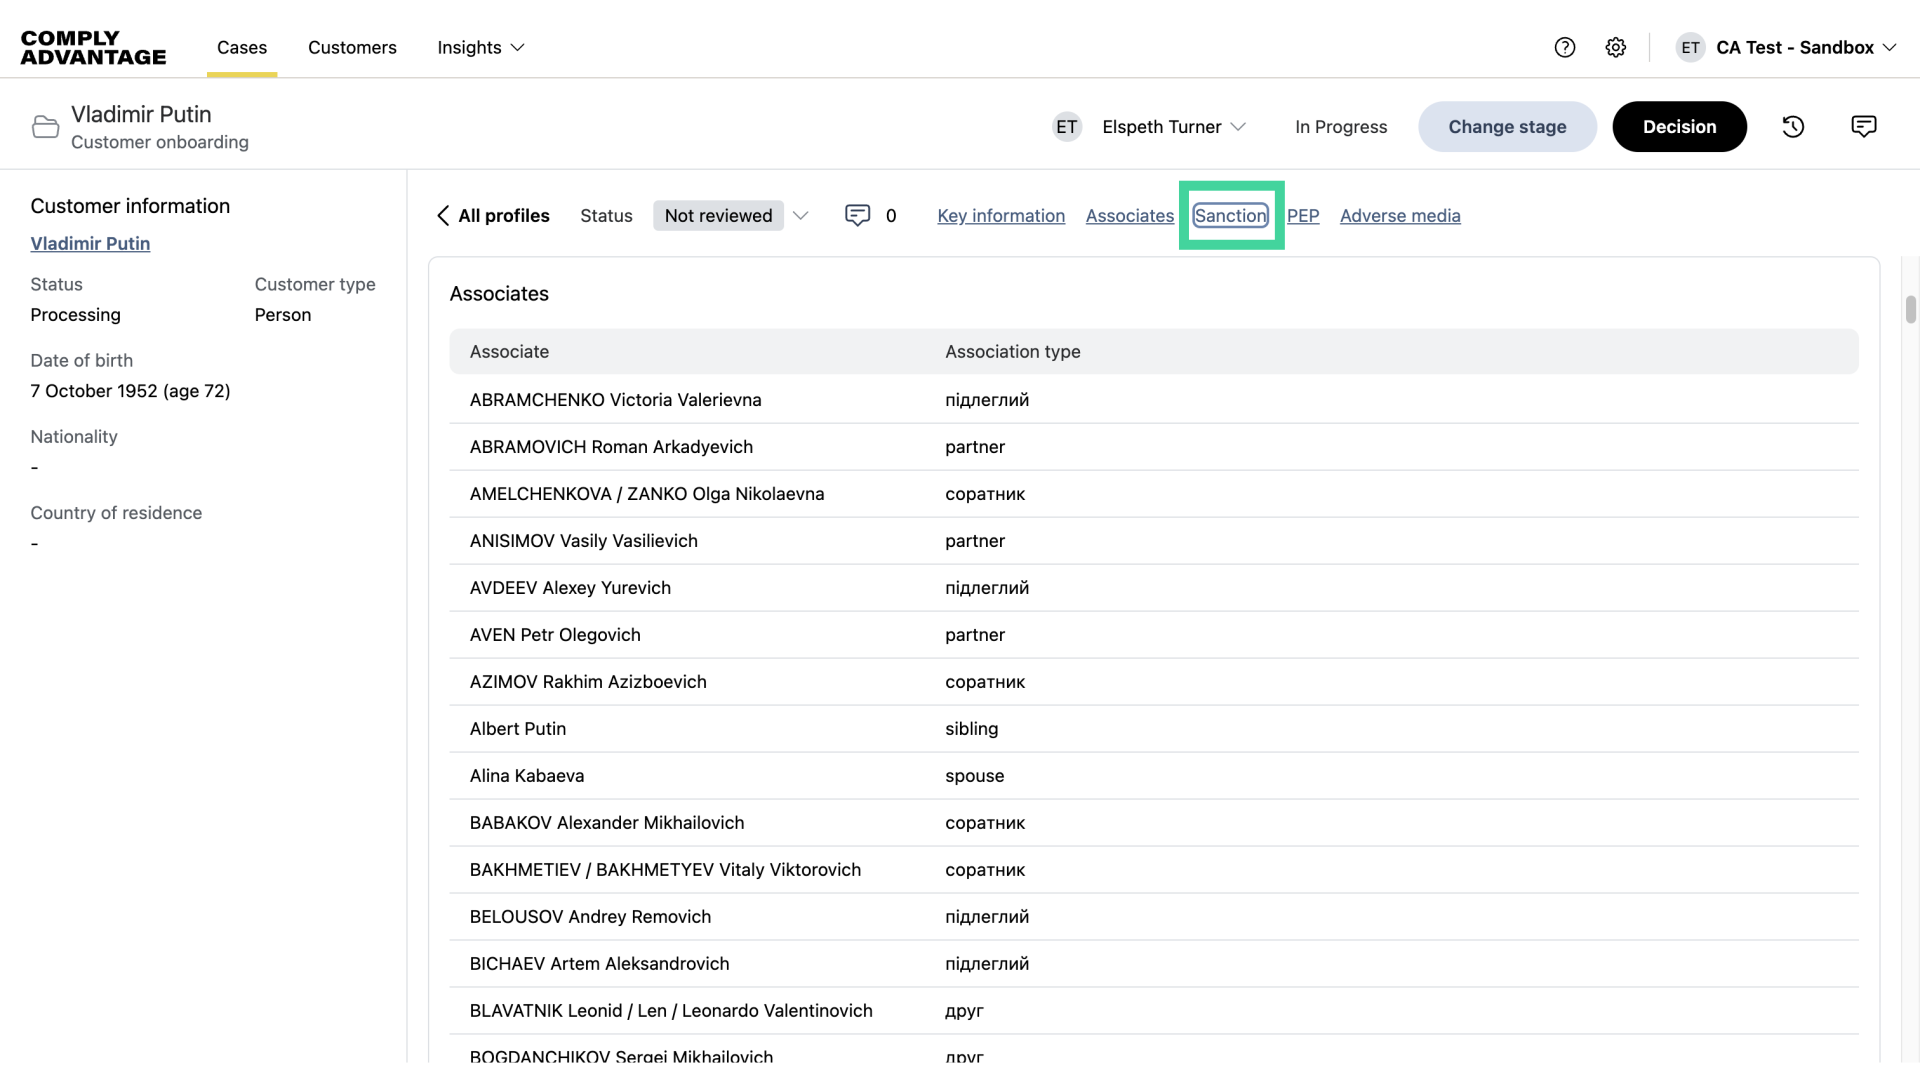
14. Click "Sanction"
Here, you can access sanction details.
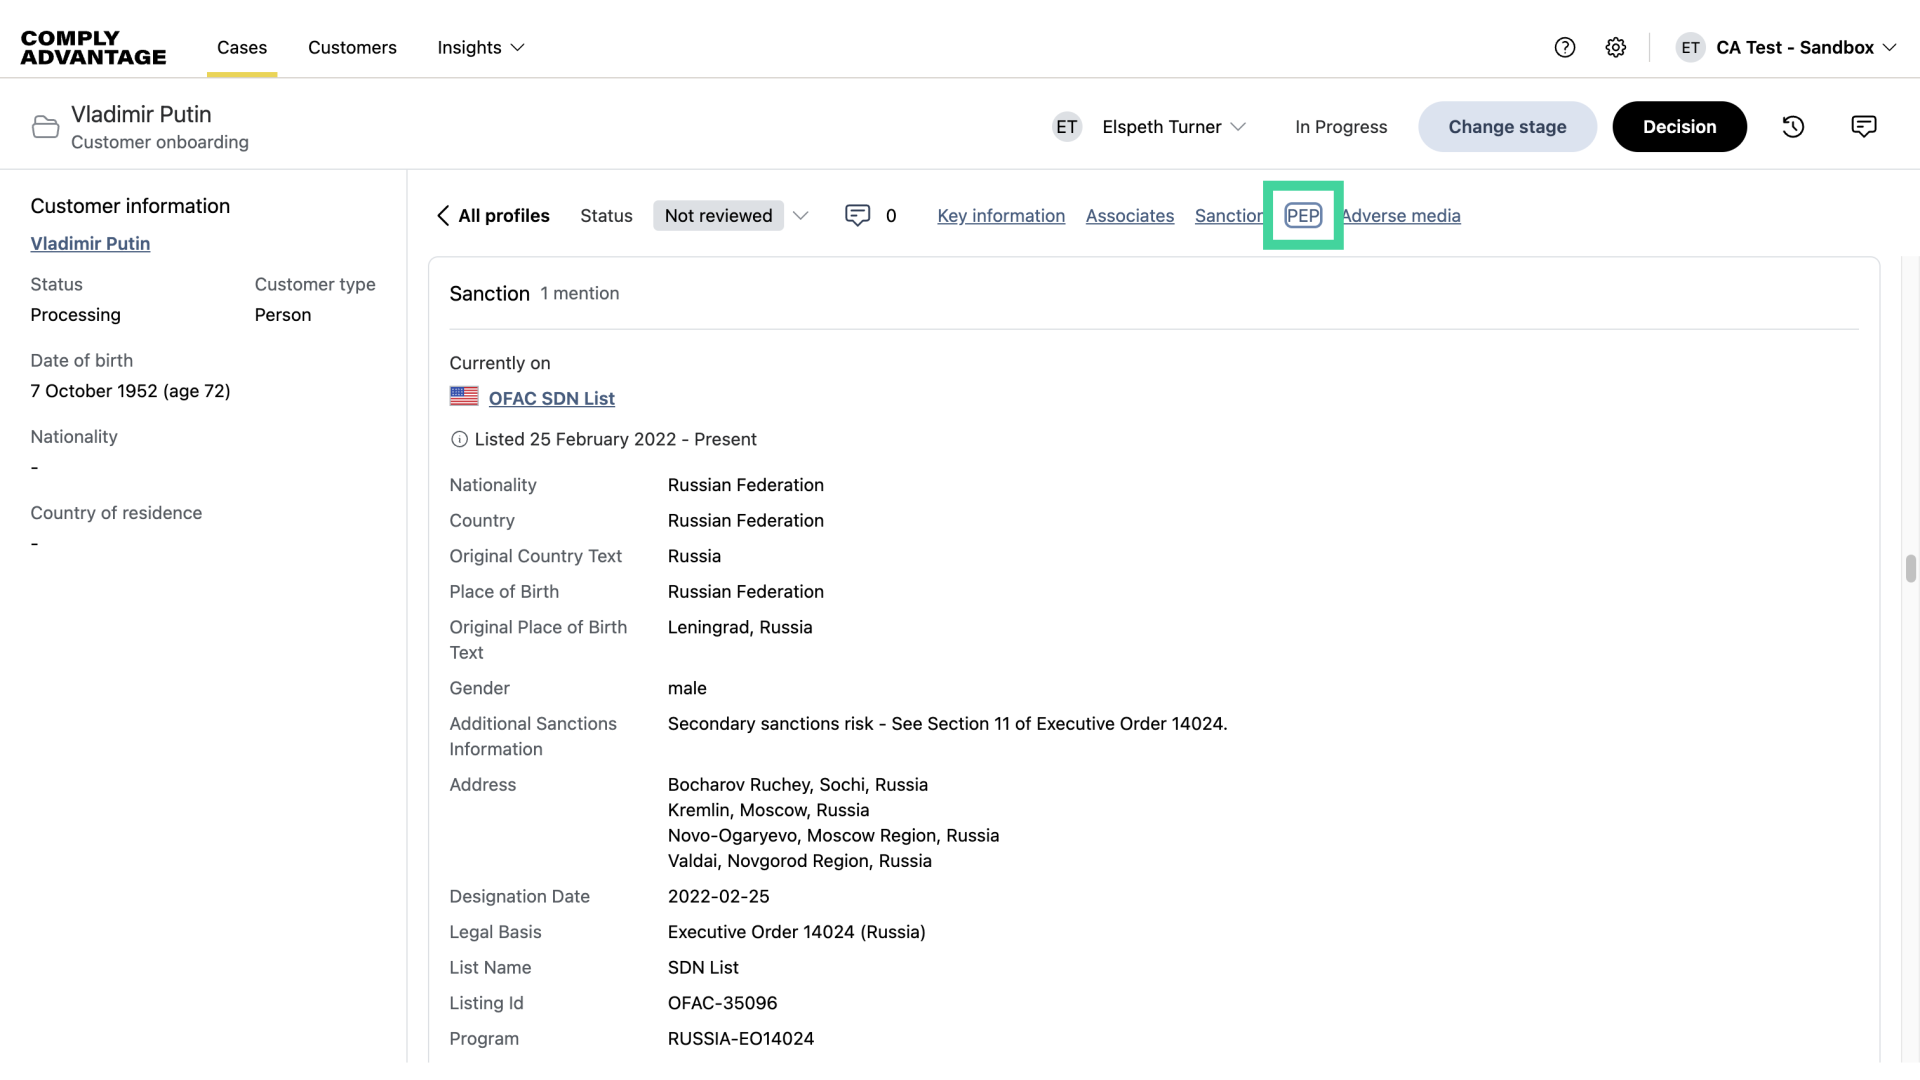
15. Click "PEP"
View PEP information.
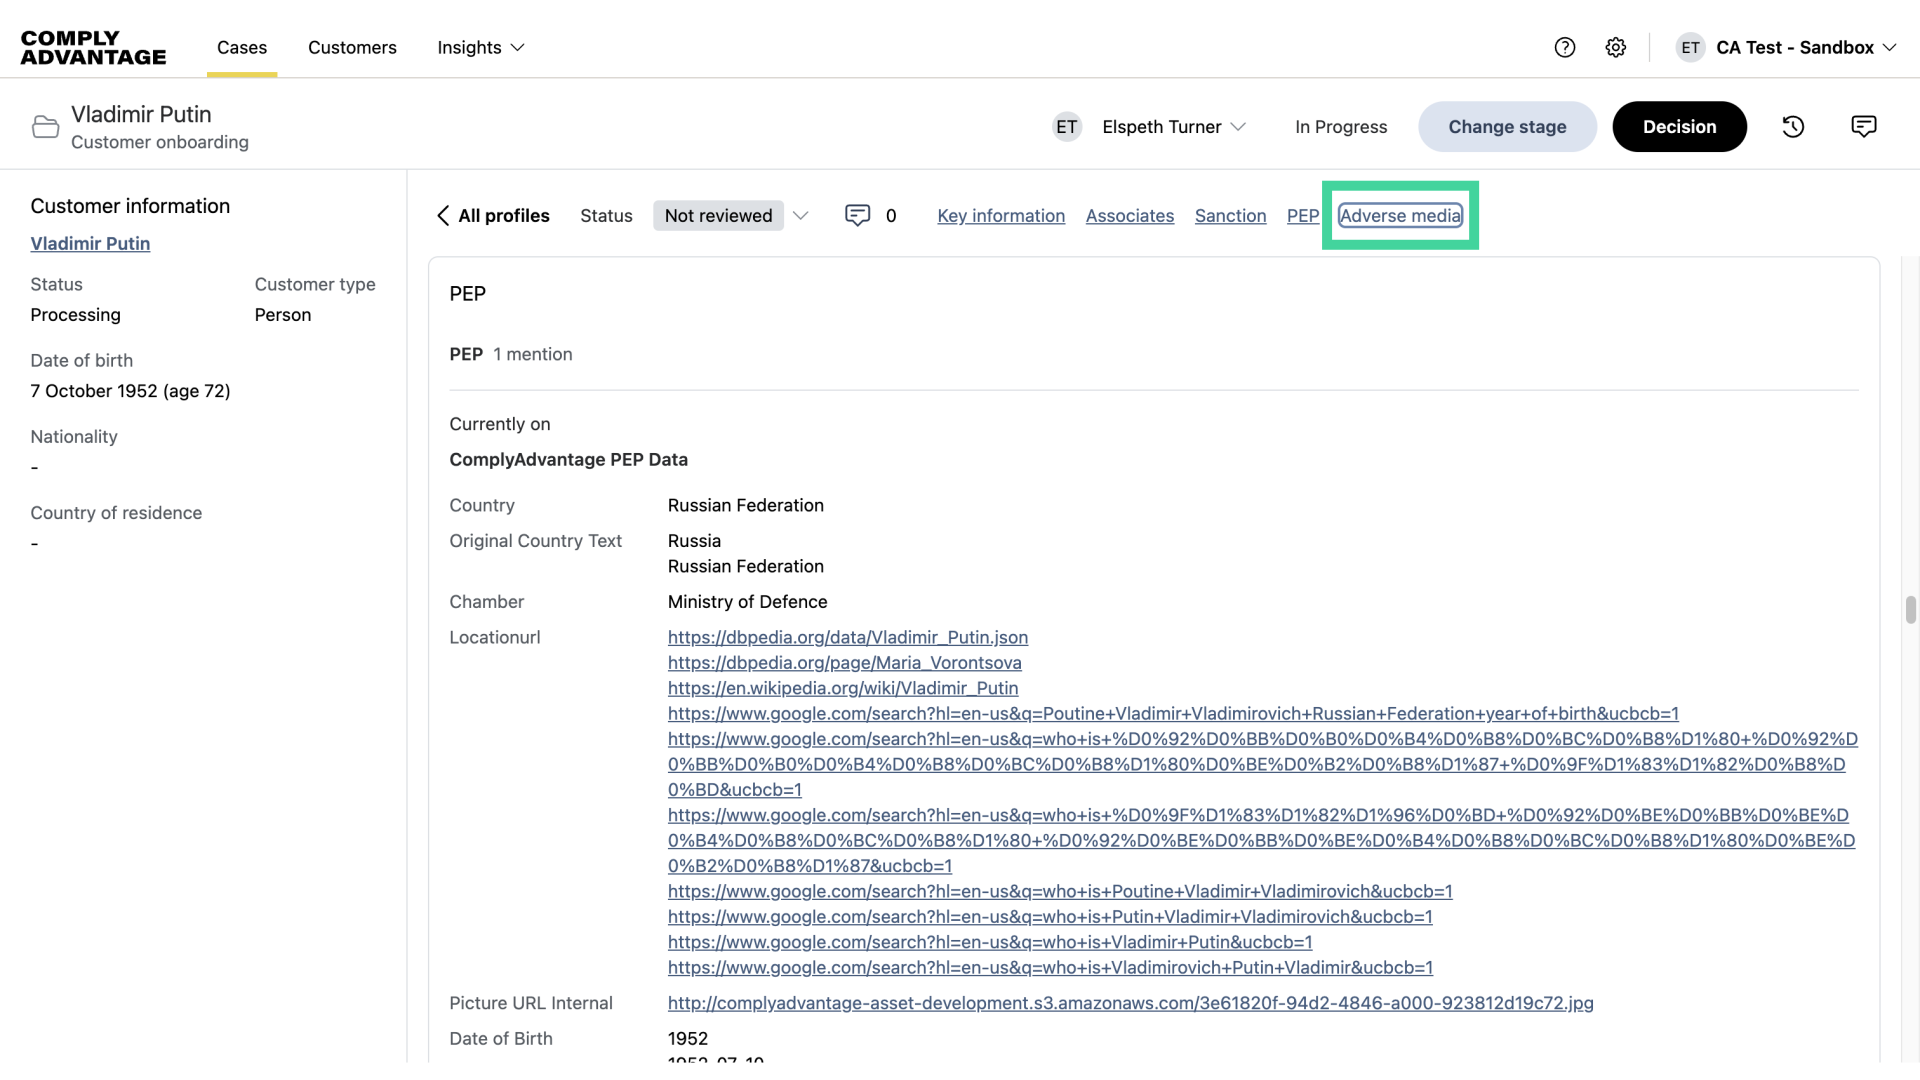
16. Click "Adverse media"
And review adverse media related to the profile.
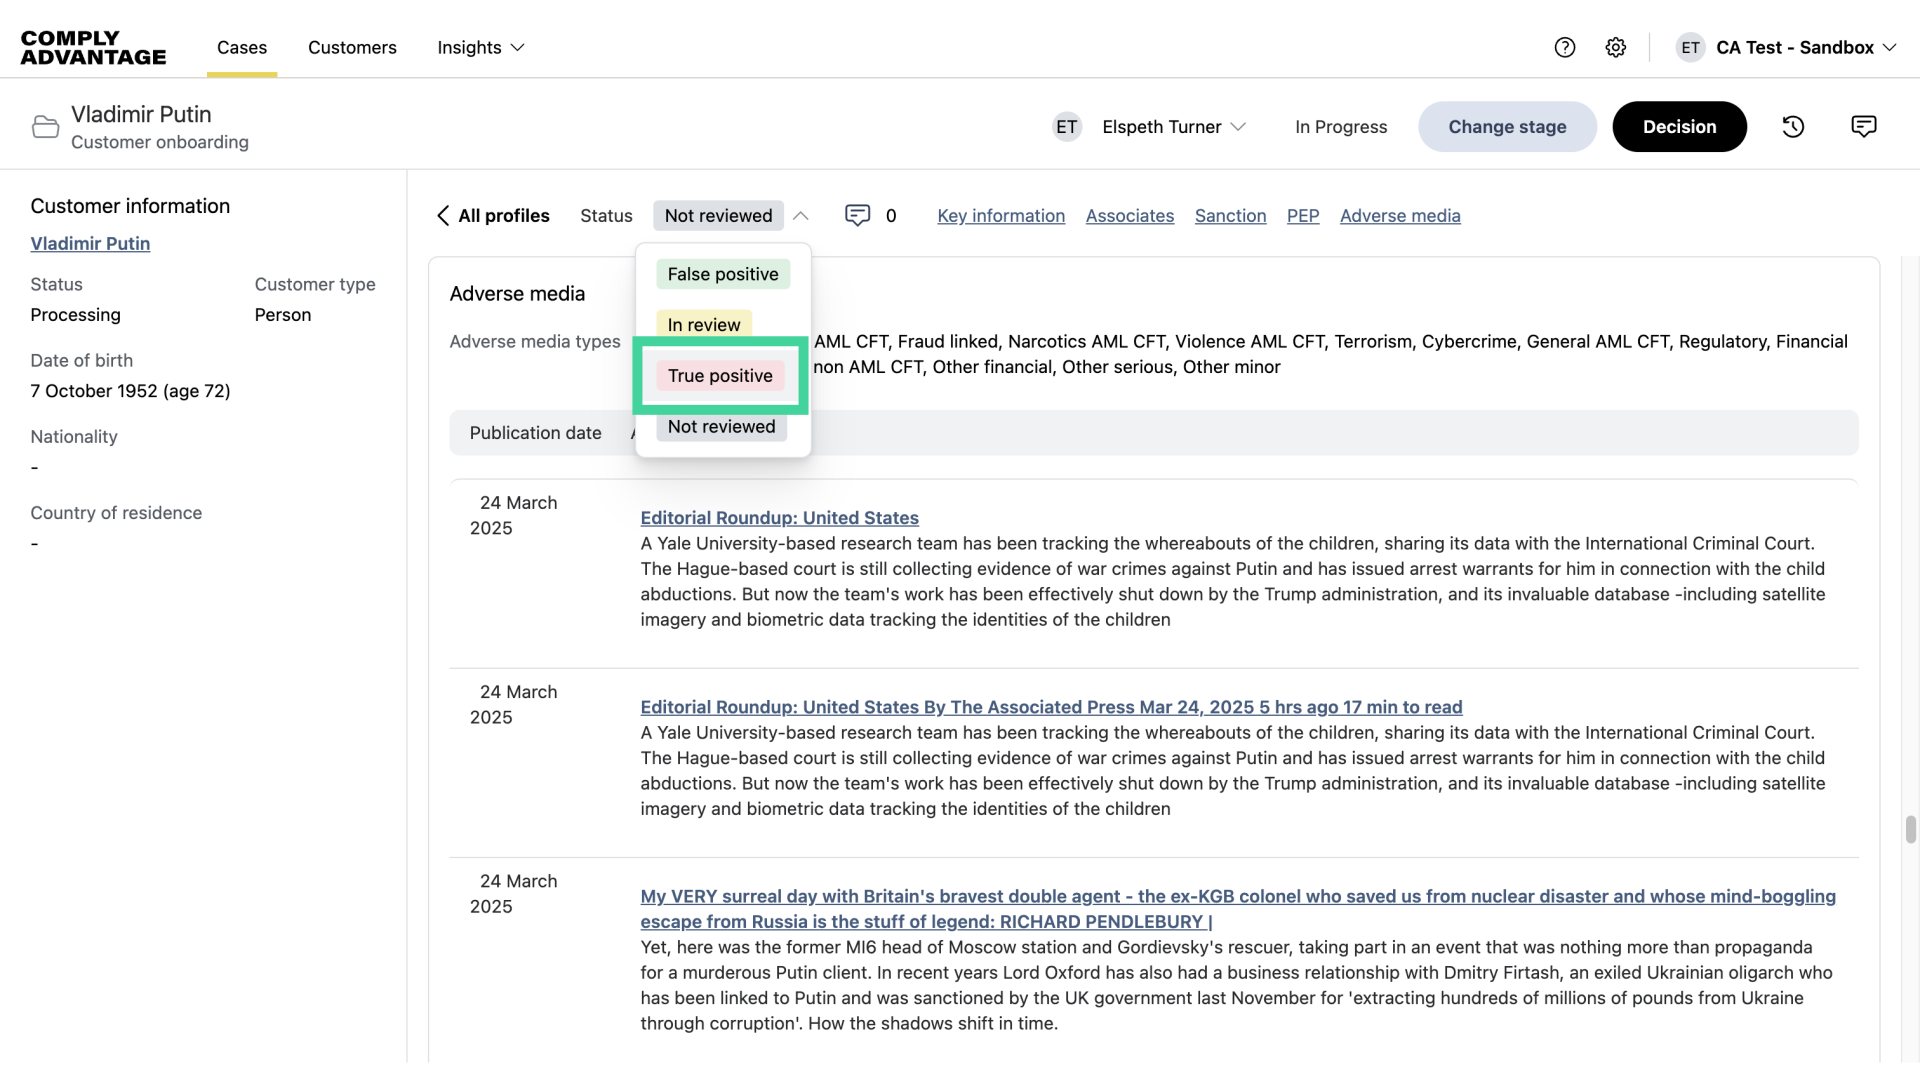
17. Change status
Once you have identified whether the profile is a true or false positive, you can change the status of the screening result accordingly.
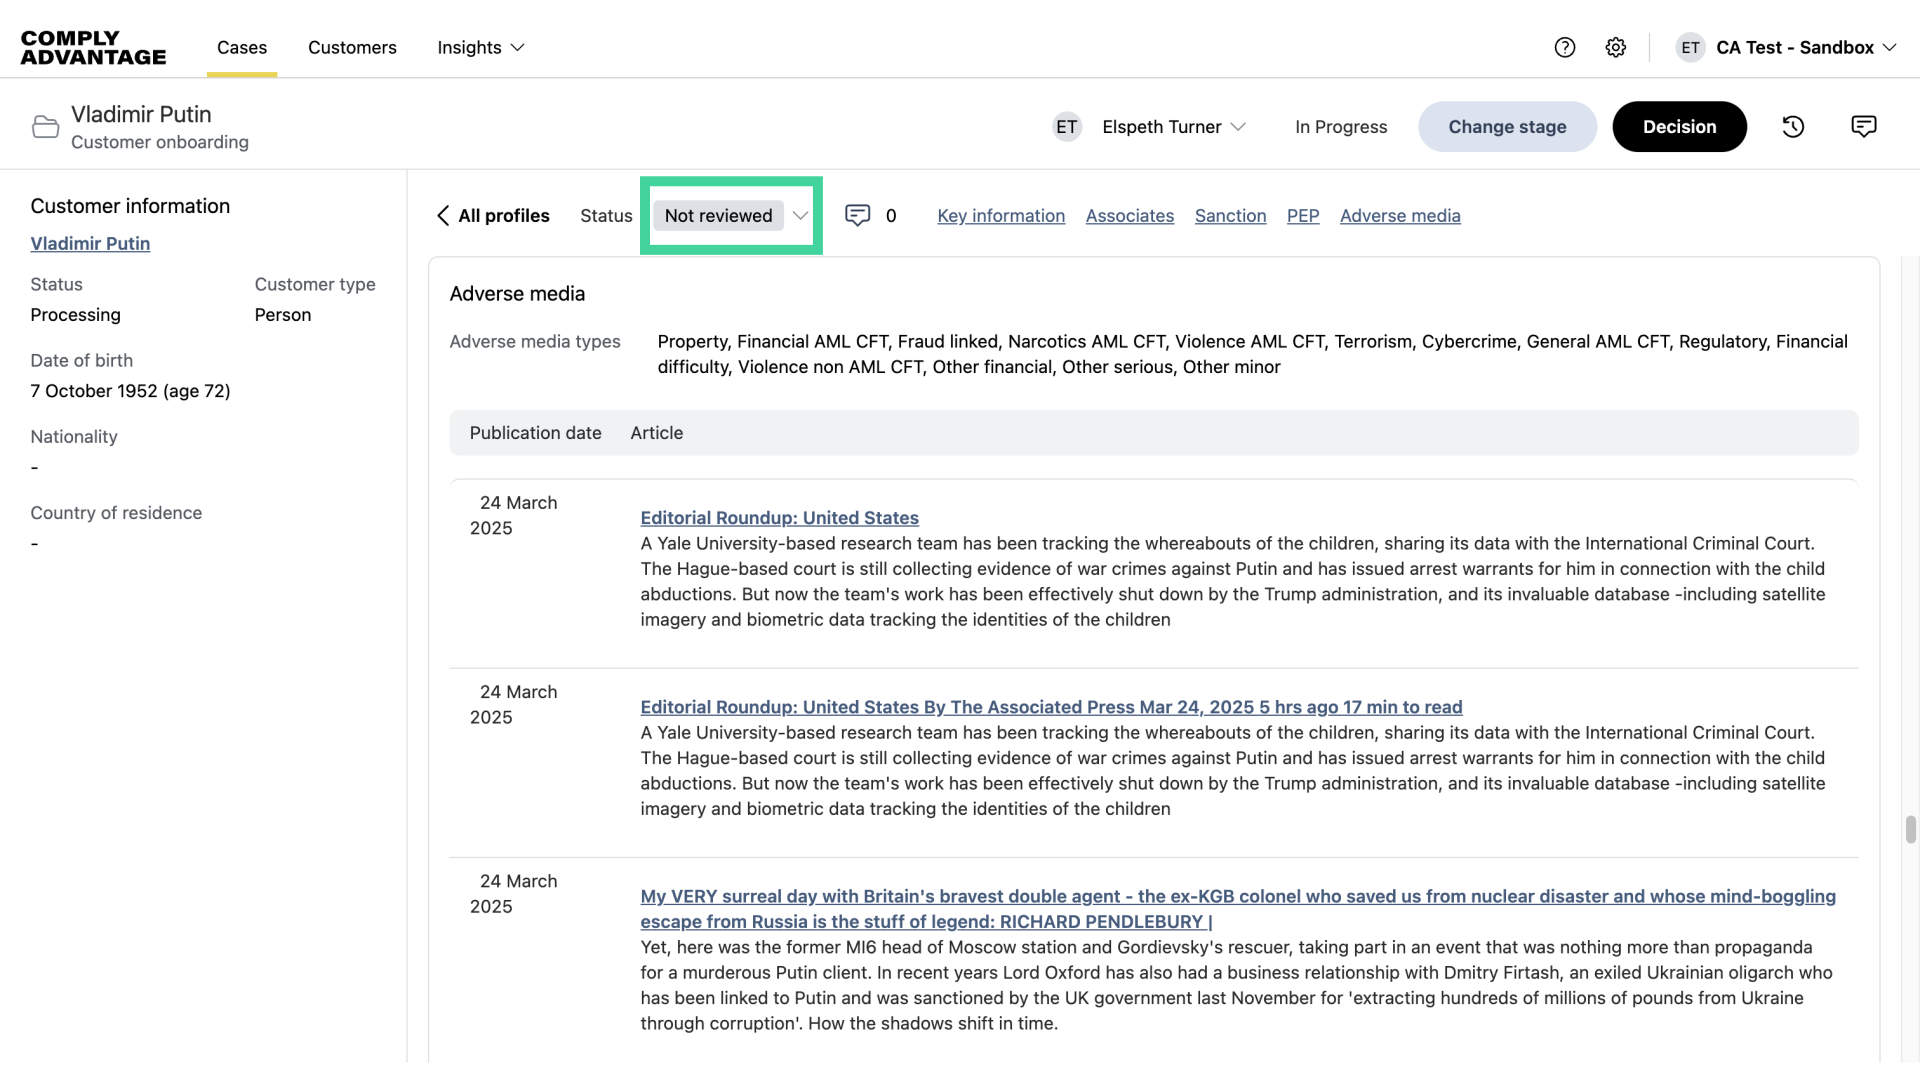
18. Choose a status
After reviewing the case details, you can assign a status to the screening result.
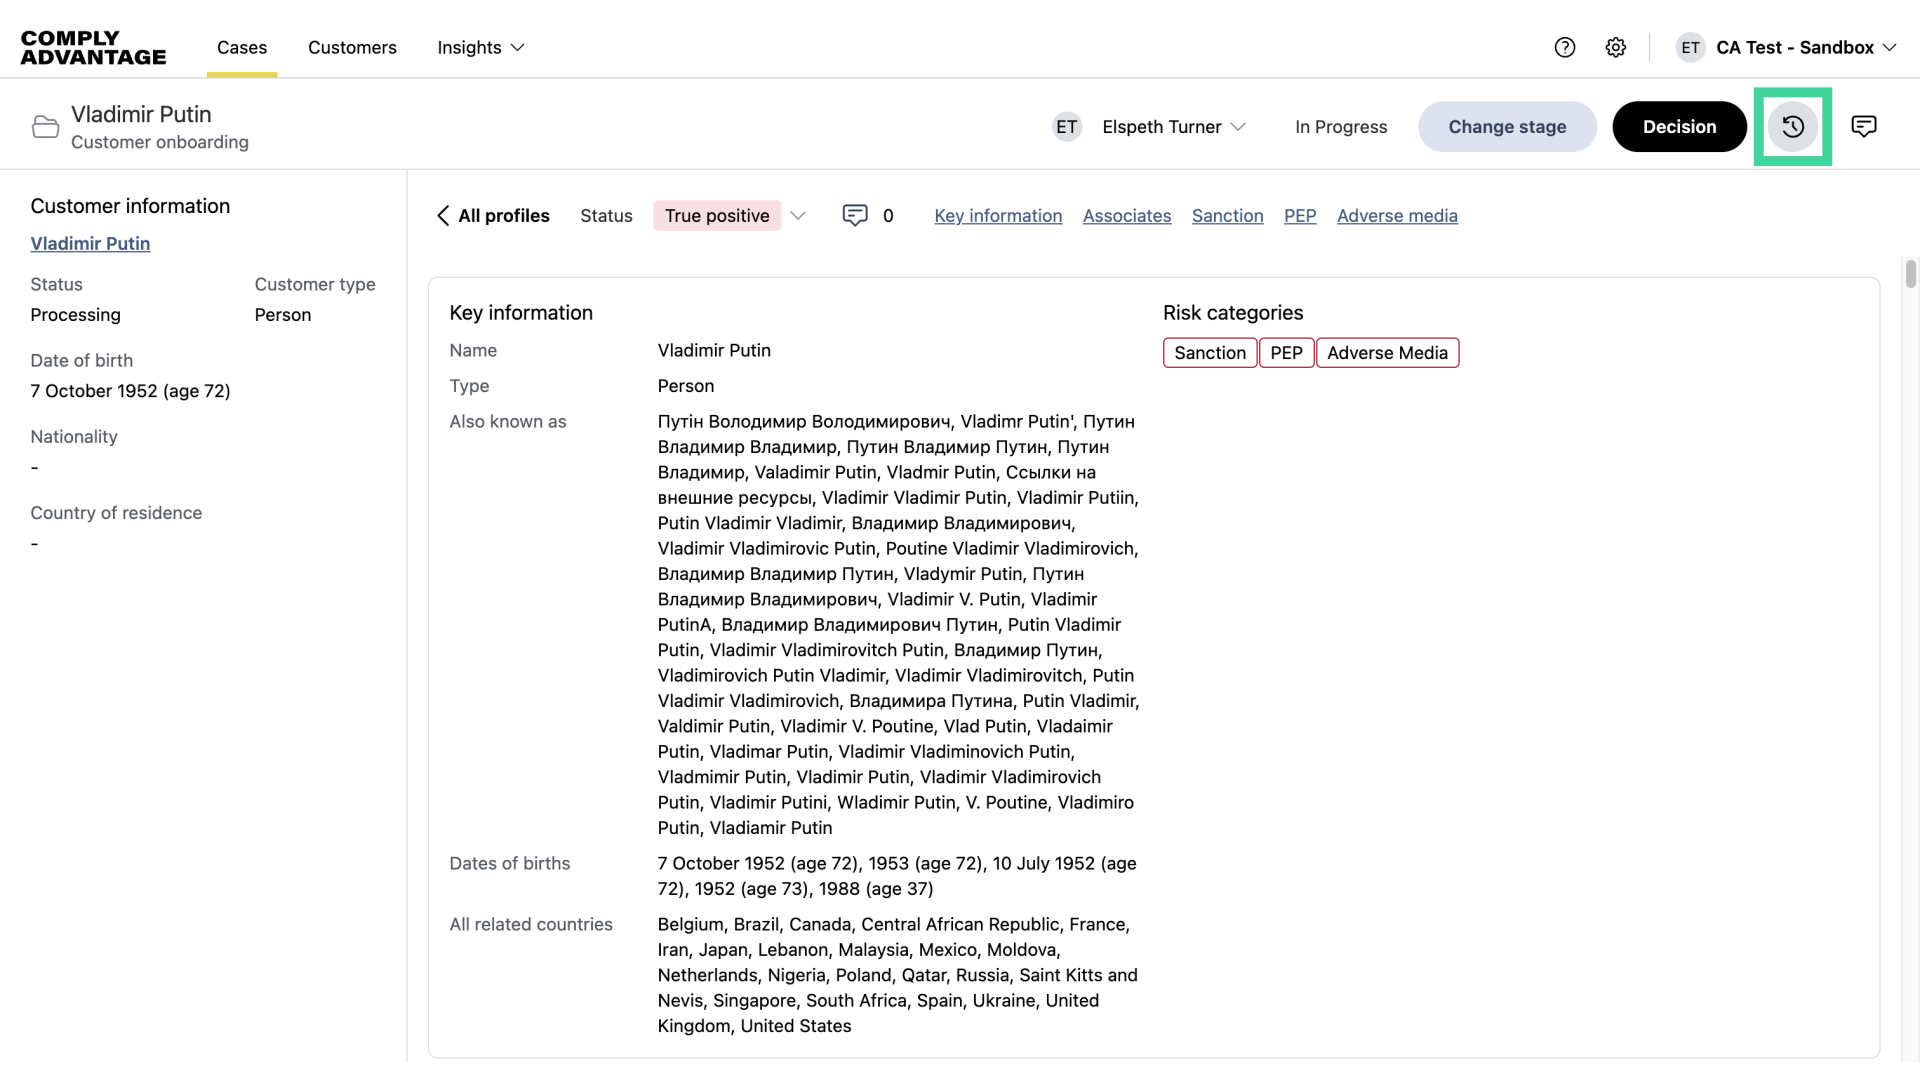
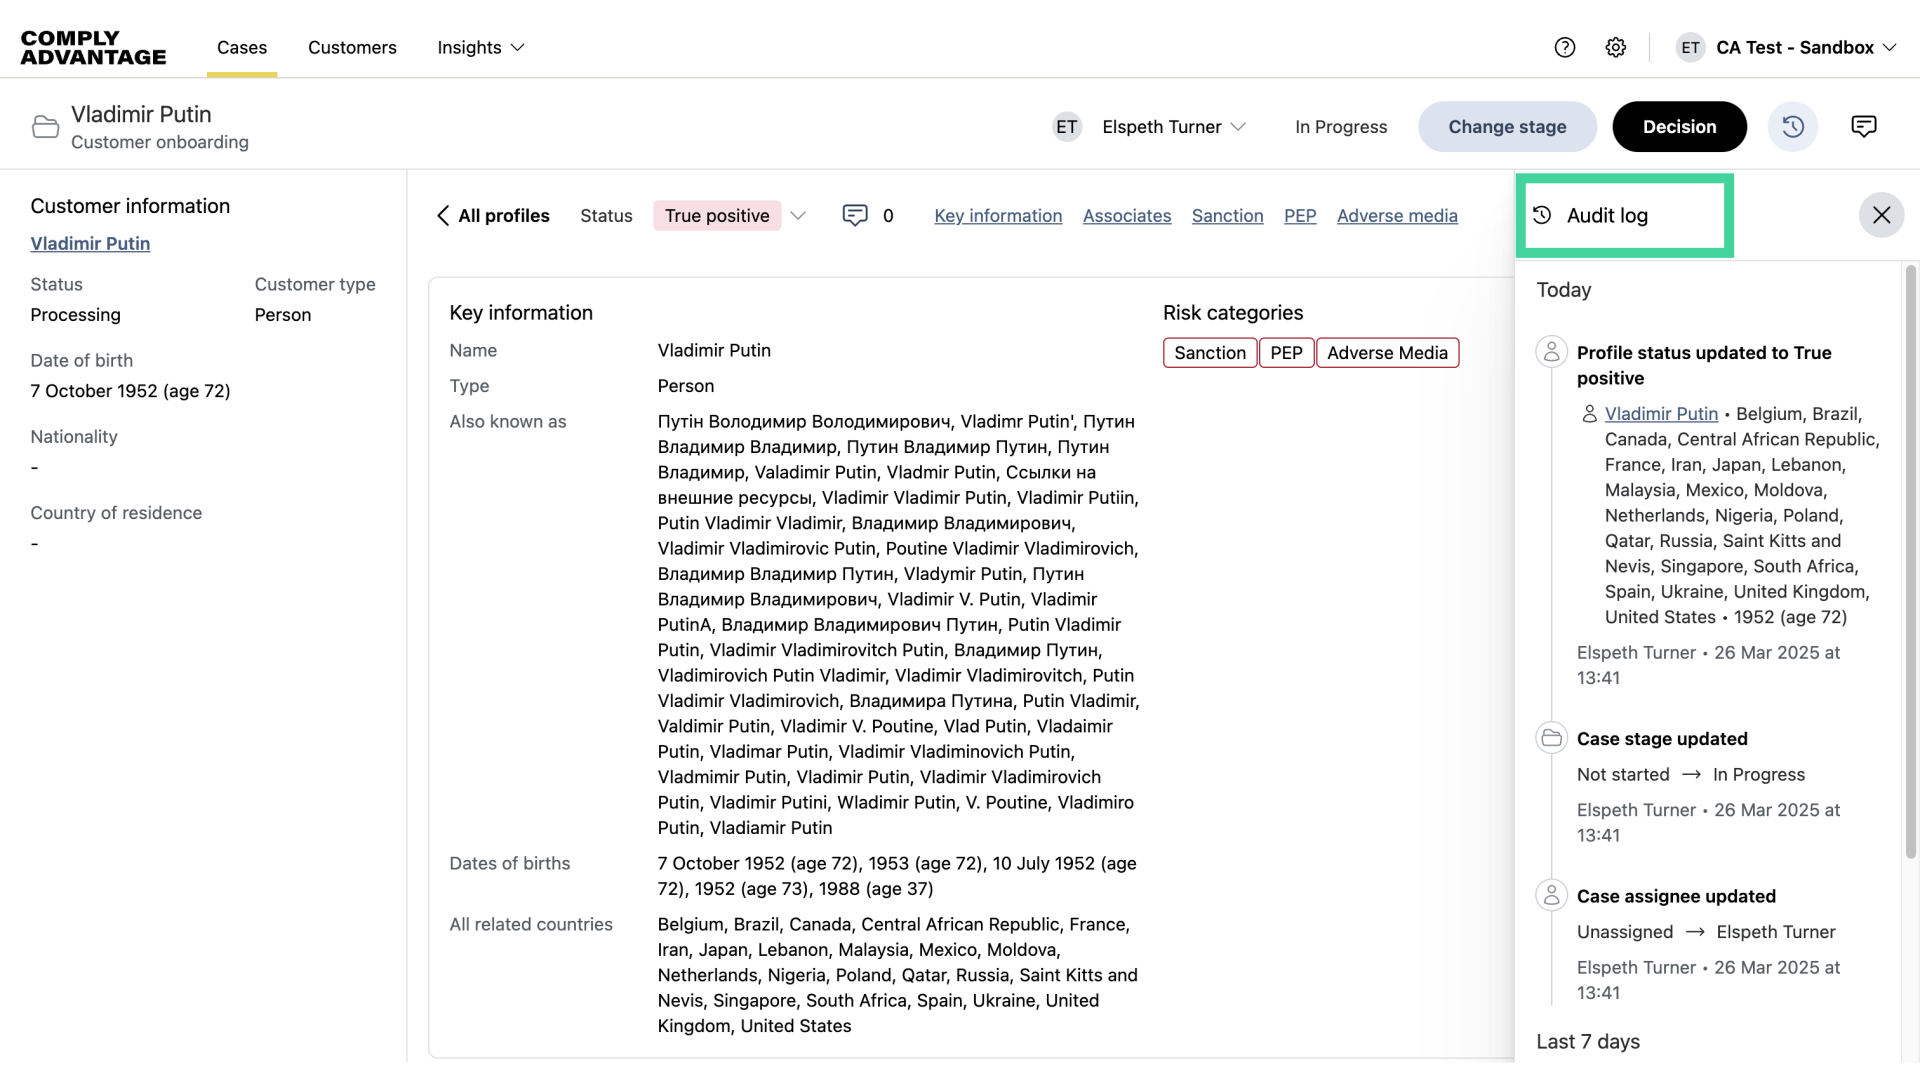
19. Access audit log
You also have the option to view the case audit log history.
20. View audit log
Here, you will see every action taken on this case.
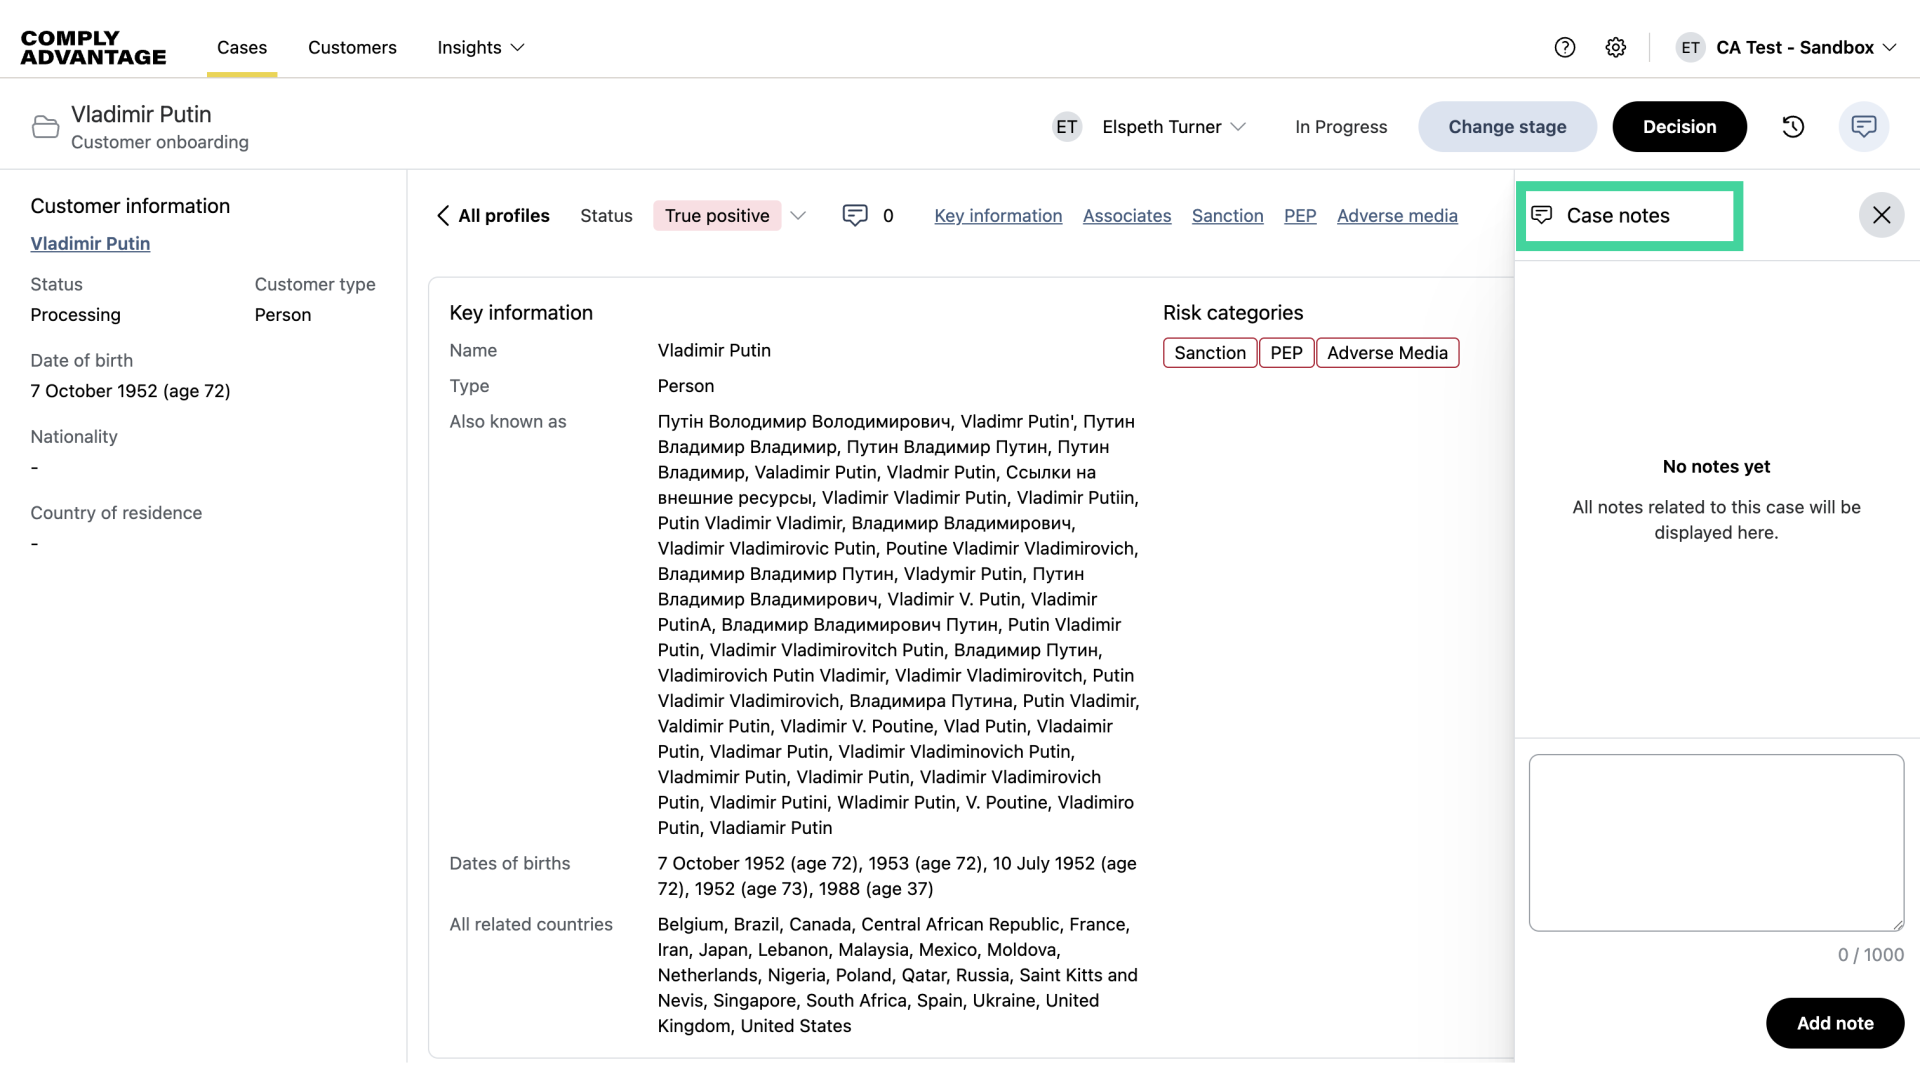
21. Case notes
You also have the option to view all notes created for a case.

22. Click here
Here, you will see every note taken, including notes that you may have left on other profiles within this case.
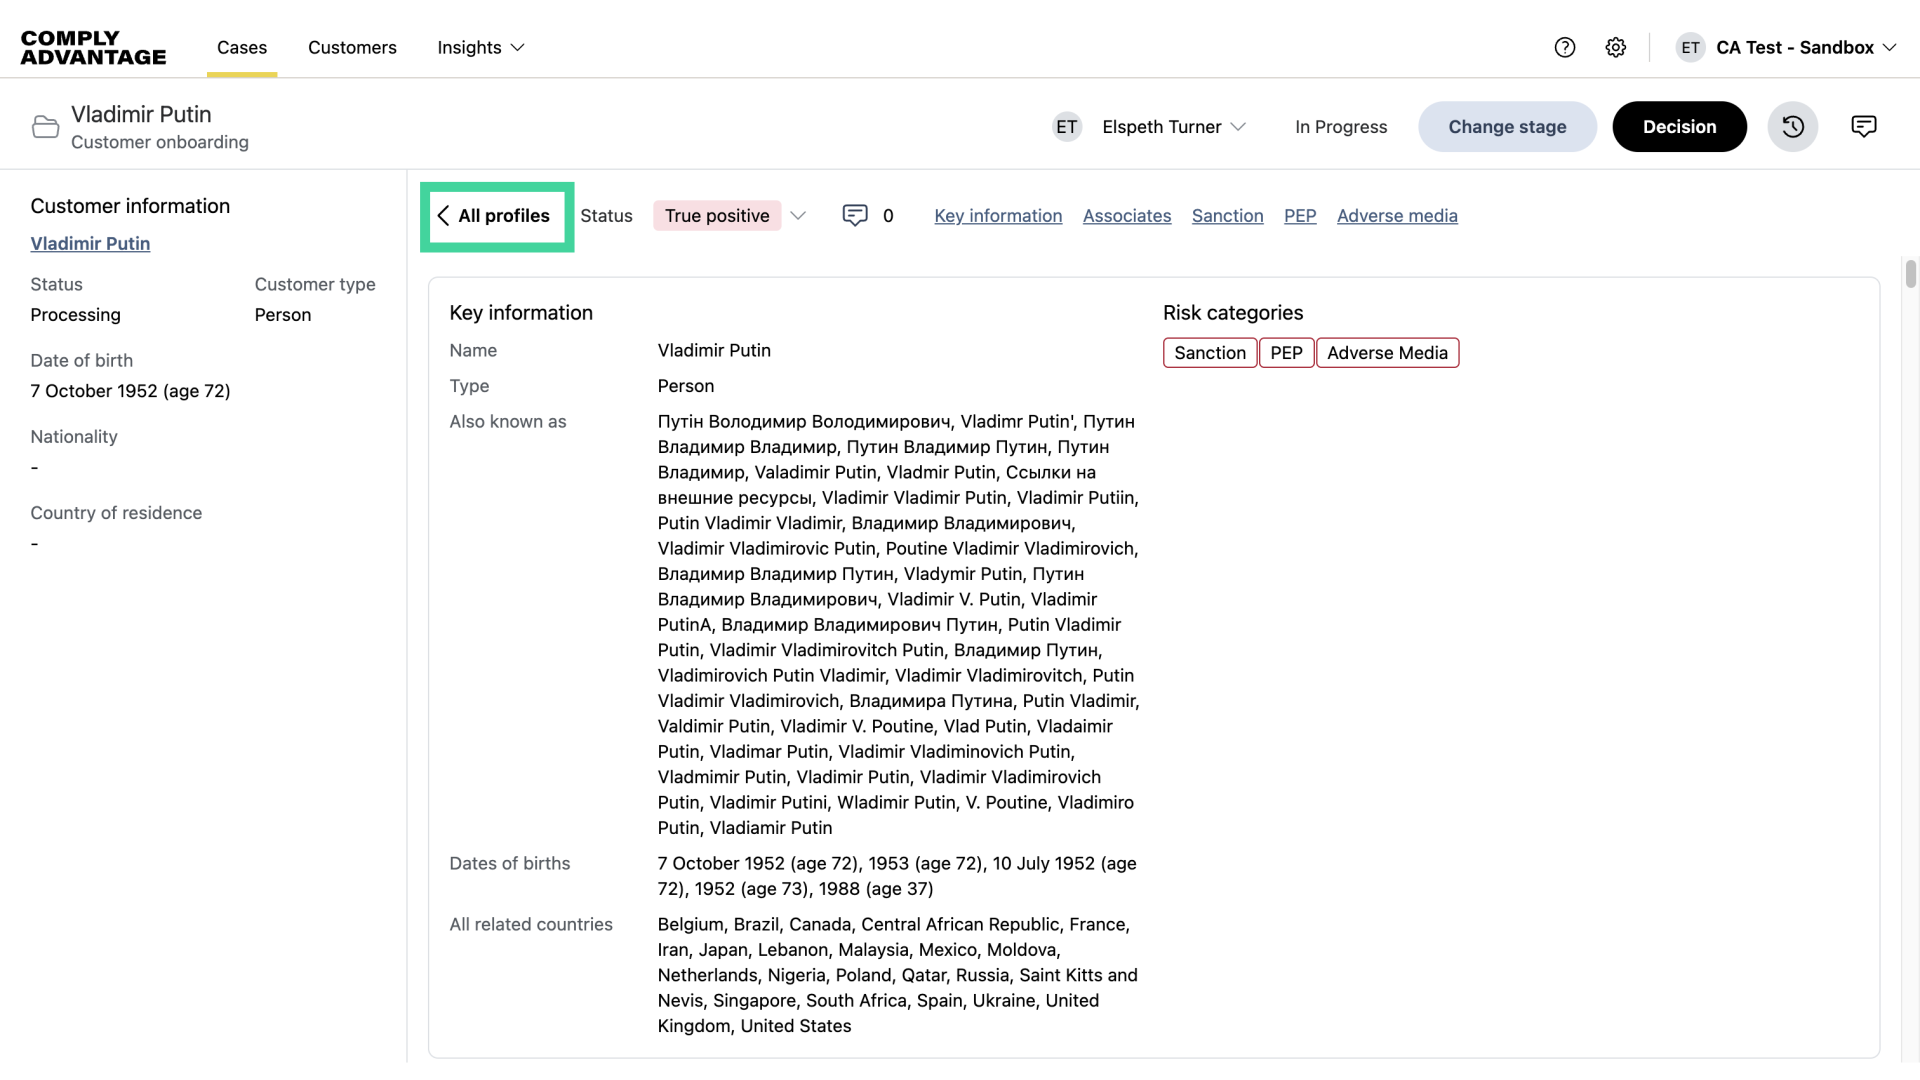
23. Click "All profiles"
Now that we've remediated one of the profiles, we can return to this customer's case page.
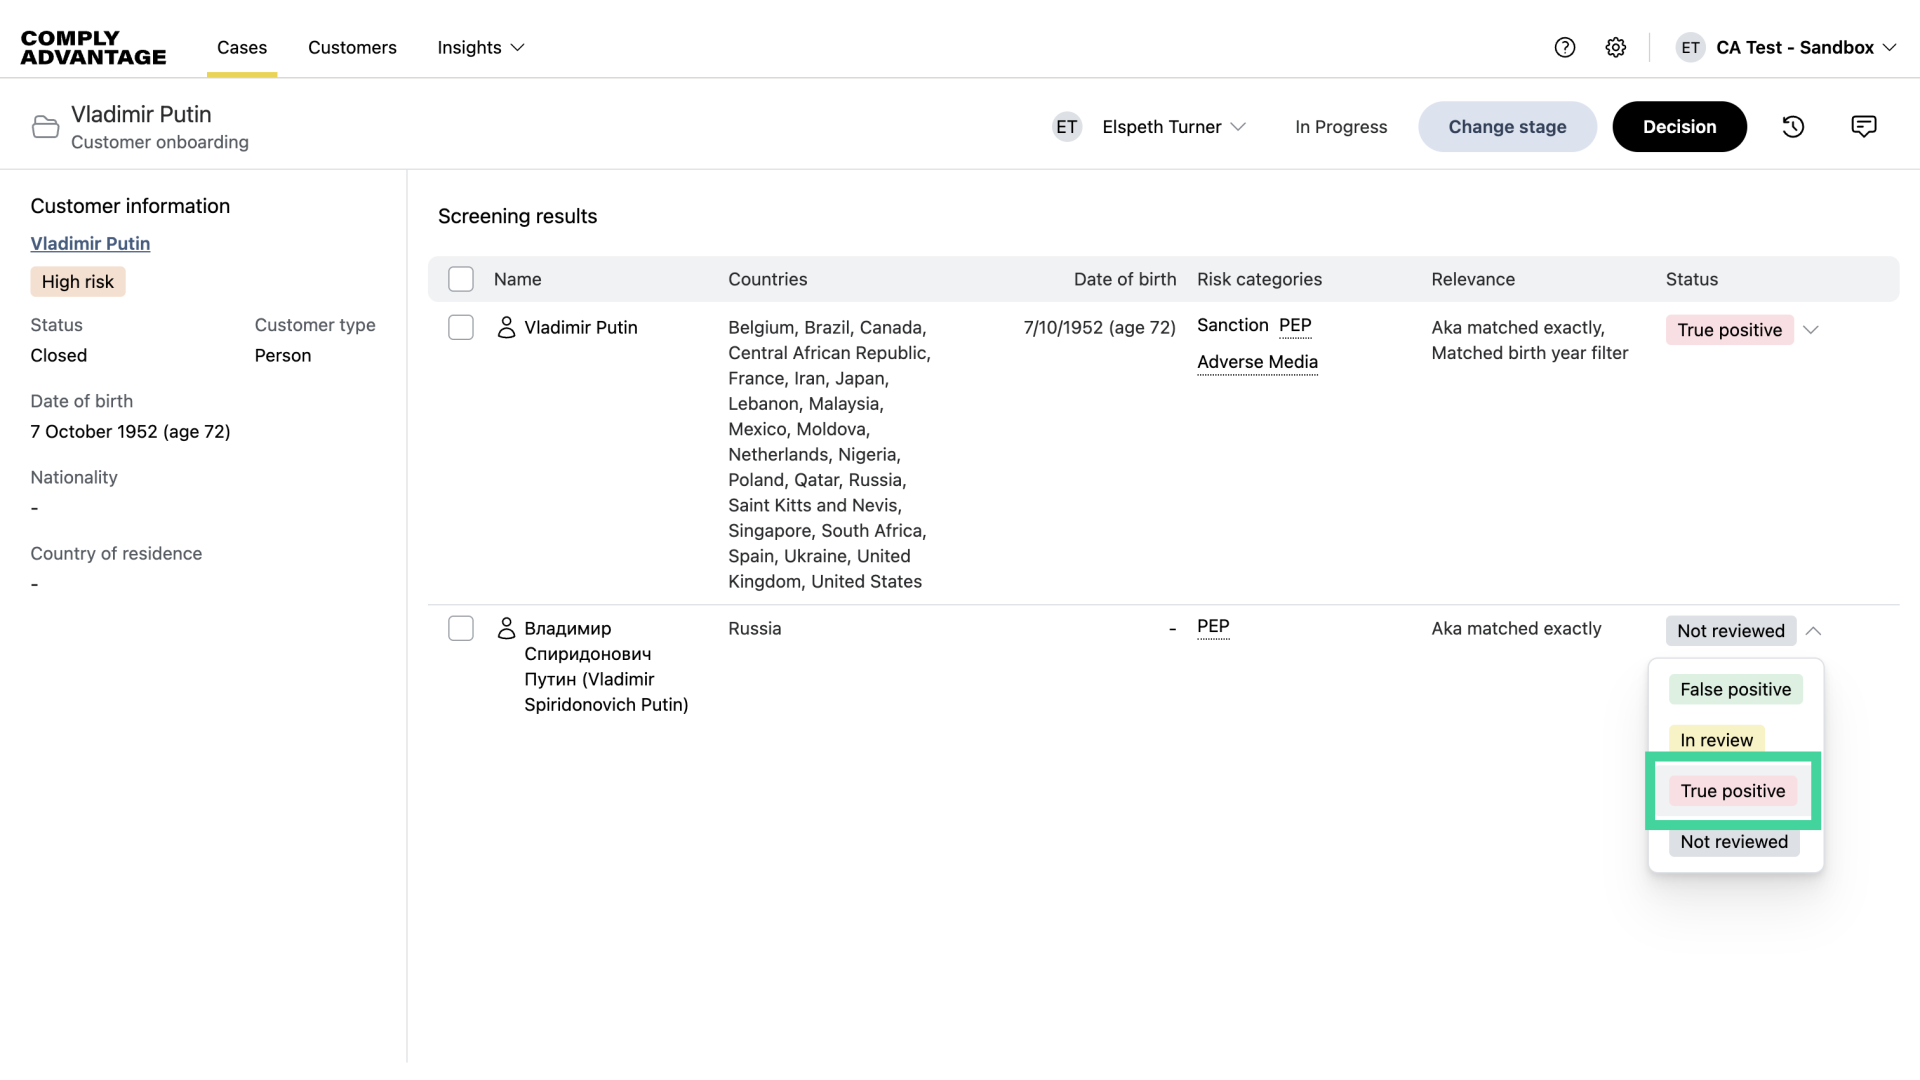
24. Click into the second profile
Now, we will remediate the second profile.

25. Select match status
After reviewing the profile details, identify whether it's a true or false positive.
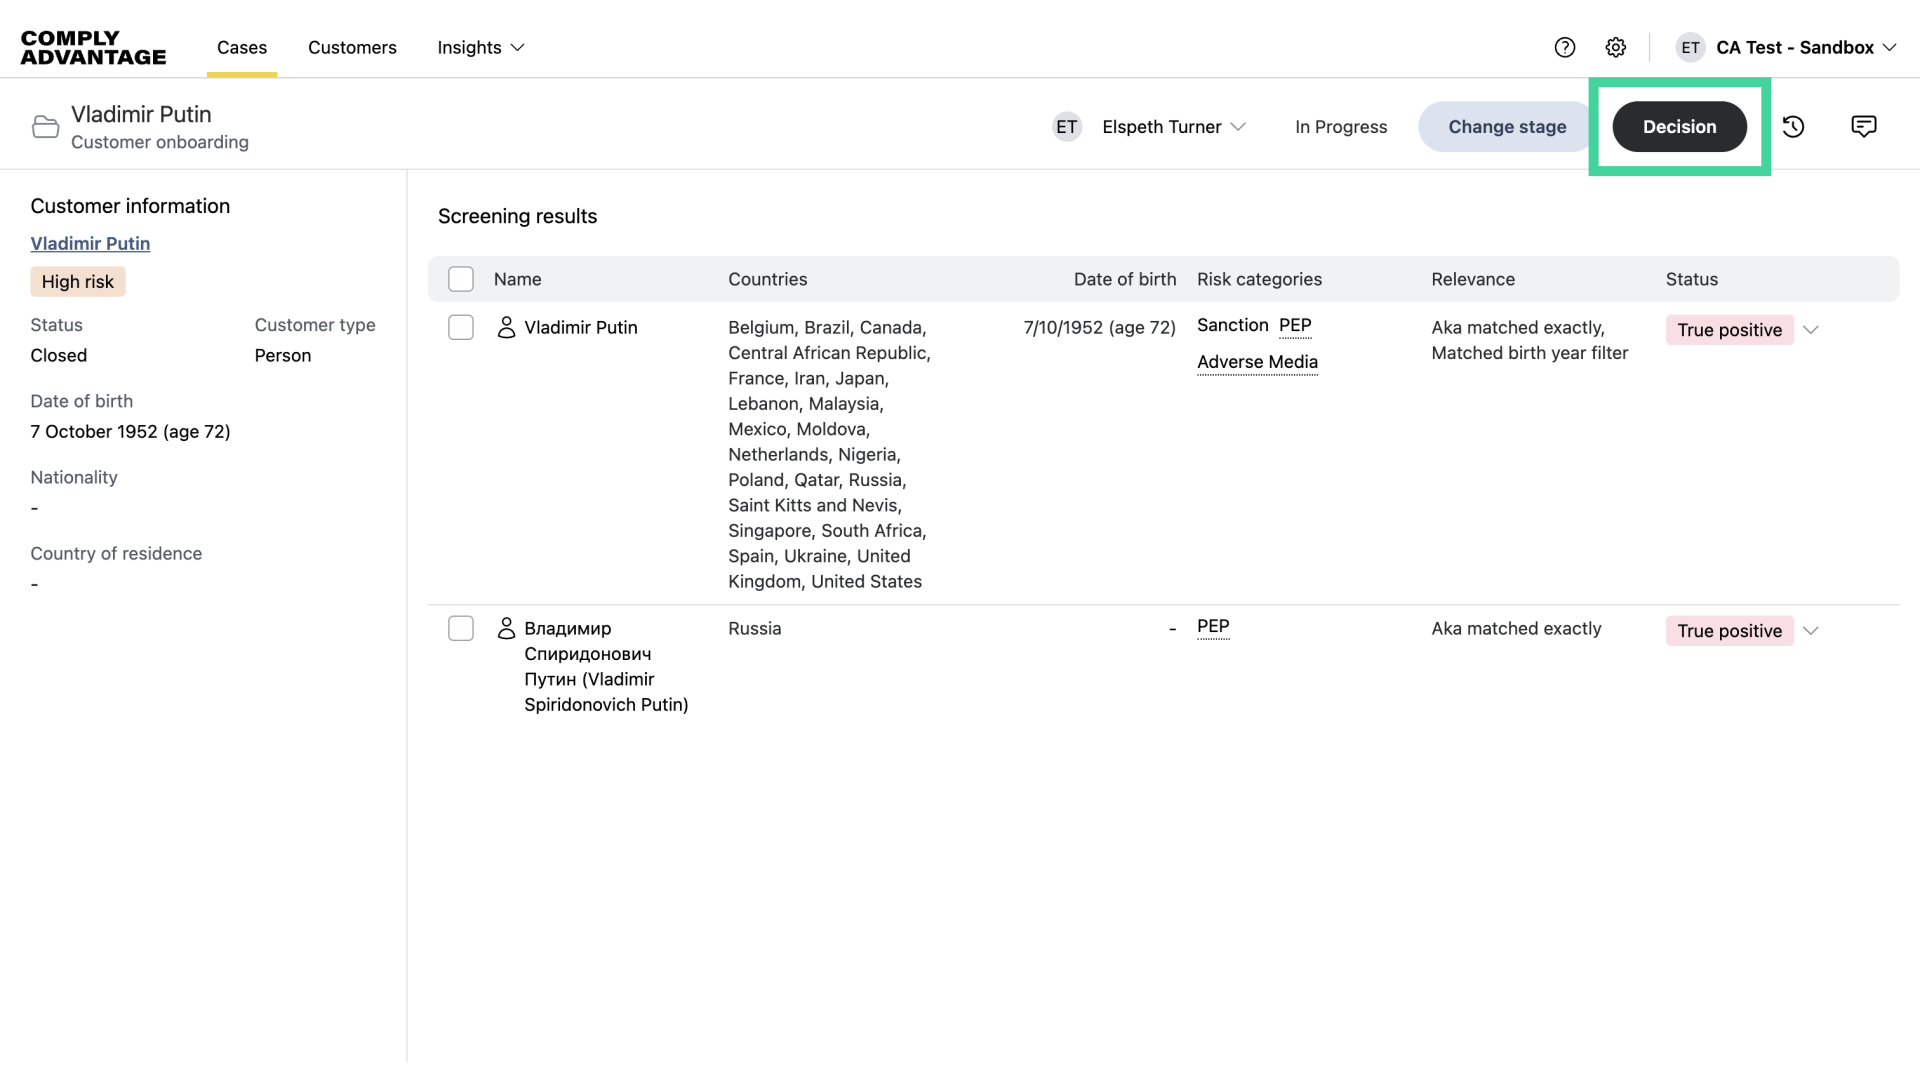
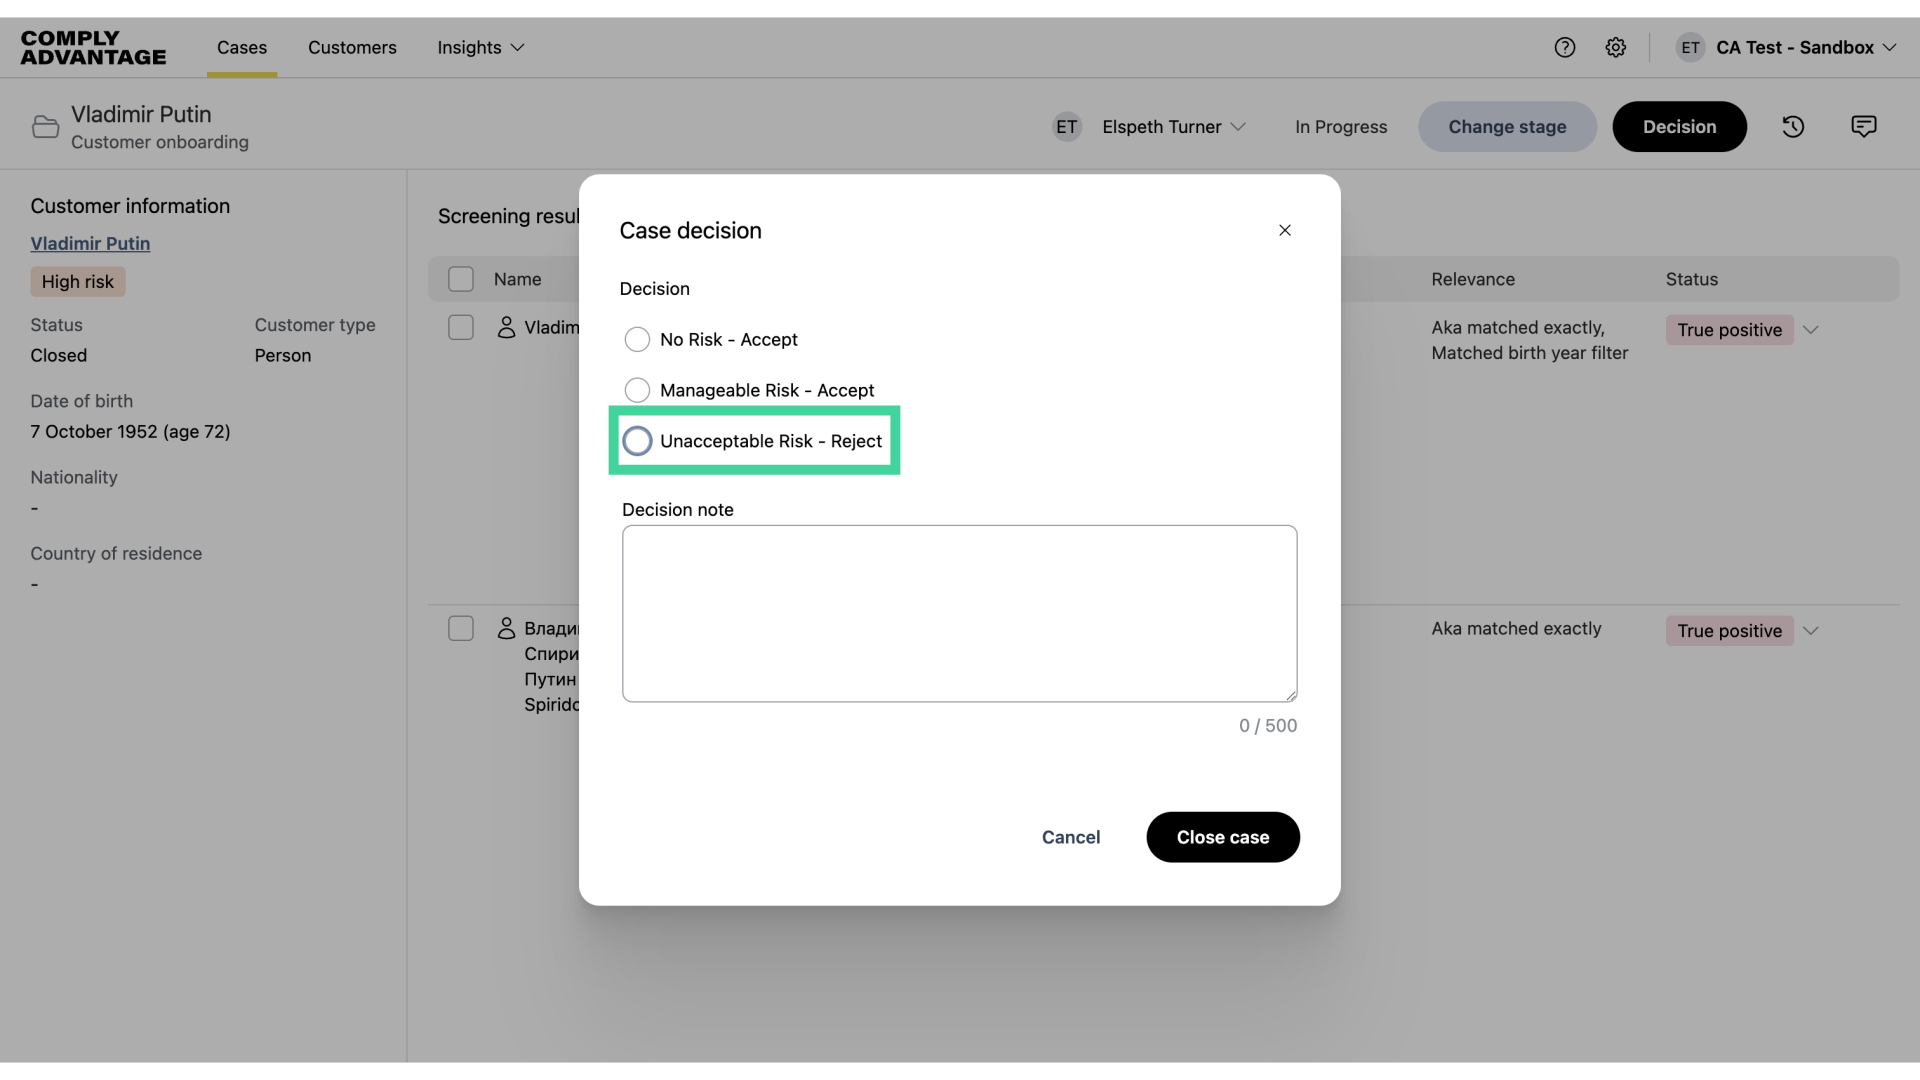
26. Click "Decision"
Now that we've remediated the profiles, we can make a decision on the customer.
27. Select a decision
Choose from one of the decision options.
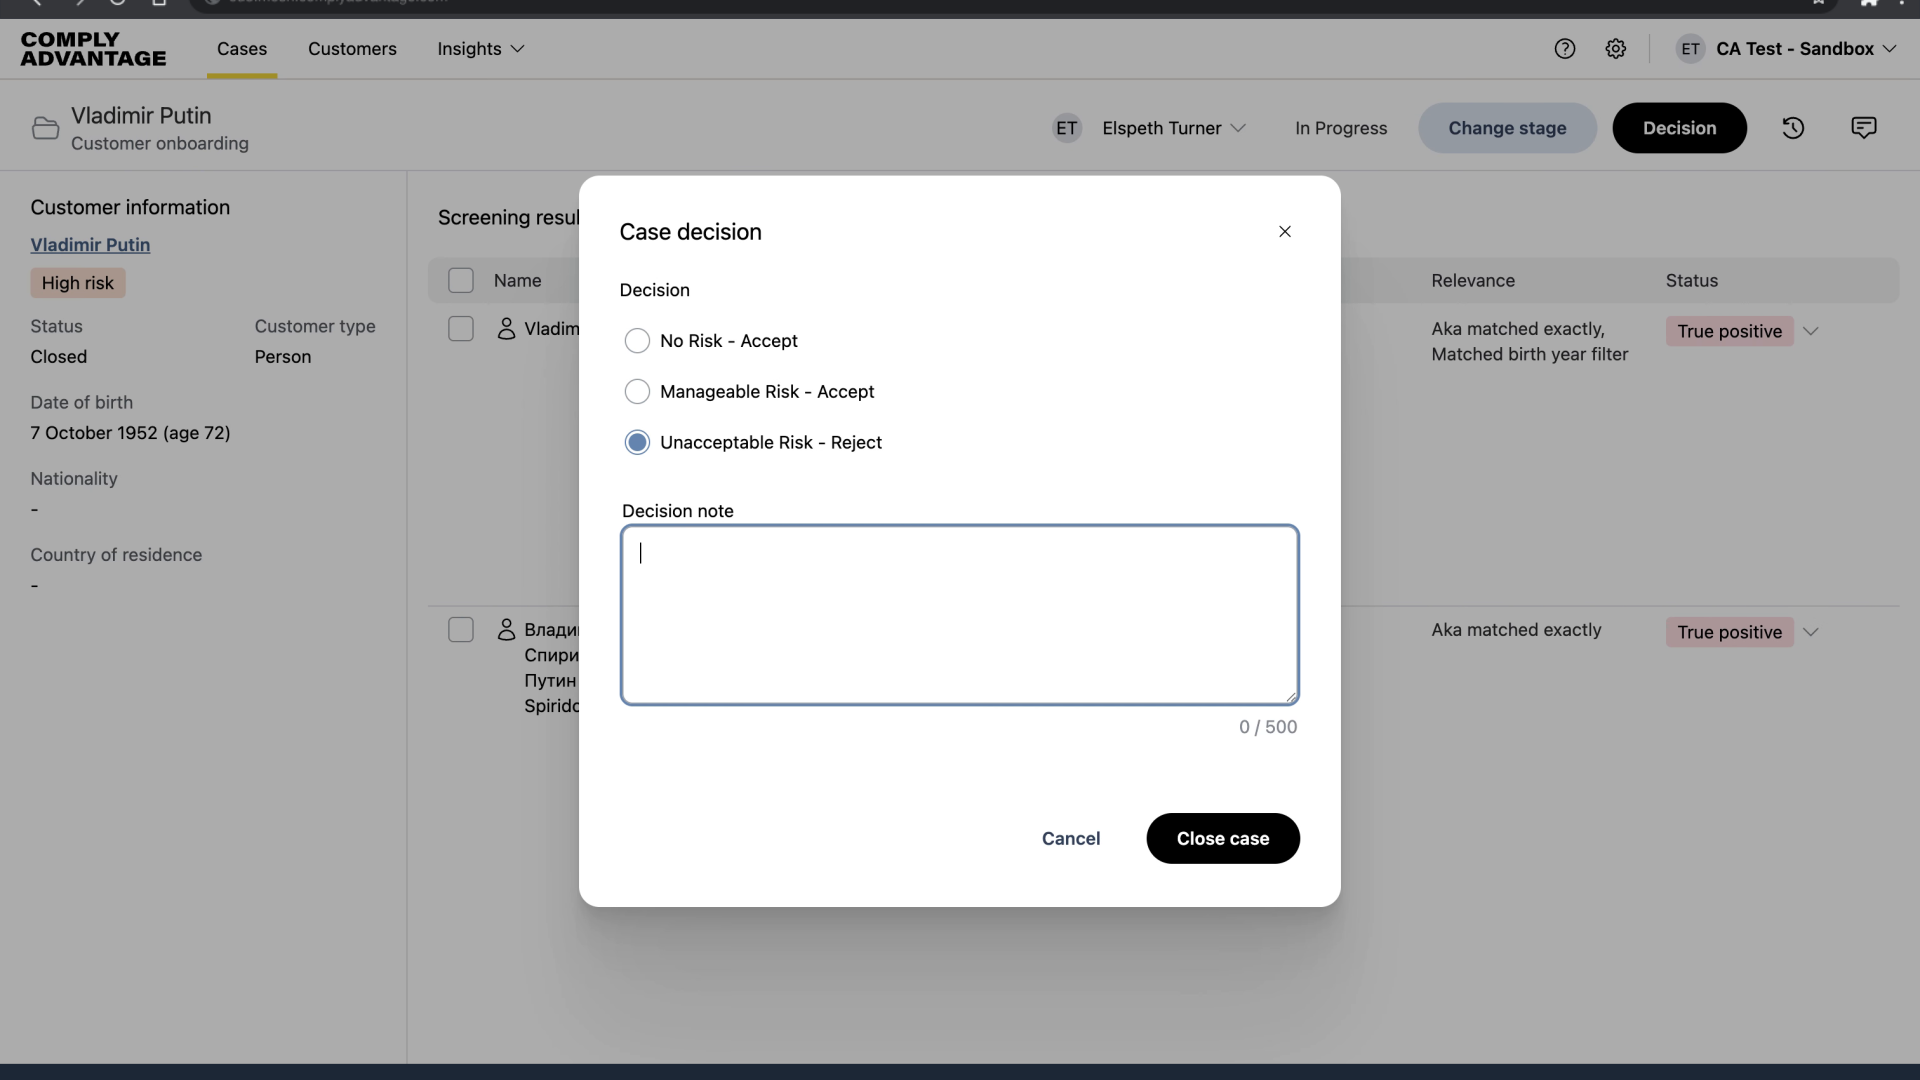
28. Add a note
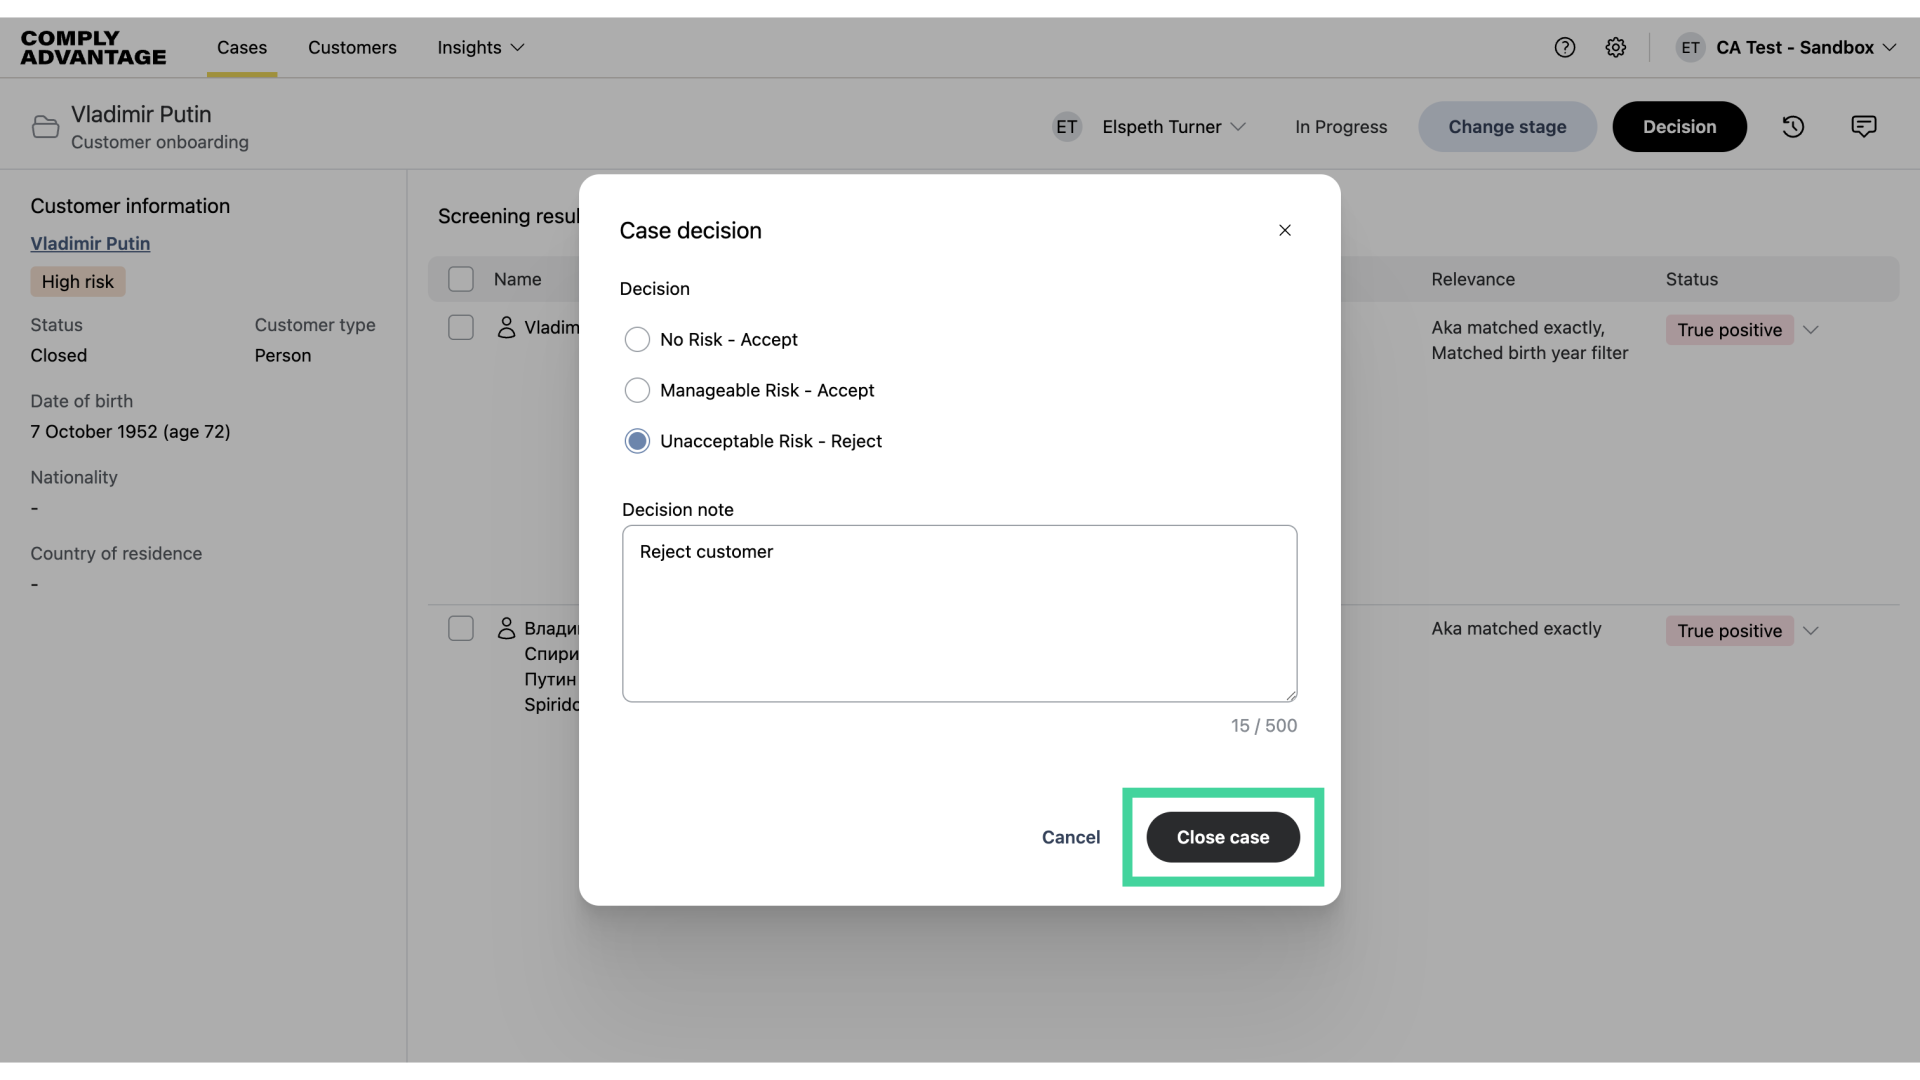
You will need to add a decision note to close the case.
29. Click "Close case"
Finalize and close the case.
30. Go to the customer page
Lastly, click on the customer you have worked on.
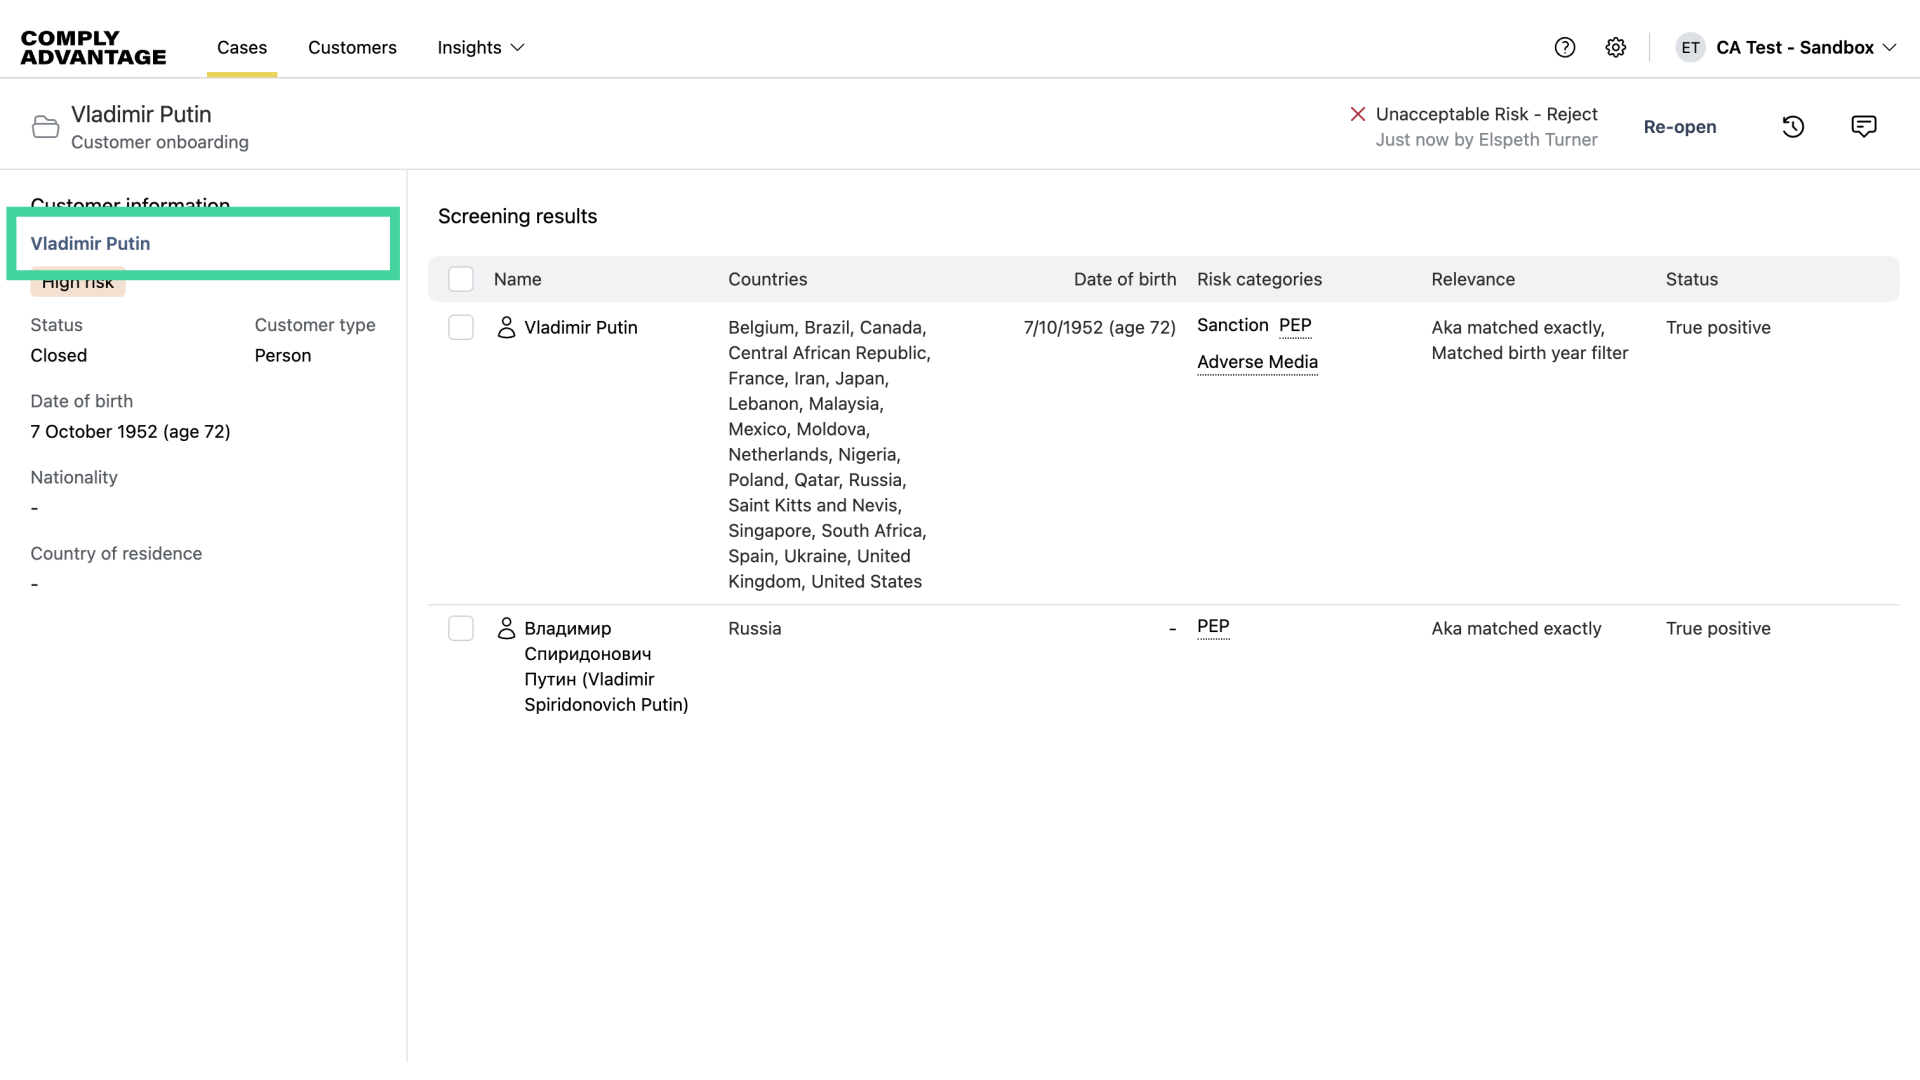
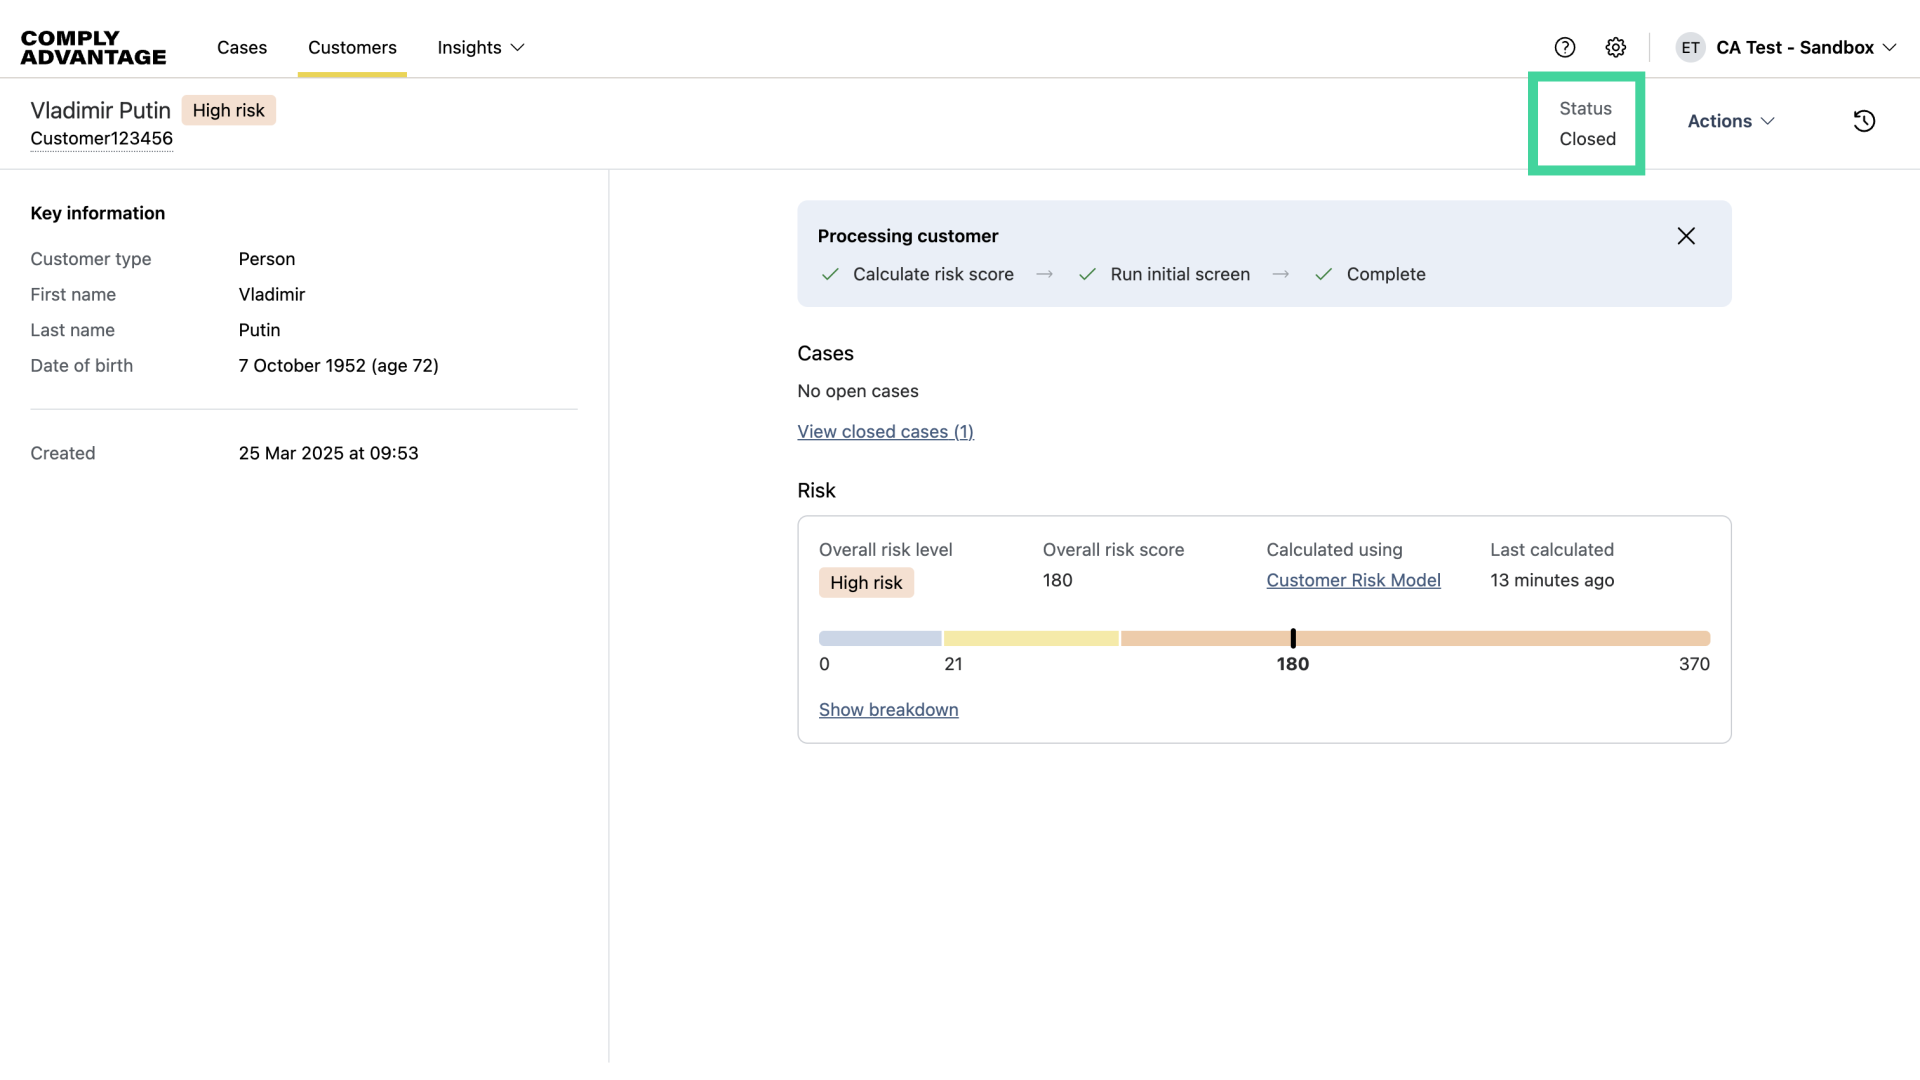
31. Customer status
You will be able to see the customer's status. Since we decided to reject this customer, it's status is now closed. If we had decided to accept instead, the status would have been set to Active.
We hope this guide helped provide an in-depth walkthrough of remediating a case in Mesh.