Creating and screening people or companies in batches
Last updated: November 20, 2026
You can create and screen Customers in batches by uploading a file to ComplyAdvantage Mesh. This requires the Create and screen customers permission. Without it, the Create menu does not appear.
In this article, you will learn:
How to generate a file containing customer information in the correct format and select a screening configuration.
How to upload a file.
How to resolve validation errors and remove files that do not pass validation.
How to view file statuses and download a report.
How to filter your uploaded files by their status.
Generating a file
You can upload files in Excel (XLSX) and comma-separated value (CSV) formats. If you upload an XLSX file, keep your Customer data on a single sheet. A file with more than one sheet fails validation.
In the Web platform, a file can be up to 100 MB. The limit is on file size, not on the number of rows.
A file over the limit is rejected. To upload more Customers, split them into several files, each with the column headers in its first row.
We recommend creating your file from a template, so that its column headers match the ones Mesh accepts. To create a file from a template:
Click Customers on the main header, then select Create on the right, then select File upload.
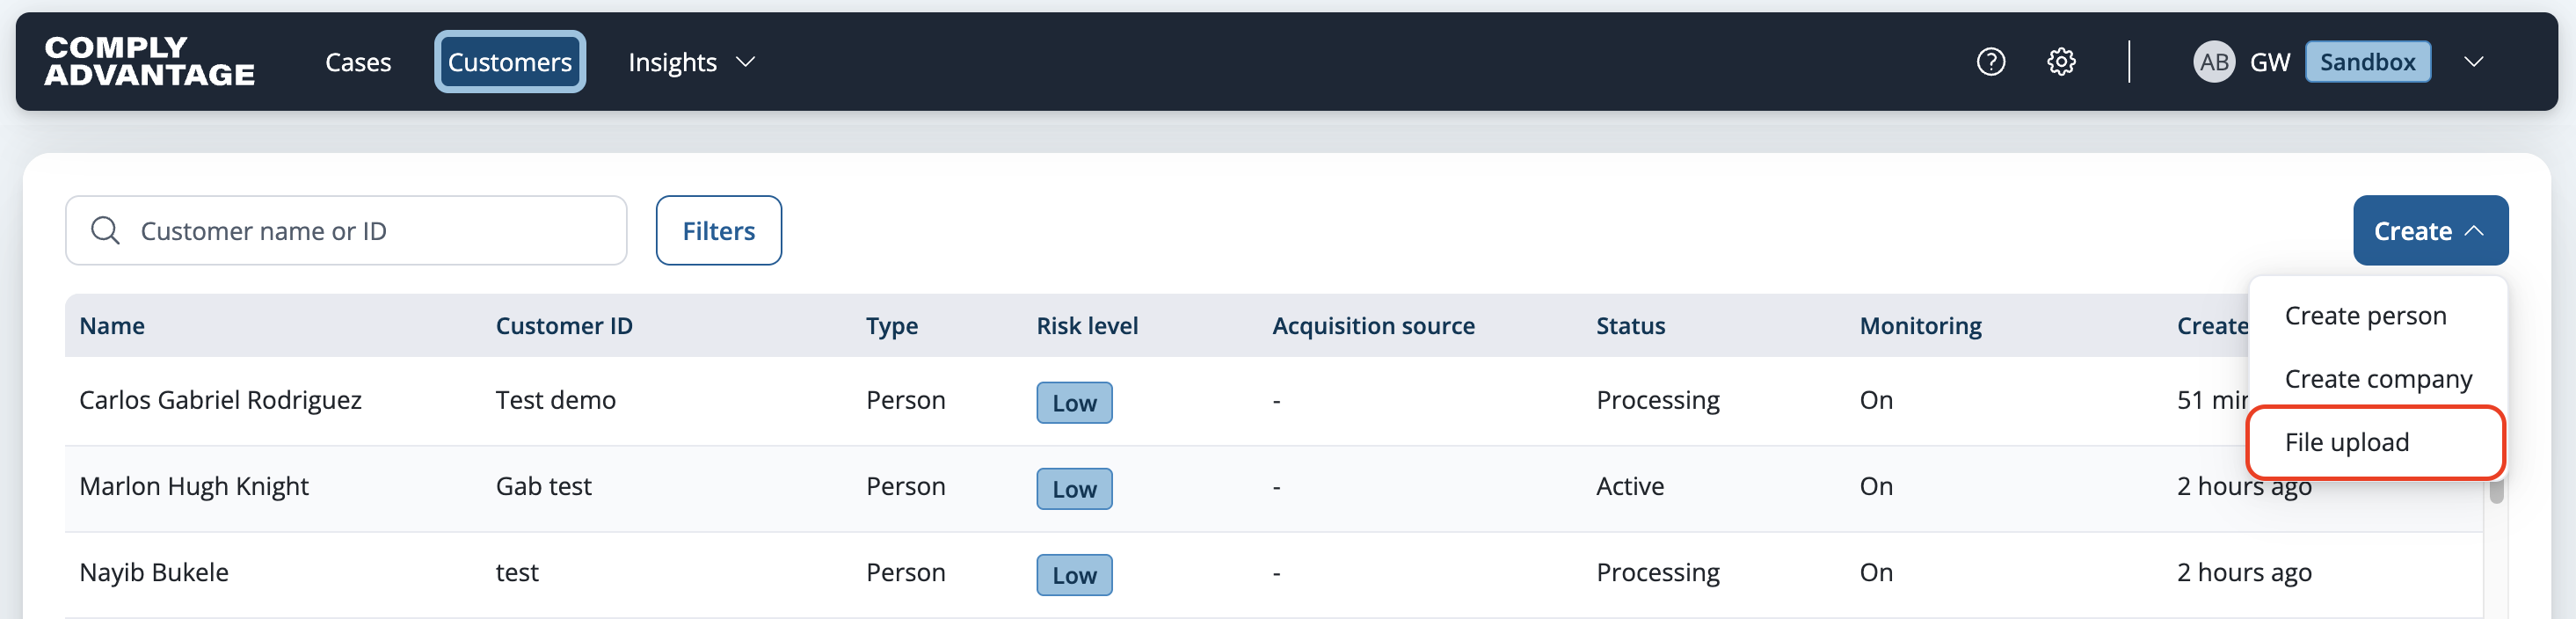
File upload in the Create menu Click Download templates in the top-right corner.

Download templates on the file upload page Click Download for the template and format you want.
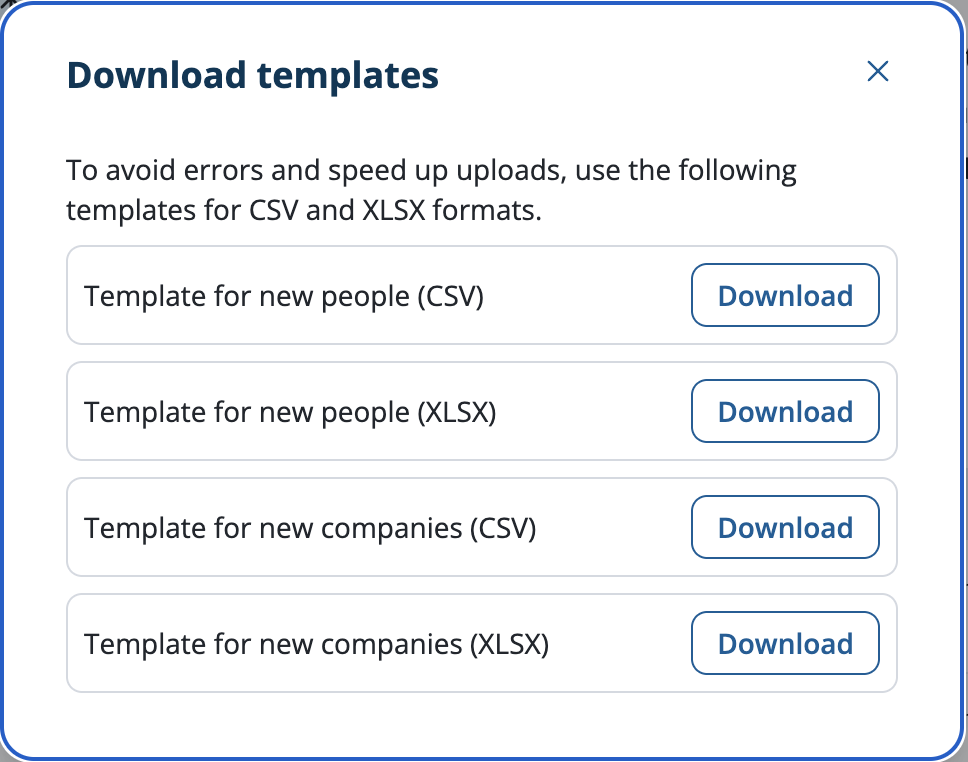
Templates and formats with their Download options The template downloads to your computer. Open it in your spreadsheet software.
Fill in your Customer data following the structure given in the template.
Each column contains data for a field in the Customer database. You can fill in as many columns as you want. The more data you provide, the better your risk scoring and screening assessment will be. You can also remove any columns that you know you won’t provide data for, as long as all mandatory fields are included.
The only mandatory fields are:
External identifier, the column header customer.external_identifier
Last name or full name if your Customer is a person, the column headers customer.person.last_name and customer.person.full_name. Fill in one or the other, not both.
Legal name if your Customer is a company, the column header customer.company.legal_name
Screening configuration, the column header customer.configuration.screening_configuration_identifier
If you add columns to the file that do not match our schema, the file fails validation. The templates do not include every supported column: the label columns, for example, are not in them. For the full list of column headers, the values each column accepts and which fields are mandatory, see Fields used when batch creating customers.
If you use a spreadsheet tool like Microsoft Excel to open and save your CSV file, we recommend that you specify the CSV (UTF-8) format when saving it.
Selecting a screening configuration for the upload file
You define which screening configuration should be used for your Customers by completing the column with the header customer.configuration.screening_configuration_identifier.
Fill this column with the ID of the screening configuration that should be used for each Customer. The ID can be copied from the screening configuration page in Settings.
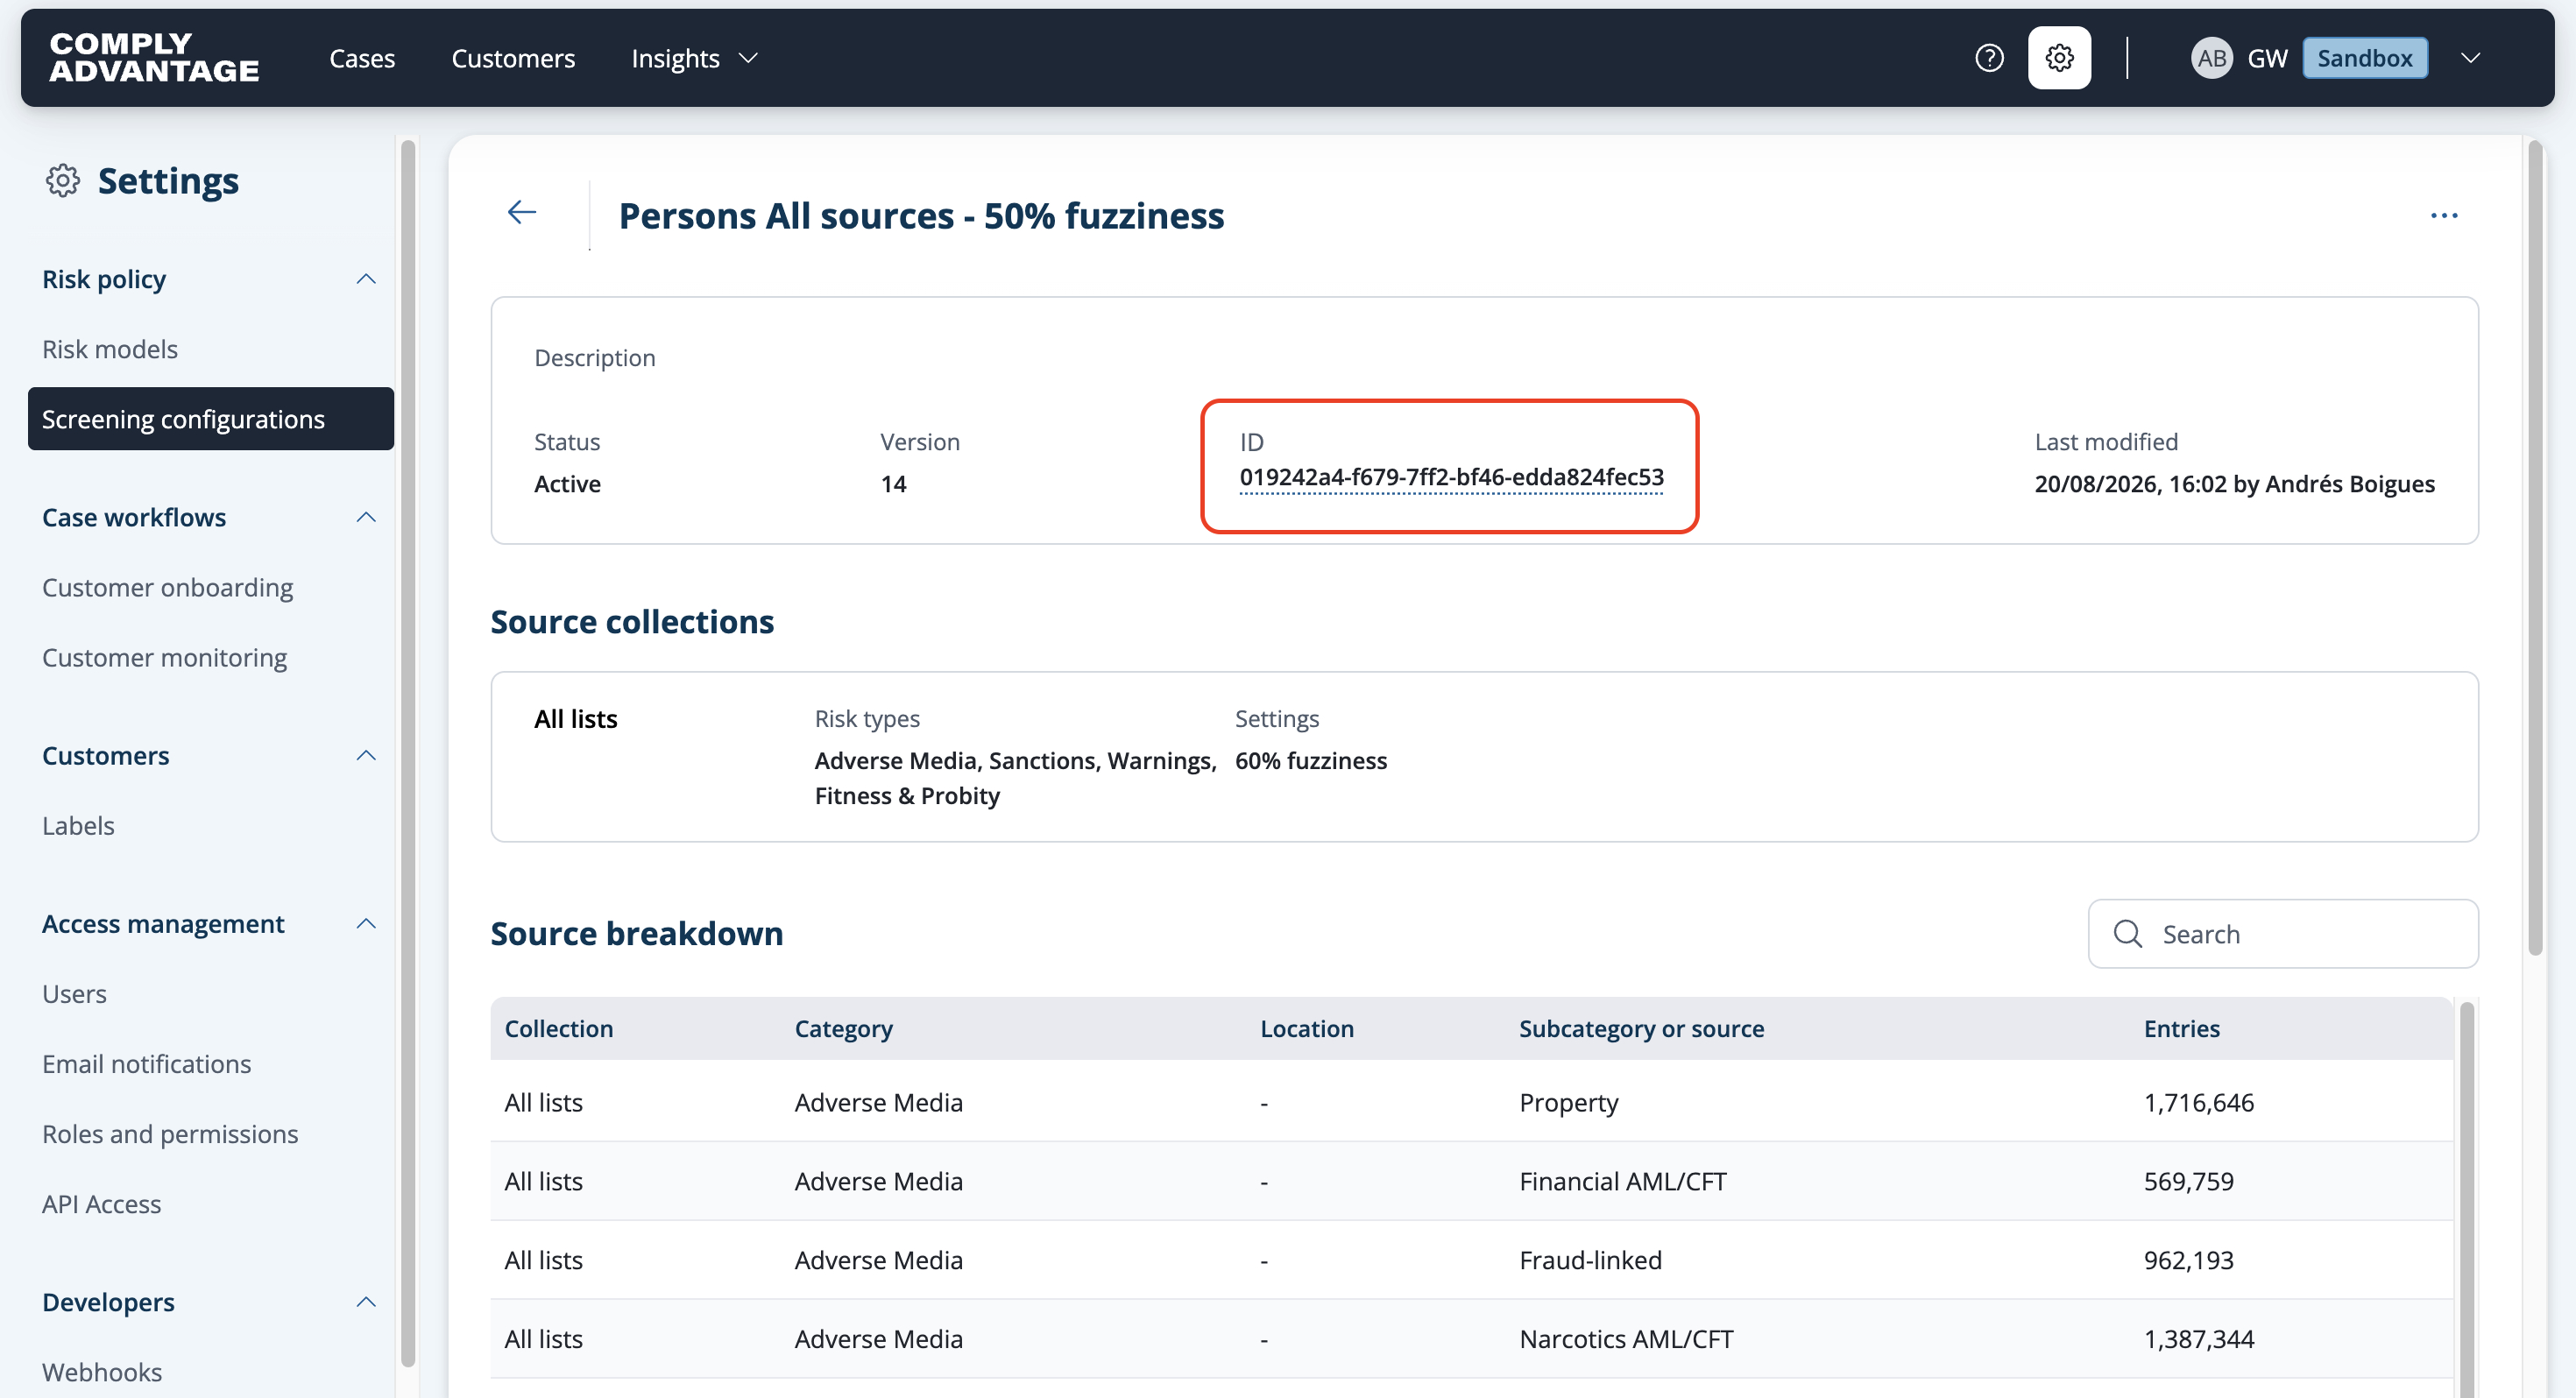
If you don’t provide a screening ID, the file will fail validation.
Uploading a file
When you have created a file containing your Customer records, you can upload it to Mesh.
Drag and drop your file into the marked area at the top of the upload page, or click select a file and choose the file you want to upload. Add one file at a time.
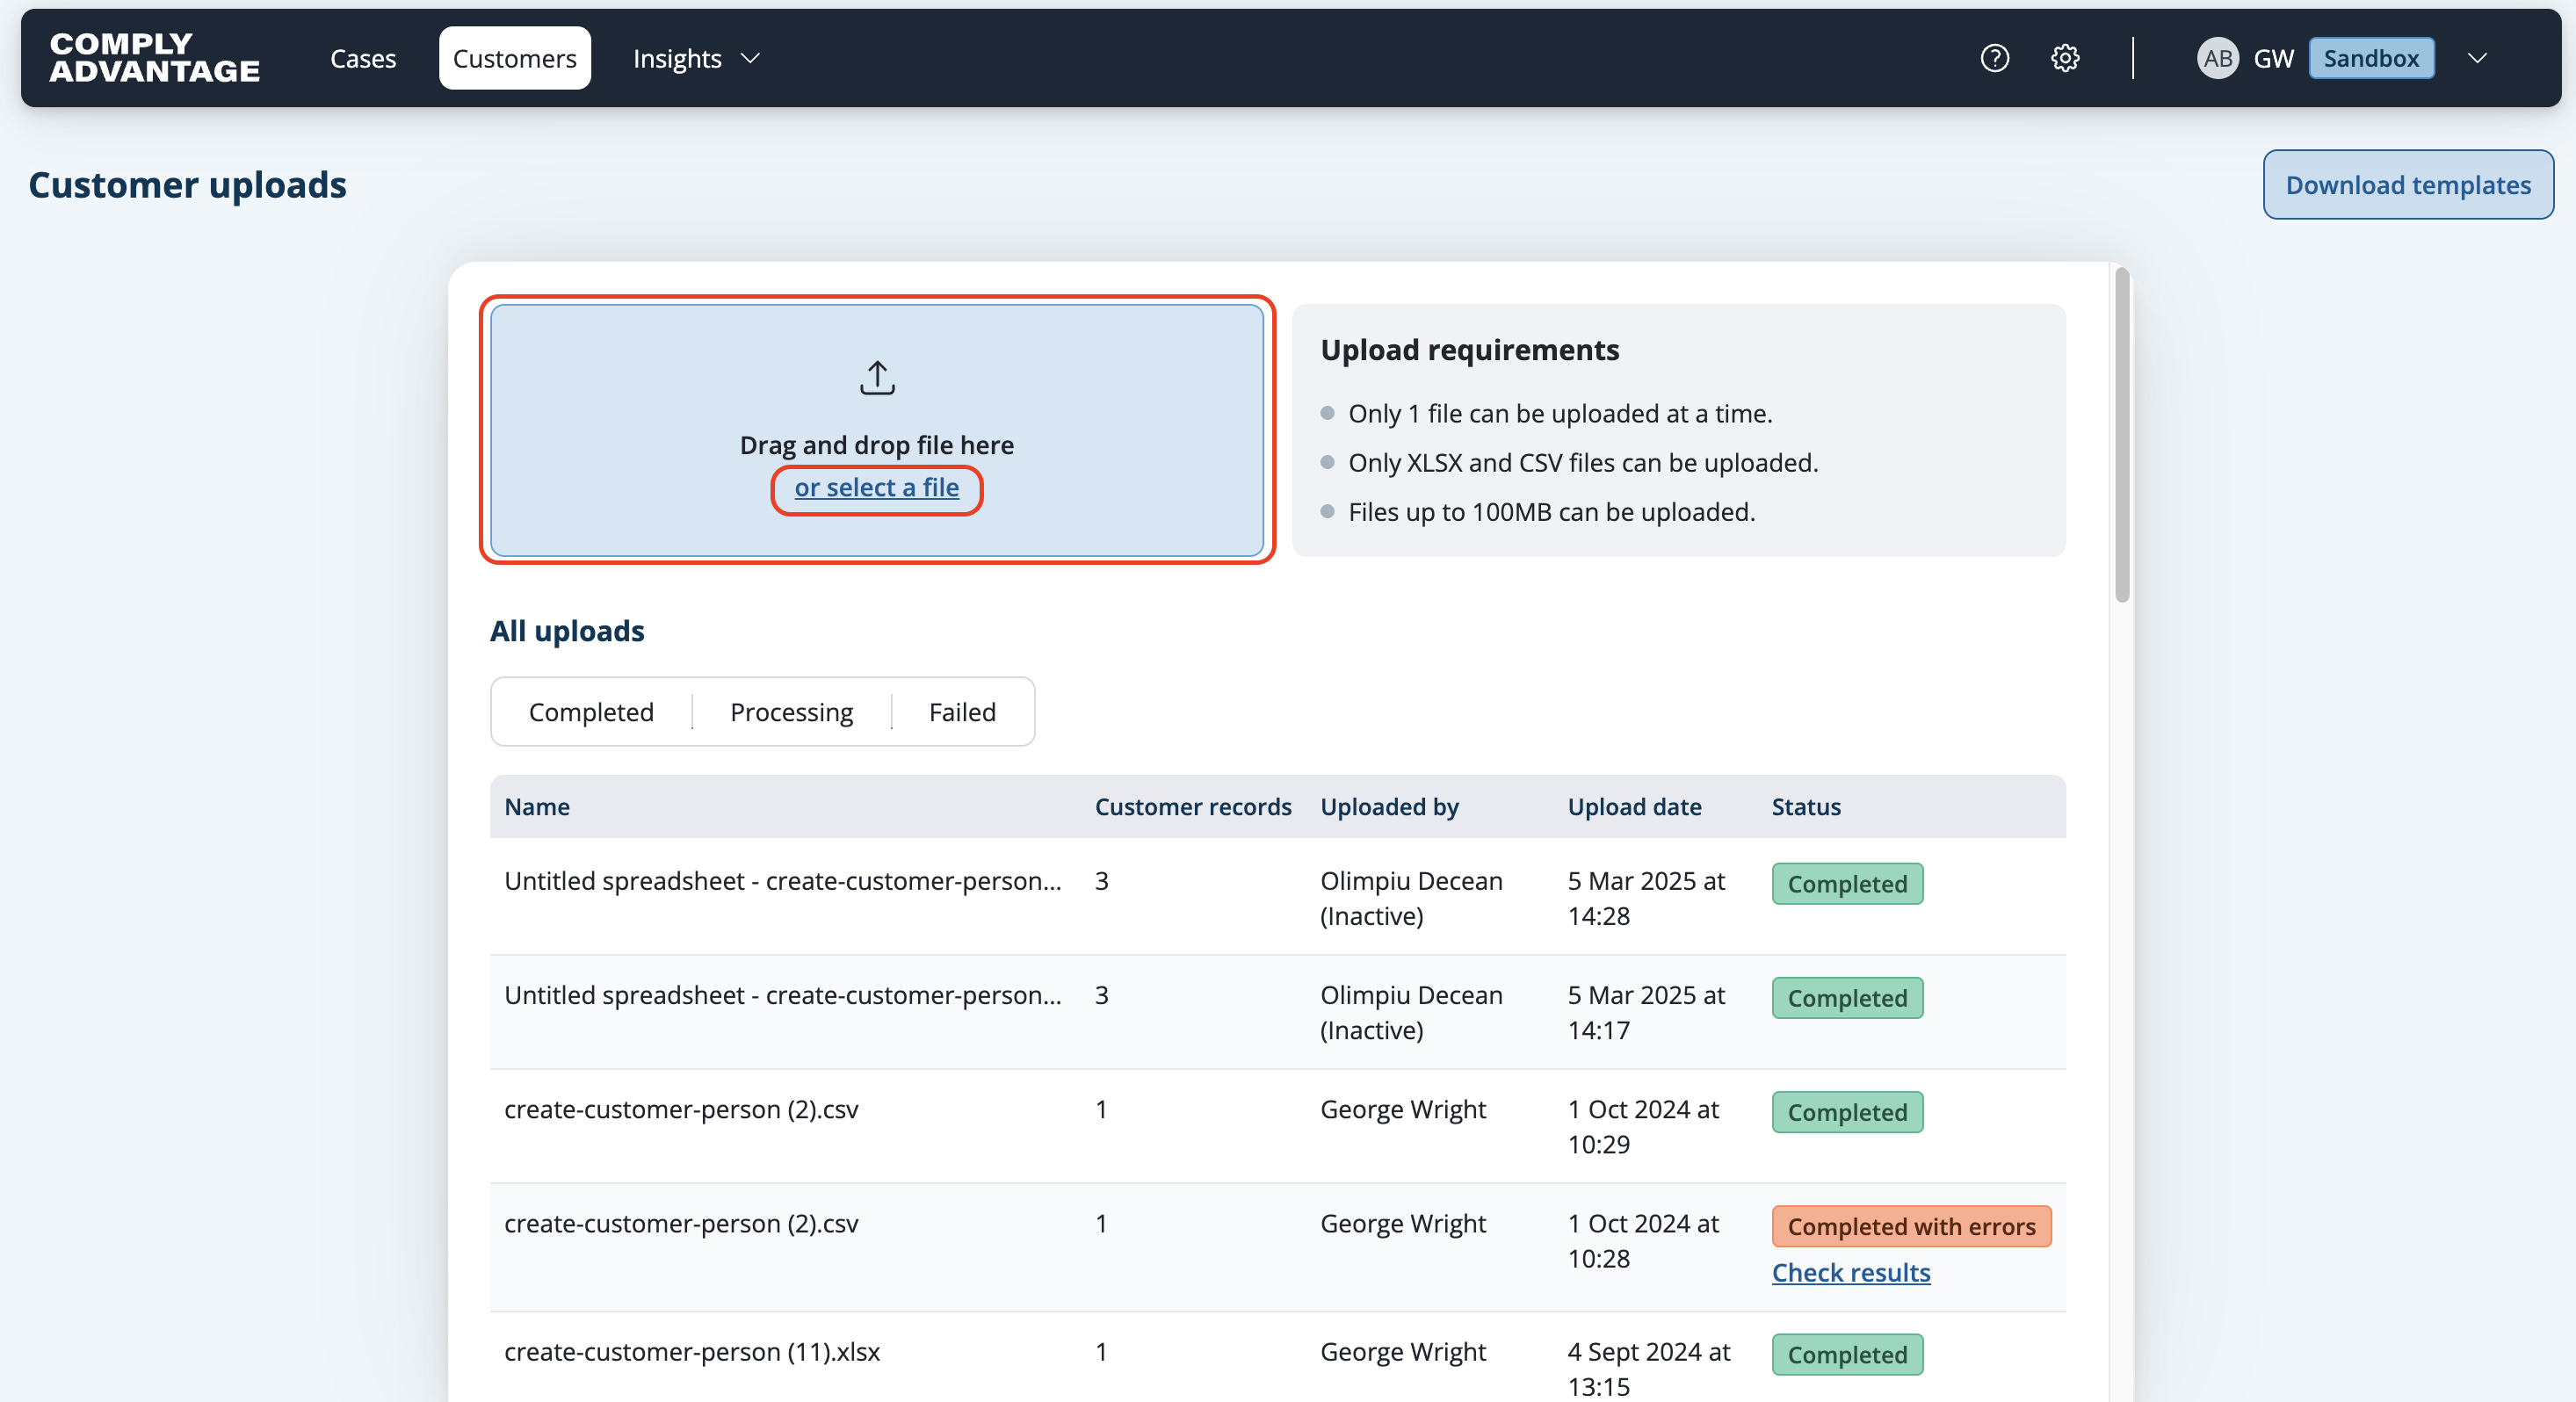
Your file is shown in the validation queue.
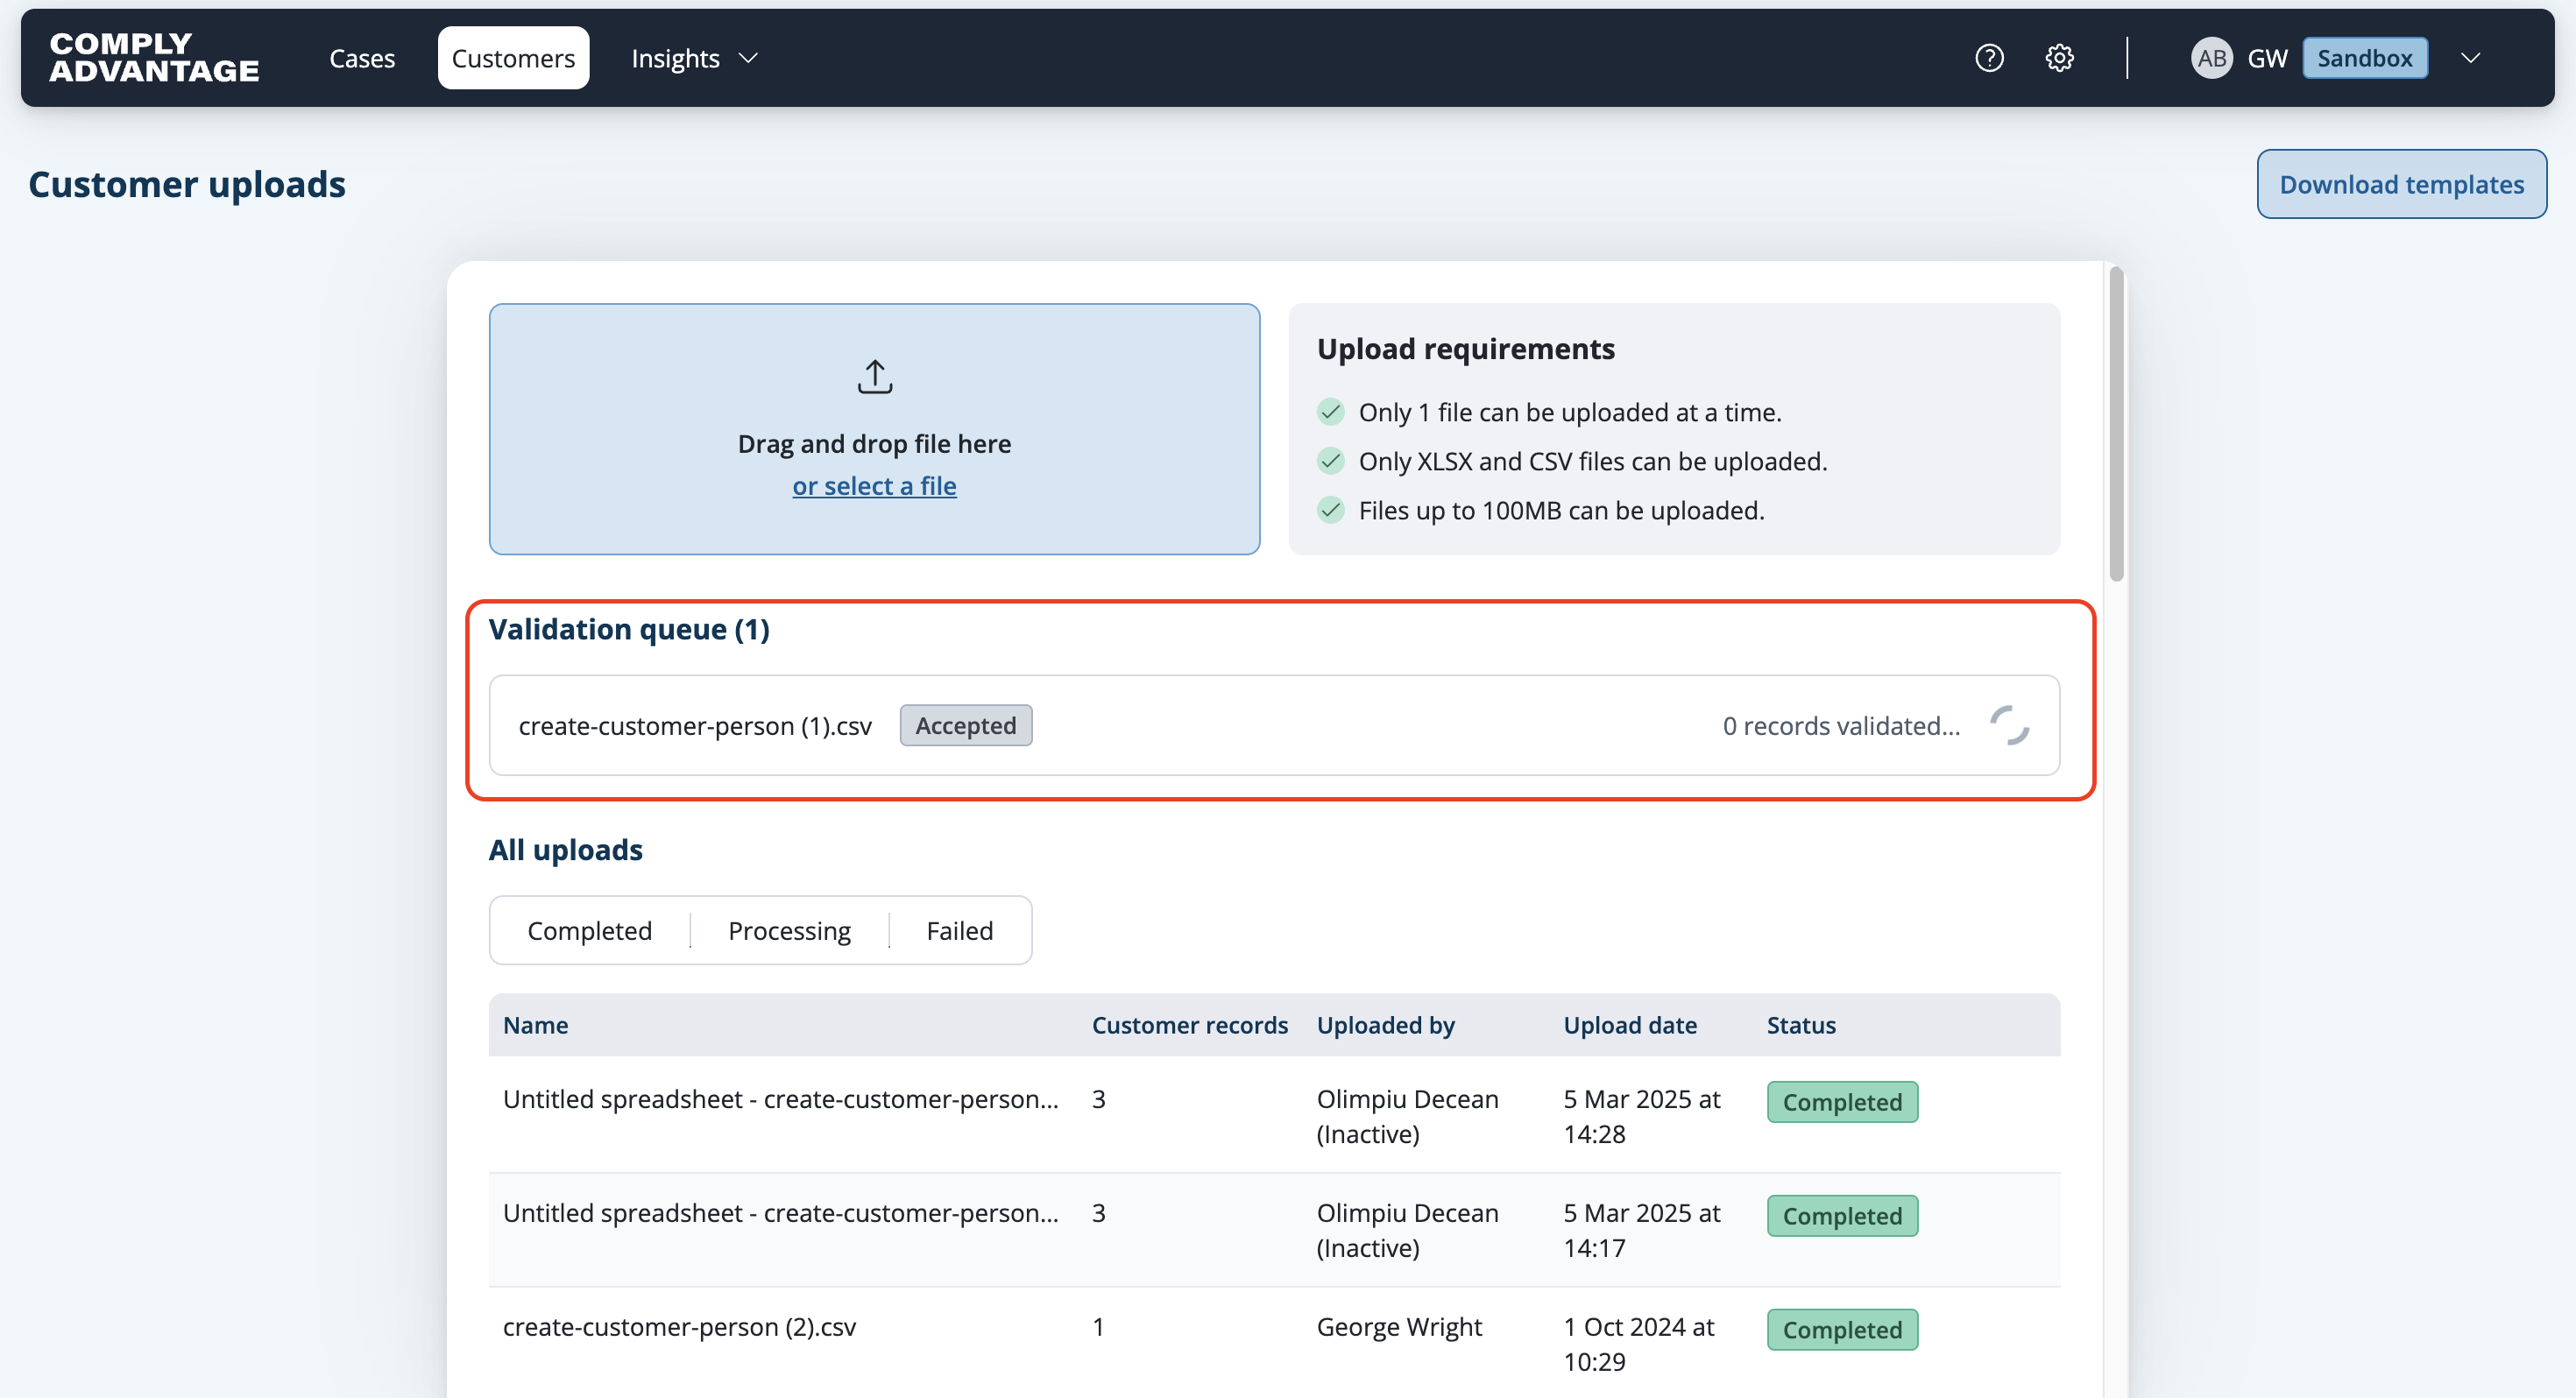
When the file validation is successful, the file shows as Completed and will begin processing.
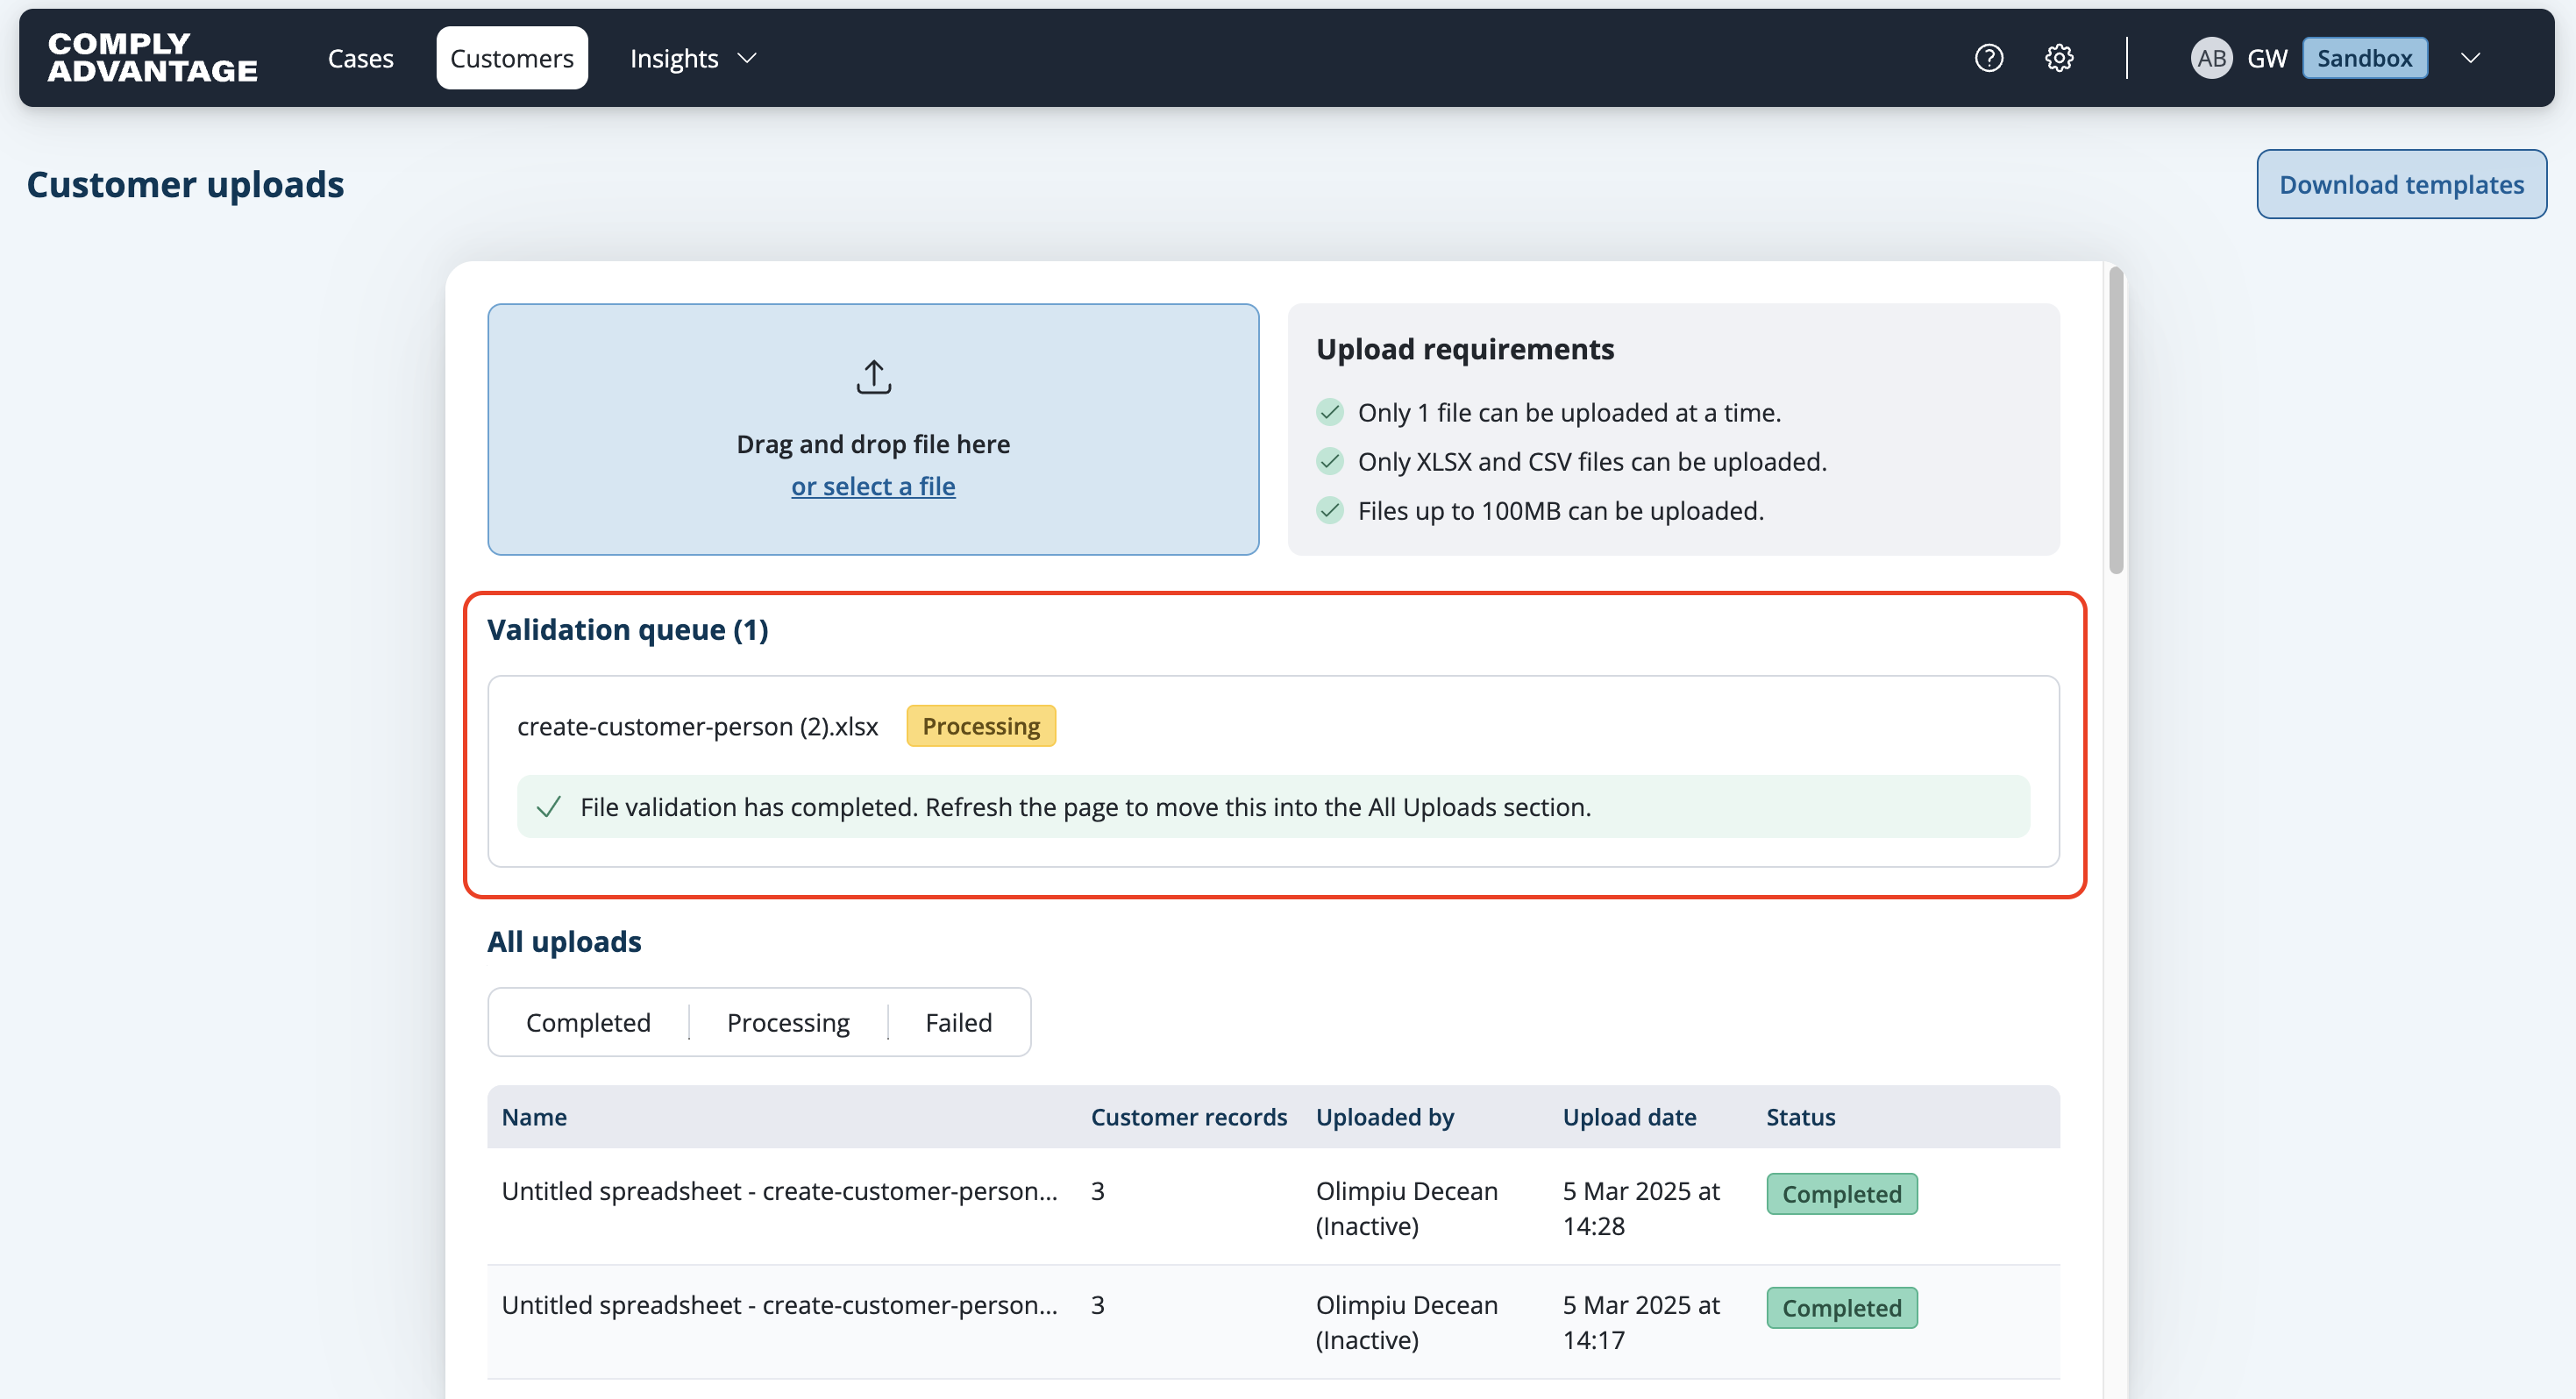
Resolving validation errors
If your file contains any values that don’t match the required format, validation errors will be shown. You will have to resolve all errors before the file can be uploaded successfully.
Below is an example of a file that failed validation.
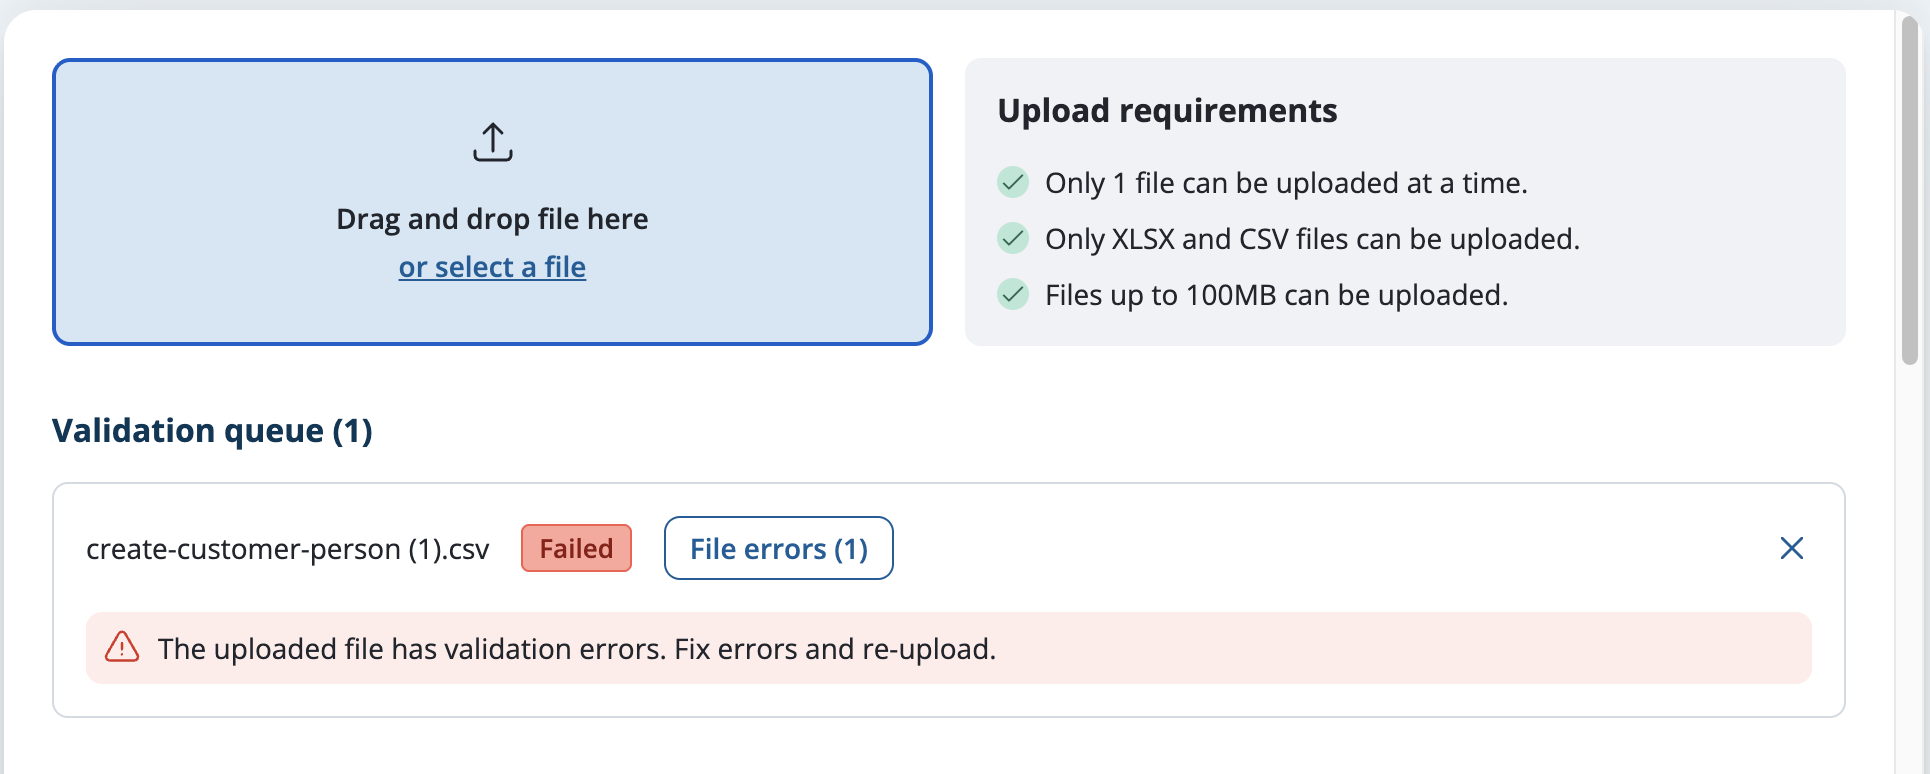
To resolve the errors:
Click on File errors for the file that shows as failed in the validation queue.

The File errors option on a failed file Review the errors in the pop-up. You can see up to 50 errors. If your file contains more than 50 errors, you will need to fix at least some of these errors and upload again to see other errors.

Validation errors listed in the pop-up Open your original file on your computer to correct the invalid values.
Upload your corrected file.
Removing files that have failed validation
Files that fail validation stay in the validation queue until you remove them.
Click the x icon in the top-right corner of a failed file to remove it.

The x icon that removes a failed file Click Remove file to confirm the removal.

The Remove file button in the confirmation prompt You see a success notification.

File removed successfully notification
Understanding file statuses
Files that have been successfully validated will start to be processed. A progress status shows what percentage of the Customers have been screened.
Your file will show one of the following statuses:
Processing: The Customers in the file are still being screened.
Failed: Processing stopped because of an error. Report it to ComplyAdvantage's Technical Support team.
Completed: All of the Customers in the file were successfully screened.
Completed with errors: One or more rows in the file failed. For example, a row whose external identifier already belongs to an existing Customer was not created. The rest were created and screened.
For files that have Completed with errors, select Check results under the status in the All uploads table, then select Download. The report is a CSV file that lists every row in your file with its status.
The details include the Customer's:
External identifiers
Workflow identifiers
Customer identifiers
Workflow statuses (COMPLETED or ERRORED)
Failed steps and error messages, for rows that failed
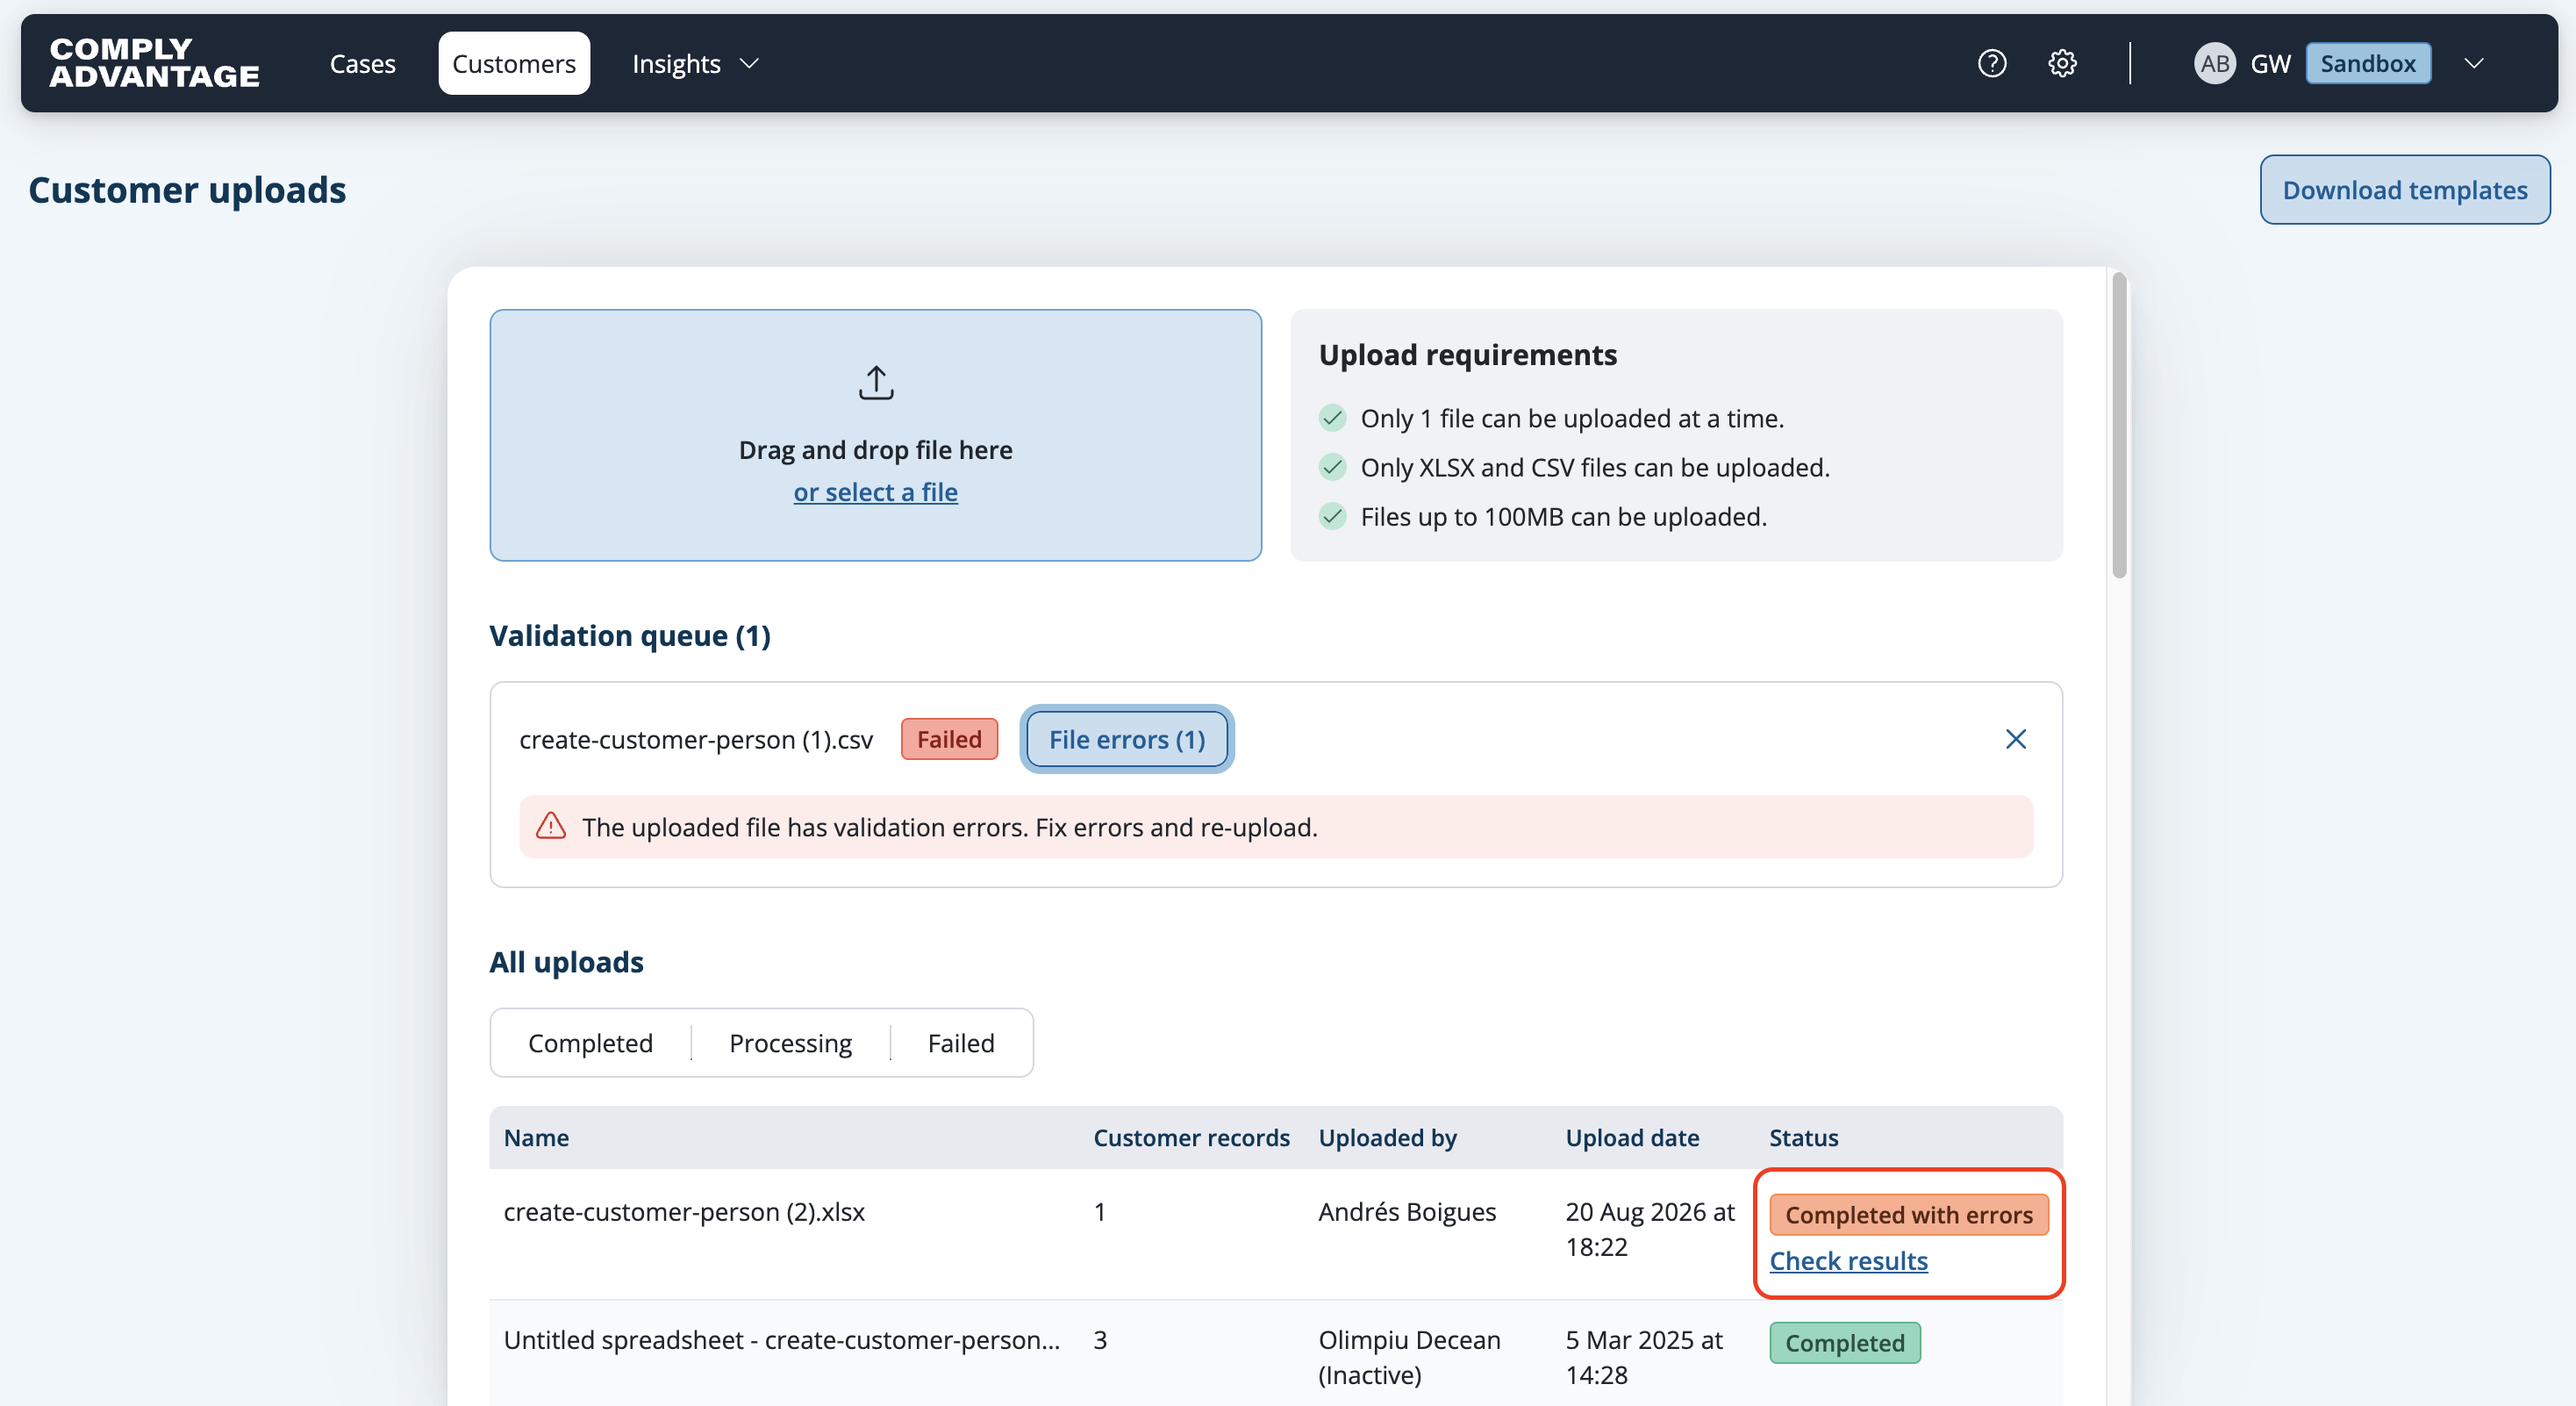
Filtering the uploads table
By default, the 'All uploads' table shows all files that are completed, completed with errors, processing or failed. The results are sorted by upload date with the most recently uploaded file at the top.
You can sort each table column by clicking on the column header. You can also use the filter option above the table to filter the results by their statuses. The Completed filter includes those that completed with errors. Click once to select and filter by a status, and click again to remove the filter.
